Shoes for Robo Kickers

Hi everyone,
I have robo sp kickers (large) and am having problems getting them to sit flush with the sole of my shoe and also the front strap always comes off – currently I just have asic running shoes. I know I’ll never get a perfect fit but does anyone know any particular shoes that accommodate robo large kickers well or any ways of modifying shoes to allow a more secure fit?

cheers- Chesky

Using the full face of the OBO HR RHP on high shots

Hi, I’ve asked the same question on FHF, but wondered if anyone esle on here had a view or indeed OBO had some specific “official” advice as this seems fairly funderrmental bust isn’t covered in the user guide on this site:
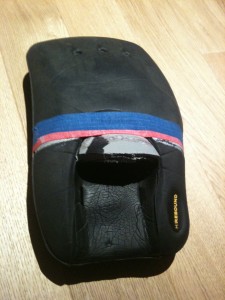
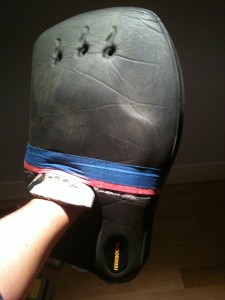
I’m having a bit of bother with my new OBO high rebound RHP (same I’m assuming applies to similar models from TK, monarch etc).
I’m quite keen on attacking the ball with my hands (as camel and Spartan advises), trying to move towards the lifted ball and to control the rebound either by deflecting or slapping the ball away where I can. Mostly I’ll bring my LHP across as it is just easier, but I’m making a conscious effort, since my Spartan coaching in the summer, not to reach too far across my body and over rotate, putting me off balance.

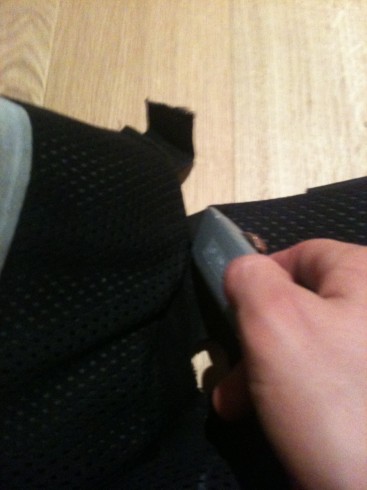
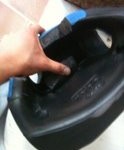
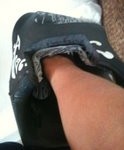
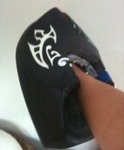
In the summer  I swapped to the Obo HR RHP due to its increased blocking area for this kind of stuff. However I’m still really struggling to get the flat face of the RHP to the ball. In my ready position I have both hands held identically (as I believe is correct) which means the LHP is flat side out and the RHP is flat side towards my body.

The problem is that as I reach forwards and out towards a wide ball to my right, stick vertical, the face is never flat to the ball in the way the LHP is and I often end up saving the ball with the smaller area designed for penalty corners or deflecting the ball back across my-self with the angled face? It is not such a problem for balls that are below the waist, (as it is flat to the ball when the stick is horizontal) or very wide, as I’m generally not taking these as far in front of myself due to the dive.

I know it has been suggested previously to drop the hand guard back in your stance and hold it wider, but I don’t really want to change what I think it one of the only areas where I am technically correct to accommodate my equipment! On the other hand (pun intended) I don’t want to go back to the HC RHP as it is so much smaller and I really like the HRs extra something in slide tackles (which is surely  the wrong way round)!

Sorry for length of post, wanted to give as much detail as possible. Advice appreciated?

ROBO SP Name Is No More

I have noticed on the net there are still a lot of references to ROBO SP; which no longer exists. (it was dropped in 2005)

Within the OBO ROBO range there are 2 kit options:

Hi-Rebound range pictured below in blue/black.

Hi-Control range pictured below in black/orange.

robo options

Hopefully its helpful so that everyone understands the naming and which kit is being referenced.

Fibreglass Helmet Review

When I started to play with OBO over 15 years ago, I didn’t use the OBO helmet but the icehockey style Cooper helmet. After a few years I tried on the OBO helmet and since then I won’t use another helmet anymore.

What I like about the helmet:

  • Protection is really good — I’ve been hit quite some times over the years but my head is still on my shoulders.
  • Perfect fit — this is a major improvement vs the other helmets I’ve used. This helmet fits perfectly well and it feels like you’re not even wearing one
  • Cool looks — Obviously the least important of the 3, but nice anyway… I have had some custom made helmet which (in my opinion) are very cool

The newest helmet I use now is pretty heavy. I thought this might be irritating, but when you put it on you hardly notice the weight and because of the perfect fit this gives no problems.

One thing I always change when I get a new helmet is the position of the wire cage. I like it better when it is placed a little lower on the helmet than standard — the vision is much better like that. So with help of the nice people at Verbunt (Dutch importer of OBO) I put in some new screws in the helmet.

All in all I’m very pleased with the helmet and I can’t think of a better one in the market.

I’ve added some pics of the custom helmets I’ve used.

Cheers and a happy new year from Amsterdam!

Klaas Veering

OBO CLOUD Kit Sizing

Just a few small tips I’d like to share for buying new OBO kit.

I recently upgraded my body armour and thigh pads to the OBO Cloud Range, (very good by the way). The first time i brought kit i got it straight from the internet, the sizing worked pretty well so it was alright. This time because of the cost i wanted to be absolutely sure the kit fit before anything was payed for. Luckily my chemistry tutor, (Who plays cricket) told me about a company that had competitive prices and a show room in London. They were very helpful and ordered it all in for me to try.

Now heres the tips.

CLOUD Body armour – don’t rely solely on the OBO sizing of arm length, every one is unique so work out what size you are by them then order the sizes around it as well to try on, i measured as a small and ended up in a medium.

CLOUD Hot Pants – wide waist = Tall is unfortunately the principle most companies work on, my waist size was for a hight of 5’10 -6’2, I’m 5’6 at the most. Try the different sizes, the waist stretches and it has a belt, and I’ve been told by other keepers that it’s better they be too small around the waist than having them catch on the leg pads

ROBO Overpants – A bit of a grey area, medium hotpants doesn’t always mean medium over shorts, because of how they wrap the size varies, if you’re at the larger end of medium like me you might want the large over shorts, it just allows for more flexibility.

Just try before you buy, if you can’t get it ordered to try, ask other keepers in your club or even on other teams you play (We do tend to be nice people us keepers), if they have what you’re after ask them if you can quickly try then to get a size idea, hopefully they’ll let you, (just remember to do it after the match when you have time).  If all that fails, post an article and hopefully other people maybe able to help you estimate, last thing you want to do is pay out on expensive kit that doesn’t fit.

OBO Size Guide Link

Making the Robo HR Left Glove even more ‘Perfect’

Hey Keepers (me again)

With such positive feedback and interest with ‘making the HR right hand even more perfect’ 😀

Something I touched on in my previous article was the OBO ‘left’ hand. I wanted to show you the alterations I’ve made on this glove which I think makes the glove a lot better (I’d say perfect)!

When I wore my first Robo kit (hi control) in 2003 at 13 years old something I always did was to leave the wrist strap undone, to have full wrist movement. To me this strap seemed point less and I removed it! I’ve seen many other gks do this. Chris Hibbert (South African Keeper) demonstrates this in the picture below!

OLYMPICS-HOCKEY/

Talking to the goalkeeping wizard Jimi Lewis (who also removed this strap) showed me the modifications he did for all his career in OBO and playing for Great Britain in the Athens Olympics (same picture) 🙂

51208435

I want to show you the 5 stages to make the left hand even more ‘Perfect’

Riem-handschoen

Stage 1, remove the strap (keep the strap for your perfect high rebound right hand alterations as a ‘spare’ just in case 😉

IMG_0058

Stage 2, mark the cuts! keep it about 1-2cms above the indents on the soft foam

IMG_0065

Stage 3, cut along your marking

IMG_0061

(Optional stage 4) if the glove is brand new… doesn’t matter so much, it’s better when the glove is loosened. Have some strong tape. Put it in the middle of where the soft foam meets the harder foam and wrap around tight!

93684340

This is becoming more common on different brand gloves as well. Shown by Nick Brothers (Current England Goalkeeper)

IMG_0062

Stage 5, enjoy!!!

xoxo

Added protection for keepers who play “Dutch” style

hey keepers

I’ve got another idea/ alteration that I’ve done, this time based on bicep protection…

If we look at products that offer bicep protection they often come in the ice hockey style protectors (not a big fan these)

FM08 Shoulder Caps

I wanted to show you lovely keepers an idea based on the “Chris Hibbert” bicep protectors

82519974

I recommend this for keepers who play a “dutch” style (no arm pads) (like me) away of having a little added protection but full arm movements

You will need OBO Cloud arm pads (the ones you buy individually not the ones that come with the Cloud Armour)

OBOElbowGuard

Here are the 5 stages to having your own OBO bicep protectors!!!

Stage one depending on the size of your arm, choose which part of the arm guard will fit snug on your bicep. Me being a small guy (nothing wrong with that) i use the part which is originally meant to go around your forearm as the bicep protection.

IMG_0069

Stage 2 undo the straps and splay out

IMG_0070

Stage 3 with your trusty Stanley knife cut off along the soft stretchy part in the middle of the arm guard and continue all the way around

IMG_0072

Stage 4 remove the last strap remaining on the new found bicep (shown on the photo above) To get the best position i found putting the guard on the opposite arm and make sure  the end part (grey part) of the arm guard is facing down your arm

IMG_0073

This is the arm guard with the new style Robo body armour

IMG_0074

Stage 5 Enjoy

tommy

xoxo

Arm Guards or Elbow Guards

Hey guys,

i’m thinking of buying the ROBO body armour and I asked myself a question…and i couldn’t answer it myself so…i thought i would ask for some opinion…

What would you advise…the obo arm guards(that are sold separately)

robo-body-armour

or the new obo elbow guards

robo-elbow-guard

……….i am 14 years old…and i play u16’s club hockey (Pembroke Wanderers) and I am the second choice senior keeper of my school….. The style of play i use is  For short corners I tend to log if its a hit  and i stay up when its a drag. And the odd 1vs.1 I tend to slide… and take the crap out of the player.

What would be the best for me?

Making the Robo HR Right Glove even more ‘Perfect’

Hi Keepers,

I’m Tommy Alexander and I play for Scotland U21s and Surbiton in England!

If your the type of keeper who likes to angle the gloves and let the foam do the work (like me), this will suit you!

I was a massive fan of the OBO Hi Control right hand glove but playing at higher level, it became more apparent I needed similar surface area as the left hand and OBO offered the Hi Rebound RH Glove. I really liked the size and rebound of the glove but felt it was restricting in terms of wrist movement (similar to the Left hand but removing that strap makes the glove perfect!).

Midway through the second half of the season (playing for Reading at the time) I got in contact with Jimi Lewis (Ex England and GB Goalkeeping Legend) to coach me. We discussed the OBO HR right hand and he showed me what cuts he did with a Stanley knife to his when he played at the Athens Olympics.

51208435

Here are the 6 stages to Making the Robo HR Right Glove even more ‘Perfect’ 😀

Make sure you remove the strap and the softer foam.

pic.1

Stage 1 (marking the cuts) I’ve made a straight line from in between the 1st and 2nd indent on the left. Then a line across, leaving a thin strip from the velcro underneath. Then a line back down on the right, roughly in line with the gap, where the strap would of come out from originally!

pic.2

Stage 2 line your wrist and arm in the middle of the glove (where it would be in a match. Make 2 cuts either side of you wrist of where you’d like the strap to be relocated (personally I have it just below the wrist bone)

pic.3

Stage 3 At the bottom of your cuts (cuts should be about 3-5 cm long), join the original two cuts with a straight line. Making 3/4s of a rectangle (don’t be afraid of going to deep, once you feel the hard plate, do not cut any further)

pic.4

Stage 4 put the strap under the cut and tape it back down

pic.5

Stage 5 the soft inner foam should be put back in the original place. Cut away to the same shape as the new cutting (if needed apply tape to keep it steady)

pic.7

Stage 6 Enjoy 🙂

Tommy alexander xoxo