Hi rebound right hand (second generation)

hey awesome people!

I wrote a previous article, regarding the Hi Rebound Right hand, and I wanted to share further developments with you guys! =)

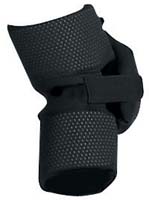
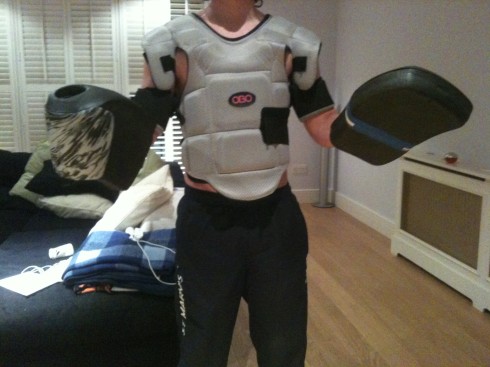
Almost a year ago, I managed to get hold of the new mercian right hand glove… and I have to be honest! I really really liked it!

I liked it so much, it gave me some ideas on what I needed to do… to my already modified right hand!

I personally believe that a gk’ers stick is an extension of the arm and the technique/ philosophy, “should be used as if your catching a tennis ball with a straight arm”.

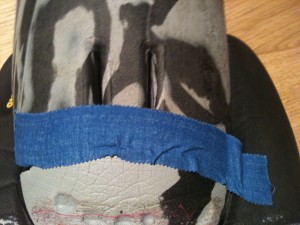
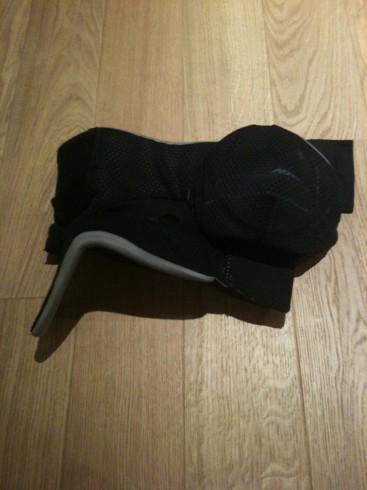
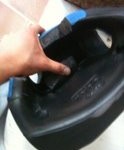
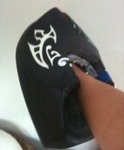
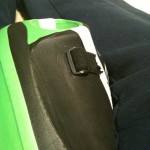
So I removed the whole back of the glove… so that the stick could be inline with my forearm.

put the inner foam back in its original spot and cut the same line!
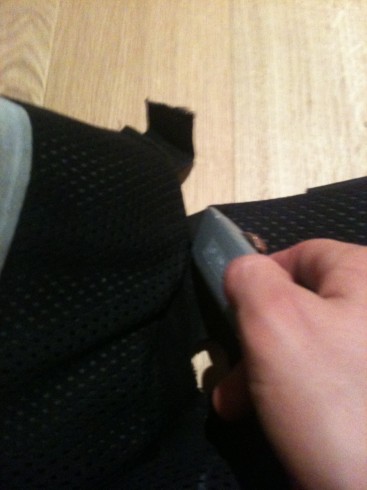
Secure it with tape

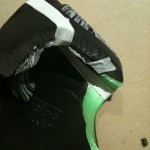
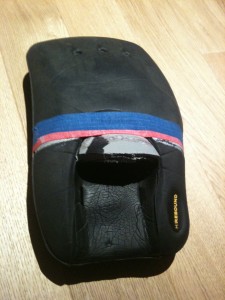
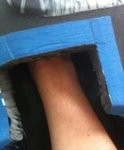
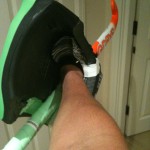
Also I removed the wrist strap entirely and put in a thumb strap… similar to the Hi control glove… & tape through the stick gap to make the finger strap!

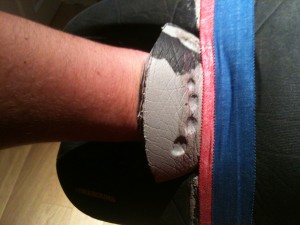
In the original models I put the thumb strap close to the front foam… and something that I have noticed when struck around the thumb area it bloody hurts!

so I added a slice of a left handed protector on top which gave better rebound and protection, but moving on from that, I simply relocated the thumb strap further back into the glove… preventing the thumb being compressed by the ball on the foam!

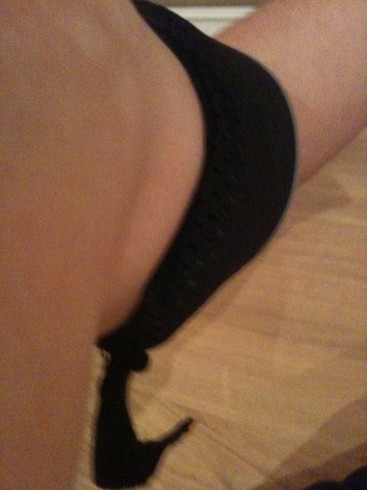
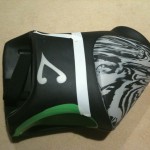
I personally think it has all the benefits of the hi control movement and keeping the stick at the same angle as the glove (especially on the deck) with the high rebound foam and surface-size! =)

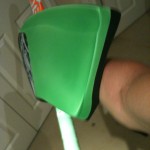
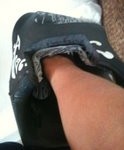
The only 2 areas I’d like to improve on the glove is the bottom part – where the glove rounds off… If that could become flat so when diving bottom right or logging the glove doesn’t rotate making the save with the front foam and the flat side of the stick! second! thicker foam (similar to the LH) as its very thin in comparison!

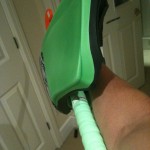
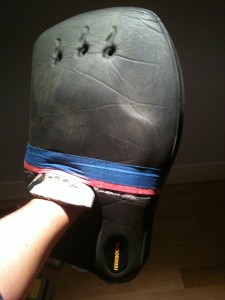
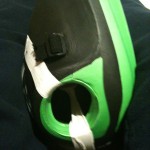
Warning!!! there is very little protection on the back of the glove on mine! I have seen keepers with unusual movements been hit there so just be careful if you do these mods as protection will be less and keep the moments correct!

happy goalkeeping

xoxo

Making the Robo HR Left Glove even more ‘Perfect’

Hey Keepers (me again)

With such positive feedback and interest with ‘making the HR right hand even more perfect’ 😀

Something I touched on in my previous article was the OBO ‘left’ hand. I wanted to show you the alterations I’ve made on this glove which I think makes the glove a lot better (I’d say perfect)!

When I wore my first Robo kit (hi control) in 2003 at 13 years old something I always did was to leave the wrist strap undone, to have full wrist movement. To me this strap seemed point less and I removed it! I’ve seen many other gks do this. Chris Hibbert (South African Keeper) demonstrates this in the picture below!

OLYMPICS-HOCKEY/

Talking to the goalkeeping wizard Jimi Lewis (who also removed this strap) showed me the modifications he did for all his career in OBO and playing for Great Britain in the Athens Olympics (same picture) 🙂

51208435

I want to show you the 5 stages to make the left hand even more ‘Perfect’

Riem-handschoen

Stage 1, remove the strap (keep the strap for your perfect high rebound right hand alterations as a ‘spare’ just in case 😉

IMG_0058

Stage 2, mark the cuts! keep it about 1-2cms above the indents on the soft foam

IMG_0065

Stage 3, cut along your marking

IMG_0061

(Optional stage 4) if the glove is brand new… doesn’t matter so much, it’s better when the glove is loosened. Have some strong tape. Put it in the middle of where the soft foam meets the harder foam and wrap around tight!

93684340

This is becoming more common on different brand gloves as well. Shown by Nick Brothers (Current England Goalkeeper)

IMG_0062

Stage 5, enjoy!!!

xoxo

Added protection for keepers who play “Dutch” style

hey keepers

I’ve got another idea/ alteration that I’ve done, this time based on bicep protection…

If we look at products that offer bicep protection they often come in the ice hockey style protectors (not a big fan these)

FM08 Shoulder Caps

I wanted to show you lovely keepers an idea based on the “Chris Hibbert” bicep protectors

82519974

I recommend this for keepers who play a “dutch” style (no arm pads) (like me) away of having a little added protection but full arm movements

You will need OBO Cloud arm pads (the ones you buy individually not the ones that come with the Cloud Armour)

OBOElbowGuard

Here are the 5 stages to having your own OBO bicep protectors!!!

Stage one depending on the size of your arm, choose which part of the arm guard will fit snug on your bicep. Me being a small guy (nothing wrong with that) i use the part which is originally meant to go around your forearm as the bicep protection.

IMG_0069

Stage 2 undo the straps and splay out

IMG_0070

Stage 3 with your trusty Stanley knife cut off along the soft stretchy part in the middle of the arm guard and continue all the way around

IMG_0072

Stage 4 remove the last strap remaining on the new found bicep (shown on the photo above) To get the best position i found putting the guard on the opposite arm and make sure  the end part (grey part) of the arm guard is facing down your arm

IMG_0073

This is the arm guard with the new style Robo body armour

IMG_0074

Stage 5 Enjoy

tommy

xoxo

Making the Robo HR Right Glove even more ‘Perfect’

Hi Keepers,

I’m Tommy Alexander and I play for Scotland U21s and Surbiton in England!

If your the type of keeper who likes to angle the gloves and let the foam do the work (like me), this will suit you!

I was a massive fan of the OBO Hi Control right hand glove but playing at higher level, it became more apparent I needed similar surface area as the left hand and OBO offered the Hi Rebound RH Glove. I really liked the size and rebound of the glove but felt it was restricting in terms of wrist movement (similar to the Left hand but removing that strap makes the glove perfect!).

Midway through the second half of the season (playing for Reading at the time) I got in contact with Jimi Lewis (Ex England and GB Goalkeeping Legend) to coach me. We discussed the OBO HR right hand and he showed me what cuts he did with a Stanley knife to his when he played at the Athens Olympics.

51208435

Here are the 6 stages to Making the Robo HR Right Glove even more ‘Perfect’ 😀

Make sure you remove the strap and the softer foam.

pic.1

Stage 1 (marking the cuts) I’ve made a straight line from in between the 1st and 2nd indent on the left. Then a line across, leaving a thin strip from the velcro underneath. Then a line back down on the right, roughly in line with the gap, where the strap would of come out from originally!

pic.2

Stage 2 line your wrist and arm in the middle of the glove (where it would be in a match. Make 2 cuts either side of you wrist of where you’d like the strap to be relocated (personally I have it just below the wrist bone)

pic.3

Stage 3 At the bottom of your cuts (cuts should be about 3-5 cm long), join the original two cuts with a straight line. Making 3/4s of a rectangle (don’t be afraid of going to deep, once you feel the hard plate, do not cut any further)

pic.4

Stage 4 put the strap under the cut and tape it back down

pic.5

Stage 5 the soft inner foam should be put back in the original place. Cut away to the same shape as the new cutting (if needed apply tape to keep it steady)

pic.7

Stage 6 Enjoy 🙂

Tommy alexander xoxo