The self-pass

The new self-pass option is also available to goalkeepers. The goalkeeper can take advantage of this at a 16, learning to further the options of their team by freeing up a defender who would normally take the free hit.

The rules have been changed again and the free hit rule has been adapted to allow a player to pass the ball to themselves and then make a pass, in comparison to smashing it straight away (this includes goalkeepers). This new self-pass therefore allows the goalkeeper to take free hits. However, you should be thoughtful about how and when you use the move, otherwise you could end up in a spot of bother with the opposition bearing down on you looking for an easy goal. Working on technique and looking to use it wisely is a good idea to helping your team; furthering their options and freeing up a player who would normally take the free hit.

Restarting play

The self-pass is a good way of quickly restarting play from a 16. By restarting the play quickly, rather than waiting around for a defender to wait and look for options, you speed up the pace; giving your team the advantage of surprise and speed, which can lead to a goal if the team takes hold of the situation and pushes up the field. By bypassing having a defender take the free hit you save time, whilst also freeing up another player to push forward on the attack (or provide extra defence; defending back if needs be).

Technique

In terms of technique, the self-pass is essentially a simple stick and ball manoeuvre; using the stick and then kicking away with the kicker. You can set up the pass with your stick, placing the ball in front of you to get a good angle on the kick. You need to pass the ball to yourself, so knock the ball back to yourself with the stick. Having passed it to yourself, you can then kick it to a nearby defender. Make sure the pass is accurate, so that it reaches the intended recipient properly.

Goalkeeper making the free hit self-pass to an open defender.

A more difficult skill is to use the self-pass option to ‘throw’ an aerial, like a soccer (football) goalkeeper would do at goal kicks. Simon Mason is the only goalkeeper I know of that can do this successfully; having seen him practising it and going beyond the half way line (to the three quarter mark). As the rules of a ‘dangerous ball’ still apply to an aerial kicked by the goalkeeper, it is a very risky move to try and pull off, unless you have the skill and accuracy to do so. Therefore I don’t recommend you try it, even if it’s fun at the training ground!

When to

The self-pass can be used properly when looking to restart the play “off the bat” without much danger of the opposition intercepting the pass. As long as there is a defender to cover a roaming opposition player and there are no opposing players (or little danger of intercepting the pass) posing a risk to you making a pass, then you should be able to make the pass. I have seen it used like this in a National Premier league game here in England; the goalkeeper quickly restarting play within the D by kicking the ball to a team mate after a shot outside the D (where a 16 is automatically given as a result).

Be careful

Ultimately, it is a great move when used correctly, but can go horribly wrong if not. You need to be careful and wise about when you use it; being aware of present threats, otherwise you could end up gifting a goal to the opposition team.

“Logging”

“Logging” is still an important save selection at the short corner, even if drag flicks are becoming more prominent at the high levels of the game. The goalkeeper should be going down on a straight strike at goal, so that they can get behind the shot. Here’s how to ‘lie down’ on the shot.

Logging is the idea of setting up before the low shot before it’s taken, taking the educated guess or expectation that it will go low. With the rules stating that the ball cannot be lifted above the backboard, on the first shot taken outside the D, at a short corner, the intelligent and crafty goalkeepers used this to their own advantage, lying down in preparation for the shot, which the shooter would bite at the opportunity to fire at them.

Logging, or going into a lying horizontal barrier, in comparison to diving down, involves the goalkeeper going down before the shot is taken; allowing you to block off the bottom of the net, playing the percentages to deny a goal through you.

Short corners

The log is a technique used specifically for the low, straight strike faced on penalty corners; it doesn’t work at any other time in the game, as a player could easily lift the ball over you and it would take too long to get back up from! On short corners, you can play the shooter’s options and make the choice based on percentages to cover the low shot; covering as much of the bottom of the net as possible by lying down against the hit. Although keepers have to be more creative with the move now as shooters favour the disguised and ruthless drag flick, it is still useful at covering a large amount of net by lying horizontally in front of goal, when faced with a straight strike at goal.

Lying down for the shot

On low shots, the goalkeeper is normally encouraged to ‘lie down’ against the incoming shot, taking away the low portion of the net that the shooter is looking for. By making full use of their equipment, the goalkeeper can reduce the scoring chances of the opposing players from scoring from a direct low shot at goal.

Rather than standing up for a shot, going down onto the pitch allows you to create a horizontal barrier against the incoming shot, maximising your body shape to cover the goal and take away a significant amount of shooting space, to deny the shooter on a low strike aimed on goal. Time is obviously needed to get down in readiness, so you should consider when it is best to use the move; going down with the strike so that you make the save properly.

The different stages

To make the log easier to understand and use in a game, it’s best to break it up into stages. This way, it makes it easier to copy when using the move in a game, as well as speeding up the process during play.

  1. As the ball is pushed out, take a few steps out from the goal depending on where you want to be for the log
  2. Start to lower your stick hand in your normal ready stance to help support the drop
  3. Drop down onto the pitch, off your hip, lying the stick down horizontally (which will also support the dropping motion) and stacking the leg pads on top of each other, ensuring you connect with the pitch to provide proper cover
  4. Squeeze the pads together to make sure there is no possible gap available for the ball to get through
  5. Push out with the legs to cover the left side, and the stick to cover low and the right post gap; using the glove to cover the space above the pads

Pointers:

  • lower your stick before you go down to help you drop more quickly
  • spread out to cover as much of goal as possible
  • squeeze your body together so that you don’t open up any gaps in which to be scored on
  • have your hip turned to face the penalty spot, so that you are horizontal to the shot

Speeding it up

As you move up the tiers of hockey, you will need to improve on your technique so that you can go down quickly when you need to (rather than going down before the shot and having the ball playing around you to be scored on). Quicker routines will mean that you have less time to get down. For the barrier save to be successful, you need to be able to get down quickly enough according to the situation. To really force yourself down into the shape quickly, you need to drive down with momentum; forcing yourself onto the floor quickly. Practising the technique repeatedly will help you improve on the technique and timing the move (try to practise it when your team are practising short corners at training).

How does the difference of the indoor game affect the keeper?

qna
Question:

My name is Josh and I’m not sure if you remember me but you were a coach of mine. I was a keeper in on the U-20 team in ’99 when Shiv cialis buy canada carried 5 keepers (I think it was 5). I had been an alternate on the U-16 the year before. That’s about all there was to my National Hockey carrier so I’m not sure how much I might have stuck in you mind. Anyway the summer after our goalkeeping camp with Ian Taylor I tore apart my knee, severely damaging my ACL, MCL and annihilating my medial meniscus. I hung up my pads (I’m still not sure why) and that was that. About a year ago I picked up a stick again, with a local club. I live in NYC now and found a club that plays on turf and has some real talent, lot of internationals. I keep very fit and hockey has been a welcome addition to my workout schedule. I have been enjoying playing the pitch, and now this winter I’ve picked up indoor.

Here’s where I have come to seeking you out. We are going to play in a mixed tournament in Baltimore at the end of January and I was asked to play in the cage. I’m game, it could be a lot of fun, but I haven’t had pads on in ages. I’ve been helping coach a few of the women keepers in the club so I’ve been getting it back in my brain, and in my body a bit. My question is: how does the difference of the indoor game affect the keeper. I can imagine that one needs to play very actively, it’s so fast. I’d really appreciate any advice you might have. I’ve found very little in the way of resources on the web, except the OBO page where I found your e-mail. I also will have a real mix of a kit. I still have my old helmet which is solid, first gen ROBO OBO gloves and groin guard. The club has a nice set of pretty new leggaurds, kickers, shorts and such. The only piece we are missing is upper body. I may have found a deal on one, Longstreath has TK 1.2 upper body armour for sale for about $150. I’ve always like TK but have no idea where in their range that item sits and what level of protection it will offer. My apologies, I know this is rather out of the blue and thanks again for any advice or ideas you might have. I really enjoyed my limited time on the team and wish I had been able to play before I was injured. Maybe this tourney will get me back into keeping…

Answer:
Hi Josh,

I’m glad you’ve rediscovered hockey. As far as indoor, it’s a challenging game for the keeper. Percentage-wise the court has a greater scoring area than outdoor hockey which allows the keeper a relatively greater area to be involved in the play.

Just as there are a number of styles for field keepers, there are a number of styles for indoor keepers and much of that depends on the style of play for your team and your athletic attributes.

The big technical advantage to indoor keeping is that you are the only player that can play on the ground (in the circle). This allows you a greater tackling surface when taking on dribbling players. That advantage is nullified though if you can’t set up a slide tackle and/or can’t recover to an upright position quickly.

It’s extremely difficult to explain a style of indoor keeping, but I think there are a lot of good examples if you go on youtube and look for indoor hockey. At the international level, indoor keeping requires excellent agility and speed as well as great reflexes and the ability to read the play.

On the equipment front, I play with a modified ice hockey goalkeeper upper body unit. I’ve seen the TK unit, but I think the ice hockey type units are more portective and better-constructed. If you’re looking in that direction, you can usually getg a good deal on a used one on e-bay or from the clearance section from a lot of the ice hockey internet stores. If you need ideas where to look let me know.

It sounds like you’re enjoying your hockey and it’s important to maintain that. The nice thing about indoor is that you have an opportunity to see alot of the ball. If a goal goes in, life goes on. It’s likely you and your team will have chances to redeem themselves. Have fun and good luck,

Jon

Aerials into the D

Aerial passes into the D are difficult for a goalkeeper to deal with, especially if a player gets on the end of the pass and deflects it onto goal. The goalkeeper can actively react to this danger, coming out aggressively to beat the opposition player to the ball and clear it; thus eliminating the scoring chance.

On the international scene aerials are becoming more and more popular as an offensive option; pushing up the pitch, with a deflector running onto the end of the aerial and tipping the ball to lob the goalkeeper. The winning goal of the recent Champions Trophy tournament by Australia is proof of this. As a result, the goalkeeper needs to be quicker on their feet and athletic in an aggressive response, if they want to be able to eliminate the threat.

As this clip shows, aerials are a danger to us goalkeepers if played incorrectly:

Coming out to intercept

The way to deal with the threat of the aerial into the D, actively and aggressively, is to come out and intercept it. Just like you would when facing an open pass into the D along the floor and completing an attacking clearance, you can sprint out to meet it. As the ball drops, you can then make your move; jumping up to knock away the ball.

Meeting the drop

To be able to stop the aerial and the threat of the opponent scoring, you need to match the aerial; matching its flight path and all important drop. You need to be quick and immediate in your actions; sprinting out to be the first to it. To eliminate the aerial, you need to beat the incoming opposing player to the ball, otherwise you can be whistled for obstruction as you are in their way. Timing is extremely important as to whether or not you will succeed in making the interception. In order to intercept it before it becomes dangerous, you have to be beneath the ball as it arrives, so that you can jump up and knock it away. Watch the ball and attempt to get underneath it to cut off its path, before leaping up to knock it clear.

Jumping into touch

To reach the ball, you really need to extend and reach up in your efforts to block. The ability to jump high is useful, since you need to be able to get as high as possible to cover the aerial. Extending the stick will give you extra reach if you are using the stick to block. When you block the aerial, try to power the ball away; batting it away to safety. However, don’t be too over zealous, otherwise you could get whistled on the play; push the ball to a reasonable distance (although your priority is to stop a goal being scored, so it shouldn’t matter too much if you are penalised).

Remember to look to the sides to direct the rebound, as that way you will have more time to respond and get back in goal if another opponent gets hold of the ball. If you let the ball simply drop to your feet, then the chances are that the incoming opponent player will latch onto the ball and then score around you.

Follow the rebound

As always, it is important to follow the rebound to shut down any secondary scoring chance. You need to follow up on the attempt to make sure there are no other chances to score. Work out where it’s gone, turning and sighting the ball before moving in to kick it away. If your defence has got back in time, then they may get to it before you.

Pointers:

  • beat the opposition to the ball; be the first to reach the aerial
  • get underneath the aerial’s path so that you can successfully block it
  • extend into the interception as you jump up
  • try to control the rebound; if it is not controlled first time, get to the rebound and clear it to safety
  • practise makes perfect; work on your technique to ensure

Rule of thumb:

– If you can’t reach the ball in time, then don’t try to: stay back and try to make the save. You have to be early in your efforts. If you leave it too late, then you won’t be able to make a successful interception.

Staying put

The other option for dealing with the aerial is not to do anything and wait for it to happen. You can passively let the play come to you. If you do not have the time to move off your goal quickly (having seen it late), or think you will misplay it, then you can wait on the opponent’s efforts to see what they do. Rather than being lobbed, stay deep in the D on your line so that you can make the save when the aerial is tipped and redirected onto goal. If the aerial is not redirected, but the player decides to knock it down to the floor to control it for an attempt on goal, then you can take a step forward to cut the angle and cover more of goal, or move out to challenge them.

Maintaining concentration

It is important to maintain concentration throughout the game. If you play on a strong team and don’t face many shots, then you will need to stay alert for long periods of time, even though you having nothing to do, until you face a shot, so you can readily stop it. This is an art form which is difficult to craft, but if you can, you will be very successful.

The goalkeeper’s main job is obviously to stop the ball and if , it can be difficult. The ability to stop shots, according to sport psychology, depends on your “arousal level” (i.e. how awake and alert you are), which means that you have to be for the whole game, not just parts of it. That’s why it is often easier to play against a high scoring team who will put a lot of shots on goal; allowing you to get into the ‘zone’ and build up rhythm, and there are goalkeepers who succeed at facing a lot of shots on a team with poor defence. However, if you face a small number of shots during the whole game, which are also of good quality (as the shooter only has that one chance to score and will make the most of it, compared to having lots of chances by simply regularly shooting at goal), then you need to be ‘awake’ for the whole time, ready to face those shots.

Therefore in order to be able to do the job of save making, you have to be able maintain a strong level of concentration for the whole game; fully focused on the task at hand, whilst also being able to keep up a level of consistent pressure on yourself, so that you are mentally prepared to stop a shot when it comes.

Not ‘mentally awake’

Not being mentally ‘awake’ is hazardous to your chances of making the save when it is most important. The biggest danger to your chances of properly concentrating for a full stretch, which can be made more difficult if you have little to do. To maximise your ability to be ready for every change in the game and every shot as it happens, you need to be ‘switched on’; ready and alert to what is happening, so that you can react when called upon. It is not humanly possible to concentrate all the time, and we cannot expect for that to be the case: however, you do have to make a concise effort to work on your concentration. If you want to be able to deal with immediate action when it occurs, often in the blink of an eye, then you have to work on maintaining concentration during a game.

It is often easy to ‘drop off’ or day dream, or ‘fall asleep’ on the play, which is dangerous territory if you end up facing a breakaway you were not ready for. Since you ‘switch off’ when the ball is not in your team’s half, it is easy to get distracted and bored, leading to a major drop in concentration levels. Not getting a good night’s sleep can attribute to this. If you don’t have the energy and are too burnt out to concentrate, then you will not be able to. Your attention span is also a key factor. When you are younger, your attention span is shorter, so it is essentially a lot harder for a younger goalkeeper (especially under 15) to be able to pay attention for such a seemingly long time as 70 minutes. As such, it is easier to face more shots because you have less concentrating to do as you focus on stopping shots. However, you can work on elongating your attention span, like doing some ‘brain’ or mental training (with various methods).

If you are “dozing off”, then you're not fully 'switched on' for action. Notice that the goalkeeper is looking the other way from the ball and is not in a ready stance, even though the player is just outside the D.

Staying focused in the game

In order to focus and remain focused, you have to force yourself to ‘stay awake’, if you want to have any chance of stopping every single shot and dealing with every broken play during a game. If you want to be able to call your defence to help, then you need to be watching: watching requires your focus. The easiest thing to focus on is the ball, as it is the obvious source of action. Maintain focus on the ball ALL the time, so that you are fully aware of what’s going on. Be completely focused, so that you can maintain your concentration.

Concentration levels

Although your main aim is to be fully alert, all the time, it is not possible; trying to do so, you could wear yourself out by the first quarter of the game. As we are human and prone to lapses in concentration, you can’t always expect to be tuned in to the flow of the game all the time. As much as it is important to be fully focused at all times on the play and where the ball is, it is just as important to conserve energy, so that you can save it for later on. Think about what would happen if you were trying to concentrate for the whole game, only to collapse in the last five minutes (as you ran out of energy); the most important part of the game, where the winner is decided.

The following is a rough percentage guide to how much you should be alert according to where the ball is:

  • When the ball is in the opposition’s D, you should be 5% ready for action
  • When the ball is in the opposition’s ’25’, be 15% ready
  • When the ball is at the half way line, you need to be 35% ready
  • When the ball is past the half way line, be 50% ready
  • When the ball is outside the D you should be 65% ready for action
  • When the ball is inside the D you should be 75% ready for a shot
  • When someone is lining up for a shot, you should be 100% ready!

This does not cover other scenarios. On set plays, like a short corner or penalty flick, you should be 100% ready to start with, as you cannot afford to not be paying attention.

Obviously your concentration levels will change throughout the game depending on what is happening. However, what stays the same needs to be your intensity; making an effort to keep up your interest in the game. Remember: you can be caught ‘napping’ by the opposition, like being too far off the line, or in the wrong place at the wrong time. At the top level being beaten by an aerial pass into the D (which is then deflected for a goal) is just an example. You need to aware of these situations and ready to act, so you don’t get beaten by them.

Pointers:

  • if your team is in control of the ball then you can be more relaxed (until they lose possession!)
  • if an attacker is in control of the ball then you should be more alert and focused on the danger of a scoring chance
  • change your level of concentration according to where the ball is on the pitch and the relating danger of facing shots
  • try to conserve energy, so that you are ready in the last minutes of the game
  • force yourself to concentrate: focus on nothing but the game at hand

Keeping up the pressure

Going for long periods without being called upon is a difficult trick to master. This is especially the case when playing at higher levels, or when you play on a team who are very (and therefore stop scoring chances reaching you in the first place). With the ball staying deep in the other end or the midfield for extended periods of time at the top levels, it is extremely difficult to stay alert and then stop only a few shorts that you will end up facing. Unlike in lower levels where you may be able to get away with ‘dropping off’ and ‘falling asleep’ on the play because you will be soon ‘woken up’ when shooters start moving in on goal, you have to be awake and alert 110% for the whole game, ready for action at any given opportunity.

The technique for reaching optimum levels of is to challenge yourself; force yourself to concentrate. Wipe out any other niggling thought from your mind and focus solely. Like yoga or zen, make your sole focus that of the match. By doing this, you will forget any distractions and be able to properly concentrate on the game.

With the ball in the other team's D this goalkeeper is taking a rest, but at the same time is focusing on the game at hand; staying mentally alert in the mind.

Concentrate!

Ultimately, you need to concentrate, and have the ability to, for long lengths of time. To be able to get the best out of yourself and perform to your highest level, you need to be focusing on the game at hand. Concentration goes hand in hand with your ability to stop shots, so it is important to work on it. It is up to you, so you have to work on it individually. You need to give 110% in your efforts.

ROBO SP Name Is No More

I have noticed on the net there are still a lot of references to ROBO SP; which no longer exists. (it was dropped in 2005)

Within the OBO ROBO range there are 2 kit options:

Hi-Rebound range pictured below in blue/black.

Hi-Control range pictured below in black/orange.

robo options

Hopefully its helpful so that everyone understands the naming and which kit is being referenced.

Face the shot on the corner

Previously goalkeepers set up on short corners facing the injection to watch it happen, before turning and moving out to face the shot. Rather than statically watching the injection, it is now more commonplace to see the goalkeeper focusing on the shot; facing forward already to move out to stop the ball, giving them extra advantage of time and ability to track the shot. If you get a chance to watch high level games, you’ll notice how it is being used. As the game changes, so does technique. The majority of the Hoofdklasse goalies face forward on short corners, as do the goalies in the English National Premier League. It is becoming more universal, with Belgian’s number 1 using at, along with USA’s starting men’s team goalie, as a couple of examples.

There is a problematic trend, with a lot of goalkeepers focusing on the ball being injected at the short corner, rather than the shot itself. This makes things harder in the save process, for making an effectual successful stop, as you are more focused on the injection, than the shot you have to stop. By being horizontal to the injector and therefore turned away from the incoming shot, you are in fact making things harder for yourself and reducing your chances of making the all important save. Instead, you can improve your success on short corners, by simply learning to focus on the shot; giving yourself more time to prepare for the save.

Being side-on

A lot of goalkeepers in Britain, western Europe (Holland, Belgium, Germany, Poland etc.), as well as Asia and Oceania (Australia and New Zealand), like to stand side-on, facing the injector at short corners, in order to watch the injection process and check the ball is properly released (making sure the attempt is not stuffed up by the injector!), before stepping out to face the shooter. Although it is in general use in goalkeepers across different leagues, it is also being used at international level by goalkeepers like Max Weinhold, Tim Jessulat (both of Germany), for example.

The reason behind this technique is that the goalkeeper is able to see the injection, following it through to the shot, tracking the ball and maintaining focus on it, into the save (maintaining eye contact with the ball allowing them to maintain their focus). By turning sideways they also give their defenders more room to move (with the 5 defenders, to defend the corner, standing within the goal). By being able to watch the injection process, they are also able to call out their defence on the time the ball is released, so they have a better chance of setting up in time for the shot/the runners have a better chance of a quick exit. The central focus is therefore on the injection process; completely ignoring the need to stop the shot, which is the more important – the goalkeeper’s fundamental task being keeping the ball out of the net.

This process, however, affects the goalkeeper’s ability to make an eventual save on the short corner attempt; rather than simply stepping out ready to stop the ball, the goalkeeper has to go through a series of before they can get ready for a save. The method itself over complicates the process of stepping out from goal and into position, as you have to turn your body in a swift motion and then step out of goal (slowing down the process of moving out from goal). By turning in this way, you can also end up away from your start position; the centre of goal, when turning round. You are moving yourself away from the destination of the incoming shot, especially if the shot is straight down the middle and around that area.

Focusing your efforts on watching the injector is also detrimental, as you have diverted your attention away from the upcoming shot. With your focus on the person injecting and watching the ball being transferred, rather than the actual shooter, you are not aware of the intended and therefore hampering your chances; you only have a short time to react to it as it happens. You are simply ‘in the dark’, unaware of the routine the opposition are going to use. Having not paid attention to the way the opposition has set up their attack, not knowing what they intend to do, you have no idea what you are facing. By doing so, you drastically limit your chances of making an efficient save; as you change your focus to the shooter, you have little time to react to the shot and therefore have little chance of making the save.

Facing forward

In comparison, a lot of technically sound goalkeepers prefer to stand with their body facing the intended shooter; already ready to deal with the expected shot when they step out from goal. The change in technique comes as a result of goalkeeper specific coaches rethinking the way goalkeepers should behave. The current crop of Dutch super keepers in the Hoofdklasse, use this technique. It is also spreading on the international scene, with goalkeepers like America’s number 1, Tom Sheridan, using the same method.

It is an important method of prioritising for the shot; getting ready before, rather than having to react immediately, once you have stepped out of the goal. At the highest level, the speed of injection is so fast that there is little time to react, complicating things if you were to stand sideways and then have to re-adjust in an instant. When you are faced with such speeds, it is important to try to gain an advantage, even if it is small. By being set already you give yourself that extra millisecond of extra time to react and read the ball better as it comes towards you, which may not have been possible if you had to turn into the shot. With little time to react, focusing on the ball is more useful; your focus is on the shot and you can therefore make a better ‘read’ on it.

In contrast to the side-on method, the complications of turning as you step out from goal are non-existent. Since you are already facing forward and set up centrally, you are already in an optimum position before you have moved out from, or set up for the set. If were are side-on, facing the injector, then you are not going to be able to exit quickly or efficiently; by off setting your position and balance, you slow down (having to reset yourself to position for the shot). Facing forward, however, you are able to set up with increased speed, giving you the time advantage. With your body facing (rather than having your hip tilting out to the side), you can balance and provide forward thrust for when you launch forward out into the D, for extra speed.

By being set up already facing the shot (rather than parallel to the injector) to start off with, you are in a better position to stop the eventual shot. With a forward view, you can pay attention to the opposition’s set-up around the top of the D. By facing the shooter, you can easily tell whether or strike or flick is coming (by their hand positioning), whilst you can also get a good look at the shape of the opposition’s corner routine (where the ‘castle’ is i.e. where the ball is being stopped and if there are any other dangers, such as deflectors running in).

Face the shot

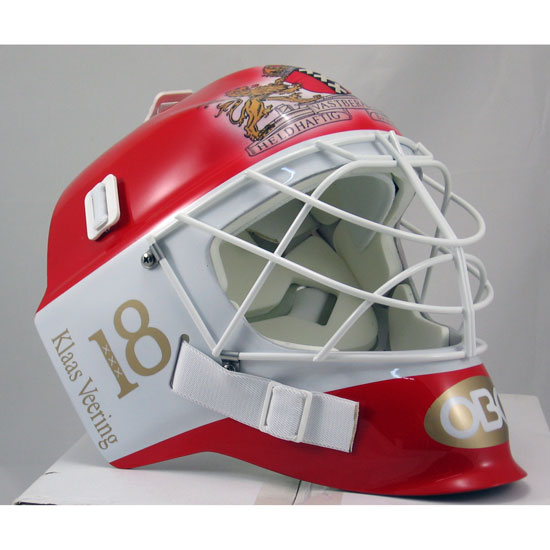
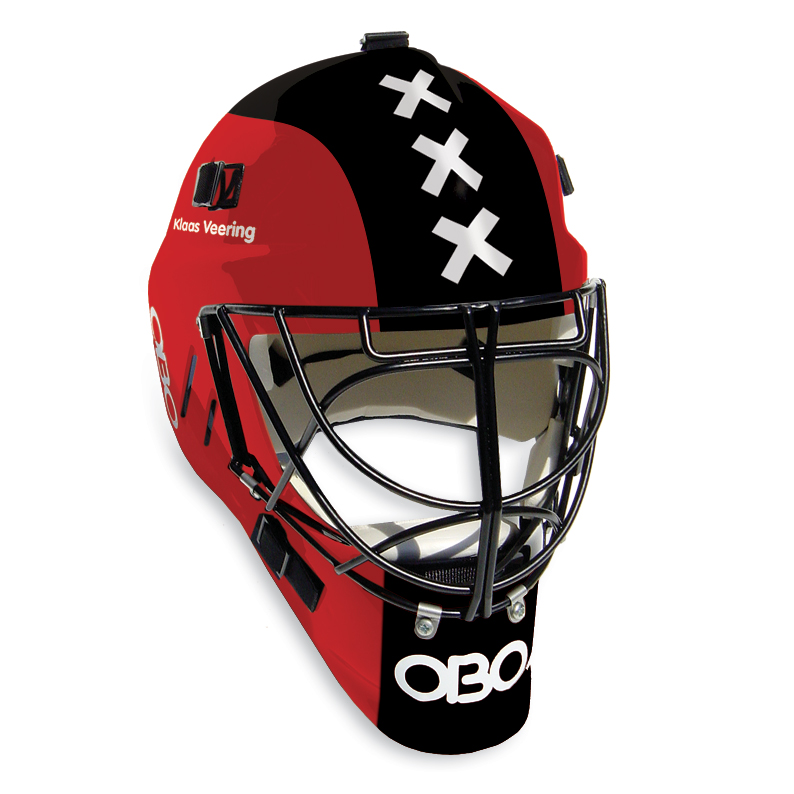
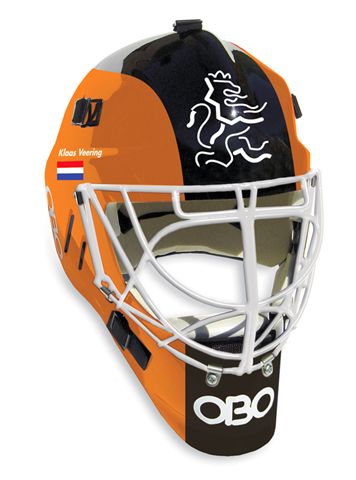
When you are just about to stop a shot, you are already pre-set in a balanced, stable ready stance and your focus is on the ball – as a result, you can make a successful save. When you are setting up on a short corner, you should therefore be doing the same; setting up in a stance relating to the type of shot you are focusing (well balanced, hands ready according to the anticipated height of the shot/flick), with your eyes focusing on the shooter and then their shot (as they receive the ball and shoot). If you watch the high performing Dutch goalkeepers, such as Klaas Veering, Jaap Stockman, Guus Vogels, and Pirmin Blaak, (who are all coached by Martin Drijver) you will notice that they now all focus solely on the shooter. As do Spanish goalkeepers, like Fransisco Cortes (who is also coached by Drijver). Stockman even goes so far as ignoring calling the defence to move out on the injection (so that the defenders get in the right positions in time), in order to prioritise the save.

The fundamental skill of watching the ball has been lost in the sense of watching the injection; taking it literally, coaches and goalkeepers alike have seen it as essential to focus on where the ball is, with the injector, which is not as important. However, the priority should be on the shooter and focusing on their stick, and following the focus on through; before they receive the ball, then when they take the shot, since that is the where the shot is coming from. By preparing early, rather than just before you have to make a save, your mind is already on the job at hand, whilst you are also physically ready (set in your stance) – reacting better to the flick/shot with increased focus and therefore making the save.

The goalkeeper in this video works as a good basic example of the technique, with them moving straight out from a forward from a forward facing stance, into their ready position to face the shot.

Facing forward on corner

The following video shows the technique in game use:

Vogels in action with the technique

The following is an interesting study by the University of Amsterdam, which proves the theory; with the goalkeeper reacting better when they are focusing on the shot, rather than the injection. Notice how the goalkeeper reacts better when they are watching the shooter. Although they do not make the save, they react much better, anticipating where it is going and able to make a proper ‘read’ because of their focus on the shot.

Study on facing forward, not watching injection

Pointers:

  • Align yourself centrally in the goal and facing forward
  • Make sure you are facing the shot; start by having your head turned towards the shooter, then make sure your hips are straight, so your whole body is set forwards, to enable an easier transition to your ready stance when you move out
  • If you aren’t comfortable standing straight up and feel unbalanced, then you can use your rear leg to support yourself
  • Focus on the ball is more important – look to work out the shooter early on
  • The quicker you exit the goal, the more time you have to prepare
  • Watch the ball from the point the shooter receives the injected ball into the save – start by focusing on the shooter
  • Focus mentally on making the save to increase your ability; mental focus helps you focus on the shot and therefore the save

Admittedly the side-on method allows you to watch the injection happen and then call your defenders to move out in time, with your head already positioned to face the injector and see the pass out, BUT it does affect your ability and chances of making the save. If you are intent on getting ready for the save, then you could have a defender (organising this before you set up the corner defence); making sure that they are aware when to call it.

Face forward!

Ultimately, to give yourself the best chance of making the initial save when facing a short corner, you need to be facing forward, so that you face the impending shot. By being pre-set and prepared in advance, you give yourself that extra time to get ready (rather than wasting essential time), as well as extra focus to concentrate on the task at hand, which is crucial to stopping the ball and eliminating the scoring chance that could level the score or put your team a goal down. This way you have more control over events; increasing and improving your chances of making the save by being better prepared.

Raising your gloves on short corners

Facing a powerful drag flick aimed high on a short corner, the goalkeeper stands little chance in making the save if they have their gloves down low. Therefore, you need to raise your gloves on such situations, if you want to have a chance of making the save.

If you watch most of the high level leagues, you will notice that the majority of goalkeepers have their gloves high up on the short corner. Just looking at the Euro Hockey League or the Hoofdklasse, for example, on short corners you will pretty much see all of the goalkeepers with their hands up high when getting set in the stance; expecting to deal with a high drag flick. The reason is simple: by having their gloves up higher, it is easier to move in for the save (even if they dive high into the save, since the gloves are already there and don’t need to be brought up). Rather than being played by the situation, they pro-actively change their stance to help their shot stopping abilities. With their hands already up, they give themselves an improved chance of making the save.

Have you ever watched a goalkeeper make a save against a well struck hit bringing their glove up , or tried yourself to stop a fast ball aimed at the top of goal with your hands low? Ball speeds and accuracy mean it is not possible. Do you think you’d be able to stop one of Taeka Taekema’s or Sohail Abbas’s awesome drag flicks powered into the roof of the net with your gloves starting from a low position?! It’s simply not logically possible, so you therefore need to change technique to increase your save capabilities; with raised gloves, you have an better chance.

When facing drag flicks on short corners, at the higher levels of the game, it is important to raise your gloves if you want to be able to make the save from a standing position. With your gloves raised, you have less of a distance to move, to get them up to block; as a result, there is a greater percentage chance of actually stopping the ball from ending up in the back of the net. If you intend to make the save from a standing position, then you will need to have the gloves to be able to reach the ball, otherwise you will need to get aerial.

Low gloves giving away shooting space

If you normally play with your gloves at a low height within your ready stance, then you are going to get ‘burned’ and made to look silly if you still play with them low, when facing high drag flicks from a standing position. Even if you jump or dive into the save, it will still take time to move them up; time you do not have when playing against highly skilled opponents. With accurate power and placement, a well placed drag flick into the top corner of the goal, or high to the sides, away from your reach, will not be stoppable. You simply cannot get to it quickly enough. If you are playing against a team with drag flickers that have a tendency to exploit such areas, then you should not expect to be able to make the save, if you a making the wrong technique selection.

The problem when you have your gloves around your hips or body, which is useful when facing shots around that area, but becomes useless when you are faced with raised flicks or shots, as you cannot reach the high shot in time, with the speed of it. Swinging the arm up in vain will not be of any use: you won’t be able to get the glove up in time, whereas having the gloves already in position means that you are already there for the save.

As these action shots show, it is near impossible to try and save a high flick with a low glove position:


The following video is a good example of failed technique with the goalkeeper trying to save a high drag flick from a position with their gloves lowered (playing time around 30 seconds in).

Drag flick

Raising your gloves

Most goalkeepers raise their gloves to shoulder height (as taught in Europe), giving them enough height to push up into a high save. In Australia, goalkeepers are encouraged to have their gloves around head height. Both arms are spread out at an equal distance, outside the body, in a symmetrical V shape. This way you cover more of the goal, as well allowing you to use the gloves independently; pushing the appropriate hand out separately to block. By raising your gloves you are making life easier for yourself. Although people think that playing a reflex style means you need to and then react immediately by moving the glove up, you can actually use your reflexes to move into the save with the speed of the ball, as they are already in position; gaining a slight advantage over the powerful drag flick coming at you with speed.

With his gloves raised, notice how this goalkeeper was now able to reach into the drag flick from a standing position as a result;quickly moving them the small distance to block. Even though it missed the goal, he had it covered.


Technique

When making an upright save maintaining balance remains important. If you do not balance properly, you will not be able to reach into the save, or balance it successfully (falling back/losing balance in the process). You need to move into the save, pushing your body from the head (to maintain balance) to drive into the motion; bringing your glove into contact by pushing from the arm to properly connect with the incoming flick. If you find that it is not possible to reach into the save from a standing ready stance, then you will need to get aerial and high dive into the save.

By taking a look when setting up for the short corner, you can then alter your stance as you get ready within the goal. Knowing that you will be facing a drag flick (by analysing the shooter’s body position) you can then raise your gloves to help in your save making. If you play against the time regularly in the season, or have played them previously, then you and your team should know their tendencies, which will help in your decision making. However, be aware of changes in routine, which will be brought in if you are successfully stopping the opposing team’s chances, and can catch you off guard if you are not aware of the change.

If you end up facing a lower flick than expected (around body/hip height), then you can bring your gloves down to block. Gravity is on your side and it is actually quicker to bring your hands down, than to try to get them up, so it should not be too difficult to make the save if you force your glove down quickly to cover.

Rule of thumb

The rule of thumb is whether or not you will be facing a drag flick. There would be no point using raised gloves when facing a straight strike, as your priority is to get down against the shot to cover the percentages. You can tell by the shooter’s hand positioning on their stick whether or not they are going to drag flick (their hands will be open, spread apart, whereas closed hands at the top of the stick mean a strike). If you know that the opposing shooter likes to shoot high, then it becomes easier to know when to use the raised glove position.

Fibreglass Helmet Review

When I started to play with OBO over 15 years ago, I didn’t use the OBO helmet but the icehockey style Cooper helmet. After a few years I tried on the OBO helmet and since then I won’t use another helmet anymore.

What I like about the helmet:

  • Protection is really good — I’ve been hit quite some times over the years but my head is still on my shoulders.
  • Perfect fit — this is a major improvement vs the other helmets I’ve used. This helmet fits perfectly well and it feels like you’re not even wearing one
  • Cool looks — Obviously the least important of the 3, but nice anyway… I have had some custom made helmet which (in my opinion) are very cool

The newest helmet I use now is pretty heavy. I thought this might be irritating, but when you put it on you hardly notice the weight and because of the perfect fit this gives no problems.

One thing I always change when I get a new helmet is the position of the wire cage. I like it better when it is placed a little lower on the helmet than standard — the vision is much better like that. So with help of the nice people at Verbunt (Dutch importer of OBO) I put in some new screws in the helmet.

All in all I’m very pleased with the helmet and I can’t think of a better one in the market.

I’ve added some pics of the custom helmets I’ve used.

Cheers and a happy new year from Amsterdam!

Klaas Veering

OBO CLOUD Kit Sizing

Just a few small tips I’d like to share for buying new OBO kit.

I recently upgraded my body armour and thigh pads to the OBO Cloud Range, (very good by the way). The first time i brought kit i got it straight from the internet, the sizing worked pretty well so it was alright. This time because of the cost i wanted to be absolutely sure the kit fit before anything was payed for. Luckily my chemistry tutor, (Who plays cricket) told me about a company that had competitive prices and a show room in London. They were very helpful and ordered it all in for me to try.

Now heres the tips.

CLOUD Body armour – don’t rely solely on the OBO sizing of arm length, every one is unique so work out what size you are by them then order the sizes around it as well to try on, i measured as a small and ended up in a medium.

CLOUD Hot Pants – wide waist = Tall is unfortunately the principle most companies work on, my waist size was for a hight of 5’10 -6’2, I’m 5’6 at the most. Try the different sizes, the waist stretches and it has a belt, and I’ve been told by other keepers that it’s better they be too small around the waist than having them catch on the leg pads

ROBO Overpants – A bit of a grey area, medium hotpants doesn’t always mean medium over shorts, because of how they wrap the size varies, if you’re at the larger end of medium like me you might want the large over shorts, it just allows for more flexibility.

Just try before you buy, if you can’t get it ordered to try, ask other keepers in your club or even on other teams you play (We do tend to be nice people us keepers), if they have what you’re after ask them if you can quickly try then to get a size idea, hopefully they’ll let you, (just remember to do it after the match when you have time).  If all that fails, post an article and hopefully other people maybe able to help you estimate, last thing you want to do is pay out on expensive kit that doesn’t fit.

OBO Size Guide Link