ROBO SP Name Is No More

I have noticed on the net there are still a lot of references to ROBO SP; which no longer exists. (it was dropped in 2005)

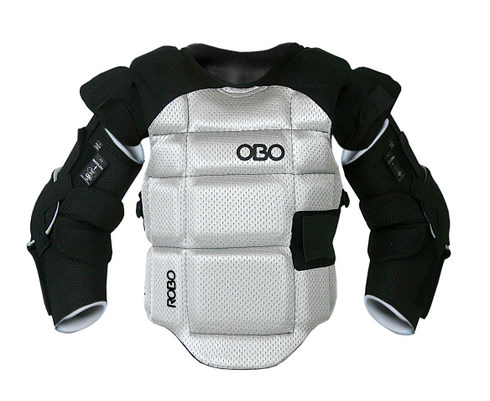
Within the OBO ROBO range there are 2 kit options:

Hi-Rebound range pictured below in blue/black.

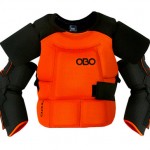
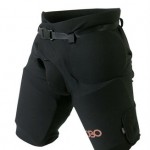
Hi-Control range pictured below in black/orange.

robo options

Hopefully its helpful so that everyone understands the naming and which kit is being referenced.

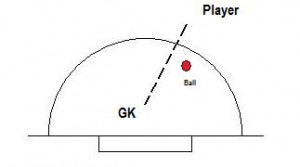
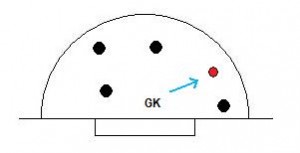
Face the shot on the corner

Previously goalkeepers set up on short corners facing the injection to watch it happen, before turning and moving out to face the shot. Rather than statically watching the injection, it is now more commonplace to see the goalkeeper focusing on the shot; facing forward already to move out to stop the ball, giving them extra advantage of time and ability to track the shot. If you get a chance to watch high level games, you’ll notice how it is being used. As the game changes, so does technique. The majority of the Hoofdklasse goalies face forward on short corners, as do the goalies in the English National Premier League. It is becoming more universal, with Belgian’s number 1 using at, along with USA’s starting men’s team goalie, as a couple of examples.

There is a problematic trend, with a lot of goalkeepers focusing on the ball being injected at the short corner, rather than the shot itself. This makes things harder in the save process, for making an effectual successful stop, as you are more focused on the injection, than the shot you have to stop. By being horizontal to the injector and therefore turned away from the incoming shot, you are in fact making things harder for yourself and reducing your chances of making the all important save. Instead, you can improve your success on short corners, by simply learning to focus on the shot; giving yourself more time to prepare for the save.

Being side-on

A lot of goalkeepers in Britain, western Europe (Holland, Belgium, Germany, Poland etc.), as well as Asia and Oceania (Australia and New Zealand), like to stand side-on, facing the injector at short corners, in order to watch the injection process and check the ball is properly released (making sure the attempt is not stuffed up by the injector!), before stepping out to face the shooter. Although it is in general use in goalkeepers across different leagues, it is also being used at international level by goalkeepers like Max Weinhold, Tim Jessulat (both of Germany), for example.

The reason behind this technique is that the goalkeeper is able to see the injection, following it through to the shot, tracking the ball and maintaining focus on it, into the save (maintaining eye contact with the ball allowing them to maintain their focus). By turning sideways they also give their defenders more room to move (with the 5 defenders, to defend the corner, standing within the goal). By being able to watch the injection process, they are also able to call out their defence on the time the ball is released, so they have a better chance of setting up in time for the shot/the runners have a better chance of a quick exit. The central focus is therefore on the injection process; completely ignoring the need to stop the shot, which is the more important – the goalkeeper’s fundamental task being keeping the ball out of the net.

This process, however, affects the goalkeeper’s ability to make an eventual save on the short corner attempt; rather than simply stepping out ready to stop the ball, the goalkeeper has to go through a series of before they can get ready for a save. The method itself over complicates the process of stepping out from goal and into position, as you have to turn your body in a swift motion and then step out of goal (slowing down the process of moving out from goal). By turning in this way, you can also end up away from your start position; the centre of goal, when turning round. You are moving yourself away from the destination of the incoming shot, especially if the shot is straight down the middle and around that area.

Focusing your efforts on watching the injector is also detrimental, as you have diverted your attention away from the upcoming shot. With your focus on the person injecting and watching the ball being transferred, rather than the actual shooter, you are not aware of the intended and therefore hampering your chances; you only have a short time to react to it as it happens. You are simply ‘in the dark’, unaware of the routine the opposition are going to use. Having not paid attention to the way the opposition has set up their attack, not knowing what they intend to do, you have no idea what you are facing. By doing so, you drastically limit your chances of making an efficient save; as you change your focus to the shooter, you have little time to react to the shot and therefore have little chance of making the save.

Facing forward

In comparison, a lot of technically sound goalkeepers prefer to stand with their body facing the intended shooter; already ready to deal with the expected shot when they step out from goal. The change in technique comes as a result of goalkeeper specific coaches rethinking the way goalkeepers should behave. The current crop of Dutch super keepers in the Hoofdklasse, use this technique. It is also spreading on the international scene, with goalkeepers like America’s number 1, Tom Sheridan, using the same method.

It is an important method of prioritising for the shot; getting ready before, rather than having to react immediately, once you have stepped out of the goal. At the highest level, the speed of injection is so fast that there is little time to react, complicating things if you were to stand sideways and then have to re-adjust in an instant. When you are faced with such speeds, it is important to try to gain an advantage, even if it is small. By being set already you give yourself that extra millisecond of extra time to react and read the ball better as it comes towards you, which may not have been possible if you had to turn into the shot. With little time to react, focusing on the ball is more useful; your focus is on the shot and you can therefore make a better ‘read’ on it.

In contrast to the side-on method, the complications of turning as you step out from goal are non-existent. Since you are already facing forward and set up centrally, you are already in an optimum position before you have moved out from, or set up for the set. If were are side-on, facing the injector, then you are not going to be able to exit quickly or efficiently; by off setting your position and balance, you slow down (having to reset yourself to position for the shot). Facing forward, however, you are able to set up with increased speed, giving you the time advantage. With your body facing (rather than having your hip tilting out to the side), you can balance and provide forward thrust for when you launch forward out into the D, for extra speed.

By being set up already facing the shot (rather than parallel to the injector) to start off with, you are in a better position to stop the eventual shot. With a forward view, you can pay attention to the opposition’s set-up around the top of the D. By facing the shooter, you can easily tell whether or strike or flick is coming (by their hand positioning), whilst you can also get a good look at the shape of the opposition’s corner routine (where the ‘castle’ is i.e. where the ball is being stopped and if there are any other dangers, such as deflectors running in).

Face the shot

When you are just about to stop a shot, you are already pre-set in a balanced, stable ready stance and your focus is on the ball – as a result, you can make a successful save. When you are setting up on a short corner, you should therefore be doing the same; setting up in a stance relating to the type of shot you are focusing (well balanced, hands ready according to the anticipated height of the shot/flick), with your eyes focusing on the shooter and then their shot (as they receive the ball and shoot). If you watch the high performing Dutch goalkeepers, such as Klaas Veering, Jaap Stockman, Guus Vogels, and Pirmin Blaak, (who are all coached by Martin Drijver) you will notice that they now all focus solely on the shooter. As do Spanish goalkeepers, like Fransisco Cortes (who is also coached by Drijver). Stockman even goes so far as ignoring calling the defence to move out on the injection (so that the defenders get in the right positions in time), in order to prioritise the save.

The fundamental skill of watching the ball has been lost in the sense of watching the injection; taking it literally, coaches and goalkeepers alike have seen it as essential to focus on where the ball is, with the injector, which is not as important. However, the priority should be on the shooter and focusing on their stick, and following the focus on through; before they receive the ball, then when they take the shot, since that is the where the shot is coming from. By preparing early, rather than just before you have to make a save, your mind is already on the job at hand, whilst you are also physically ready (set in your stance) – reacting better to the flick/shot with increased focus and therefore making the save.

The goalkeeper in this video works as a good basic example of the technique, with them moving straight out from a forward from a forward facing stance, into their ready position to face the shot.

Facing forward on corner

The following video shows the technique in game use:

Vogels in action with the technique

The following is an interesting study by the University of Amsterdam, which proves the theory; with the goalkeeper reacting better when they are focusing on the shot, rather than the injection. Notice how the goalkeeper reacts better when they are watching the shooter. Although they do not make the save, they react much better, anticipating where it is going and able to make a proper ‘read’ because of their focus on the shot.

Study on facing forward, not watching injection

Pointers:

  • Align yourself centrally in the goal and facing forward
  • Make sure you are facing the shot; start by having your head turned towards the shooter, then make sure your hips are straight, so your whole body is set forwards, to enable an easier transition to your ready stance when you move out
  • If you aren’t comfortable standing straight up and feel unbalanced, then you can use your rear leg to support yourself
  • Focus on the ball is more important – look to work out the shooter early on
  • The quicker you exit the goal, the more time you have to prepare
  • Watch the ball from the point the shooter receives the injected ball into the save – start by focusing on the shooter
  • Focus mentally on making the save to increase your ability; mental focus helps you focus on the shot and therefore the save

Admittedly the side-on method allows you to watch the injection happen and then call your defenders to move out in time, with your head already positioned to face the injector and see the pass out, BUT it does affect your ability and chances of making the save. If you are intent on getting ready for the save, then you could have a defender (organising this before you set up the corner defence); making sure that they are aware when to call it.

Face forward!

Ultimately, to give yourself the best chance of making the initial save when facing a short corner, you need to be facing forward, so that you face the impending shot. By being pre-set and prepared in advance, you give yourself that extra time to get ready (rather than wasting essential time), as well as extra focus to concentrate on the task at hand, which is crucial to stopping the ball and eliminating the scoring chance that could level the score or put your team a goal down. This way you have more control over events; increasing and improving your chances of making the save by being better prepared.

Raising your gloves on short corners

Facing a powerful drag flick aimed high on a short corner, the goalkeeper stands little chance in making the save if they have their gloves down low. Therefore, you need to raise your gloves on such situations, if you want to have a chance of making the save.

If you watch most of the high level leagues, you will notice that the majority of goalkeepers have their gloves high up on the short corner. Just looking at the Euro Hockey League or the Hoofdklasse, for example, on short corners you will pretty much see all of the goalkeepers with their hands up high when getting set in the stance; expecting to deal with a high drag flick. The reason is simple: by having their gloves up higher, it is easier to move in for the save (even if they dive high into the save, since the gloves are already there and don’t need to be brought up). Rather than being played by the situation, they pro-actively change their stance to help their shot stopping abilities. With their hands already up, they give themselves an improved chance of making the save.

Have you ever watched a goalkeeper make a save against a well struck hit bringing their glove up , or tried yourself to stop a fast ball aimed at the top of goal with your hands low? Ball speeds and accuracy mean it is not possible. Do you think you’d be able to stop one of Taeka Taekema’s or Sohail Abbas’s awesome drag flicks powered into the roof of the net with your gloves starting from a low position?! It’s simply not logically possible, so you therefore need to change technique to increase your save capabilities; with raised gloves, you have an better chance.

When facing drag flicks on short corners, at the higher levels of the game, it is important to raise your gloves if you want to be able to make the save from a standing position. With your gloves raised, you have less of a distance to move, to get them up to block; as a result, there is a greater percentage chance of actually stopping the ball from ending up in the back of the net. If you intend to make the save from a standing position, then you will need to have the gloves to be able to reach the ball, otherwise you will need to get aerial.

Low gloves giving away shooting space

If you normally play with your gloves at a low height within your ready stance, then you are going to get ‘burned’ and made to look silly if you still play with them low, when facing high drag flicks from a standing position. Even if you jump or dive into the save, it will still take time to move them up; time you do not have when playing against highly skilled opponents. With accurate power and placement, a well placed drag flick into the top corner of the goal, or high to the sides, away from your reach, will not be stoppable. You simply cannot get to it quickly enough. If you are playing against a team with drag flickers that have a tendency to exploit such areas, then you should not expect to be able to make the save, if you a making the wrong technique selection.

The problem when you have your gloves around your hips or body, which is useful when facing shots around that area, but becomes useless when you are faced with raised flicks or shots, as you cannot reach the high shot in time, with the speed of it. Swinging the arm up in vain will not be of any use: you won’t be able to get the glove up in time, whereas having the gloves already in position means that you are already there for the save.

As these action shots show, it is near impossible to try and save a high flick with a low glove position:


The following video is a good example of failed technique with the goalkeeper trying to save a high drag flick from a position with their gloves lowered (playing time around 30 seconds in).

Drag flick

Raising your gloves

Most goalkeepers raise their gloves to shoulder height (as taught in Europe), giving them enough height to push up into a high save. In Australia, goalkeepers are encouraged to have their gloves around head height. Both arms are spread out at an equal distance, outside the body, in a symmetrical V shape. This way you cover more of the goal, as well allowing you to use the gloves independently; pushing the appropriate hand out separately to block. By raising your gloves you are making life easier for yourself. Although people think that playing a reflex style means you need to and then react immediately by moving the glove up, you can actually use your reflexes to move into the save with the speed of the ball, as they are already in position; gaining a slight advantage over the powerful drag flick coming at you with speed.

With his gloves raised, notice how this goalkeeper was now able to reach into the drag flick from a standing position as a result;quickly moving them the small distance to block. Even though it missed the goal, he had it covered.


Technique

When making an upright save maintaining balance remains important. If you do not balance properly, you will not be able to reach into the save, or balance it successfully (falling back/losing balance in the process). You need to move into the save, pushing your body from the head (to maintain balance) to drive into the motion; bringing your glove into contact by pushing from the arm to properly connect with the incoming flick. If you find that it is not possible to reach into the save from a standing ready stance, then you will need to get aerial and high dive into the save.

By taking a look when setting up for the short corner, you can then alter your stance as you get ready within the goal. Knowing that you will be facing a drag flick (by analysing the shooter’s body position) you can then raise your gloves to help in your save making. If you play against the time regularly in the season, or have played them previously, then you and your team should know their tendencies, which will help in your decision making. However, be aware of changes in routine, which will be brought in if you are successfully stopping the opposing team’s chances, and can catch you off guard if you are not aware of the change.

If you end up facing a lower flick than expected (around body/hip height), then you can bring your gloves down to block. Gravity is on your side and it is actually quicker to bring your hands down, than to try to get them up, so it should not be too difficult to make the save if you force your glove down quickly to cover.

Rule of thumb

The rule of thumb is whether or not you will be facing a drag flick. There would be no point using raised gloves when facing a straight strike, as your priority is to get down against the shot to cover the percentages. You can tell by the shooter’s hand positioning on their stick whether or not they are going to drag flick (their hands will be open, spread apart, whereas closed hands at the top of the stick mean a strike). If you know that the opposing shooter likes to shoot high, then it becomes easier to know when to use the raised glove position.

Fibreglass Helmet Review

When I started to play with OBO over 15 years ago, I didn’t use the OBO helmet but the icehockey style Cooper helmet. After a few years I tried on the OBO helmet and since then I won’t use another helmet anymore.

What I like about the helmet:

  • Protection is really good — I’ve been hit quite some times over the years but my head is still on my shoulders.
  • Perfect fit — this is a major improvement vs the other helmets I’ve used. This helmet fits perfectly well and it feels like you’re not even wearing one
  • Cool looks — Obviously the least important of the 3, but nice anyway… I have had some custom made helmet which (in my opinion) are very cool

The newest helmet I use now is pretty heavy. I thought this might be irritating, but when you put it on you hardly notice the weight and because of the perfect fit this gives no problems.

One thing I always change when I get a new helmet is the position of the wire cage. I like it better when it is placed a little lower on the helmet than standard — the vision is much better like that. So with help of the nice people at Verbunt (Dutch importer of OBO) I put in some new screws in the helmet.

All in all I’m very pleased with the helmet and I can’t think of a better one in the market.

I’ve added some pics of the custom helmets I’ve used.

Cheers and a happy new year from Amsterdam!

Klaas Veering

OBO CLOUD Kit Sizing

Just a few small tips I’d like to share for buying new OBO kit.

I recently upgraded my body armour and thigh pads to the OBO Cloud Range, (very good by the way). The first time i brought kit i got it straight from the internet, the sizing worked pretty well so it was alright. This time because of the cost i wanted to be absolutely sure the kit fit before anything was payed for. Luckily my chemistry tutor, (Who plays cricket) told me about a company that had competitive prices and a show room in London. They were very helpful and ordered it all in for me to try.

Now heres the tips.

CLOUD Body armour – don’t rely solely on the OBO sizing of arm length, every one is unique so work out what size you are by them then order the sizes around it as well to try on, i measured as a small and ended up in a medium.

CLOUD Hot Pants – wide waist = Tall is unfortunately the principle most companies work on, my waist size was for a hight of 5’10 -6’2, I’m 5’6 at the most. Try the different sizes, the waist stretches and it has a belt, and I’ve been told by other keepers that it’s better they be too small around the waist than having them catch on the leg pads

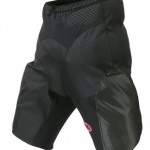
ROBO Overpants – A bit of a grey area, medium hotpants doesn’t always mean medium over shorts, because of how they wrap the size varies, if you’re at the larger end of medium like me you might want the large over shorts, it just allows for more flexibility.

Just try before you buy, if you can’t get it ordered to try, ask other keepers in your club or even on other teams you play (We do tend to be nice people us keepers), if they have what you’re after ask them if you can quickly try then to get a size idea, hopefully they’ll let you, (just remember to do it after the match when you have time).  If all that fails, post an article and hopefully other people maybe able to help you estimate, last thing you want to do is pay out on expensive kit that doesn’t fit.

OBO Size Guide Link

Making the Robo HR Left Glove even more ‘Perfect’

Hey Keepers (me again)

With such positive feedback and interest with ‘making the HR right hand even more perfect’ 😀

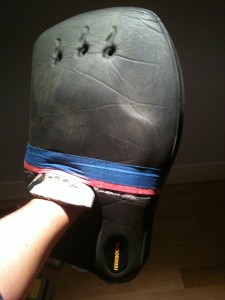
Something I touched on in my previous article was the OBO ‘left’ hand. I wanted to show you the alterations I’ve made on this glove which I think makes the glove a lot better (I’d say perfect)!

When I wore my first Robo kit (hi control) in 2003 at 13 years old something I always did was to leave the wrist strap undone, to have full wrist movement. To me this strap seemed point less and I removed it! I’ve seen many other gks do this. Chris Hibbert (South African Keeper) demonstrates this in the picture below!

OLYMPICS-HOCKEY/

Talking to the goalkeeping wizard Jimi Lewis (who also removed this strap) showed me the modifications he did for all his career in OBO and playing for Great Britain in the Athens Olympics (same picture) 🙂

51208435

I want to show you the 5 stages to make the left hand even more ‘Perfect’

Riem-handschoen

Stage 1, remove the strap (keep the strap for your perfect high rebound right hand alterations as a ‘spare’ just in case 😉

IMG_0058

Stage 2, mark the cuts! keep it about 1-2cms above the indents on the soft foam

IMG_0065

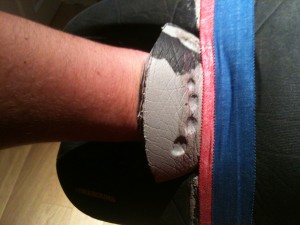
Stage 3, cut along your marking

IMG_0061

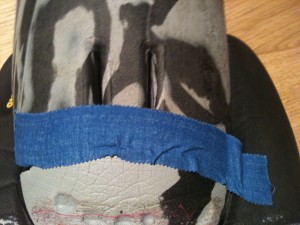
(Optional stage 4) if the glove is brand new… doesn’t matter so much, it’s better when the glove is loosened. Have some strong tape. Put it in the middle of where the soft foam meets the harder foam and wrap around tight!

93684340

This is becoming more common on different brand gloves as well. Shown by Nick Brothers (Current England Goalkeeper)

IMG_0062

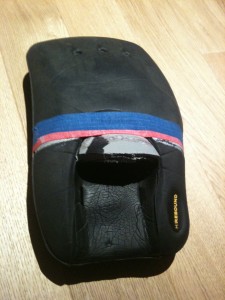
Stage 5, enjoy!!!

xoxo

Added protection for keepers who play “Dutch” style

hey keepers

I’ve got another idea/ alteration that I’ve done, this time based on bicep protection…

If we look at products that offer bicep protection they often come in the ice hockey style protectors (not a big fan these)

FM08 Shoulder Caps

I wanted to show you lovely keepers an idea based on the “Chris Hibbert” bicep protectors

82519974

I recommend this for keepers who play a “dutch” style (no arm pads) (like me) away of having a little added protection but full arm movements

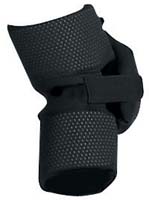
You will need OBO Cloud arm pads (the ones you buy individually not the ones that come with the Cloud Armour)

OBOElbowGuard

Here are the 5 stages to having your own OBO bicep protectors!!!

Stage one depending on the size of your arm, choose which part of the arm guard will fit snug on your bicep. Me being a small guy (nothing wrong with that) i use the part which is originally meant to go around your forearm as the bicep protection.

IMG_0069

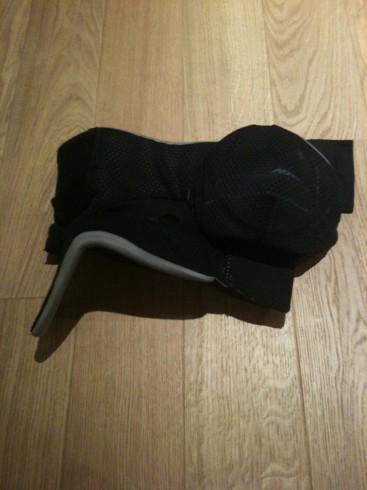
Stage 2 undo the straps and splay out

IMG_0070

Stage 3 with your trusty Stanley knife cut off along the soft stretchy part in the middle of the arm guard and continue all the way around

IMG_0072

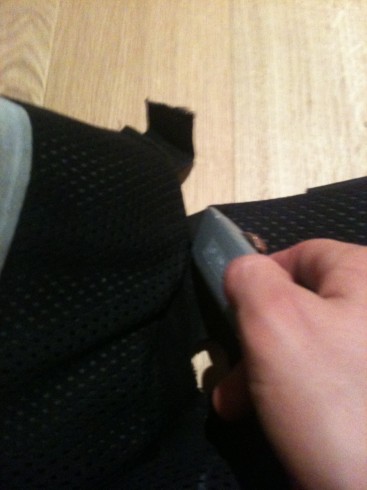
Stage 4 remove the last strap remaining on the new found bicep (shown on the photo above) To get the best position i found putting the guard on the opposite arm and make sure  the end part (grey part) of the arm guard is facing down your arm

IMG_0073

This is the arm guard with the new style Robo body armour

IMG_0074

Stage 5 Enjoy

tommy

xoxo

Philippe Thiltges OBO Profile

Austrian mens goalkeeper Philippe Thiltges’s OBO profile.

Philippe Thiltges

What club you play for: WAC

What Country you play for: Austria

Great achievements:

Outdoor:

Playing U21 Europeans Championsships in every Pool (C, B, A);

Playing in the spanish Premier League as Nr 1 Keeper for R.S. Tenis

Euro Hockey Championship A-Pool in Amsterdam

Indoor:

Selected for “Best Goalkeeper of the tournament” at European Cup A Pool 2005 in Vienna with only 18 years

2006 European Championship (A-Pool) in Holland

U21 European Champion 2007 (A-Pool) in Zagreb

List of gear you use:

OBO ROBO Hi-Rebound Kickers & Legguards, OBO ROBO Body Armour, OBO High Rebound Gloves, OBO Helmet, OBO Fat Boy

Best goalie memory: Winning the game against Wales at Europeans U21 B-Pool which promoted us for the A-Pool to null. (1:0)

Saving a lot in the game against Belgium at the European Championship in Amsterdam in front of some thousand spectators.

How often do you train: 3 times a week with the Club, 1 time a week national team, 1 time a week special keepers training with ballmachine in the morning

International caps: aprox. 25

International debut: Eindhoven 2006

Any secret tips: you play only for yourself never let anyone pressure you into it.

Goals in life: Being well educated and finding a challenging job which should also offer the possibility to go on with hobbies and find some time for family & friends.

Arm Guards or Elbow Guards

Hey guys,

i’m thinking of buying the ROBO body armour and I asked myself a question…and i couldn’t answer it myself so…i thought i would ask for some opinion…

What would you advise…the obo arm guards(that are sold separately)

robo-body-armour

or the new obo elbow guards

robo-elbow-guard

……….i am 14 years old…and i play u16’s club hockey (Pembroke Wanderers) and I am the second choice senior keeper of my school….. The style of play i use is  For short corners I tend to log if its a hit  and i stay up when its a drag. And the odd 1vs.1 I tend to slide… and take the crap out of the player.

What would be the best for me?