OBO Hi-Control Legguard’s Review

hi-control-legguards

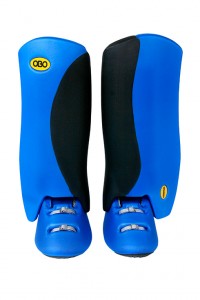
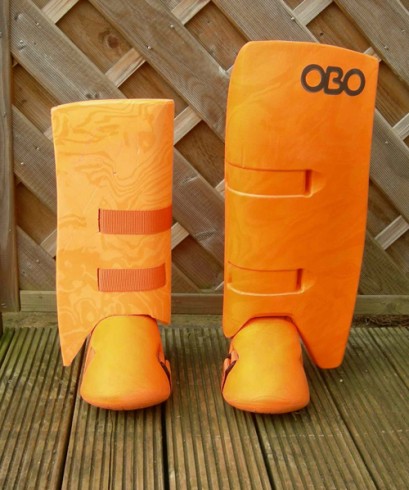
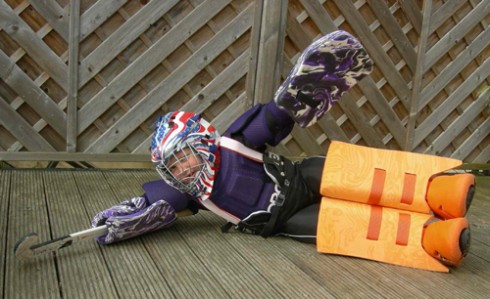
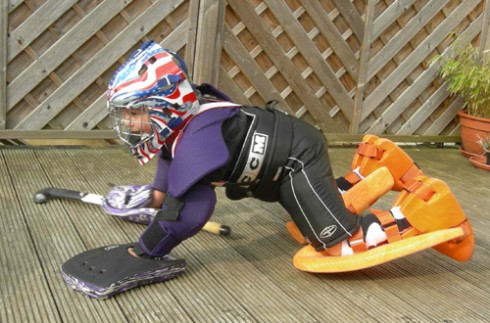
When I purchased my Hi-Control legguards (in my first ever Obo spending spree), I wasn’t sure what to expect- apart from I had heard great things about them from other keepers. I find the hi-controls easy to run in and move about in but overall I was impressed by them because rebound is very good and the ball ends up being in a perfect place away from the attackers.

In the women’s league that I play in the shots are very powerful so the rebound comes into use/effect. I am only 14 so I have to play junior hockey as well for my school, where the shots have almost no power in them, the ball just falls to the ground (off the legguard) where I can kick it away. At first I wasn’t sure about how to effectively control the ball away but over the last few months I have learn’t to control the ball away from the attacker(s). The legguards fit onto my legs and over my Hi-Rebound kickers perfectly and they don’t twist when I dive or get up from a dive. When I am landing from a dive they protect my knees and other bones well (especially compared to other brands gear. A year ago I dislocated my knee from a high, dive landing in my old kit!!)

To improve the legguards I would make them in a numerous amount of colours and I would make the part where you put your leg, about 5cm shorter because sometimes it (depending on what shorts you wear) is a tight fit to have the legguards and the shorts in the right pace because they overlap. I can’t really think of anything else to improve them because overall they fulfill my needs. I haven’t tried the Hi-rebound legguards but at the moment so I can  not compare but compared to my previous legguards that I have used (such as: TK GX4, Slazenger school goalie kit, and the Grays G200) they are absolutely brilliant.

Alton Womens Goalie

OBO PE Helmet Review

I have chosen to write a review on my PE helmet.

To start off, before purchasing this helmet I used to play in a very mediocre lid, Not going to name names : )

I purchased this helmet at the start of this season and from the moment I took it out of the box I loved it. When I first picked it up I was surprised at the weight of it! sooo light compared to my other lid.

First things first, once opening the box I couldn’t wait to try it on, From box to head was almost a perfect fit without adjusting a thing! I tinkered with the straps a little to get it to the right tightness which took no time at all! This was the first time I’d had a helmet fit perfectly directly from the box without a lot of tinkerage.

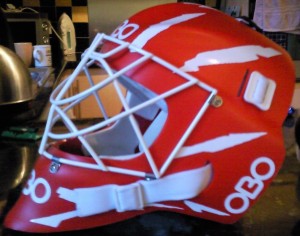
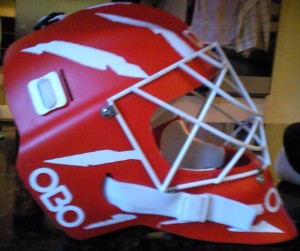
Next thing to do was add the stickers, I may be 18 but stickers are always fun to play with whatever your age. OBO provide just the right amount of stickers for the lid and even give you a little template to follow if you don’t have an idea on where to stick them. I spent a while customizing until I was happy with the look, here are a few pictures of it : )

photo0384wphoto03822

Once all the tightening and stickering was done I tried the helmet on with my body armour, My previous helmet used to catch on my body armour when lowering my head a little… Not a problem at all with this helmet.. I was soo chuffed as it was soo damn annoying with the previous helmet!

Next thing to note is the vision! Referring to my old helmet first, the vision was unbelievably poor, the bars of the grill were in the totally wrong place and I had to wear the helmet in the un-correct way to be able to get a good line of sight! The new helmet tho.. what an improvement!  No wearing the helmet in a way it isn’t supposed to be worn, no adjusting of the grill.. just a perfect line of vision.. the first time for a few seasons.

Next The comfort of the helmet. The thickness of the foam could be improved (made a little thicker) But apart from that it was the most comfortable helmet I’d tried on. The velcro tabs that hold the sweat band on are a good idea but after a few uses (and a lot of sweat) the velcro lost its stickiness and fell off. Not really an issue to me as I was considering changing it from two squares of velcro to one long strip anyway. Previous helmets have given me really bad headaches as they were too tight in certain places, such as the temple. This is not an issue with the PE helmet, its really comfortable.

Protection.

I have taken many hits to this helmet, a few to the temple and a few to the front of the grill and not felt a thing.. the only thing I would say is be prepared for the ringing in your ears when you get hit as it makes a really loud noise, I think this is due to the materials used. In the previous helmet I was scared to chase down shots where I knew an undercut could be possible as the helmet didn’t fit properly, when I ran out because of the way I had to wear it, it used to slide down and my vision was severely impaired, I used to close my eyes and turn my head when a ball was coming towards me at head height as I was afraid I would get injured. Since I bought this helmet, the eye closing and head turning problem has ceased and I now try an actively charge down shots without worry.

On the protection issue, 6 games before the end of the season at a training session a ball was undercut from 6-8 foot away from me and hit me square on the left side of my face ( where the grill attaches to the helmet ) I did fall to the ground as the shot took me by surprise and I did feel the shot thru the helmet. Saying this if I hadn’t of been wearing the helmet I would have a very mashed face, the helmet did a brilliant job of protecting me and where the ball made contact with my cheek/grill it left a nasty dent but I am going to say that’s what the helmet is designed to do? it kind of reminded me of crumple zones in a car.

All in all OBO have done a great job in designing this helmet and I would totally recommend it to any player (whatever your level) and personally would buy another one tommorow!

Review Your Kit Competition

Guys and Gals,

its time for the Keepers Resources 2.0 site to host its first competition.

The Review Your Kit competition!

We want you to create a new post / article reviewing 1 item of kit for the world to see.

So tell us straight what you think – tell us what you love about your piece of kit (and also any improvements you would like to see us make – we listen!)

You can enter as many reviews as you want on as many pieces of kit as you like – but each article must only review 1 product. Be creative on how you tell us – you can write text, add pictures and embed youtube videos.

Deadline is 5pm Friday 5th June 2009.

So what’s the prize for the winners?

The top 5 reviews will have a choice between a set of our new ROBO Elbow Guards or CLOUD Knees up knee protectors delivered to your doorstep!

robo-elbow-guard

Elbow Guard

Knees Up

Knees Up Knee Protector

How to add your review

Make sure you have registered with the site or logged in.

Next go to your dashboard to add a new post. Quick link to it here: add a new post.

You may want to check out this demo on “How to add a new post/ article”

If you have any questions please e-mail resources@obo.co.nz

ROBO Elbowguards Review

Here is a couple of stills and a couple of vids that are a bit tongue in cheek.


My comments are as follows…

1. Great adjustability and wearability c/o the amount and placement of the velcro strips.

2. very minor impediment to full movement.

3. Courtesy of my immense bodyweight I regularly end up with burstitis (deep haematoma around the joint) on my right elbow c/o heavy/poor landings on my elbow when diving….I know it is a technique problem but I have not been practising enough to address the poor technique. These elbow guards have negated the problem so far this season.

4. Inner elbow protection when logging is far far superior to anything I have come across before. I dont wear or buy/sell crap and I wear as well as sell these. I cant give any higher recommendation than that. I know what Mrs Animal is getting for Christmas.

ANIMAL

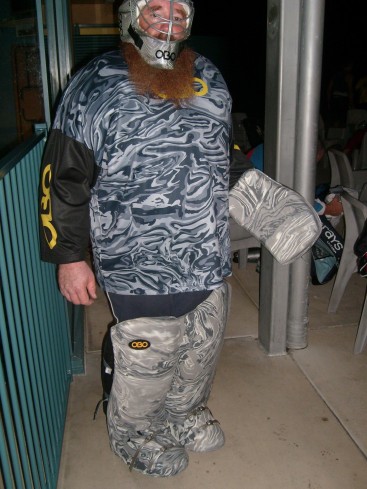
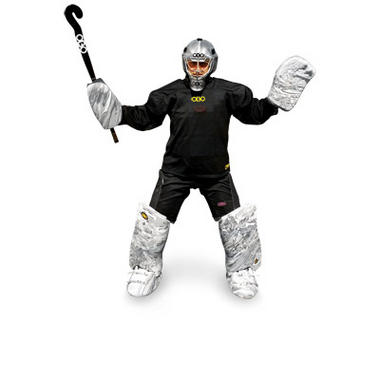
Camo Hi Control Gear

Here is a cheeky shot of Animal showcasing the Hi Control Camo range.

animal camo

(Please note you do not require a beard of this nature to wear this kit, although it is a nice touch!)

This kit is currently only available in Australia, and it has been well received here. What are your thoughts on the kit?

camo1

You can get the Camo Hi Control gear including a free Camo smock as shown above from Hockey World, Australia website link here.

Ps: Good to see you have an Adult helmet now Animal!

OBO Shirts

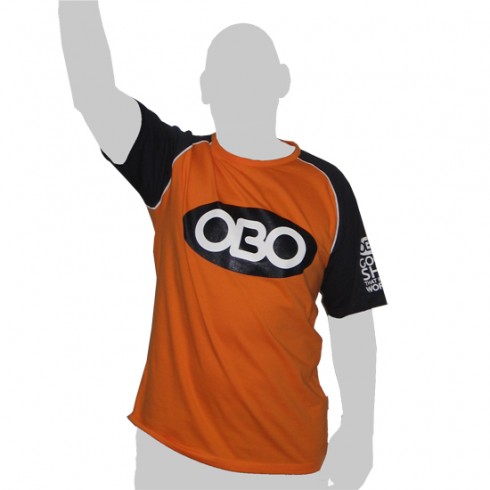
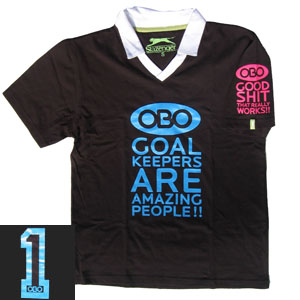
Verbunt Hockey, Netherlands have recently launched 2 new OBO shirts that are exclusive to Verbunt.

Check out the Orange shirt: link

new-obo-shirt-550x550

Front

back

Back

The new OBO shirt, now in orange/blue. Nice to play in or wear after the game.
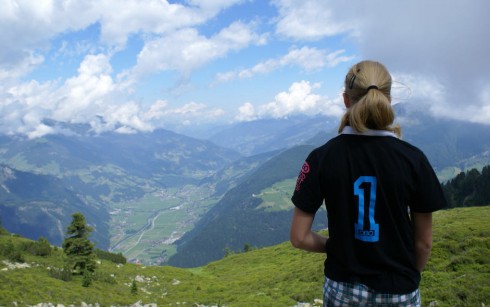
Backside: ‘Goalkeepers are amazing people’ logo + number 1.
Left sleeve: ‘OBO Good shit that really works’ logo.
Front: OBO logo oval.

Also a new OBO Polo: link

obo-shirt

Here is a cheeky shot of one shirt being worn out in the “field”.

obo shirt out in the field

The Worlds Smallest Keeper Uses OGO Custom Kit

Here is a nice little OBO story for you;

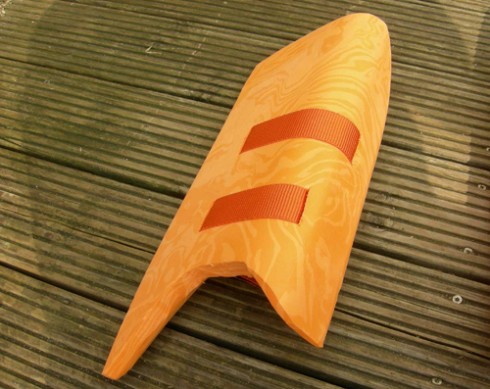
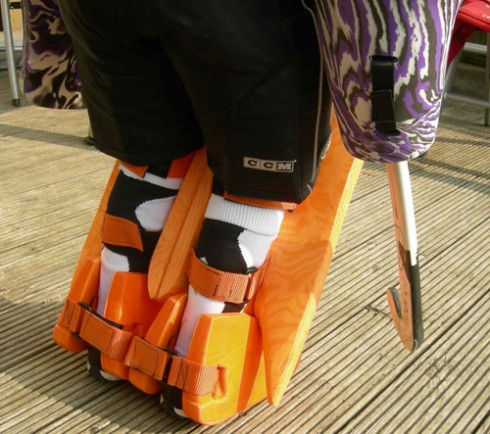
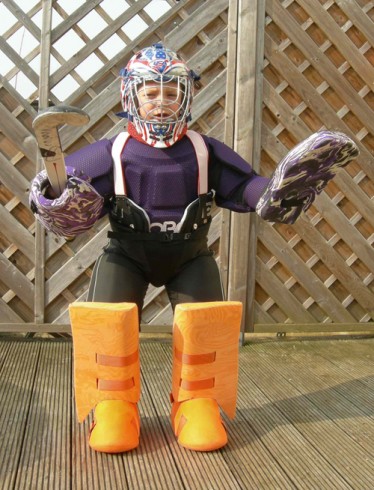
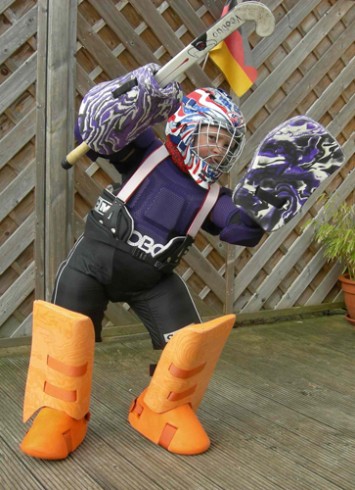
An OBO dad bought the smallest OBO kit possible (OBO OGO XXS) for his Son age 7. However at this age the  legguards were still too big.

At OBO HQ we got a request from dad for some foam and a few tips on how he could make smaller legguards for his son.

Check out the outcome of the custom kit below:

ogo xss

Custom XXXS legguard / OGO XXS legguad

ogo xxs custom
Custom XXXS right / OGO XXS Left

custom xxxs ogoCustom XXXS OGO

xxxs custom ogo2Custom XXXS OGO Kicker Tongue Grove

Here are dad’s comments:

“I did it! I created the smallest OGO legguards in the world, a 95%
copy of the original. Have a look on the pics I promised you (the original
is the bigger one on the right side, OGO-XXS size, also the kickers…).
The foam you sent me is fantastic. Bonding was no problem, I found a
fantastic glue. But shaping was a challenge…
My son is happy to have this equipment ready now!”

Dad
OBO Unlicensed Develop Department, GERMANY

Here are a few shots of the kit in action.

custom ogo xxxs 3

custom ogo kit xxxs
The Worlds Smallest Keeper

xxxs ogo custom kit

ogo custom xxxs

ogo custom kit xxxs

Our goalie started his hockey career age 4 (2006) and plays for TSV Riederich, a small village near Stuttgart.His favourite movie is the DVD from the German Hockey Team while the WCC 2006, Honamas.

obo xxxs keeper ogo

Quite possibly the worlds happiest keeper – good work Dad!

OBO Elbow Guard Product Tour

Our ROBO Elbow guard is in the final stages of our βeta testing programme and we are just making the final tweaks before we launch the product. This product will in your local OBO supplier soon.

robo-elbow-guard

Here is a quick video displaying how the elbow guard is reversible so you can adjust the product to suit your style of play…. Some keepers prefer to have more protection on their forearm and others on their biceps.

I have also taken a few photos to demonstrate how the guard will work with full or half protection with Hi Control and Hi Rebound RHP’s. To view the presentation click below.

[HTML1]

Keep an eye out in our βeta testing section to get more views on this and other new OBO products.

Here is a link to NicfromSweeden’s review

Knees Up Knee Protector

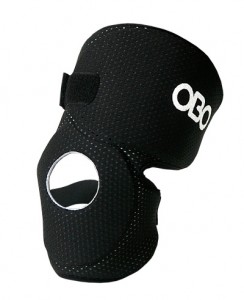
OBO and myself (along with other keepers) have been working together to produce a knee protector that would protect the exposed top part of the knee joint. The goal for this project was to make a light weight, protective piece of equipment that didn’t hinder a keepers mobility or effect performance by being bulky and cumbersome. The knee protector had to fit in and work with a keepers leg and thigh protection and help to prevent injury to the delicate ligaments and bones found in the top of the knee joint.

I’ve been testing a prototype since Mid-March with very encouraging results. We’re at the stage where we feel we’re almost ready to take the product to market, save for a few minor tweaks here and there. I’m now at the point where I’m allowed to release images of the prototype and I would appreciate it if you could take the time to give some feedback and impressions on the design and if you would consider using it (or why you wouldn’t).

The 2016 balklänningar This is one of our best collections yet and we are very proud of this years formal dress collection!

The basic design of the knee protector is a soft foam part that wraps around the knee cap itself with a HD foam part which wraps around the thigh, snuggly covering and protecting upper part of the knee and knee ligaments. Velcro straps are used to hold the unit in place.

A view of the knee protector on the knee. As you can see, the unit sits close to the body so not to interfere with the leg guard or shorts.

Image of the knee protector with the HD Foam on the “inside” of the leg.

A view from above.

The knee protector whilst wearing SPs and Hot Pants. As you can see, the knee protector fits in the leg channel easily and under the bottom of my hot pants. Note: I like to wear my gear TIGHT and I had no problems with the knee protector making the leg guards or hot pants feel uncomfortable.

If anyone has any questions at all, please feel free to ask and I will answer them as quickly and as thoroughly as I can.

Thanks,

Zip

Check out GB Goalkeeper Ali McGregor’s review

How To Keep Your Goalkeeping Kit In Top Condition

Here are some great tips and advice on how to keep your kit in its best condition.

1.After each training session or game, take the gear out of the bag to allow it to dry. It helps prevent odours and damage to body armour and other gear can be monitored and repaired.

2.Before putting the helmet into the gear bag after use wipe out the inside (use a small towel or rag kept in the bag and regularly washed). This will prevent both mould and a build up of odours in the helmet.

3.Where possible try and wash all the gear at least every month. Washing the gear will help to reduce odours and will prolong the life of all the gear in particular the body armour.

3.1 Use your bathtub or washtub to soak all gear including pads, kickers, gloves, helmet and any body armour in a solution of borax (approx 1 lid full) in plenty of cold water. Borax is available in the cleaning products section of most supermarkets.

3.2 Leave to soak for several hours or till the next day if possible. The pads, kickers and gloves will not remain covered with the solution. It is important that they are turned a couple of times and are re-immersed when possible. (You can use a scrubbing brush to remove any marks and dirt off any equipment if necessary).

3.3 After soaking drain the water completely.

3.4 Refill the tub with cold water and add a generous measure of fabric conditioner. Ensure that the tub is reasonably full to allow all items to be well rinsed.

3.5 Allow the gear to soak for at least 2 hours to remove any residue of the borax. If this is not done it is possible for a skin reaction to occur so it is quite important to ensure a good rinse process is followed.

3.6 Drain completely and hang the gear on the line. The gear will dry quite well overnight. The gloves need to be stood up to allow water to drain away. If the left hand glove still smells after the washing process put a diluted solution of bleach into it and leave for a short while then rinse thoroughly with clean water and some fabric softener. This will remove the odour.

3.7 The bag can also be washed in this solution if necessary, as it will absorb odours from the gear it carries.

3.8 If the helmet has any mould on the foam inside, this can be removed by using bleach and a small brush (toothbrush or similar will do the job). You will then need to rinse to remove any residue.

4.When the gear is dry, check all the gear for any damage that needs repairing.

4.1 Look for any areas of separation on the pads and kickers, which may need reglueing. This includes any tears or splits. Reglue as necessary using contact adhesive or shoe goo.

4.2 Check kicker and pad straps and if necessary, replace prior to them breaking and being a problem. It is likely that the kicker straps will break more often that the pad straps. Checking for wear and early replacement can prevent these problems from occurring. Look for any padding in the helmet, which may be loose and need reglueing. Check any straps and other replaceable items such as chinstraps are in good order. Repair and replace as necessary.

4.3 Check all the screws on the helmet and tighten any that may be loose. You may need to do this on a weekly basis. It can be useful to carry a couple of short handled screwdrivers in the gear bag to manage this process. If any screws or other pieces have been lost, replacement kits can be purchased. Also check for any splits or cracks to ensure that the helmet continues to meet the safety standards required.

4.4 Check body armour for any wear. If necessary repair any small tears and broken seams with a large needle and strong thread. Any major damage can be repaired by a saddler or a shoe repair company. If maintenance and checking of body armour is carried out on a regular basis, this allows repairs to be made quickly with minimal disruption to training and games.

4.5 Check the bag for any damage, which can be repaired. A saddler or shoe repair company can repair damage.

5. To assist with odours emanating from the gear and bag whilst in the car, a can of Glen20 kept in the bag and sprayed in the car and gear bag can temporarily neutralise the odours. However, keeping the gear reasonably clean and dry can help prevent any problems with odour. DO NOT USE DE-ODOURANTS AS THEY ATTACK THE FOAM If you are not leaving the playing fields straight away it may be helpful to leave the gear out to dry a bit before packing up.

6. It is in your interests to keep the gear well maintained and clean as it will last longer and will therefore not be a financial drain. If the steps listed above are adhered to any replacements or repairs due to wear and tear can be carried out quickly to minimise any disruption to you, your team, coach or club. Any repairs should be carried out as quickly as possible to ensure that gear is always ready for use.

7. It is imperative that you check your gear at the completion of the season to ensure that your gear will be in good playing order at the beginning of the next season. You will also be able to organise the purchase of new gear, which will reduce any extra costs to start the next season. This will also enable you to wear any new gear in prior to the start of the next season.
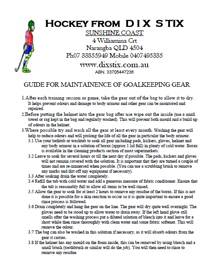
kit-maintance

Download the PDF

Thanks to Animal who supplied the PDF and wrote the content.