Added protection for keepers who play “Dutch” style

hey keepers

I’ve got another idea/ alteration that I’ve done, this time based on bicep protection…

If we look at products that offer bicep protection they often come in the ice hockey style protectors (not a big fan these)

FM08 Shoulder Caps

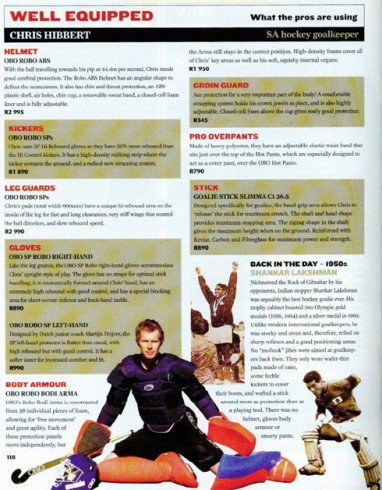
I wanted to show you lovely keepers an idea based on the “Chris Hibbert” bicep protectors

82519974

I recommend this for keepers who play a “dutch” style (no arm pads) (like me) away of having a little added protection but full arm movements

You will need OBO Cloud arm pads (the ones you buy individually not the ones that come with the Cloud Armour)

OBOElbowGuard

Here are the 5 stages to having your own OBO bicep protectors!!!

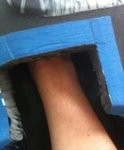
Stage one depending on the size of your arm, choose which part of the arm guard will fit snug on your bicep. Me being a small guy (nothing wrong with that) i use the part which is originally meant to go around your forearm as the bicep protection.

IMG_0069

Stage 2 undo the straps and splay out

IMG_0070

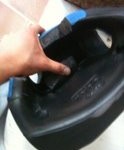
Stage 3 with your trusty Stanley knife cut off along the soft stretchy part in the middle of the arm guard and continue all the way around

IMG_0072

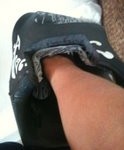
Stage 4 remove the last strap remaining on the new found bicep (shown on the photo above) To get the best position i found putting the guard on the opposite arm and make sure  the end part (grey part) of the arm guard is facing down your arm

IMG_0073

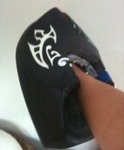
This is the arm guard with the new style Robo body armour

IMG_0074

Stage 5 Enjoy

tommy

xoxo

Making the Robo HR Right Glove even more ‘Perfect’

Hi Keepers,

I’m Tommy Alexander and I play for Scotland U21s and Surbiton in England!

If your the type of keeper who likes to angle the gloves and let the foam do the work (like me), this will suit you!

I was a massive fan of the OBO Hi Control right hand glove but playing at higher level, it became more apparent I needed similar surface area as the left hand and OBO offered the Hi Rebound RH Glove. I really liked the size and rebound of the glove but felt it was restricting in terms of wrist movement (similar to the Left hand but removing that strap makes the glove perfect!).

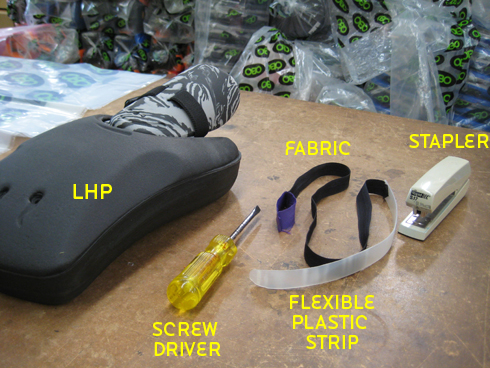
Midway through the second half of the season (playing for Reading at the time) I got in contact with Jimi Lewis (Ex England and GB Goalkeeping Legend) to coach me. We discussed the OBO HR right hand and he showed me what cuts he did with a Stanley knife to his when he played at the Athens Olympics.

51208435

Here are the 6 stages to Making the Robo HR Right Glove even more ‘Perfect’ 😀

Make sure you remove the strap and the softer foam.

pic.1

Stage 1 (marking the cuts) I’ve made a straight line from in between the 1st and 2nd indent on the left. Then a line across, leaving a thin strip from the velcro underneath. Then a line back down on the right, roughly in line with the gap, where the strap would of come out from originally!

pic.2

Stage 2 line your wrist and arm in the middle of the glove (where it would be in a match. Make 2 cuts either side of you wrist of where you’d like the strap to be relocated (personally I have it just below the wrist bone)

pic.3

Stage 3 At the bottom of your cuts (cuts should be about 3-5 cm long), join the original two cuts with a straight line. Making 3/4s of a rectangle (don’t be afraid of going to deep, once you feel the hard plate, do not cut any further)

pic.4

Stage 4 put the strap under the cut and tape it back down

pic.5

Stage 5 the soft inner foam should be put back in the original place. Cut away to the same shape as the new cutting (if needed apply tape to keep it steady)

pic.7

Stage 6 Enjoy 🙂

Tommy alexander xoxo

Foam wear on Kickers

Does anyone have any tips on foam wear of Kickers?

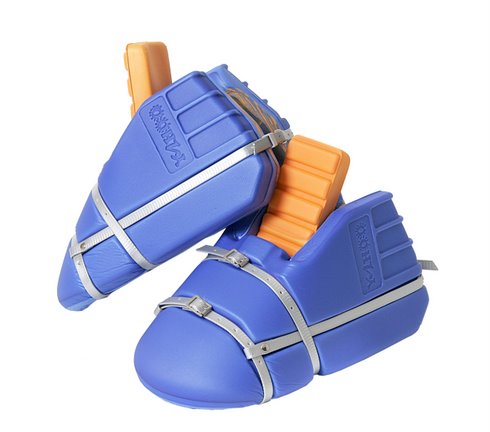
I have a pair of the Yahoo Kickers and have been using them for about a year and I’ve found that on the surface that touches the ground the top layer has rubber off and the foam is starting to wear down, especially on the toe. On the old pair of Grays kickers I used at school I coated the surface with a two part epoxy glue, however i don’t want to dive in and try this on my pair as they’re expensive and the last thing I want to do is folk out for a new pair because the foam melted away!

Has anyone got any ideas for something can coat the foam with to protect it from wear?

yahoo-kickers-blue

How To Fix Foam

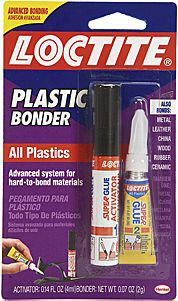
Here at OBO we want you to get as much use as you possibly can from your kit. We often get asked whats the best glue to use on foam…we used to advise contact adhesive, but we have just discovered a great glue made by Loctite for “hard to bond materials”. Its called Loctite Plastic Bonder and bonds to OBO foam like a bad boy!  The consmer pack contains an activator and glue and bonds to OBO foam superbly. You should be able to get this product from your local hardware store..here is a link to product on the Loctite website. If you cant find this the Loctite code is 770 primer and 406 glue.

Item_1943

A video showing how to repair your foam to get as much use as possible from your kit.

Indoor Legguard Covers

An article about indoor legguard covers and how to make them yourself or purchase them.

I have seen a few questions floating around about indoor pad covers on FHF so I have written this article to try and summarise the information.

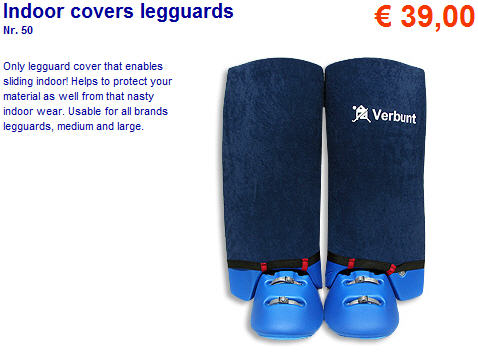
Indoor pad covers are made from fabric and a held in place to cover the foam on your pads to help you slide and protect the foam.

You are able to buy some covers; Verbunt offer Indoor Legguard covers for 39 Euros.

legcovers

Alternatively if you are a bit strapped for cash or fancy getting creative on a sewing machine you could make some. Pillow cases seem like a base point to start from.

Here are a few detailed pictures from of Folmer of his pad covers which should give you a good idea on how they work;

In Summary
The cover is basically a piece of fabric that has the edges covered with thin nylon band. A piece of string runs all the way through the hem of nylon band. At the bottom 2 thicker fabric bands are attached where the points of the legguards go through.
Then pull the string and the fabric “folds” itself around the legguards.

Please let me know via the comments if there are any other tips to add and update the article.

The Great Stick Debate! Outfield V Goalkeeper

Sticks used by outfielders are actually a good option for us goalkeepers. Their weight and strength makes them good for shot blockers and aggressive style keepers who also like to sweep the ball away with the stick. With some goalkeeper style sticks on the market too light and badly balanced, they are a suitable stick for those wanting an effective save making option.

A normal defender’s stick makes a suitable stick for a goalkeeper; the flat horizontal surface (remember, an attacker’s stick is curved for better flicks!) is capable of stopping shots, whilst the stick properties make it great for an aggressive and shot stopping style of play. Aggressive goalkeepers (myself included) often prefer a flat stick because it makes it easier to stick tackle; instead of rolling over as a goalkeeper specific stick can (due to its curved nature at the head, and more so, if it has ‘kinks’ in the middle), a defender’s stick stays firm when stick tackling, whilst the added weight gives greater clearance when sweeping the ball away.


Unlike the recent types light weight ‘goalkeeper’ and indoor sticks used by goalies, they have greater mass on the save; stopping the ball from pinging off (and potentially into the back of the net) during the save action, which is something the Dutch have known about for a long time. If you look at the best Hoofdklasse goalies Vogels, Stockmann, Veering and Blaak, you will notice they all use outfielders’ sticks. This gives greater rebound control, for ‘dead-stop’ saves (where the ball is stopped and dropped to the floor, to kick away), or enhanced ability in turning away the ball on the shot, to safety on the redirect. Martin Drivjer (the well known Dutch goalkeeping coach and guru) has been coaching the Spanish international goalkeepers, which is why you will see their current crop of keepers using outfielders’ sticks; with Fransisco Cortes (who plays his club hockey for Club Egara), a good example of this trend. The German goalkeepers are also aware of the benefits of using such sticks, with the majority of the Bundesliga goalkeepers making use of them. Belgian goalkeepers too are using outfield sticks for these reasons.


When purchasing an outfield stick, you should be aware of the way the stick curves in relation to your ability to make saves with it. A forward’s stick is often designed for drag flicking, or ball control (where the ball is kept at a distance, in a circular width away from the body), where the stick is curved, and has a greater bend (a ‘bow’) for raised the ball up with momentum when driving forward through the flick; this isn’t good for a goalkeeper, as the ball can redirect off the stick into goal. A defender’s stick, on the other hand, offers a flat blocking surface to stop the ball flat without the danger of it rebounding oddly. The width of the stick also affects save ability; a wider stick would give you more surface area for coverage when shot blocking, whereas a slimmer stick would obviously offer less.


Outfielder’s sticks also have a better balance on the stick, compared to some ‘goalkeeper’ designs of stick that have been produced, like the Grays, which is very unbalanced. This is why more goalkeepers are switching back to using the ‘standard playing stick’, having learnt about the advantages. Simon Mason, has recently switched over to a Mercian defender’s stick, is a good example. With a properly balanced stick, the goalkeeper has the advantage of being able to make efficient saves with the stick, able to move it into position to block, without swinging or having the stick pull down. With a good centre point, for a well balanced stick; rather than a head-heavy, or tilted stick, over weighing to one side, the goalkeeper is better placed to make accurate saves with the stick.


The majority of the English national premier league goalkeepers (excluding the second choice keeper) actually currently use outfield sticks: Nick Brothers, James Fair, George Pinner and Ian Scanlon all use an Adidas, whilst Chris Bristow uses a Gryphon. Allan Dick, the capped Scottish international from Azurri Kelburne, used a TK stick in his time at Surbiton. James Bailey, the touted Junior GB U21s keeper, also uses a TK stick. Goalkeepers in the national conference leagues, like Old Loughtonians’ Stuart Hendy, are also aware of the benefits and have begun using them.


You can also get varying weights of stick, from the large amount of different sticks available. The problem with lighter sticks is that they do not give good power, for clearances on the ground (when sweeping the ball away), or when slide tackling. With a heavier stick, in comparison, the goalkeeper can actively power away the ball. Wooden sticks are good saving tool in their blocking mass and strength of clearance. However, they can be quite heavy, therefore limiting the movement of the right hand (weighing down the arm) and save opportunities, such as making a blocking save with the rhp on a drag flick. The modern fibreglass composite designs reduce the weight; giving a more medium weight, whilst still retaining the mass and blocking features. Although the lighter they are, the less power they will have for making long clearances.


Ultimately, outfielders’ sticks provide a good stick for those goalkeepers who like to make stick saves, as well as being able to clear the ball with distance when faced with a loose rebound, or trying to get the ball clear when down on the ground (to get it away, or give enough time to recover). Being more ‘meaty’ than indoor sticks, they also provide more mass on the save to prevent the ball awkwardly redirecting back. Features that can’t always be provided for this by other sticks are provided by the design of the outfielder’s stick.


outfield stick


Pros

  • Lower positioning, (stick not raised up by ‘kinks’) for full contact with the ground means no gaps, and strong blocking surface against the on-ground shot

  • Easy to get hold of

  • Affordable prices

  • Greater mass within stick ensures that ball does not deflect off, but is blocked, compared with a light composite design

  • Weight provides a better clearance on the save

  • Better stick tackling capabilities; no chance of stick rolling over with ‘flatter’ design

  • Stick head gives enough coverage for making saves to the top of the stick

  • Wide variety available to suit individual preferences (including weight, length etc.)


Cons

  • Covers less space on low/ground shots due to shape (straight design with no added ‘kinks’ for a larger barrier against the shot); less blocking surface area for playing percentages

  • Heavy weight can mean the goalkeeper struggles to move their right arm for saves with the rhp

‘Tubigrips’

With ‘going Dutch’ and padding down for greater flexibility in save making, the skin is left vulnerable to getting shredded on tough sand based pitches. As has been said goalkeepers are amazing people! Ingeniously, some keepers have come up with the idea of wearing medical tubular bandages; allowing them to protect their skin without losing any mobility at the elbow for those all important reflex glove saves.

What with goalkeepers being amazing people, there are a few tricks used to match the way they play. Given that ‘going Dutch’ when playing on nasty surfaces and sliding around can give you the result of some dodgy turf burns, some keepers have attempted to find a suitable solution. This innovative method makes use of the support bandages used for sports injury rehab, which are readily available in pharmacies, to counter the effects of a dodgy pitch surface.


Whilst some ‘keepers wear elbow guards purely to prevent being ‘skinned’ when diving or sliding out along the pitch, the tubigrip allows the goalkeeper to cover the bare elbow skin without compromising movement; leaving the elbow with full freedom of movement for those dramatic reflex saves.


tubigrip


Where do I get them?

You can easily get tubigrips at pharmaceutical stores or chemist’s (like Boots over here in the UK), and general health shops. If you don’t want the hassle of popping down to the local chemist’s and prefer the Internet sales, as well as being able to get it delivered to your door, then you can shop online! Go onto Google or Ebay and simply search for ‘tubigrip’ or ‘tubular bandage’ from health store websites.


Cutting to size

The tubi-grip is supplied as one long length, which you will need to cut down to size. The grip itself needs to double back over itself to provide an extra layer (for greater coverage, and a thicker barrier, against the pitch) and maintain the elastic springiness that keeps it in place. 15 centimetres is a suitable length of ample coverage for the elbow, so you will want to cut the length to approximately 30 centimetres long for one elbow. Measure out the required length, and then evenly cut across the width to give yourself a new elbow cover. Material scissors work better, but any scissors should do.


Wearing them

When putting it on, the tubigrip easily slips onto the arm. Put the grip on as the full length, covering the elbow, and then fold it back on itself to double-up (with equal length covering before and after the elbow, for extra surface protection for the skin around the elbow). As mentioned, halving it, as suggested by the company information, gives a stronger ‘wrap’ around the arm, as well as providing an extra layer of protection for the skin.


How you play will often dictate how you use them:


  • A lot of keepers wear just one on their left arm, as they leave the glove arm unprotected for extra movement in directing and controlling the ball on a glove save; covering up the right with an elbow pad.


  • If you ‘go Dutch’, then you’ll want to cover up the right elbow, to slide on, as you haven’t got an elbow pad on to protect your skin from burns.


  • If you tend to slide on your left as well (especially when block sliding to the left), or are quite acrobatic and athletic; flinging yourself around to intercept or disrupt plays, then it is a good idea to cover up both elbows to protect them from turf burns.


tubi_grip


Putting them over elbow pads

A further optional use for tubigrips is to wear them over elbow pads; this way they act as a barrier between the pitch surface, to protect and prevent the elbow pad from wearing down so easily when sliding. If you wear sleeveless jerseys, then the padding is left uncovered and can get worn out when rubbing with the pitch. I have previously worn elbow guards, which easily get shredded and worn out when sliding around on a sand based pitch.


When sizing the tubigrip to match the elbow pad, you need to take into consideration its size (measuring the pad length, and then doubling that for the needed overlap of the second layer when folding). To match the width, check how flexible the grip is to make sure you can stretch it over the elbow pad.


When wearing the grip over the elbow pad; kit up normally, putting the elbow pad on, and then slide the grip over the elbow pad with the help of your free arm. You can then peel it off and remove it, after the game has ended.


tubigrip1


It is also possible to wear tubigrips over the arm pads (to cover pads if you wear a short sleeve smock); you will have to cut the grip longer to cover the arm pad (to reach the sleeve on the jersey).


tubigrip2


Looking after them

Remember to wash them afterwards to keep them nice and clean, as well as getting rid of dirt, bacteria and the like! Tubigrips cannot be machine washed because of the materials they are made of, which would get destroyed in the heat of a machine wash (like polyamide).


It is best to wash them by hand, as instructed by the details on the pack they come in. Fill a bucket with cold or luke warm water and washing powder (or the hand wash option on your washing machine, if you have it), and then soak and scrub them clean. Leave them out to dry to get rid of the sweat; you can use air freshener (like “Fabreeze”) for the smell!

Picture of the Old Loughtonians’ keeper (second photo, in TK kit) comes from  Richard “the hockey nut”‘s website www.thehockeynut.co.uk

Robo Body Armour Modifications

Next came the most painful and bloody part of the modification, yes ladies I can sew 😉 I’m domesticated.

Hey everyone this is obviously my first post on the resources (most of you probably know the username/name from FHF)

I didn’t want to write this review as part of the competition as I kind of see it as more of a rant than a review, but hey enough talk time to stop boring you people.

Right well it all started one training session when I coped a rather nasty shot on my right shoulder, the body armour did it’s job of protecting me from serious harm. However I started feeling more and more uneasy with shots in the shoulder region to the point of flincting when a ball went there.

Fearing that I had lost a lot of confidence I decided to try other brands of equipment in shops to see what felt better and a bit more solid around the shoulders. I was amazed to find that nothing on the market at the time had solid shoulder protection. I found my old ice hockey style protector (mercian shoulder caps) and thought “hey I wonder how they would work together.” Safe to say having both on was silly.

I then decided modification was the key, I then chopped off both shoulders of the Robo armour and carefully removed the shoulder caps off the mercian shoulder caps. I then removed the hard protective foam across the top of the remaining parts of the BA, making the BA look like a vest haha.

Next came the most painful and bloody part of the modification, yes ladies I can sew and I did sew the mercian shoulder caps on to the BA. Looking rather messy I made some covers for the shoulders which I later removed cos they was PANTS!

The last thing I did was resew the arm attachement velcro or whatever it is to the shoulders to allow the arms to be attached again.

Finally my mod was done, I felt like a tank but as fast as a shit off a shovel. It also gave me a massive confidence boost not only in my goalkeeping but in life as it gave me the drive to get properly creative again, which really helped my job too (web design.)

I hope I entertained you for a small amount of time, or if I bored you sorry, but you could have clicked off!

🙂

Here are some links to pics of the BA. Just to let you know I now no longer use the BA but my good friend and back up keeper is wearing it and believes its the best thing since the pull cap on baked beans.


I hope that the new generation of OBO Robo Armour can be reinforced up in the shoulder department.

Anyway take care and happy keeping!