Cross training

“Cross training” (or circuit training) is the phrase used to explain athletes training in other sports than the one that is their main focus (i.e. hockey in our case!), to work on inherent skills like muscle memory, reaction speeds, response time, stamina and tactical awareness/decision making. With so much variety available, multiple sports give the chance for a sportsman (or woman!) to work on aspects of their own game outside the constraints and pressures of their sporting environment. Of course, although if, as internationals, they are going to be playing still with games over the course of the summer when everyone else is resting (on the laurels even perhaps!)

“Cross training” (or circuit training) is the phrase used to explain athletes training in other sports than the one that is their main focus (i.e. hockey in our case!), to work on inherent skills like muscle memory, reaction speeds, response time, stamina and tactical awareness/decision making. With so much variety available, multiple sports give the chance for a sportsman (or woman!) to work on aspects of their own game outside the constraints and pressures of their sporting environment. Of course, although if, as internationals, they are going to be playing still with games over the course of the summer when everyone else is resting (on the laurels even perhaps!)

When the season is over, it is a good chance to keep the itch at bay (goalkeeping itch that is!) by playing another sport. Otherwise you could add in a short session of another sport to your regular training schedule; an alternative to gym work where the game practice can be more useful for skills like reading the game and such. Apparently the Royal Marines do a lot of cross training, which is enough to provide some inspiration; something that the elite amongst us might prove a catalyst. It’s something extra, even though it might not directly correlate to obvious games in your goalkeeping, and when it comes to goalkeeping, you can stay fresh and have a space to learn and try out new things, even if you don’t intend applying them to the hockey pitch.

Playing ‘out’

Playing as an outfield player (playing ‘out’ as there say in various places in the world, I think!), is useful for goalkeepers because it allows you to see the game from your team mates view. You can then apply this to your game play, as you see the key times in a game, the psychological impact, and how to direct the players in front of you, with better calling and so on. Playing ‘out’, you can see more regards what the view like is from an outfield position, helping you learn how to command your defence in terms of more appropriate and concise calls. And the running around, especially if playing in midfield or up front looking to explode out of the blocks to get to a loose ball or beat the defence,  obviously helps for general fitness!

Wicket keeping

Wicket keeping is an activity that goalkeepers seem attracted to quite a bit. David James (more known for his afro, playing in Iceland and his bankruptcy days than world class saves these days), had his chance at a TV based go at wicket keeping. As can be seen below, David used it as an excuse to apply his football based approach, but following the ball and focusing on the ball are things that can be taken from cricket practice and re-applied to our own goalkeeping:

And in hockey, watching the ball through in to the save, is so important in whatever action is called upon, more so in deflections where you have to be focused on the ball entirely to make that last second shift across to make the block. For hockey, both Hinch and Pinner have had a go at wicket keeping technique through English sporting connections, and have seen the positives.

Maddie Hinch training with Matt Prior

http://www.hockeyimages.co.uk/portfolio353383p1.html

Racquet sports

Racquet sports are great for hand-eye co-ordination, getting that muscle memory working and helping visualisation and your reactions. The posture is similar enough to a goalkeeping stance, working those leg muscles, and by reacting from the hands, you can see and should be able to; see a difference in saving from the hands when you go back to hockey. Rachael Lynch has written some interesting stuff on this, which is worth checking out.

Playing in goal

If you are addicted to playing in goal as much as I am (can’t help it!), then you may consider giving other sports a go when the hockey season is over, just to keep the goalkeeping bug ticking over until the hockey season starts again. Having close friends that are more interested in football comes in handy when they need a goalkeeper to fill in, but I’m sure there are opportunities out there if you really want to look into this an option. Commanding the defence and being vocal are simple but effective things you can get the chance to work on in another 11-sided game format.

Football

Football, being the world’s biggest (most popular) sport, has pretty impressive player base, and it therefore shouldn’t be too hard to get a game in or get involved in so how as some extra training (if for fitness if nothing else!). 11 a side is a little hairy due to the bigger goals and feeling like an ant coming from hockey, as well as not parrying (unless you want to punch everything like a certain Pat Jennings in his early days!). But the athleticism and the kicking can help you work on crossover skills for your hockey season. The need for immediacy for the need to be off your line and out to reach a loose ball can be incredibly useful for reading 1-on-1’s and rushing out, as well as the confidence to.

Five or six-a-side is handy for getting used to player like a sweeper and working on your kicking; more so looking for outlet passes as the first line of attack (last line of defence; first line of attack!). You’ll often be playing as a sweeper, playing the short pass and shifting the ball around and looking for space to put the ball to be useful when looking for space to put the rebound into when you are saving with your feet. Kicking the ball with a strong kick through and follow through will also be put to good use in your upcoming hockey season. In football you’re going to be kicking a lot, and the opportunity to do that is pretty useful, given the fundamental of kicking and saving with the feet in our game.

An interesting case of an elite level goalkeeper doing a bit of football cross training, was Beth Storry before the London Olympics (biased because he’s a Spurs goalkeeper, so sue me!). It was interesting to see the discussion between styles as the goalkeepers analysed the crossovers of technique and application. You can read the write-up and see Storry in action at Tottenham’s training ground at the link below:

Goalkeeping legends Compare Tactics   Investec Specialist Bank

http://www.investec.co.uk/about-investec/investec-news/goalkeeping-legends-compare-tactics.html

Futsal

Futsal is pretty popular in Spain and South America, as well as Eastern Europe, so could be worth looking into if you’re from these parts of the globe. It will help you push yourself out your comfort zone to come out and cover; learning to dominate your area. Having to block rather catch also helps out given the automatic tendency will be for you to block rather than catch coming from your hockey style of goalkeeping! So you will have a good chance to use your leg based muscle memory for foot and ‘kick’ saves. Spreading your body to make a large surface area for blocking shots when coming off your line is also handy for charging down a rebound in hockey.

Ice hockey

This might be more applicable to those that play a winter sport (would prefer playing summer sports in summer than on a freezing pitch so obviously jealous!) and then a summer sport in the form of field hockey, but is still a good concept. Again, the emphasis is on catching and swallowing it rebounds, but being dead on with your rebounds is central to being a good goalie on the ice. Interestingly enough, Lev Yashin, who is considered by far the world’s best ever goalkeeper in the footie, was actually a dual athlete goalkeeper. On the edge of Winter Olympic selection, he actually stuck to football and then went on to fame (didn’t get much fortune sadly…). Many critics and  reckon that the repetition of angle play in his ice hockey training days helped him iron out problems he had with football, being the key ingredient to the great success he had.

Others:

  • Handball – can use it for footwork/fitness and Schmeichel’s ‘star jump’ technique
  • Lacrosse – can use it to work on reactions/reflex saves, hand-eye and reading the game
  • Floorball – more catching based, but can use this to practise working on hand-eye co-ordination

Non-goalie sports

Rugby or American Football should help with defensive awareness and learning to read the game. As a result, your awareness of how you can work as a defensive unit with your defence and learning to make the right calls relating to repositioning or man marking etc. And there are various other sports that can help with different aspects of goalkeeping like athleticism and explosive power.

Just training!

At the end of the day, it’s just training! There’s no commitment to a season long of another sport; it’s all about trying things out and re-applying what you have learnt from reading the game and blocking shots instinctively. Reading the play in different sports can help you spot defensive breakdowns sooner in a hockey game.

Psychologically it is also a neat trick for you to work on your confidence and playing under pressure (since you are trying something new). Sometimes it can be difficult to develop outside of training with the pressures of playing at a competitive level, and therefore you don’t always get to experiment with confidence (i.e. the certainty of not allowing a goal). So playing another sport allows you to do this and build up your self confidence, which is ever so vital for high performance in goalkeeping.
Legguard straps slipping loose

I’ve encountered a bit of an issue with my leg guards lately–the straps slip loose a little bit

qna
Question:

I am a field hockey goalie in the United States. I’ve encountered a bit of an issue with my leg guards lately–the straps slip loose a little bit, causing them to twist when I stack and dive (I have Robo kickers and leg guards). It got me thinking: what if you replaced the clips with buckles? It would eliminate that problem and also make them easier (though not as quick) to strap on. Would you ever consider making it an option to have leg guards made with buckles rather than clips?

The idea came from researching ice hockey pads. All pro goalies use a combo of leather straps with metal buckles. It is considered superior to nylon straps and plastic clips, and is durable enough for those guys to last at least a few seasons. Additionally, if they are resistant to the ice and snow, surely they would also weather a water pitch well.

Thanks,

Answer:

Pads shouldn’t twist as the straps shouldn’t loosen. OBO leg guards have a “creeper” buckle designed to prevent slipping. Sometimes the strap will loosen if the male end of the clip is facing the wrong way. The angled slot edge of the buckle should face down and towards the prongs of the buckle when the strap is properly threaded. Make sure the strap is pulled snug when you secure the clips and the leg guard is locked in place on the tongue of the kicker. The leg guard should be snug when the straps are properly tightened.

Metal buckles will damage foam when sliding, plus the buckles require the straps to have punched holes. Legs come in a variety of sizes and the holes that suit one keeper with leather straps may not fit another keeper, preventing a truly secure fit. Most ice hockey keepers wear their pads with the straps done loosely so they’ll rotate and maintain contact with the surface when they go down so a tight, custom fit isn’t an issue.

Cheers,

Jon

Skinny or fatboy?

I am buying a new goalie stick, I wondered what you thought was better out of the fatboy and skinny?

qna
Question:

I am buying a new goalie stick, I wondered what you thought was better out of the fatboy and skinny?

Answer:

Fatboy or Skinny is really a matter of preference. The primary difference is in the weighting/balance of the sticks. The Fatboy has a heavier head as the shaft is hollow. Keepers who are active using their stick to clear the ball like the weighting/balance because you can generate more power swinging the stick. The Skinny stick is solid and the weight is more evenly distributed through the length of the stick. The Skinny stick is more suited to keepers who push the ball if clearing with their stick if clearing. As the stick is solid as opposed to hollow, the Skinny tends to be a little more durable than the Fatboy, something to keep in mind if you’re hard on your stick and money is an issue.

Cheers

Jon

Wondering what the best set of OBO pants to buy is?

Is it the Robo Bored Shorts? Or the Robo Hot Pants?

qna
Question:

Hey dude
How’s it going?

Wondering what the best set of OBO pants to buy is?

Is it the Robo Bored Shorts? Or the Robo Hot Pants?
The website puts the bored shorts higher than the hot pant but I am asking the expert..

Cheers

Reg

Answer:

Hey Reg,

I wouldn’t say which pants are best, but I can tell you they both offer great protection. The Bored Shorts are a one piece pant with the protective padding built in. Unlike the old Smarty Pants, Bored Shorts are snug. They don’t require over pants, while the Hot Pants do. Personally, I prefer the Bored Shorts. Having said that, if you play on abrasive turfs and slide a lot I’d suggest wearing over pants with the Bored Shorts.

Cheers,

Jon

Jon’s Tips: Painting Your OBO Helmet

For all you creative OBO-ites who’ve been asking about painting your OBO helmets but aren’t sure how to go about it, here’s some ideas and advice based on recent experience. If you’re handy and keen, you can jazz up your helmet at a reasonable price on your own.

For all you creative OBO-ites who’ve been asking about painting your OBO helmets but aren’t sure how to go about it, here’s some ideas and advice based on recent experience. If you’re handy and keen, you can jazz up your helmet at a reasonable price on your own.

I need to start off with an advisory, if you’re not handy, this is best left to professionals. You can find mask painters on the internet. Depending on the part of the world you live in you might have to ship it away and depending on the type of mask you have it may not be worth it. Professional painters will charge anywhere between $200-$400 US based on how complicated your design is.

If you are handy, but haven’t done this type of work before, PATIENCE (note capitals) is a key skill. Painting a mask properly is not done in a day. Preparation is the other big word. A paint job is only as good as what’s under it and if you don’t do the prep work and get a good smooth, clean surface to paint, it will show in the paint. In keeping with the P theme, the other key to a good paint job is planning.

There are a number of ways to paint/decorate your mask and a lot will depend on the type of mask you’re painting. The OBO CK and FG masks are made from either Carbon Kevlar or Fibreglass and are painted (or have a finish on them) while the PE, Poly P and ABS helmets are essentially plastic without a finish.

Before you commit to painting your helmet, I recommend taking to Youtube and looking at some of the entries under GOALIE MASK PAINTING. Most of them show the work of professionals and involve airbrush work. There are low-tech ways to paint masks and the video below is a particularly good clip:

The mask that’s shown in the video involves painting and vinyl decals. Vinyl decals are another way to decorate your helmet and can be custom done by any Sign Shop that has graphics arts programs. They’re durable, easy to apply and can be a way to incorporate more intricate, detailed designs relatively cheaply. An expensive set of vinyl decals could be $60US. If you’re going to paint your helmet with anything other than one colour, expect to spend at least $40+US for spray paint.

At the planning stage of painting your mask, you should have a good idea of the design and if this is your first go, I’d recommend keeping things simple. If you’re somewhat artistic, draw the design out. You can trace a template of the mask if that helps and lay it out. Assemble your materials, paints, masking tape, sandpapers, paint stripper, scrapers, screw drivers, pliers, adjustable wrench, etc. Spray paints that are designed for cars are best for masks.

As mentioned, preparation will depend on whether your mask already has a finish on it. If it does (CK or FG helmets, you’ll need to take the clear coat and any paint off first). Regardless of type of helmet, you want to remove the cage and any other helmet hardware. Depending on the state of your helmet, that can be tricky as screws can rust (hence the wrench and/or pliers). If you’re helmet hardware is in a really bad state, have replacement hardware lined up before you get too far along. It doesn’t make a whole lot of sense to have a flash paint job and rusty old screws. Set aside your hardware and make sure it’s in a good place.

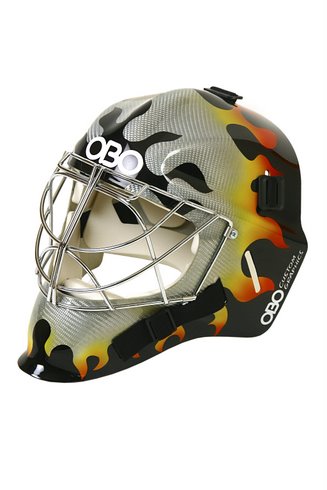
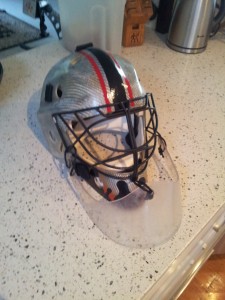
helmet-fg-halfpaint-flame

Step one of preparation starts with a good wash with a mild liquid soap, a plastic scrub brush and a good dry. A couple of notes about spending time and money on your paint job, your finished product will reflect what you put in, especially on what you do before you paint. Quality materials won’t cost a fortune.

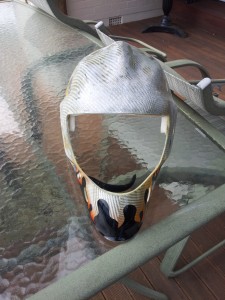
My project was a half painted Flame FG helmet that I was looking to personalize. I wanted to tone down the Flames, accentuate the raw natural fibreglass and add a little simple trim. The first bit was stripping off the clear coat and painted section. When selecting paint strippers, read the directions carefully and make sure they’re suitable for your helmet. Most automotive paint strippers are fine for FG and CK helmets, not for PE, Poly P or ABS types. You will need to use a scraper to remove the paint. A word to the wise, work with the contours of the helmet when scraping and as much as it is scraping, be gentle. You don’t want to leave gouges or deep scratches when you scrape as you’ll have to sand or fill them later.

Next up on the prep front is sanding. Sandpapers come in a number of types and grades. The higher the grit, the finer the paper and there is dry and wet sandpaper. If you’ve done a good job with your stripping, sanding should go in rounds. First round is a medium grade (400-600 dry grit paper) and sanding should be done lightly in a circular pattern to smooth out major surface irregularities. Depending on how smooth your painting surface is, you may be able to go directly to wet sanding with a fine paper (1200-1400 grit). Both the mask and the paper (grit side) should be wet when wet sanding and with fine papers, more sanding is better as you won’t sand into the masks composite materials.

20130901_104050

Once you’re satisfied that the mask is smooth and clear of residue paint, you’re ready to start painting. Once again, paint work will depend on your paint job. For my mask, I wanted to retain the natural fibreglass look for most of the helmet so clean and smooth was as far as I needed to go. If you’re looking to completely paint your mask, then primer is next. You can buy sandable primer and if your mask isn’t completely smooth, it’s a good idea. Before applying primer, make sure you’ve completely washed, rinsed and dried your mask. Primer is the bond for paint and if you don’t have a clean, dry surface the primer and paint won’t adhere. You also won’t likely need to paint the inside of your mask. You should tape the cutout for the cage and other holes to prevent spray getting on the inside.

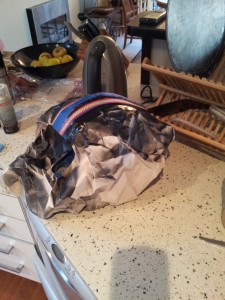
You’re now ready to prime. Using primer will be good practice for painting later. Whatever paint or primer you use, READ THE DIRECTIONS. Not all paints are the same and this is especially true as it applies to spraying multiple coats and for primers, how long you need to wait before spraying colour over it. When spraying coats of primer or paint, multiple light coats are better than single heavy coats. Heavy coats of paint take longer to dry between coats and are more likely to sag or drip. Make sure you’re spraying in a bright and well-ventilated area.

20130903_070718

Once you’re happy that you’ve got a good primer coat down, you’ll need to wet sand with a fine paper again. Make sure mask and paper are wet and be light with the paper and work in a circular pattern. Rinse with clean water and then let the mask completely dry.

Painting will depend on the complexity of your paint scheme. If you are using multiple colours, your base colour should be the one that covers the majority of the mask. Like primer, read and follow the paint instructions, especially as it applies to multiple coats of paint and the time between coats. Once again, many, light coats are preferable to fewer heavy coats. Be patient, if you’re in a hurry, it’s easy to overspray and get drips. If you do get drips and you’re looking to do a quality job, it’s far better to stop early, let the paint dry and sand the drips out. Hoping to get the drip out by spraying more coats of paint on, rarely works well.

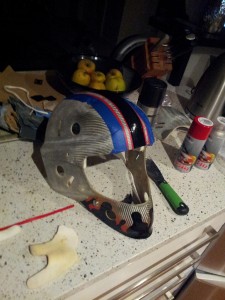
Mask 2

Depending on your design, you may need to tape when spraying other colours. A couple of notes on taping, buy good masking tape (professional painters grade). Nothing will botch your best paint plans up faster than using bad tape. Make sure the paint layer under the colour you’re taping is fully dried and cured. If it isn’t, the paint will adhere to the tape and come up when you remove the tape. Check to make sure the tape is fully adhered between coats, especially in curvy areas of the mask as tape can release. Lastly, make sure the paint is dry before removing tape. If you do get some wobbly lines when you remove tape, you can always re-tape and spray the adjacent colour or if it’s only a small bit and light you can try rubbing it out with a small bit of paint remover on a rag.

Once you’re satisfied with your paint, the last step is clear coat. Plan on using all the clear coat you get in a large spray can, it’s basically the only thing that protects your paint. Recurring theme, lots of light coats are best. Once your clear coat is dried, wet sand the finished product as that will level the finish.

20130912_065241

Painting a PE, Poly P or ABS helmet is much simpler. There’s no paint or clear coat to remove, you don’t need to prime and you can use a plastic paint on the helmet. You’ll still need to apply a clear coat to protect the paint and make sure it’s compatible with the paint you use.

Can I paint my OBO helmet?

qna
The helmet you have has a clear coat of lacquer which will need to be stripped before you paint….

qna
Question:

Can I paint my OBO helmet?

Answer:
The helmet you have has a clear coat of lacquer which will need to be stripped before you paint. What type of paint you use will depend on how you are going to paint the helmet. For simple paint jobs you can use aerosol cans of spray paint. Depending on your artistic abilities and resources, you may use an airbrush. Whatever way you paint (paint brush, spray can, air brush), the quality of the finished product depends on your preparation. You will want to remove the cage and straps so you have clear access to work/paint the mask. I would recommend Brudtärna klänning using a paint stripper to remove the finish.

After you strip the lacquer, thoroughly wash and rinse the helmet and allow it to completely dry. If the helmet has residue or dirt, the paint won’t adhere. You will need to sandpaper the helmet to get the helmet smooth. Start with a rough sand paper and then you will want to use a fine wet/sandpaper to get a smooth finish. Then you will apply your paint. Once the paint is done, you’ll put the clear coat on. If you use a spray paint, look for an automotive paint and/or Clear Coat/Lacquer.

I just got done painting a helmet and to do it properly it will probably take a week depending on how detailed you want the paint job to be. The big thing is don’t rush and make sure you follow the instructions on the paints you use. If you use several colours, each colour will have to fully dry and cure for the paint to properly adhere to the mask surface. If it doesn’t fully cure, you’ll get big chips when a ball strikes the helmet. You will probably want to protect the paint with several (at least four or five) coats of clear coat. Good luck and let me know if you have more questions,

Cheers,

Jon

Taping arm pads

A simple but effective tip for those arm pad wearers out there, who use the removable Obo pads (which also give you more set-up options, if you think about it versus attached ones sewn into the body armour!), more specifically, is to tape them! With the design of the elbow pad that goes around the bone, rather than a hard shell fixed in place, you will see a lot of Obo arm pad users taping their pads to ensure the pad stays fixed in place and gives more flexibility when bending at the joint for those glove saves nearer the body. The tape helps hold the inner bicep protection in place for the newer range of Obo pads, whilst at the same time also helping keeping that bend at the joint for all important flexibility for those instantaneous reflex saves. Some electrical tape taped around the arm pad in this way, will help to keep the pad together and give important movement as stated. With taping, it essentially forces the foam into the bend that you need for that bending motion for save making whilst wearing the arm pads.

A simple but effective tip for those arm pad wearers out there, who use the removable Obo pads (which also give you more set-up options, if you think about it versus attached ones sewn into the body armour!), more specifically, is to tape them! With the design of the elbow pad that goes around the bone, rather than a hard shell fixed in place, you will see a lot of Obo arm pad users taping their pads to ensure the pad stays fixed in place and gives more flexibility when bending at the joint for those glove saves nearer the body. The tape helps hold the inner bicep protection in place for the newer range of Obo pads, whilst at the same time also helping keeping that bend at the joint for all important flexibility for those instantaneous reflex saves. Some electrical tape taped around the arm pad in this way, will help to keep the pad together and give important movement as stated. With taping, it essentially forces the foam into the bend that you need for that bending motion for save making whilst wearing the arm pads.

Otherwise eventually the padding can come loose or just become a nuisance! Like Filip Neusser’s (Czech international and great at indoor!) whose arm pads demonstrate. It’s not the greatest example, but you will be able to notice the effect and get the idea! So with taping, it’s simple but useful when keeping the arm pad together, also helping the pad bend at the joint, for when you turn and bend your arm for glove saves.

Filip Neusser keeps a eye on the game
http://www.flickr.com/photos/12608538@N03/8431574403/

One I did earlier like the Blue Peter saying is a poor attempt by myself to illustrate using some old Obo arm pads I have knocking around, to illustrate how it’s done. A quick bodge job but you get the idea and basics of it! Notice the taping centrally to keep that bend and movement, whilst also helping to keep the padding at the elbow in place and central, over the elbow, to provide all important coverage:

tape_arm_pads_obo

Here you can see Germany’s international second choice Reuss who uses Obo body armour and arm protection, with taping to hold the circular pad at the elbow in place and also to help keep the padding above the elbow (on the forearm) firmly in place:


http://www.gettyimages.co.uk/detail/news-photo/reserve-keeper-felix-reuss-of-germany-takes-a-break-during-news-photo/157837162

And here is retired international Ali McGregor in his playing days with Loughborough Students with taped arm pads:

tape_arm_pads_mcgregor

Goalkeeper or shot stopper?

As you look to move on from the basics of shot stopping and evolving your game as a goalkeeper, you need to think (perhaps thinking hard and conscientiously about it, if you want to!) about how you play as a goalkeeper, and your roles and responsibilities within the team. About how you need to work to intercept and interrupt passes by the opposition to stop them from gaining a chance to score. When you consider it, a goalkeeper should be able to shut down attacks and passing opportunities, providing a presence behind their defence that is able to do their job when the defensive line is ‘caught short’. You will see goalkeepers at the elite levels who play a more proactive style, rushing out to tackle or clear away the ball, especially in the indoor game, where being active and aggressive in challenging and intercepting a pass is really important for a goalkeeper to succeed in the fast paced indoor arena.

As you look to move on from the basics of shot stopping and evolving your game as a goalkeeper, you need to think (perhaps thinking hard and conscientiously about it, if you want to!) about how you play as a goalkeeper, and your roles and responsibilities within the team. About how you need to work to intercept and interrupt passes by the opposition to stop them from gaining a chance to score. When you consider it, a goalkeeper should be able to shut down attacks and passing opportunities, providing a presence behind their defence that is able to do their job when the defensive line is ‘caught short’. You will see goalkeepers at the elite levels who play a more proactive style, rushing out to tackle or clear away the ball, especially in the indoor game, where being active and aggressive in challenging and intercepting a pass is really important for a goalkeeper to succeed in the fast paced indoor arena.

And you need to work on being confident stepping off your post or your “line”, if you are to challenge the opposition and restrict their opportunities in your D to score. Bringing in the ability to disrupt chances by coming out to tackle and so forth, you will be able to limit the opposition’s chances. Good shot stoppers are worth their weight in gold, but they also need to be able to have an important impact on their game in order to achieve success.

Pure shot stopper

All goalkeepers are shot stoppers, but some are more inclined to hope on their ability to make the save, perhaps expecting the defence to do the job of intercepting passes and for them to stay where they are. Rather than go out to challenge if needs call upon them to, unable to see past the lens of a goalkeeping simply being there to make the saves (that might have drawn them to the position in the first place) and the need to step out of goal at times to shut down a scoring chance by kicking away a loose ball or going in for a decisive tackle, for example. As a position in our sport, this is an important aspect of the way we play within the game, like football goalkeepers who need to come out and catch crosses on corners, or rush out to tackle, versus ice hockey goalies who are not going to come flying out of their zone to slide tackle a player (unless they’re Dominic Hasek!), or floorball, where it is more a case of shot stopping. And it needs recognising! For some, not others, probably though!!

In a negative way, you could consider a case example of a goalkeeper rooted to their line and fearful of coming out to tackle or intercept. But rather than coming out to challenge, in a positive light, they do themselves an injustice by staying back against the play and expecting a shot to be stoppable. Passively hoping to just have to stop shots instead of be involved in the play, even if a case of a difficult redirect is a potential possibility, say for example. Not confident in their ability to tackle, or just unable to see the point in doing so. A goalkeeper that stays where they are, on the spot, hoping that they will do ok facing a shot that might come in from the top of the D say, that doesn’t come out to tackle or chase lose rebounds, instead expecting to be able to stop all shots.

A ‘goal’ ‘keeper’

Goalkeeping is more than just being there to get behind shots and save them, unfortunately! And the way you approach goalkeeping will have a significant impact on the way you play. You can either be a goalkeeper where you expect to just be there to stop shots and end up not doing a good job of ‘owning your D’, or make sure this isn’t the case! If you take the structure of the word goalkeeper, you can literally get “goal” and “keep”; in this way of thinking, can you consider yourself a goalkeeper who ‘keeps’ their goal? Do you look after your D, or do you stay on your line and get beaten by chances that you could have stopped through coming out to challenge? Do you stop chances turning into goals by eliminating them before they happen, or do you get beaten by them?

Your job as a goalkeeper is more than just simply the saving aspect, there is also passes and potential breakaways to contend with! It’s about more than standing there and being on angle and in the right spot at the right time, all of the time. Wherein a goalkeeper needs to be able to come out and tackle or intercept and will be able to when these situations present themselves. Think about breakaways where you stand a better chance of rushing out to challenge, if you go in for that glorious slide tackle, where you will take the ball off the play and stop the shot happening in the first place. Or interceptions, where making the interception will eliminate the passing option and prevent a high risk scoring opportunity.

Goalkeeper versus shot stopper

When you think about, goalkeeping is more than just a case of shot stopping. You can’t expect to save every shot if you play like that, so making sure you actively play a part in shutting down scoring opportunities means that you can work things into your favour. As you develop and play more games and get more (as a beginner anyway!), you will soon realise and notice that it is more than just the save making that may have brought you to playing the position in the first place.

Sometimes you need to do more than just stop shots. The “sweeper keeper” idea and conceptualisation epitomises the way a goalkeeper can (attack being the best form of the defence!), with the goalkeeper making use of their aggressive abilities to shut down chances instead of having to make the potential save, acting like an extra defender in the way they are involving themselves in the game. Elite goalkeepers are more than just shot stoppers and capable of tackling and challenging appropriately, bringing an extra dimension to their game.

Take this video montage of world class Guus Vogels (who has obviously retired recently, leaving way for Stockmann to take over in his place, for Holland). Notice how amazing his shot stopping abilities are, but also how he is involving himself in the game, making important diving interceptions and challenges; diving off the post and reaching out with his stick say or  sliding out to intercept a breakaway forward:

If you think about it, you need to be able to do this as well as make saves when it is right to. Eliminating scoring chances before they happen is an important part of goalkeeping as save making is and you need to know this! It may look good if you have stats where you face a lot of shots or end up saving a lot of shots, but that could also be down to poor rebound control or allowing scoring opportunities to happen by not being proactive like this, so it is important to reflect on the way you play and how you go about the concept of ‘keeping’ goal.

Be a goalkeeper!

Ultimately, you need to be more than just a shot stopper. And a goalkeeper at that! There is more of a responsibility to your team to help them out by challenging and doing the defensive work by coming out to intercept a breakaway among other roles. Therefore there are effectively two sides or parts to a goalkeeper: a shot stopper and an active ‘keeper’ of goal. And if you want to go far up the hockey ladder (or at least improve!), you need to be both! Any goalkeeper worth their weight in gold (or goalie legendary status, take the phrase as inspiration!), as already mentioned (oops with déjà vu!) is a great shot stopper but more importantly also a dominant force within the D. So, make sure you are able to do this, and be a goalkeeper and not just a save maker!

Elegant kvinnlighet spets brudklänning är 2017 bröllop inget undantag. Den känsliga spets brudklänning kan användas för att beskriva en tunn spets täcker bara bröst och skulderlinjen , skapa extraordinära skönhet, det ser mycket attraktiv.

The art of visualisation

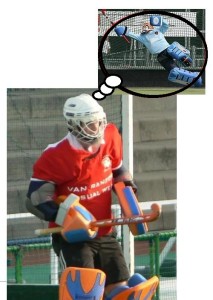
Visualisation is a useful technique for any goalkeeper, to help them with their confidence and save making. Visualising making saves at specific times within the game (say, at short corners) and specific saves, the goalkeeper can visualise the process of the save to help them concrete technique and build on their confidence, whilst helping make those glorious, spectacular saves, because of the self belief developed from these thoughts running through your mind pretty much all the time! Popular in a variety of sports, it can be applied to our own favourite sport, our beloved hockey, and been made use of when we approach our goalkeeping.

Visualisation is a useful technique for any goalkeeper, to help them with their confidence and save making. Visualising making saves at specific times within the game (say, at short corners) and specific saves, the goalkeeper can visualise the process of the save to help them concrete technique and build on their confidence, whilst helping make those glorious, spectacular saves, because of the self belief developed from these thoughts running through your mind pretty much all the time! Popular in a variety of sports, it can be applied to our own favourite sport, our beloved hockey, and been made use of when we approach our goalkeeping.

 art_visualisation

How visualising would sort of look, at least in essence!

What is it?

Visualisation is a psychological aid, a way of approaching the game and the art of goalkeeping itself, through the lens of self image, imagining yourself making particular saves or decisions made. Thinking outside of yourself (as you visualise the shooting space the opposing attacker has when facing you) so you can see what the shooter’s options are. Or from an internal perspective, wherein you can effectively see yourself making saves, which in turn will help out making the actual saves when you are called upon to do so.

It’s basically way of seeing yourself make a save, a way of imagining you pulling off some cracking stops or saves that you struggle with, technically, and working through the save process in thinking, so that you can pull off specific saves during an actual game. A skill that allows you to work with your muscle memory to pull off the save as the shot comes and the memory recall causes the save to happen, during the game. Essentially it’s pre-thinking, or thinking about saves in order to make them when it counts. You visualise yourself making a save by diving out in extension say. The visualisation itself is a driving force for helping you do that in reality when you go to make the dive, the visualisation helping you through enacting the proper technique. As well as providing you with reinforcing your confidence and self belief in trusting in your technique, it also helps for playing games where you have little to do and can lose focus or be forced into making an unexpected save that could have a huge impact on the game and score line.

And it’s not something new to something, just something that needs more promotion of! I’ve seen national league goalkeepers go through visualisation, combined with the physical motion and attacking push out with the appropriate limbs, with Greg Lewis at Guildford HC being a specific example as he pushed out with the glove (and mental thought processing), practising a specific save making format on some short corners. Visualisation is something a lot of elite goalkeepers, in a variety of sports, who use it to help them (you can read Gordon Banks, the famous England football goalkeeper, affirming this, in this article

How?

Visualisation is pretty simple if you think about it: it’s just a case of ‘seeing’ yourself making saves. Imagining a diving save, for example. When visualising, you are going through the technique and action of the specific save, working through it in your mind’s eye, and imagining pull off wonder saves, so that you correspondingly play well in the match.

You can work on visualising set saves made. So high or low diving stops at short corners, making glove stops with whichever hand to the appropriate saving side. You can also work in rebound control; visualising where you would put the ball, to a safe place where a second scoring chance is difficult or could lead to a scoring chance if not properly dealt with. And so on.

Apparently, there are two main forms of visualisation that goalkeepers (http://voices.yahoo.com/visualization-techniques-ncaa-college-soccer-goalkeepers-2992419.html) can and should make use of. In first person visualisation, you are imagining pushing out to make the save as the ball comes at you, so seeing an imaginary shot coming at you for you to save. In third person, you can see yourself from an outside perspective, seeing you diving out say for a strong save.

But although it is slightly self explanatory, here are some ideas to help you practise in some quiet place (no distractions for this, like goalie meditation or something!):

  • See  yourself making certain saves
  • See yourself making those spectacular, awesome saves we as goalkeepers love to make and it should help with your confidence enough to make them in a game, having seen yourself play that well in your mind
  • See yourself being confident, in the sense that you can stop every shot, and it should have a knock-on effect on the way you play
  • See yourself from the shooter’s point of view: are you giving away too much shooting space? Are you off-angle or poorly positioned? How much room do they have to shoot into or at? What looks like the easiest scoring chance for them?

Essentially, visualise to the extent that you can improve your game. To the level where seeing yourself make saves in fact makes those saves happen. The list sort of emphasises the types of options but you can work off this to think things through that you have difficulty with.

Why?

Visualisation is a really useful technique for self believe and actual shot stopping. It’s cost effective (it doesn’t cost you anything to work on it by yourself!) and for its seemingly basic level of technique, it is incredibly useful for what it does, as you will see when you give it a go. It is a very productive psychological technique as you look to be an unstoppable goalkeeping force. The benefits and uses of visualisation are twofold. Imagining making a certain save will help you make it in an actual game, whilst also aiding your confidence, giving you a boost in the way you see yourself in terms of ability, so that you can make those important saves. When you do visualise, be confident, so seeing yourself making those saves rather than any negative thinking creeping in! Visualising in your mind’s eye how you are going to make saves should impact you actually making them!

Visualisation is useful for the actual process of shot stopping. According to studies and research, it helps your muscles and brain work in unison. The sport science of it being that the neurones in your brain fire of as you simply imagine the save being made, meaning that your brain is more “switched on” and the neurones will fire quickly as you make the connection between thought of save and save itself, whilst also helping you make the specific save as your muscle memory kicks in and you can call upon the memorised technique to make the appropriate save.

Think about what it is like to make a reflex save. There are times when this will happen, but visualisation can be more useful if it is so possible. Trying to do so in a game is tougher, as you can’t rely on anticipation all the time (if the shooter is good at dummying their intentions, especially in the elite tiers of hockey), so obviously it’s a case of balancing things. But if your head (and thoughts!) are in the right place as the saying goes, then you should be in a better (metaphorical!) position to make every save for every shot that comes at you.

During a game, this is very useful. If you have not had a save to make for quite some time, then it helps with concentration and “awakening” for the save as it happens, perhaps late on in the game, where you have not had the chance to build in to a game with more saves as assistance. It allows you to imagine the next save, so that when you are called into action, you are mentally ready and prepared for the save. This will aid concentration as you focus on the game (or at least what is happening in front of you!) and be ready for a save to be made, versus losing interest in the game and zoning out to the point of being use when you are eventually called upon.

Visualising saves

You can visualise on the build up to a game, so the night or so before you could see yourself making particular saves. Then just before the game in the journey there and during the warm-up. It is also very useful to visualise making saves during the game. If you have time to, when the play is outside your half, you can do this to keep concentrating and keep ready for making saves. Obviously you need to be reading the game and commanding your defence when the ball is out of your area, but you can also visualise, if you can multi task (who said goalkeepers aren’t special?!)!

Visualise!

Ultimately, it’s a good idea to look at visualising as a psychological and developmental technique to help you through games and improve your shot stopping and confidence and concentration levels. Believing that, you should be able to make any save possible is going to have a positive impact on the way you play. A means to see and then make, an exact save. It’s something you can add into your game and training as well, as you can do this in training sessions when practising corners or facing shots. This way, when you go to make a save, you will be more prepared for save making, especially certain types of save as you have mentally ‘practised’ it, and are more confident in yourself as the repetition of visualisation sees you making astonishing saves and stopping anything that comes your way, pumping you up for the big game, say!

Med personlig Fishtail brudklänning design kan vara din största skönhet dyker upp. Perfekt kropp brud kan prova.Te Längd brudklänningar 2017

Plyometrics

With plyometrics (turns out it isn’t plymetrics, even though I thought otherwise, always thought it was plymetrics?!) needed for improving your jumping abilities and also useful for increasing agility and your explosive power, it is important that goalkeepers are made aware of this form of training and added it to their regime of outside-structured-training-training! They are a definitive aspect of athleticism when pushing out athletically and aggressively to save and explosiveness, ensuring an agile and athletic style that should crossover into your game and training sessions. It’s a standard part of training and exercising for football goalkeepers, who are expected to leave their feet to intercept and catch crosses, but they, for some reason, seem a little left out of the hockey repertoire.

With plyometrics (turns out it isn’t plymetrics, even though I thought otherwise, always thought it was plymetrics?!) needed for improving your jumping abilities and also useful for increasing agility and your explosive power, it is important that goalkeepers are made aware of this form of training and added it to their regime of outside-structured-training-training! They are a definitive aspect of athleticism when pushing out athletically and aggressively to save and explosiveness, ensuring an agile and athletic style that should crossover into your game and training sessions. It’s a standard part of training and exercising for football goalkeepers, who are expected to leave their feet to intercept and catch crosses, but they, for some reason, seem a little left out of the hockey repertoire.

And for me (and my perception!), they potentially are a very (too harsh?) over looked part of hockey goalkeeping, if you think about it. In the sense that they are not a part of training programme and goalkeepers generally may not be aware of them. So, in the case of reverting this and bringing them into educational and practical use, it would be good to see more , although I guess it’s a little harder (maybe, no excuses!) to jump up and down in full hockey kit, in comparison to football goalkeepers not being as hindered. I guess football has a more grounded coaching system (to some degree), but jumping is perhaps of more importance for catching crosses, which are important parts of the game for explosive based save making and athleticism, but still, it is something that can be used and adapted when we look at upgrading and developing our own game.

Generating force and height

The whole idea of plyometrics is to improve your explosiveness and power for those leaping motions. As well as the height or distance you can achieve (say if using the jumps to help with pushes and pushing out explosively for a full stretch, extension diving save)! It’s not really a repetitive drill in regards to learning things via muscle memory for a specific movement or saving motion, but a move that’s looking to push your ability to ‘explode’ in a movement upwards from your stance with good effort. It’s more about a continued effort to get higher each time and with greater speed.

And then there is the added psychological factor of intensity within your game, wherein you push yourself to play and attack the ball with more desire and explosive power; with this approach to “explosivity” (it’s not a word apparently, so I’ll just instigate the Dickensian neologism clause i.e. make up new words!), helping translate into an agile and athletic performance in games as you leap for ball you might not otherwise reach. When you jump up, you’re trying to push yourself to get higher, faster; to get , so that you can replicate this in a game where you may have to make an outstanding extension save, reaching out, before getting back up for another spectacular stop!

Exercises

Whilst I do have a rough understanding of plyometrics, this article isn’t really focused on specifics and guidelines (couldn’t you tell!)! More of an intro into this form of training; you can find a lot more about them via online searches for “goalkeeper ploymetrics” and such, or in goalkeeping books written for football. But regardless, it’s important to have an awareness about them, especially now that it’s the off-season in Europe and a great time to start doing fitness and off-pitch training in advance of pre-season.

There are some exercises, which you can do by yourself and won’t need a coach or equipment to work on. This also means you obviously don’t need any extra kit or equipment to do so (although you can find somewhere with steps or something I guess, to make use of that to jump on/to!). In terms of working by yourself, there are some basic drills you can do in your own time. You can do static jumps to see how high up you can get and push yourself to get higher each time, or do so more quickly. Skipping is also said to be useful, with the jumping itself on the scale of plyometric exercise.

http://keeper-skool.com/plyometrics-depth-jumps-pure-goalkeeping-power

You can start off with a basic squat jump to begin lightly, and then build up to :

If you have a suitable box to jump onto, then box jumps can also be useful:

Or if you have cones (easy to buy, you can even get them in Tesco’s these days, as far as I remember!), then you can do things like the following to feel “light on your feet” and comfortable hopping around (i.e. for explosive drive off lead foot for a high/low dive).

Practising

Age is going to be a factor according to the intensity; so the older you are (especially if you’re at a high level and about 20/in your 20’s), the more you can do for set reps, and a teenager should be doing a bit, yet not overdoing it! It’s just a case of being sensible but the workload of a mature goalkeeper isn’t the same as a young nine year old, obviously! In football they incorporate plyometrics into a drill that involves shot stopping, so they can work on footwork and plyometrics as a routine (to incorporate them into how they play as a goalkeeper), before making the expected save. When you do the exercises, it’s important to keep to the fundamentals and not go too fast to the point you’re not taking it on or getting the technique right and falling off balance and so on. Start small and build up, working your way up with intensity level and level of advanced technique, as you develop your explosive power and jumping abilities.

Standard jumping can be done anywhere so there’s no excuse! Jumping straight up and having your hands at your sides to balance and as a guidance as to how high you want to bring your knees and foot up is a good place to start. Box or obstacles and hurdles/posts to jump over, can then be utilised for more advanced technique.

The following articles give a developed explanation for the reason you need to do them and the intensity level required:

https://www.keeperstop.com/articles.php?artid=31

http://jinked.net/2012/08/28/improve-goalkeeper-agility-with-plyometrics-training/

Translating into game play

Working on plyometrics should help you become a more explosive and agile goalkeeper in your shot stopping and athleticism and agility as you play with intensity, rather than a passive approach. And there is an argument for the need for this kind of development to help you play to a suitably intense and competitive level in goal. Leaving your feet to make a high ‘diving’ save or jumping to stop drag flicks at a short corner, you need that level of explosive power and athleticism to get to the ball. In open play, diving’ high, or getting off the ground to challenge an aerial pass into the D (as is becoming more popular at the higher levels), you need to be able to get high up to cover. These are two key examples of where plyometrics would help you and your goalkeeping.

Add them to your training schedule!

Ultimately, it is a good idea to consider plyometric training and adding it to your schedule; you can only gain from it! You should also find that you are getting more explosive after such exercises, being more athletic with diving across or low because of the power you can achieve when you jump up or out, this explosive nature translating to your game as you compete more intensely and athletically. And you may want to be pushing yourself to get as high as possible, so you can end up being able to jump like this!

I will try and write (potentially doing a separate guide for off-pitch training and exercises, as I’ve started work on guides for different areas of goalkeeping and set plays and the ‘mental game’, which will eventually be available as downloads in PDF form) more in-depth guidance on variations and more technical and advanced drills, at some point, but for now, I hope this has been of some use!