If you can’t find what you are looking for on here you can email one of the friendly team at OBO in New Zealand on the following address… contact@obo.co.nz
Great News!
Keepers Resources
If you can’t find what you are looking for on here you can email one of the friendly team at OBO in New Zealand on either of the following addresses… info@obo.co.nz or georgia@obo.co.nz
Great News!
If you can’t find what you are looking for on here you can email one of the friendly team at OBO in New Zealand on the following address… contact@obo.co.nz
Great News!
Painting should be undertaken by an experienced painter. It is quite difficult and probably not that easy to do at home without experience and the needed materials. The process is similar to airbrushing plastic parts of cars (bumpers/fenders etc)
Painting should be undertaken by an experienced painter. It is quite difficult and probably not that easy to do at home without experience and the needed materials. The process is similar to airbrushing plastic parts of cars (bumpers/fenders etc):
1. The surface must be roughened.
2. The whole surface must be degreased.
3. Apply a full surface special feeder.
4. The helmet can then be painted with a two-part paint.
5. When the paint is dry the helmet should be sprayed with transparent varnish.
A very clever video put together by Dutch goal keeper Anne Veenendaal. Using 248 still pictures of every movement Anne was able to create a movie that showed a goal keeper magically being dressed in OBO gear.
A very clever video put together by Dutch goal keeper Anne Veenendaal. Using 248 still pictures of every movement Anne was able to create a movie that showed a goal keeper magically being dressed in OBO gear.
Anne plays for Amsterdam with my good friend Emily Hurtz and was kind enough to let me post this video of her. I hope you enjoy it
A little over 7 years ago, a radical new protection polymer called D30 was offered to OBO
A little over 7 years ago, a radical new protection polymer called D30 was offered to OBO. Because we are always trying to improve our products we were excited by the potential of D30 so our designer made a special trip from New Zealand to England to meet with the creators of D30. He returned home with lots of information and some samples which we tested in the purpose built OBO impact lab … The O lab.
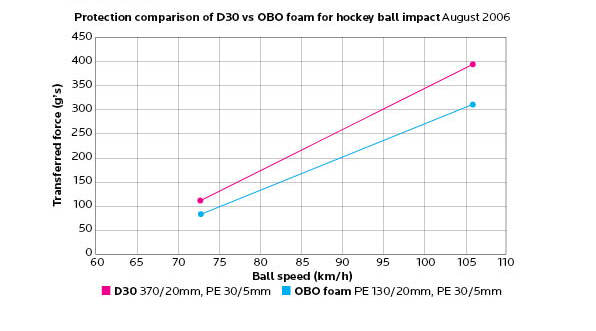
Our impact lab testing showed that while D3O weighed more than two and half times the OBO polyethylene and EVA foams, it provided significantly less protection when dealing with the high speed and highly localised impact encountered with a hockey ball.
Have a look at the results on the following impact graph (the horizontal axis is speed, the vertical transmitted force)
While we are sure D30 is an excellent material in certain usage situations, on the basis of our laboratory testing results, we decided not to use D30 in our hockey protection products.
If you are really interested in all learning more about this, please drop us a line at info@obo.co.nz
I’ve encountered a bit of an issue with my leg guards lately–the straps slip loose a little bit

Question:
I am a field hockey goalie in the United States. I’ve encountered a bit of an issue with my leg guards lately–the straps slip loose a little bit, causing them to twist when I stack and dive (I have Robo kickers and leg guards). It got me thinking: what if you replaced the clips with buckles? It would eliminate that problem and also make them easier (though not as quick) to strap on. Would you ever consider making it an option to have leg guards made with buckles rather than clips?
The idea came from researching ice hockey pads. All pro goalies use a combo of leather straps with metal buckles. It is considered superior to nylon straps and plastic clips, and is durable enough for those guys to last at least a few seasons. Additionally, if they are resistant to the ice and snow, surely they would also weather a water pitch well.
Thanks,
Answer:
Pads shouldn’t twist as the straps shouldn’t loosen. OBO leg guards have a “creeper” buckle designed to prevent slipping. Sometimes the strap will loosen if the male end of the clip is facing the wrong way. The angled slot edge of the buckle should face down and towards the prongs of the buckle when the strap is properly threaded. Make sure the strap is pulled snug when you secure the clips and the leg guard is locked in place on the tongue of the kicker. The leg guard should be snug when the straps are properly tightened.
Metal buckles will damage foam when sliding, plus the buckles require the straps to have punched holes. Legs come in a variety of sizes and the holes that suit one keeper with leather straps may not fit another keeper, preventing a truly secure fit. Most ice hockey keepers wear their pads with the straps done loosely so they’ll rotate and maintain contact with the surface when they go down so a tight, custom fit isn’t an issue.
Cheers,
Jon
I am buying a new goalie stick, I wondered what you thought was better out of the fatboy and skinny?
Question:
I am buying a new goalie stick, I wondered what you thought was better out of the fatboy and skinny?
Answer:
Fatboy or Skinny is really a matter of preference. The primary difference is in the weighting/balance of the sticks. The Fatboy has a heavier head as the shaft is hollow. Keepers who are active using their stick to clear the ball like the weighting/balance because you can generate more power swinging the stick. The Skinny stick is solid and the weight is more evenly distributed through the length of the stick. The Skinny stick is more suited to keepers who push the ball if clearing with their stick if clearing. As the stick is solid as opposed to hollow, the Skinny tends to be a little more durable than the Fatboy, something to keep in mind if you’re hard on your stick and money is an issue.
Cheers
Jon
Martijn Drijver, principal of the Drijver Goalie Academy based in The Netherlands has suggested it’s high time that goalkeeper Coaches and Trainers from around the world get together for a day of sharing, learning, discussions and doing … and of course some fun.
Martijn Drijver, principal of the Drijver Goalie Academy based in The Netherlands has suggested it’s high time that goalkeeper Coaches and Trainers from around the world get together for a day of sharing, learning, discussions and doing … and of course some fun.
There’s so much to learn, so much to share.
We at OBO agreed and together with a small team of like-minded passionate people want to get your reaction to our progress to date. So here’s where we are at ….
Who ■ Goalie Coaches and Trainers who are passionate about improving their coaching… who want to contribute to the world’s body of knowledge about ‘keeping’ … basically those coaches and trainers who want to take ‘keeping’ and their coaching to a whole new level.
We don’t know what we don’t know!
When ■ Wednesday 4th June 2014 (a rest day at the 2014 World Cup)
Where ■ The Leiden Hockey Club (20 minutes via train from The Hague), The Netherlands (it has amazing meeting areas and 3 pitches are already booked)
What ■ A full day of …. presentations, discussions and debate. This is not about lectures. There is no right answer. Let’s share the pros and cons of various approaches.
…. On field sessions showing, doing, talking, sharing. ….. An evening of food, fun and friendship.
Topics in Mind ■ Saving and clearing the ball, Saving within the 6 metre zone, The mental aspects of ‘keeping’, The conditioning/physical training of goalies
Led by ■ Martijn Drijver (Holland), Grahame Mansell-Grace (UK) and several top trainers still to be finalised – hosted by Guus Vogels (Holland) and supported by a number of highly experienced Keepers from around the world.
Cost ■ There will be a cost but we promise it won’t be exorbitant – just enough to cover costs. This is all about sharing, growing, learning, developing and connecting…not making money.
Are you a starter? Tell us if you are interested, if you can come and any suggestions you have for ‘the day’.
Register your comments and interest by emailing global.coach.meet@obo.co.nz
Here is a downloadable PDF with all the information needed!
Global Forum
Supported by OBO because they really care about helping goalkeepers
… Goal Keepers are Amazing People!
My views on the relationship between team goalkeepers have naturally been shaped by experiences throughout my career and the influence of people I have played with and been coached by.
My views on the relationship between team goalkeepers have naturally been shaped by experiences throughout my career and the influence of people I have played with and been coached by.
The psychology of goalkeeping is multidimensional. It’s not an easy position by any means and the mental game can often be more important than any physical or technical aspect. I decided to explore the topic of competition and the relationship between team goalkeepers.
Goalkeepers spend more time together than any other position on the field. You know the ins and outs of that person, their technique, their weaknesses, their preferences, how they call, what gear they prefer and so on. Just like in a work place you must be able to work well with this person or it will become a very uncomfortable environment.
Other than at a junior level, most teams will have two goalkeepers. In some clubs, training academies and at the top level, there are anywhere from two to five goalkeepers competing for one spot. Unlike other field positions there can only be one goalkeeper on the field at a time. Some coaches may play a different goalkeeper each half but generally one keeper plays. The rules of hockey state that 18 players can be listed for each game and due to the chance of injury usually two goalkeepers will be picked.
In a training environment it is a good thing to have more keepers as it keeps things competitive. You can push each other. If you are training by yourself you can become lazy and complacent which is never good for a team. I have been fortunate enough to have played my whole international career with exceptional goalkeepers. When I first debuted for Australia I was playing alongside Rachel Dwyer (nee Imison) who is someone I have idolised ever since I started keeping. She taught me many things in the five years we played together for Victoria and Australia, not just hockey wise but also about how to be a well rounded athlete and person. Rach was an extremely professional athlete who pushed herself to the limit with everything she did and was never afraid to share her knowledge and help others along the way. It would have been very easy for her to keep it all locked away knowing I was competing for her spot but this was not the case. If she saw an opportunity to teach me something she took it and I really admired her for that. Rach retired after 2008 and will always be known as one the best keepers the world has ever seen.
The dynamics amongst the Australian women’s goalkeeping group has certainly changed and evolved over the eight years I have been involved. Usually in the Australian squad we train as a group of three or four keepers. During those eight years I have spent my fair share of time on the bench or left back at home while the team tours. In 2008 I did not play a single game before the Olympics and in 2012 only played three, yet I trained day in day out with the two other keepers who were getting picked- It was very difficult! But I have been on both sides of the spectrum and so it is these times that make you really appreciate your selection and strive to be better. You learn very quickly that non-selection is not something you can blame the other goalkeeper for. You will be angry and disappointed yes but if you have any bitterness towards the other keeper then you will never be able to train and work harmoniously.
As with all team sports you must keep in mind what is best for the team. There will be times where you may be in the form of your life yet still do not get picked. Here is when you can take comfort in the fact that you have pushed the other keeper to be better and the decision made by the coach is in the best interest of the team.
My view on it all: it is about having respect for the other keepers, helping each other learn and improve but never losing that competitive drive to be the best. The hours you put in on the training track gets you in the best shape and form possible so that when the time comes to play you are ready. If on that day you are not picked’ then the priority becomes supporting the keeper or keepers who are, whilst ensuring you are ready to go should the situation change.
Id love to hear others thoughts on the topic. Please feel free to share them below 🙂
Is it the Robo Bored Shorts? Or the Robo Hot Pants?
Question:
Hey dude
How’s it going?
Wondering what the best set of OBO pants to buy is?
Is it the Robo Bored Shorts? Or the Robo Hot Pants?
The website puts the bored shorts higher than the hot pant but I am asking the expert..
Cheers
Reg
Answer:
Hey Reg,
I wouldn’t say which pants are best, but I can tell you they both offer great protection. The Bored Shorts are a one piece pant with the protective padding built in. Unlike the old Smarty Pants, Bored Shorts are snug. They don’t require over pants, while the Hot Pants do. Personally, I prefer the Bored Shorts. Having said that, if you play on abrasive turfs and slide a lot I’d suggest wearing over pants with the Bored Shorts.
Cheers,
Jon
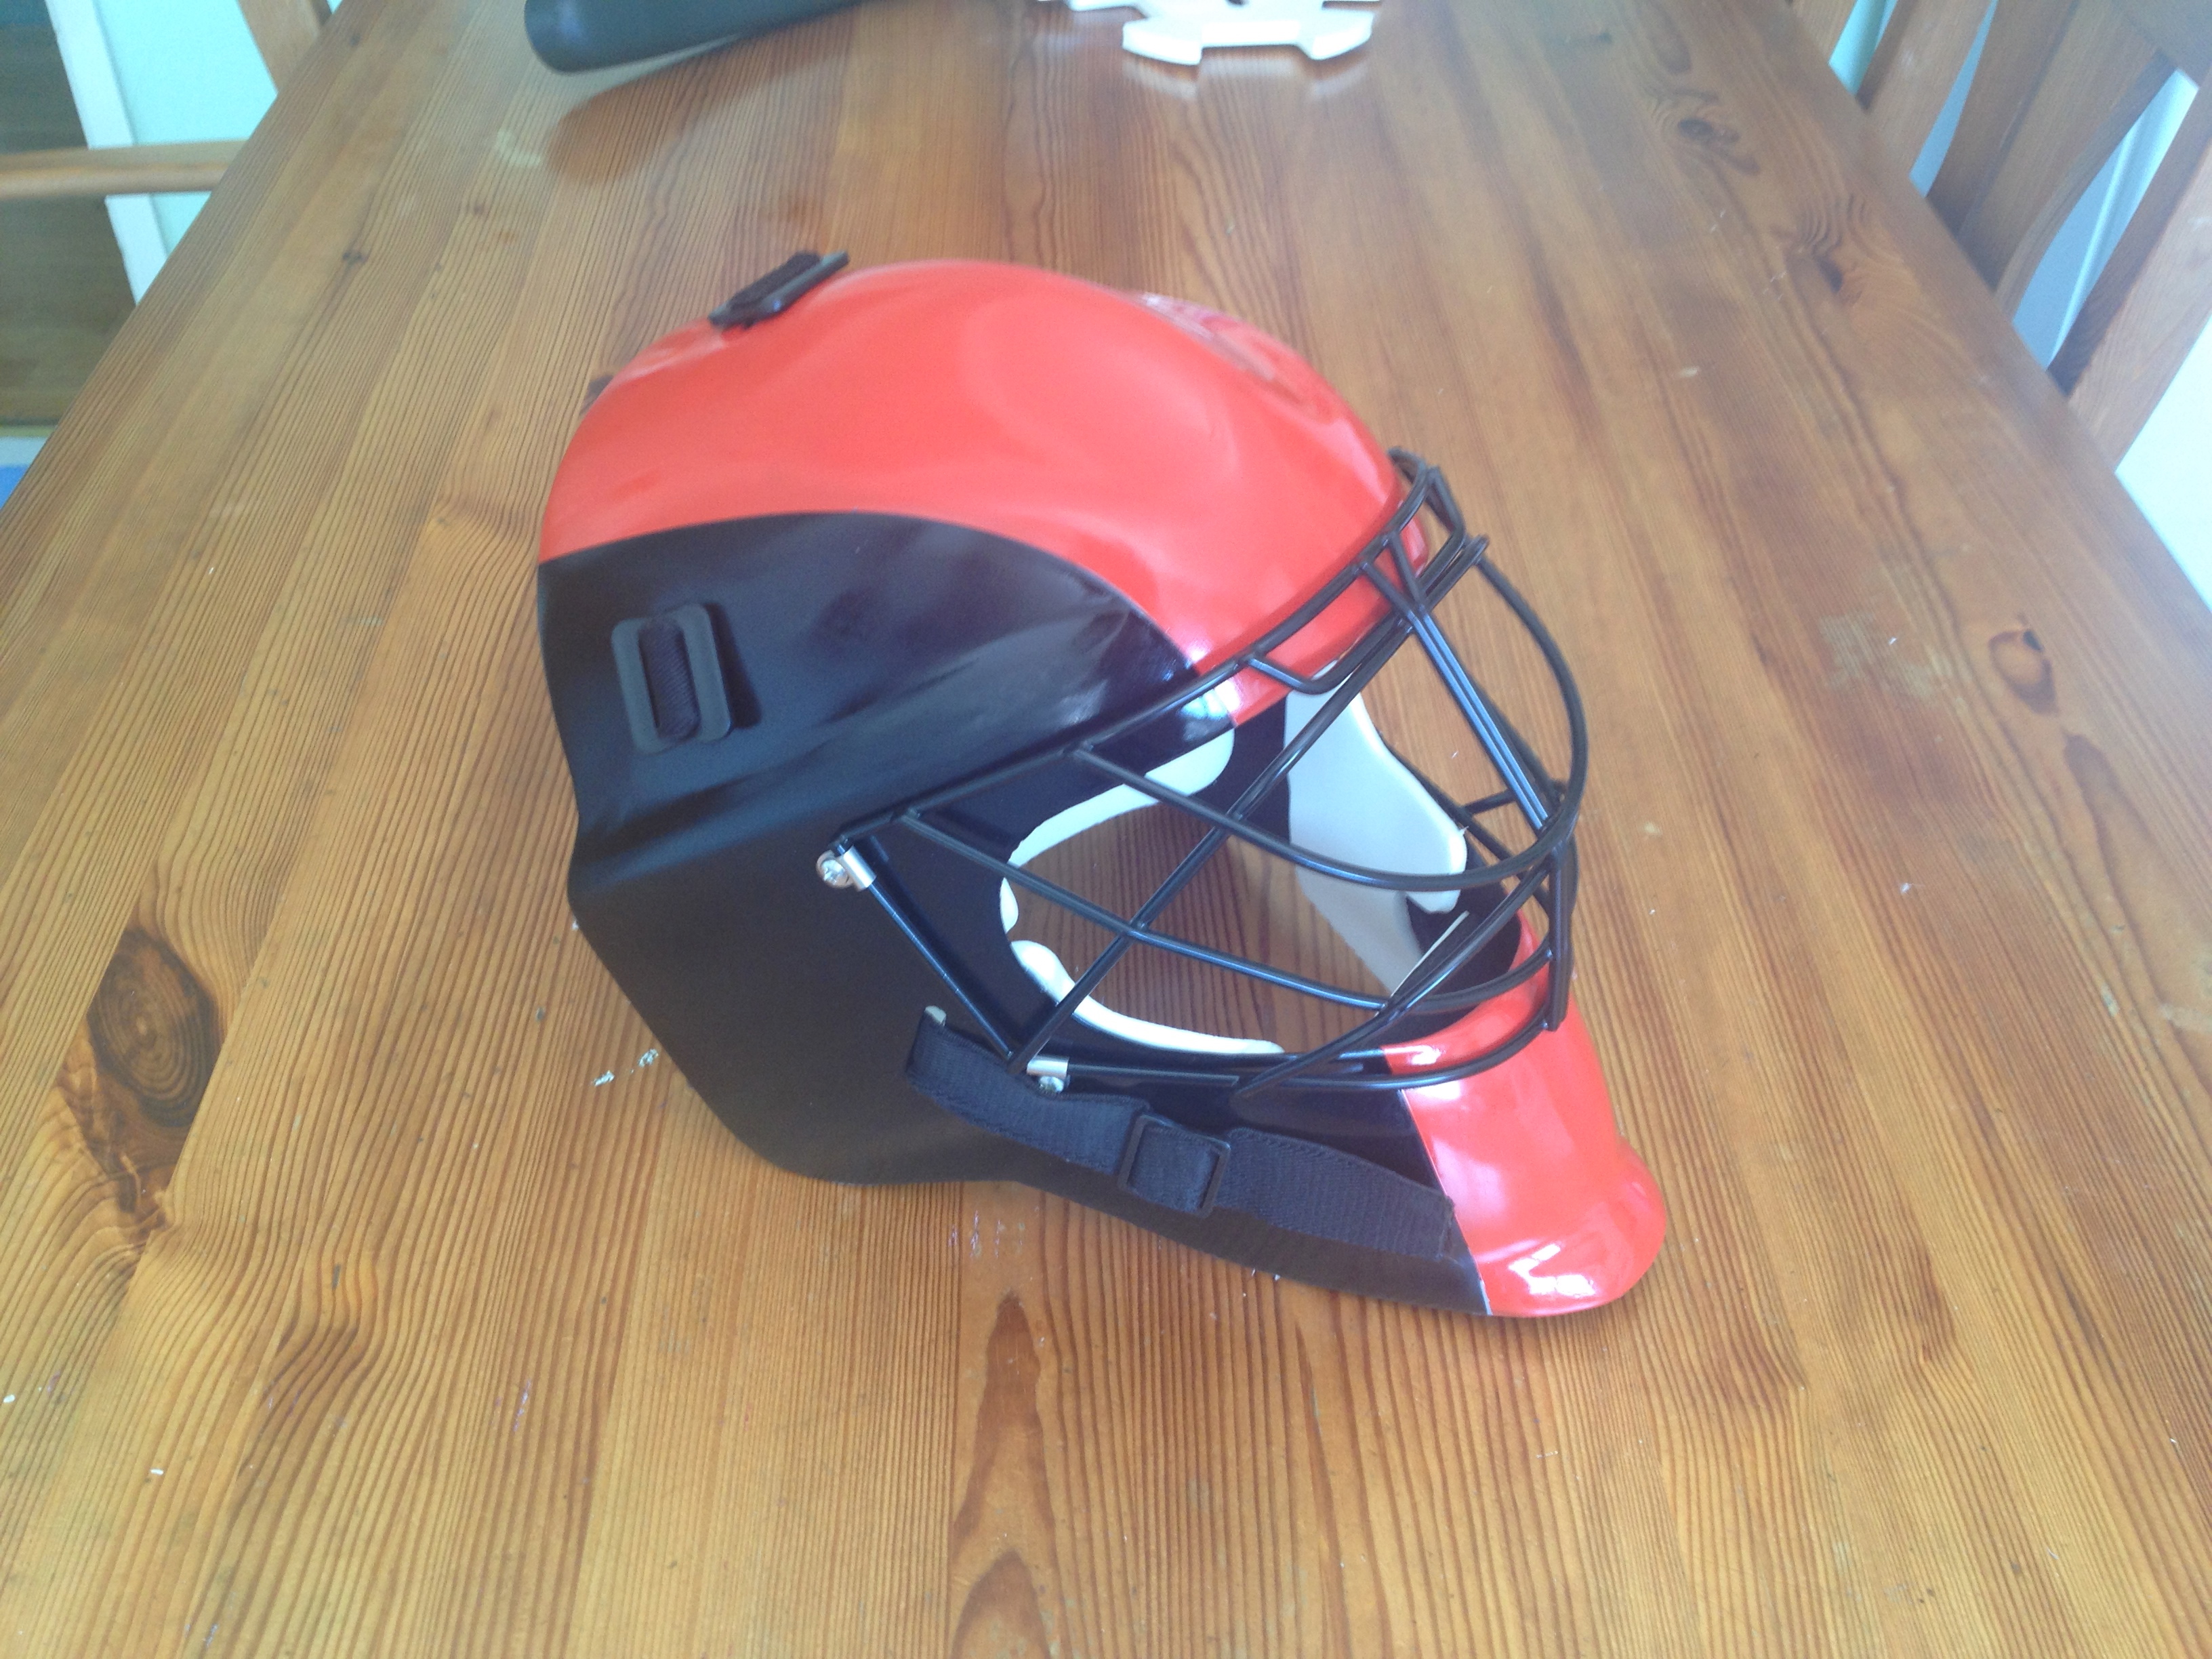
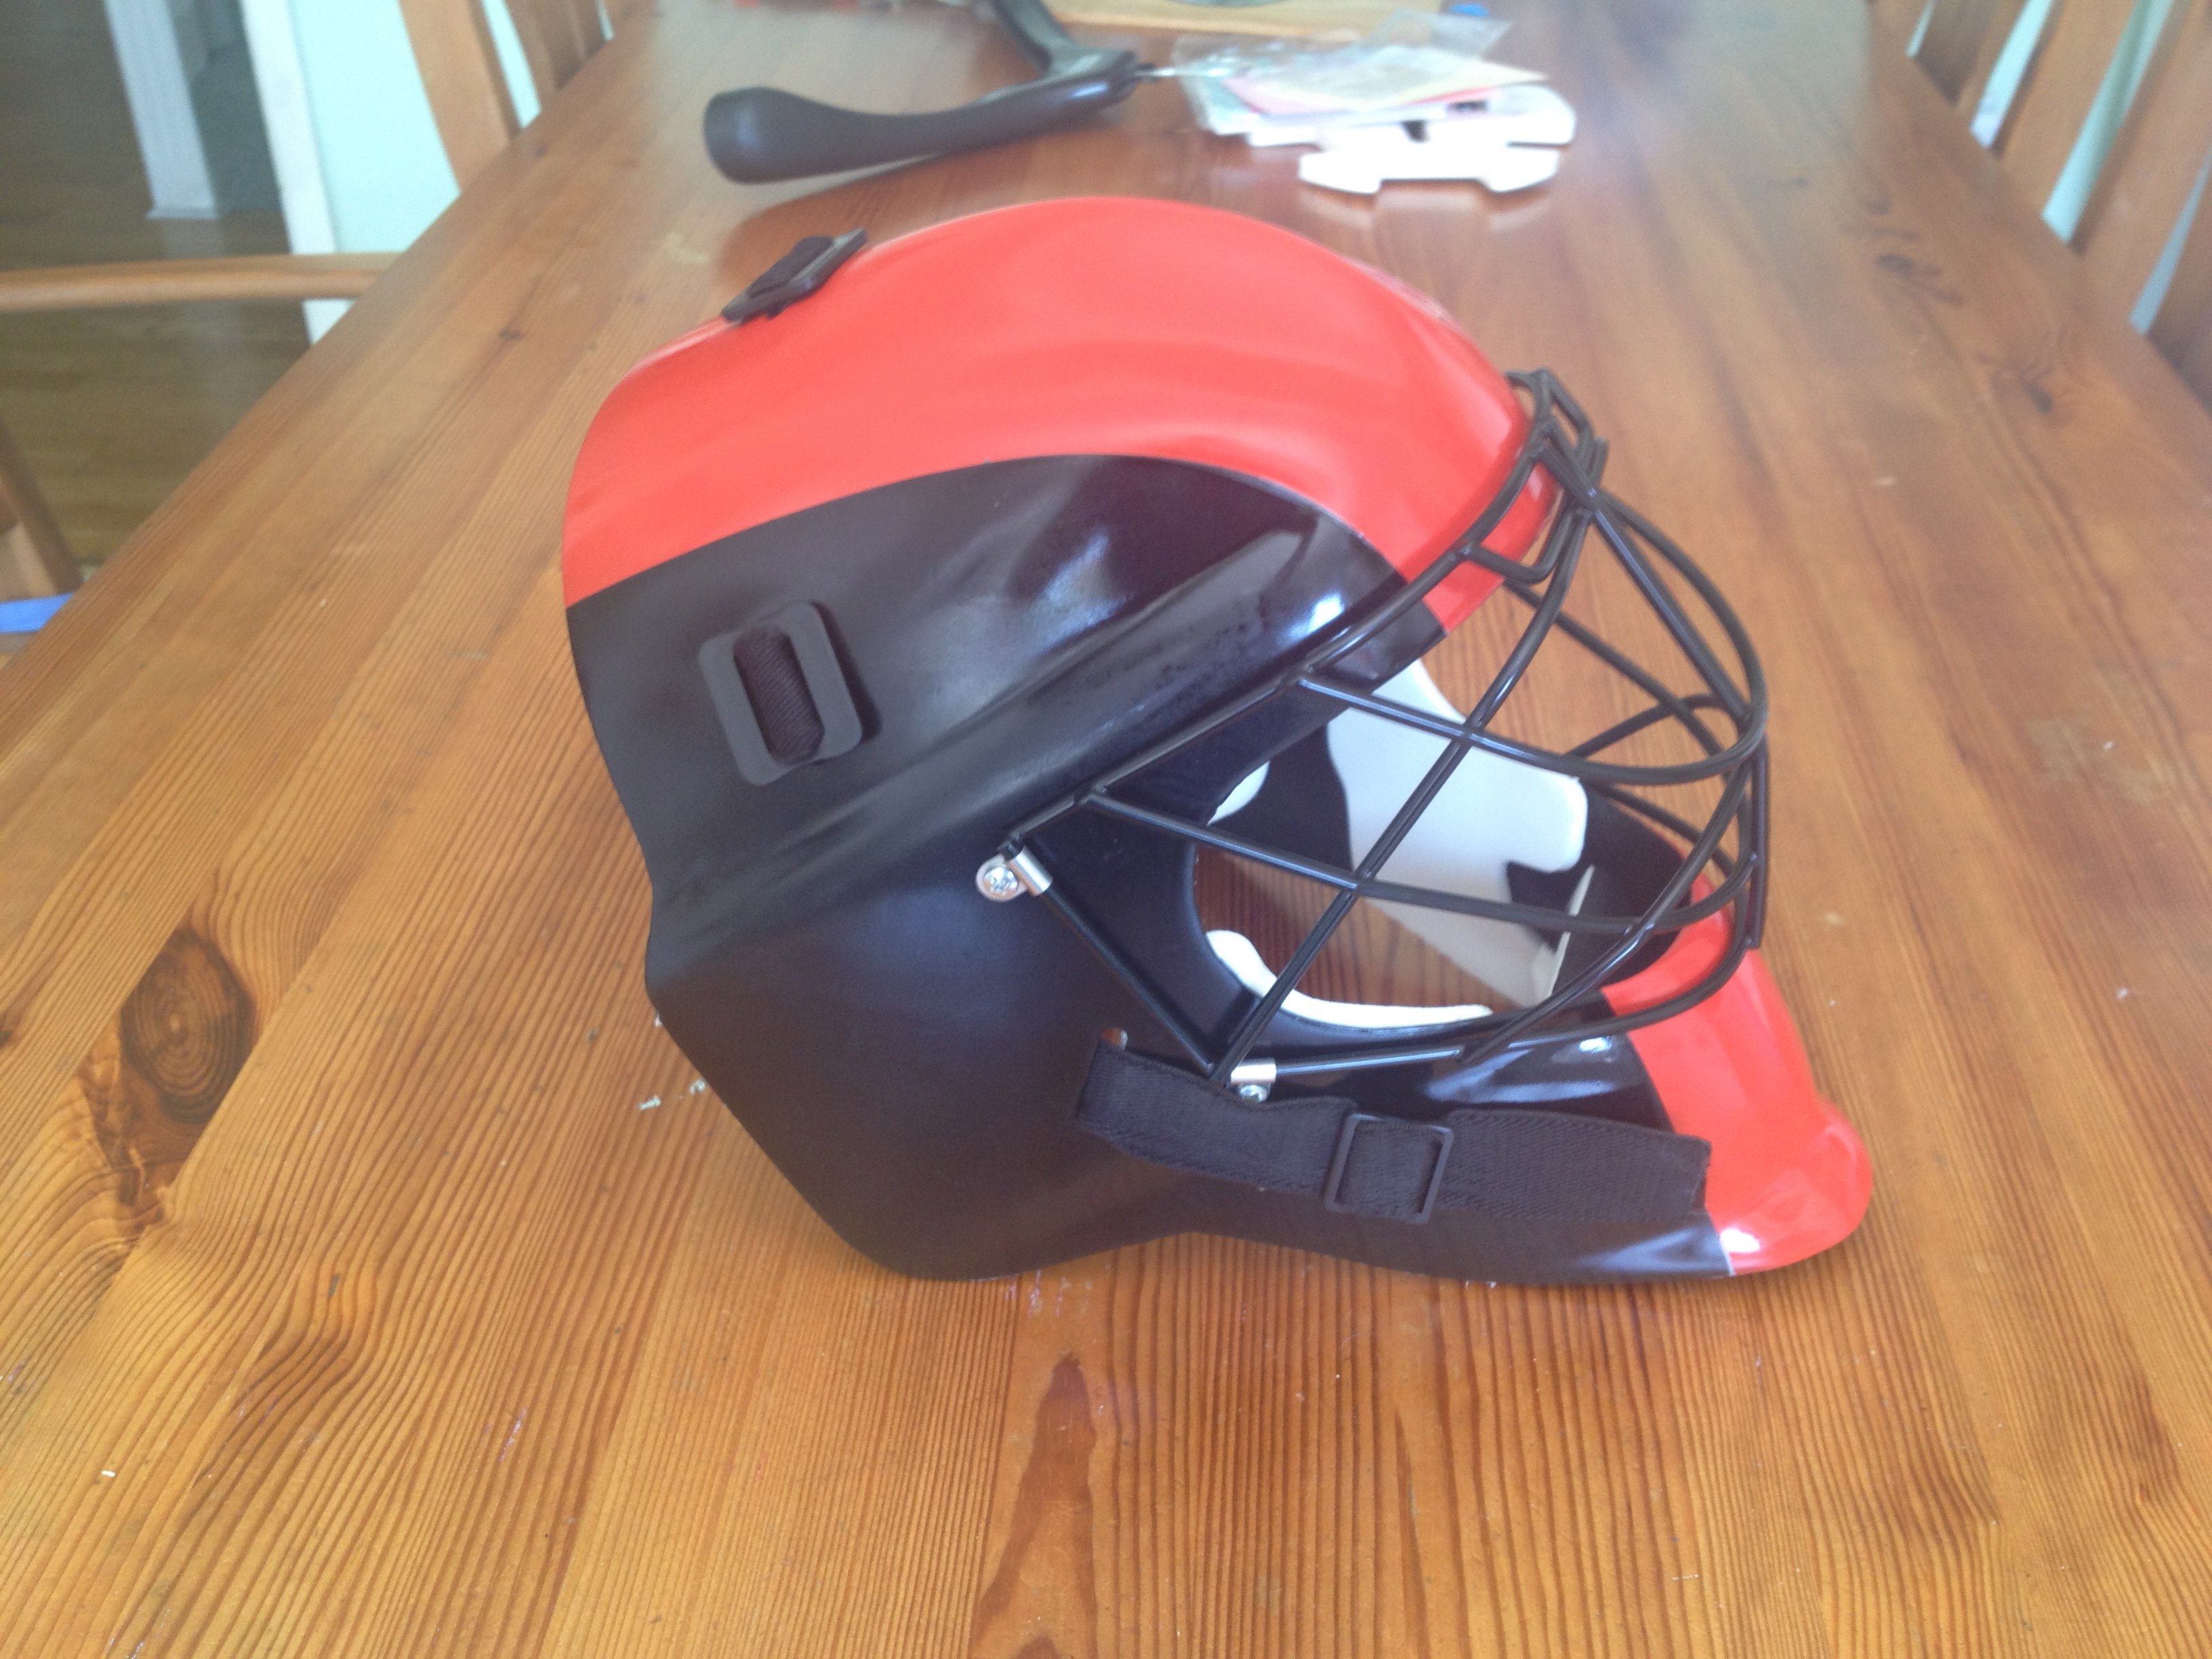
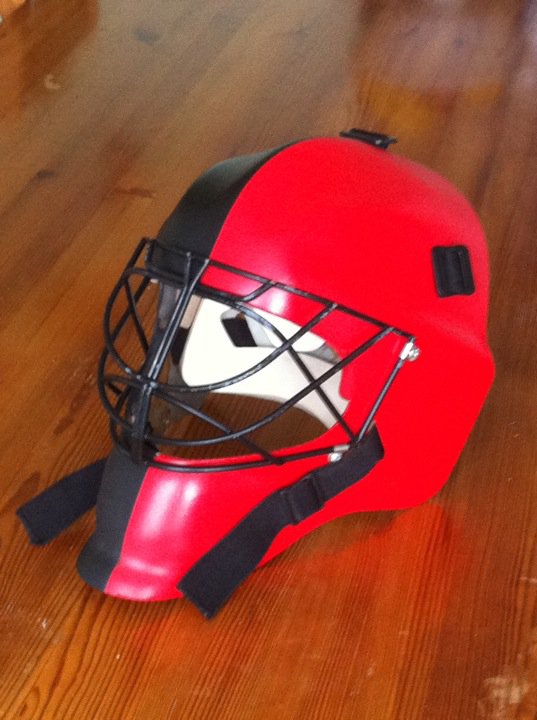
Three years ago, I decided to refurbish and repaint my Obo CK helmet…
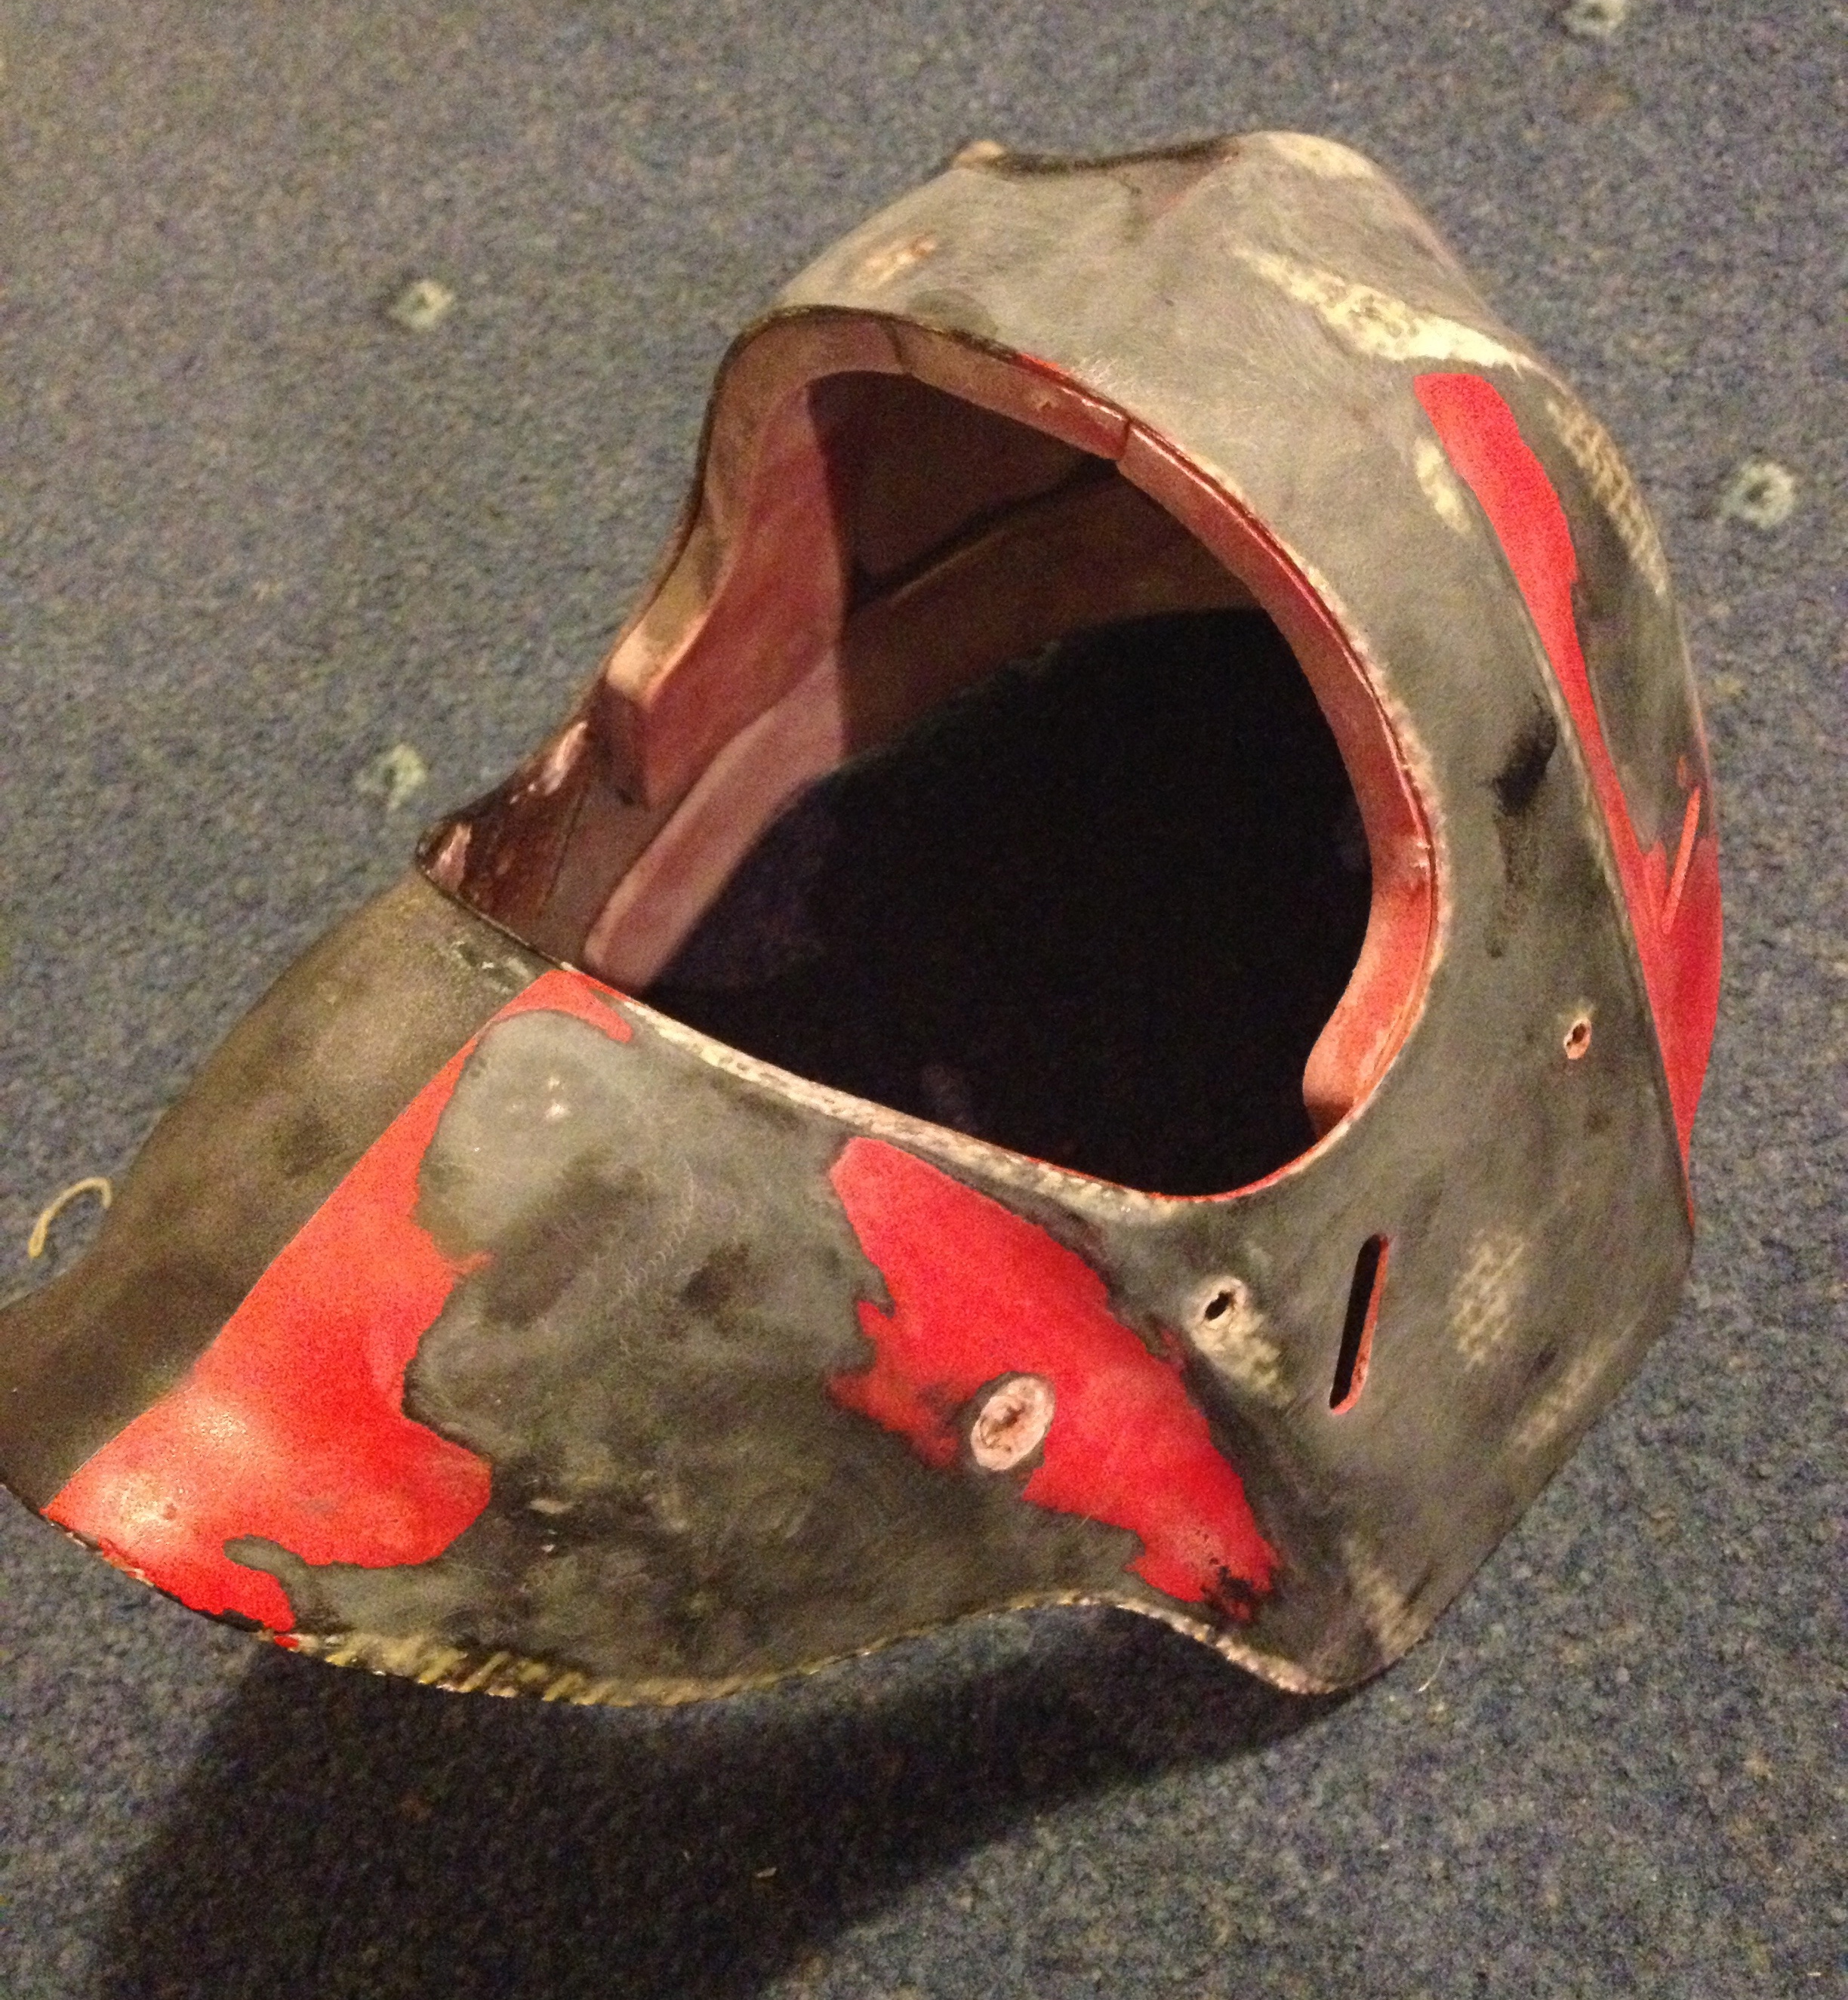
Three years ago, I decided to refurbish and repaint my OBO CK helmet. The default black paint had become a grey colour after exposure to the sun, and I wanted to try and create a custom colour scheme. So, I sanded it down to remove the clear coat and prepared the old paint surface for the new undercoat and paint. I also replaced the metal and plastic fittings, repainted the grill and replaced the internal foam. The end result was this.
It looked good for about a year, after which it started to become chipped and cracked and the clear coat started to flake and leave white residue on the helmet surface. So, before the start of this season I decided to redo the helmet completely from scratch, using better materials and more thorough processes to ensure a better end result.
Before you start.
Ensure you have adequate space to conduct this particular refurbishment. Setup for painting should be outside or in a well ventilated area, free of dust and particulate. I have a large paved area in the back garden which is out of the way and protected well with some cardboard and newspaper which I use for another painting project, which is quite good for this sort of thing.
Ensure you have enough time to conduct the refurbishment. This is not something you can do in between matches on a Saturday. This would definitely be something to do during the off season. I managed to finish this completely over the course of 3 weeks, on and off in conjunction with work. The main reason for this long time was the use of many thin coats of paint and long curing times for the filler material combined with life in general getting in the way.
Materials
You will need:
OBO Helmet Cage
OBO Helmet Replacement Foam (9 piece)
OBO Helmet Chin Cup [Note: some replacement foam packs include a chin cup so you may not need to buy a separate one]
OBO Helmet Forehead Pad Sweatband
OBO Elasticated Back Strap
OBO Helmet Fittings Set
Sand Paper – 80/120 grade
Wet and Dry Emery Paper – 400/600/1200 grade – used wet in all cases
Masking tape
Methylated Spirits
Old rags/cloth/old tea towel – non fibrous material
Newspaper/cardboard/tarpaulin to paint on
Spray Undercoat/Primer (car paint)
Spray Paint in colour(s) of choice (car paint)
Spray Clear coat (car paint)
JB Weld/Bondo/Other filling material
Copydex or other latex based glue.
Hot glue and glue gun
Gloves
Face mask
Safety Glasses
The specialist OBO helmet materials are available from Gilmour sports in the hyperlinked list above. The rest of the materials can be bought from most decent hardware, car body shops or similar retailers. I went to a small car body shop called JK Autospares in Belfast to get most of my materials. Retailers like this are usually quite happy for your custom and are generally quite helpful.
I list a face mask, glasses and gloves on the materials list as we will be sanding either carbon fibre (CK) or glass fibre (FG), as well as the cured polymer/resin associated with the bonding process. Sanding material like this will not produce particles small enough to inhale and cause long term damage to your respiratory system, but it will cause irritation if inhaled. As a result, I have covered all bases in terms of protecting your lungs and nose from harm. Composite fibre is also particularly irritant to your skin. It will leave unprotected skin feeling prickly, nearly like a rash. This will go away in time, but I recommend gloves and a long sleeved shirt to protect against this.
It should be noted that this is strictly an amateur’s guide to how to paint this type of helmet. It is based on my research and experience and is by no means a fully professional way to go about it.
This guide is not intended for use with OBO Poly P or PE helmets.
Step 1 – Preparation
Remove all the plastic fittings from the elastic straps and then remove the elasticated back plate of the helmet. Now remove the elastic webbing from the back piece and set aside.
Step 2 – Remove Internal Foam
Take a picture of the inside of the helmet to ensure the correct placement of replacement foam, then carefully remove the internal foam and set aside. This can be done by carefully peeling it away from the surface of the helmet. A thin sharp knife can also be used to cut away the adhesive and to scrape away any small parts that are stuck to the composite. The composite is much harder than the foam, but try and avoid damage to the internal weave of the carbon kevlar or fibreglass. Try to keep as much of the old foam as possible intact, as it can be used again if required. I left my foam inside the helmet until it came to spraying the undercoat, but this is personal preference, as my foam was pretty grubby and covered in paint from the previous refurbishment, so it was going straight in the bin anyway.
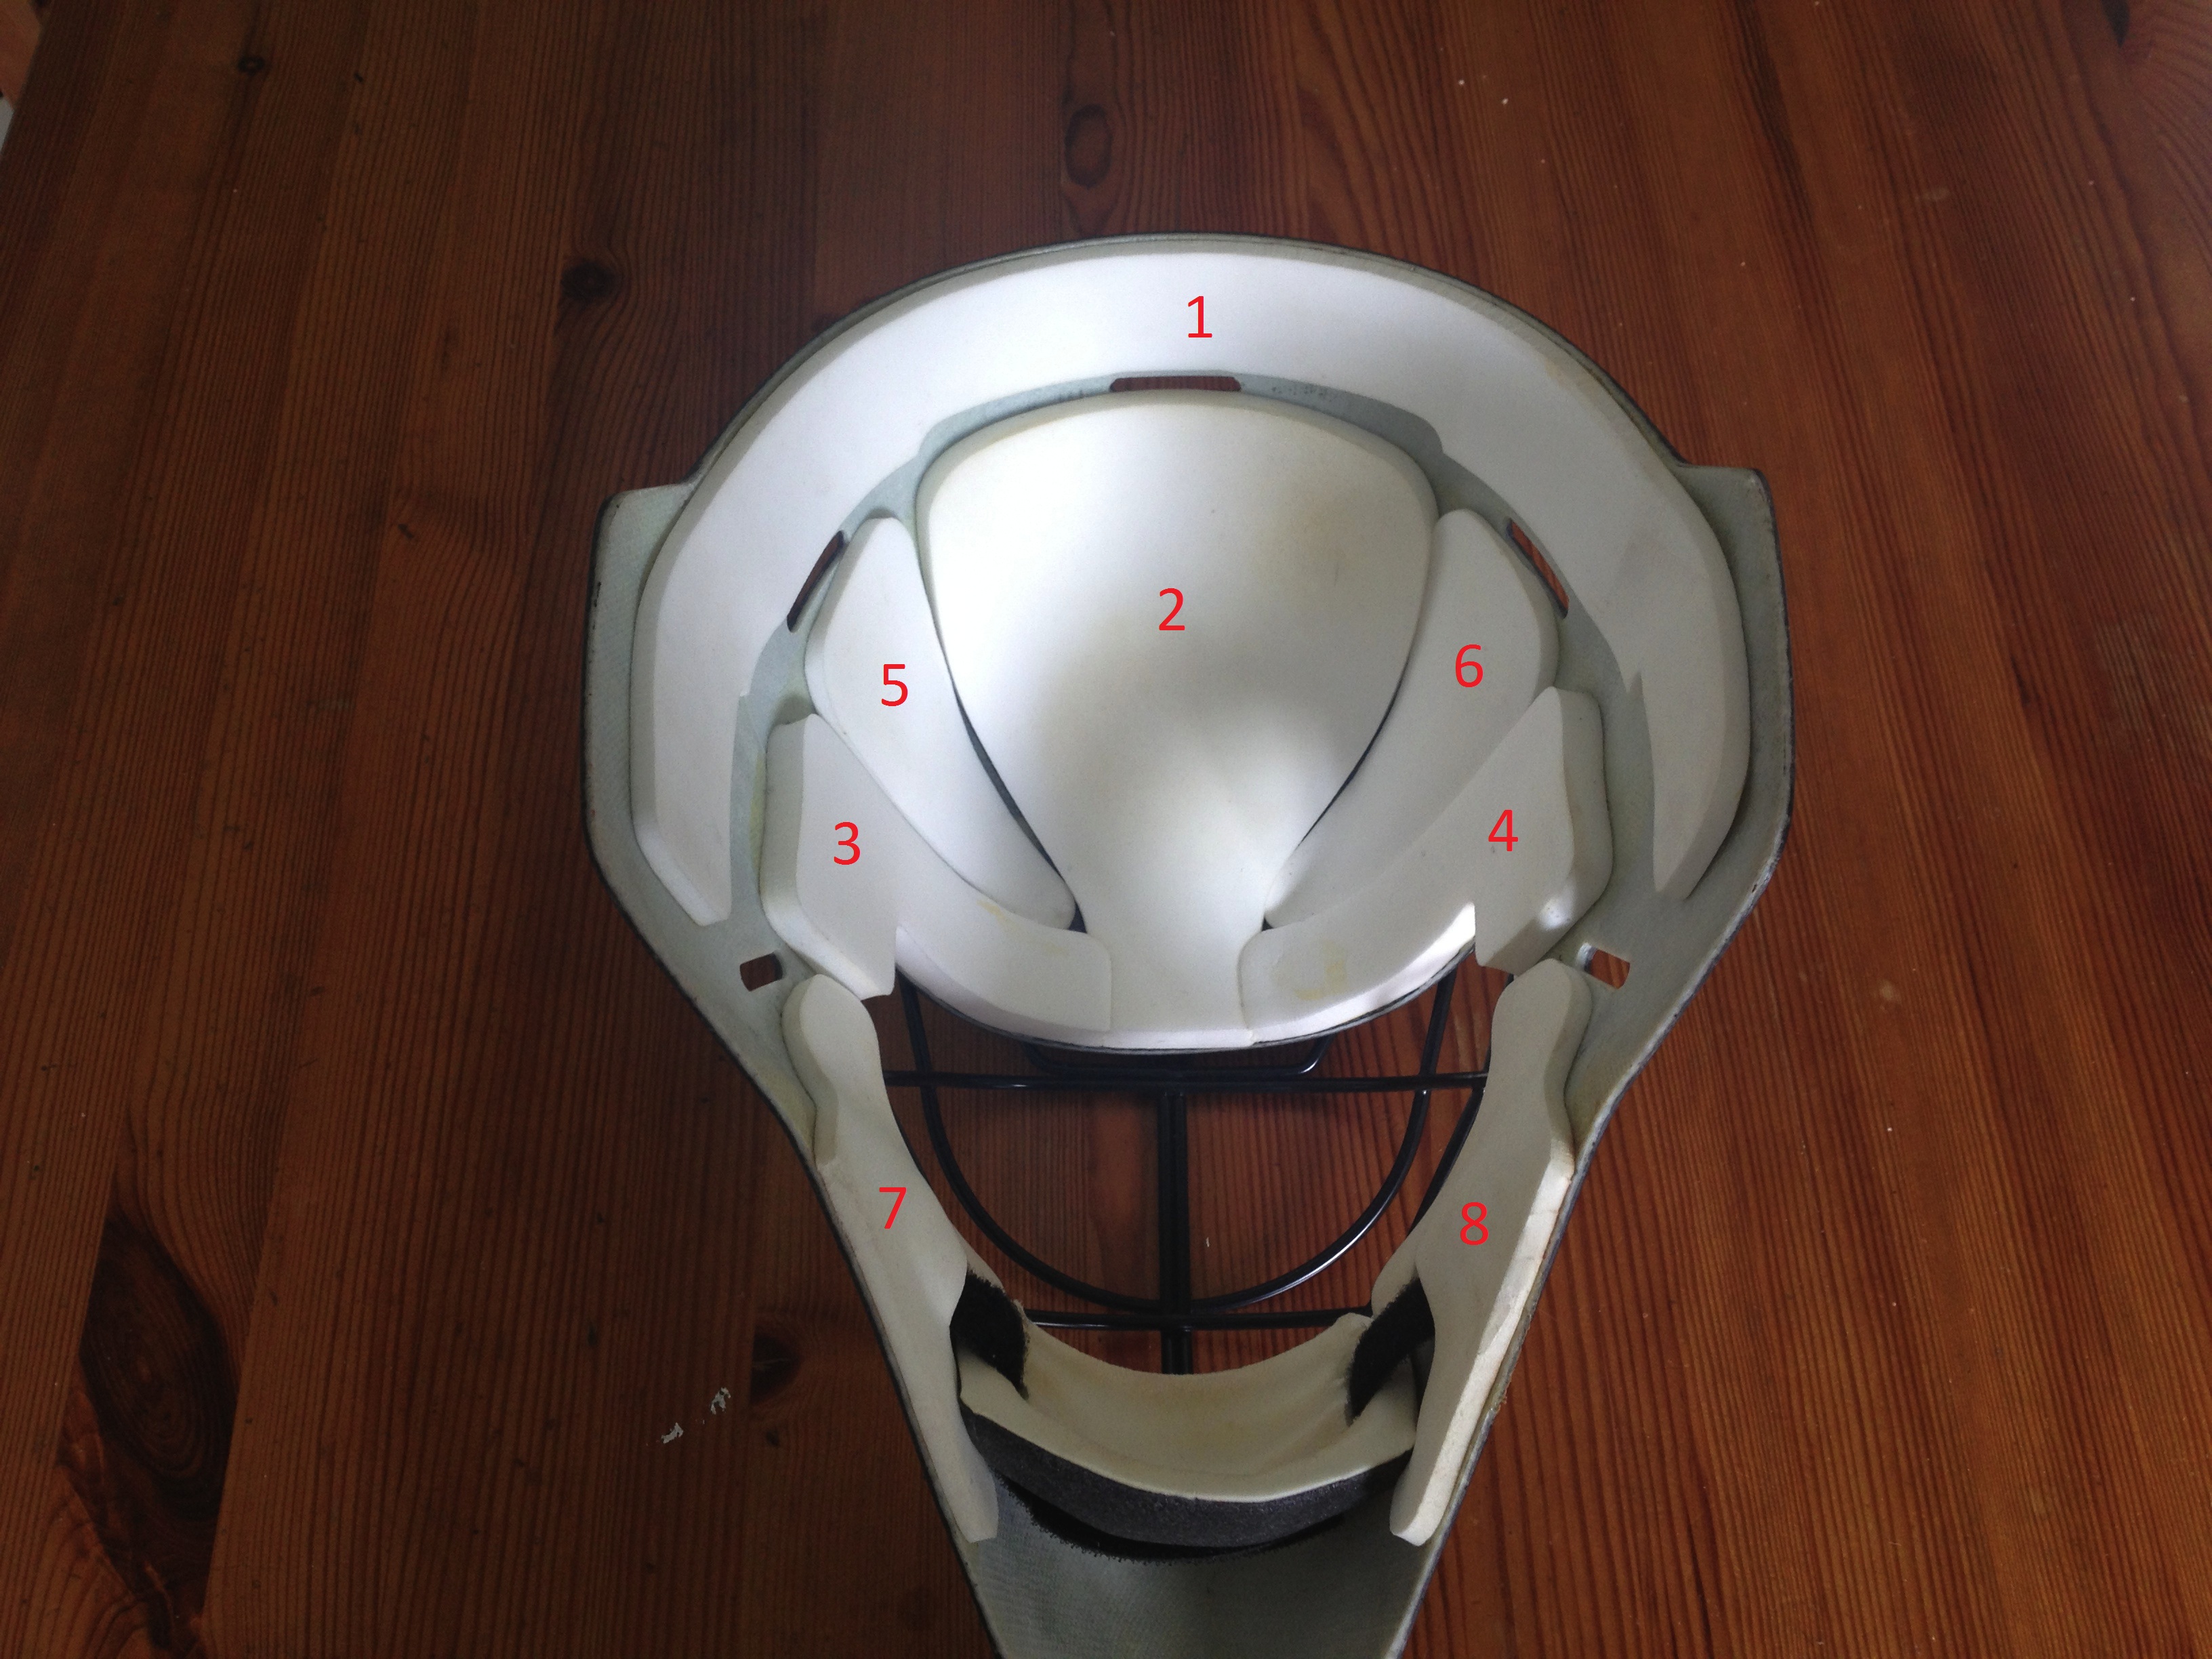
Above is a picture of the foam placement for reference.
Step 3 – Remove Fittings
Remove and collect all of the metal fittings from the shell of the helmet. If the metal screws have rusted or corroded to such an extent that you cannot unscrew them you may have to drill them out. Use a high speed drill and a 4 mm metal bit for the best results. Pay particular attention to the metal stud collar that the plastic fittings snap into. These parts are not included in the OBO Replacement part pack, so they have to be refurbished and reused.

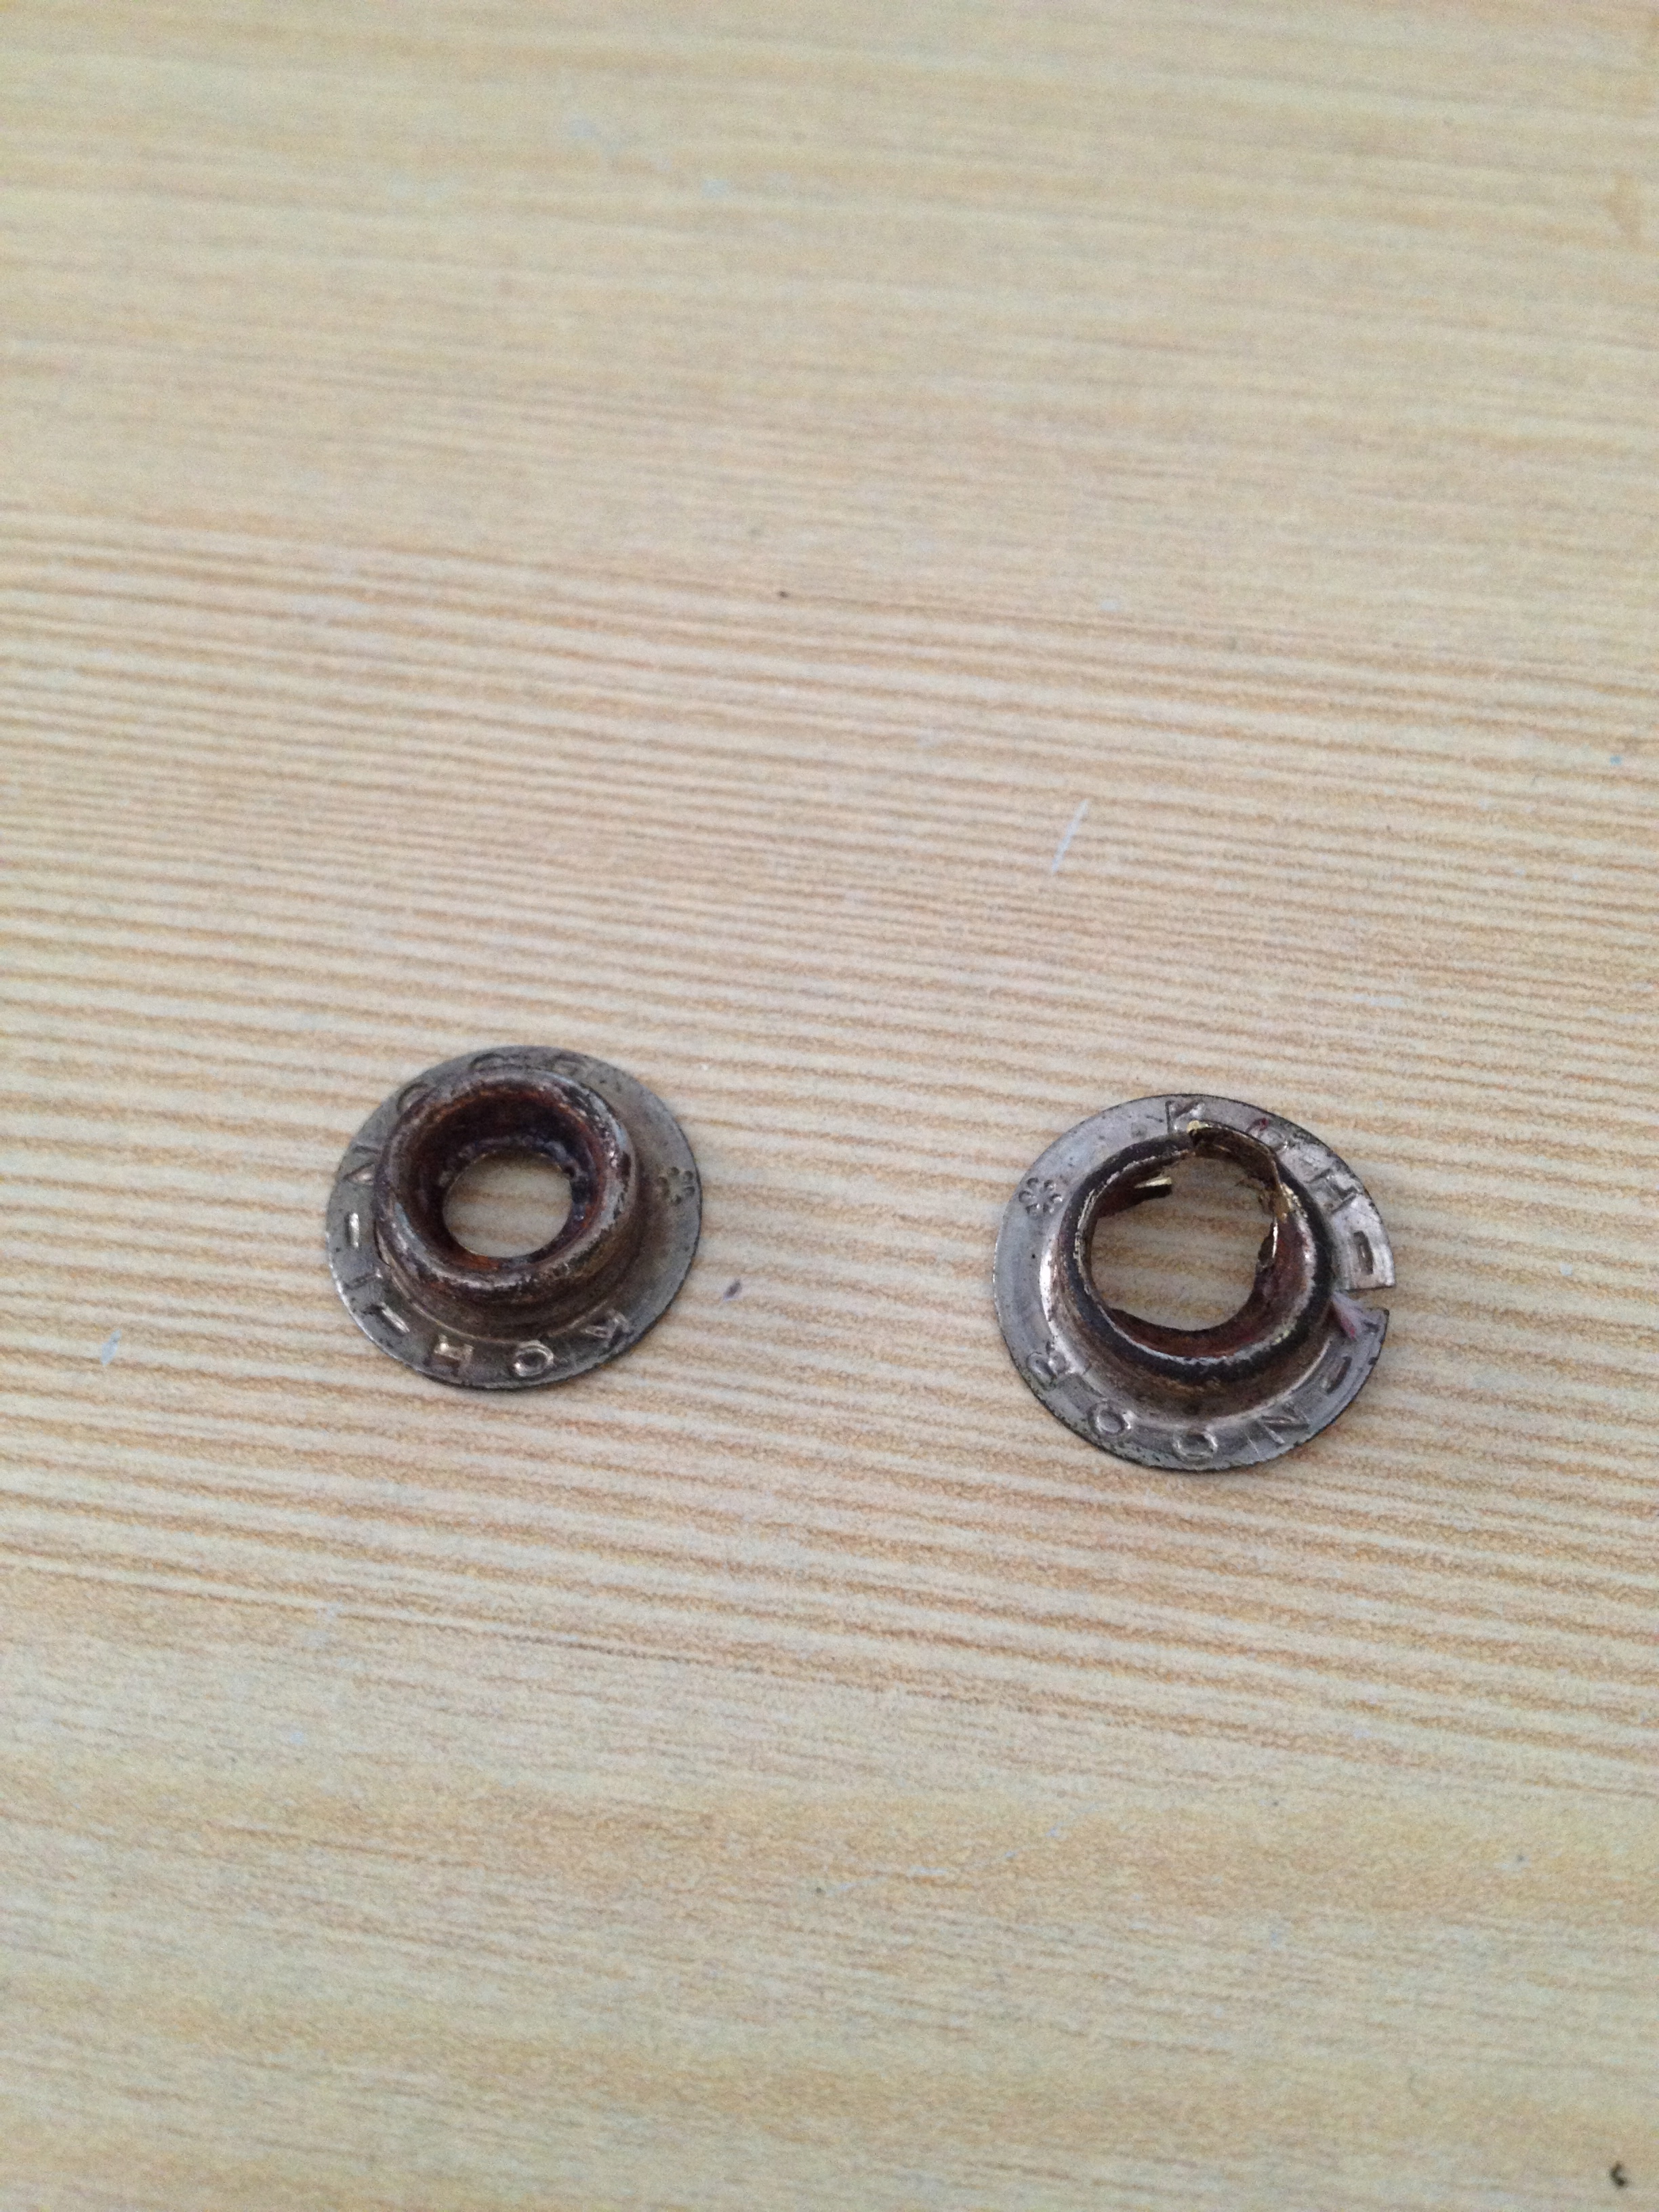
Shown above here are new studs from a spare helmet of mine, in comparison to the old studs that have just been removed. I managed to damage mine when drilling them out, so I contacted Mike at OBO to secure some replacement parts. If they are undamaged, but rusted badly then put them in some rust removal solution or some Coke to improve their aesthetics.
Step 4 – Sanding
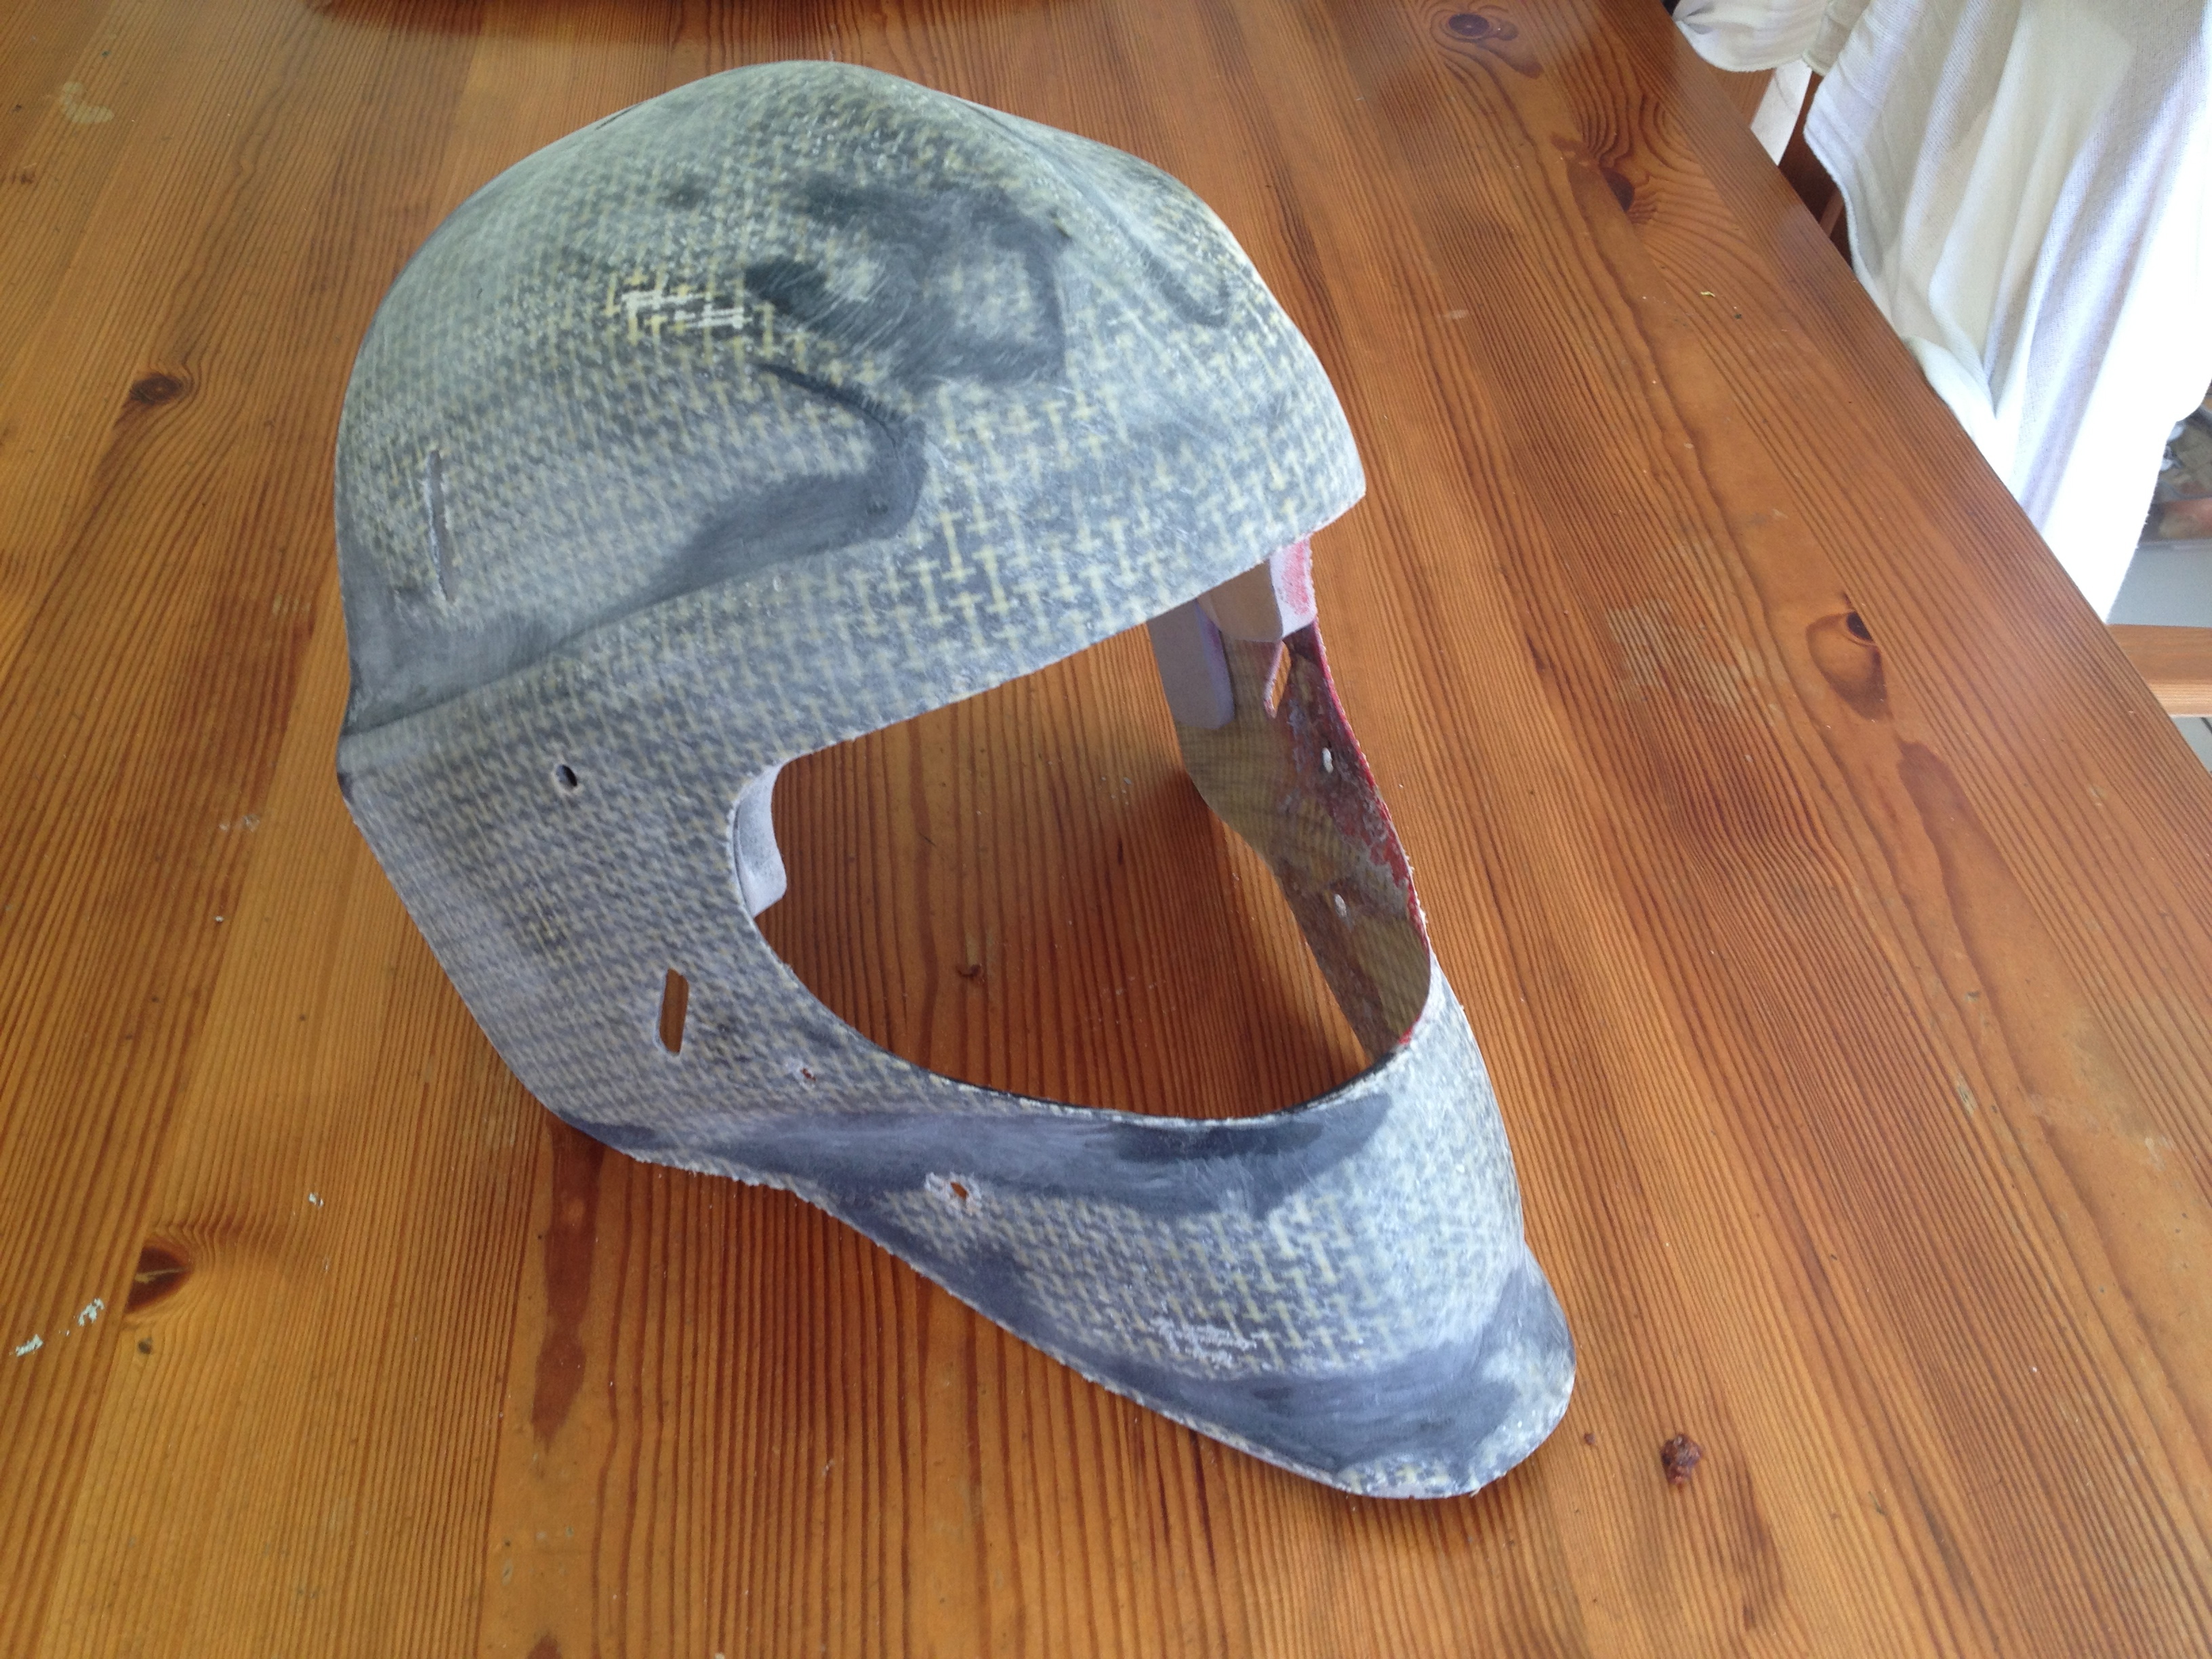
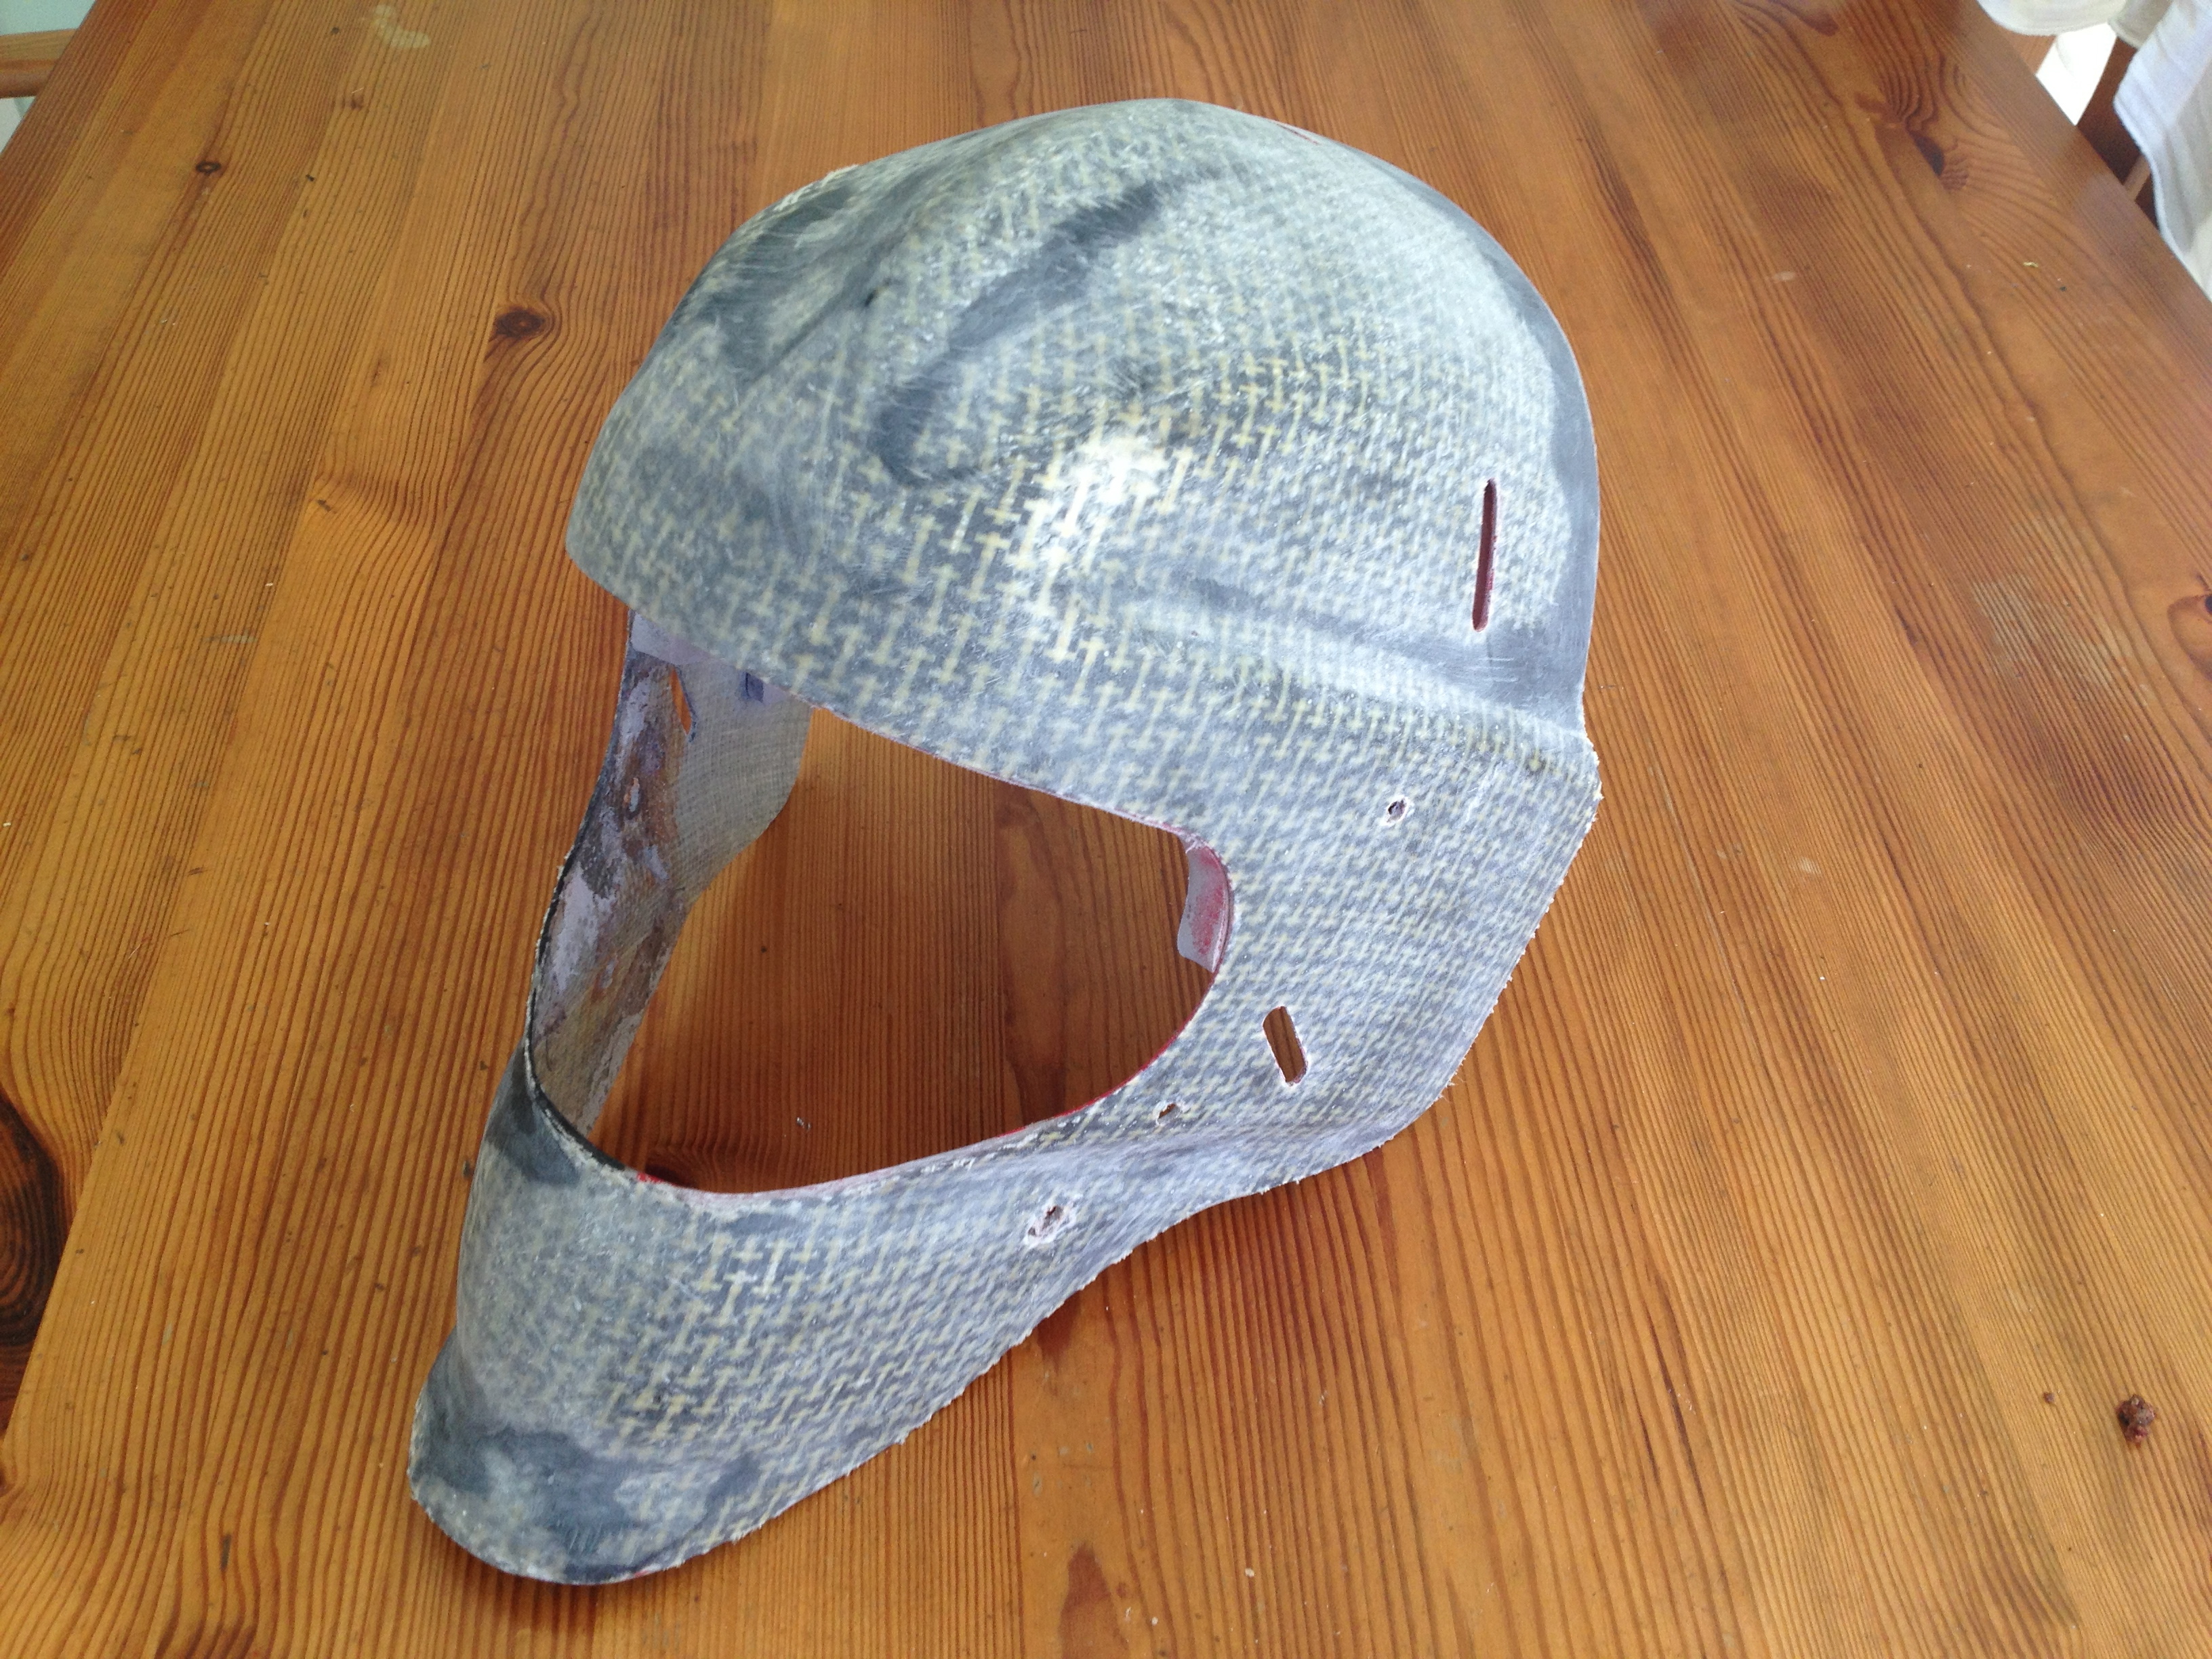
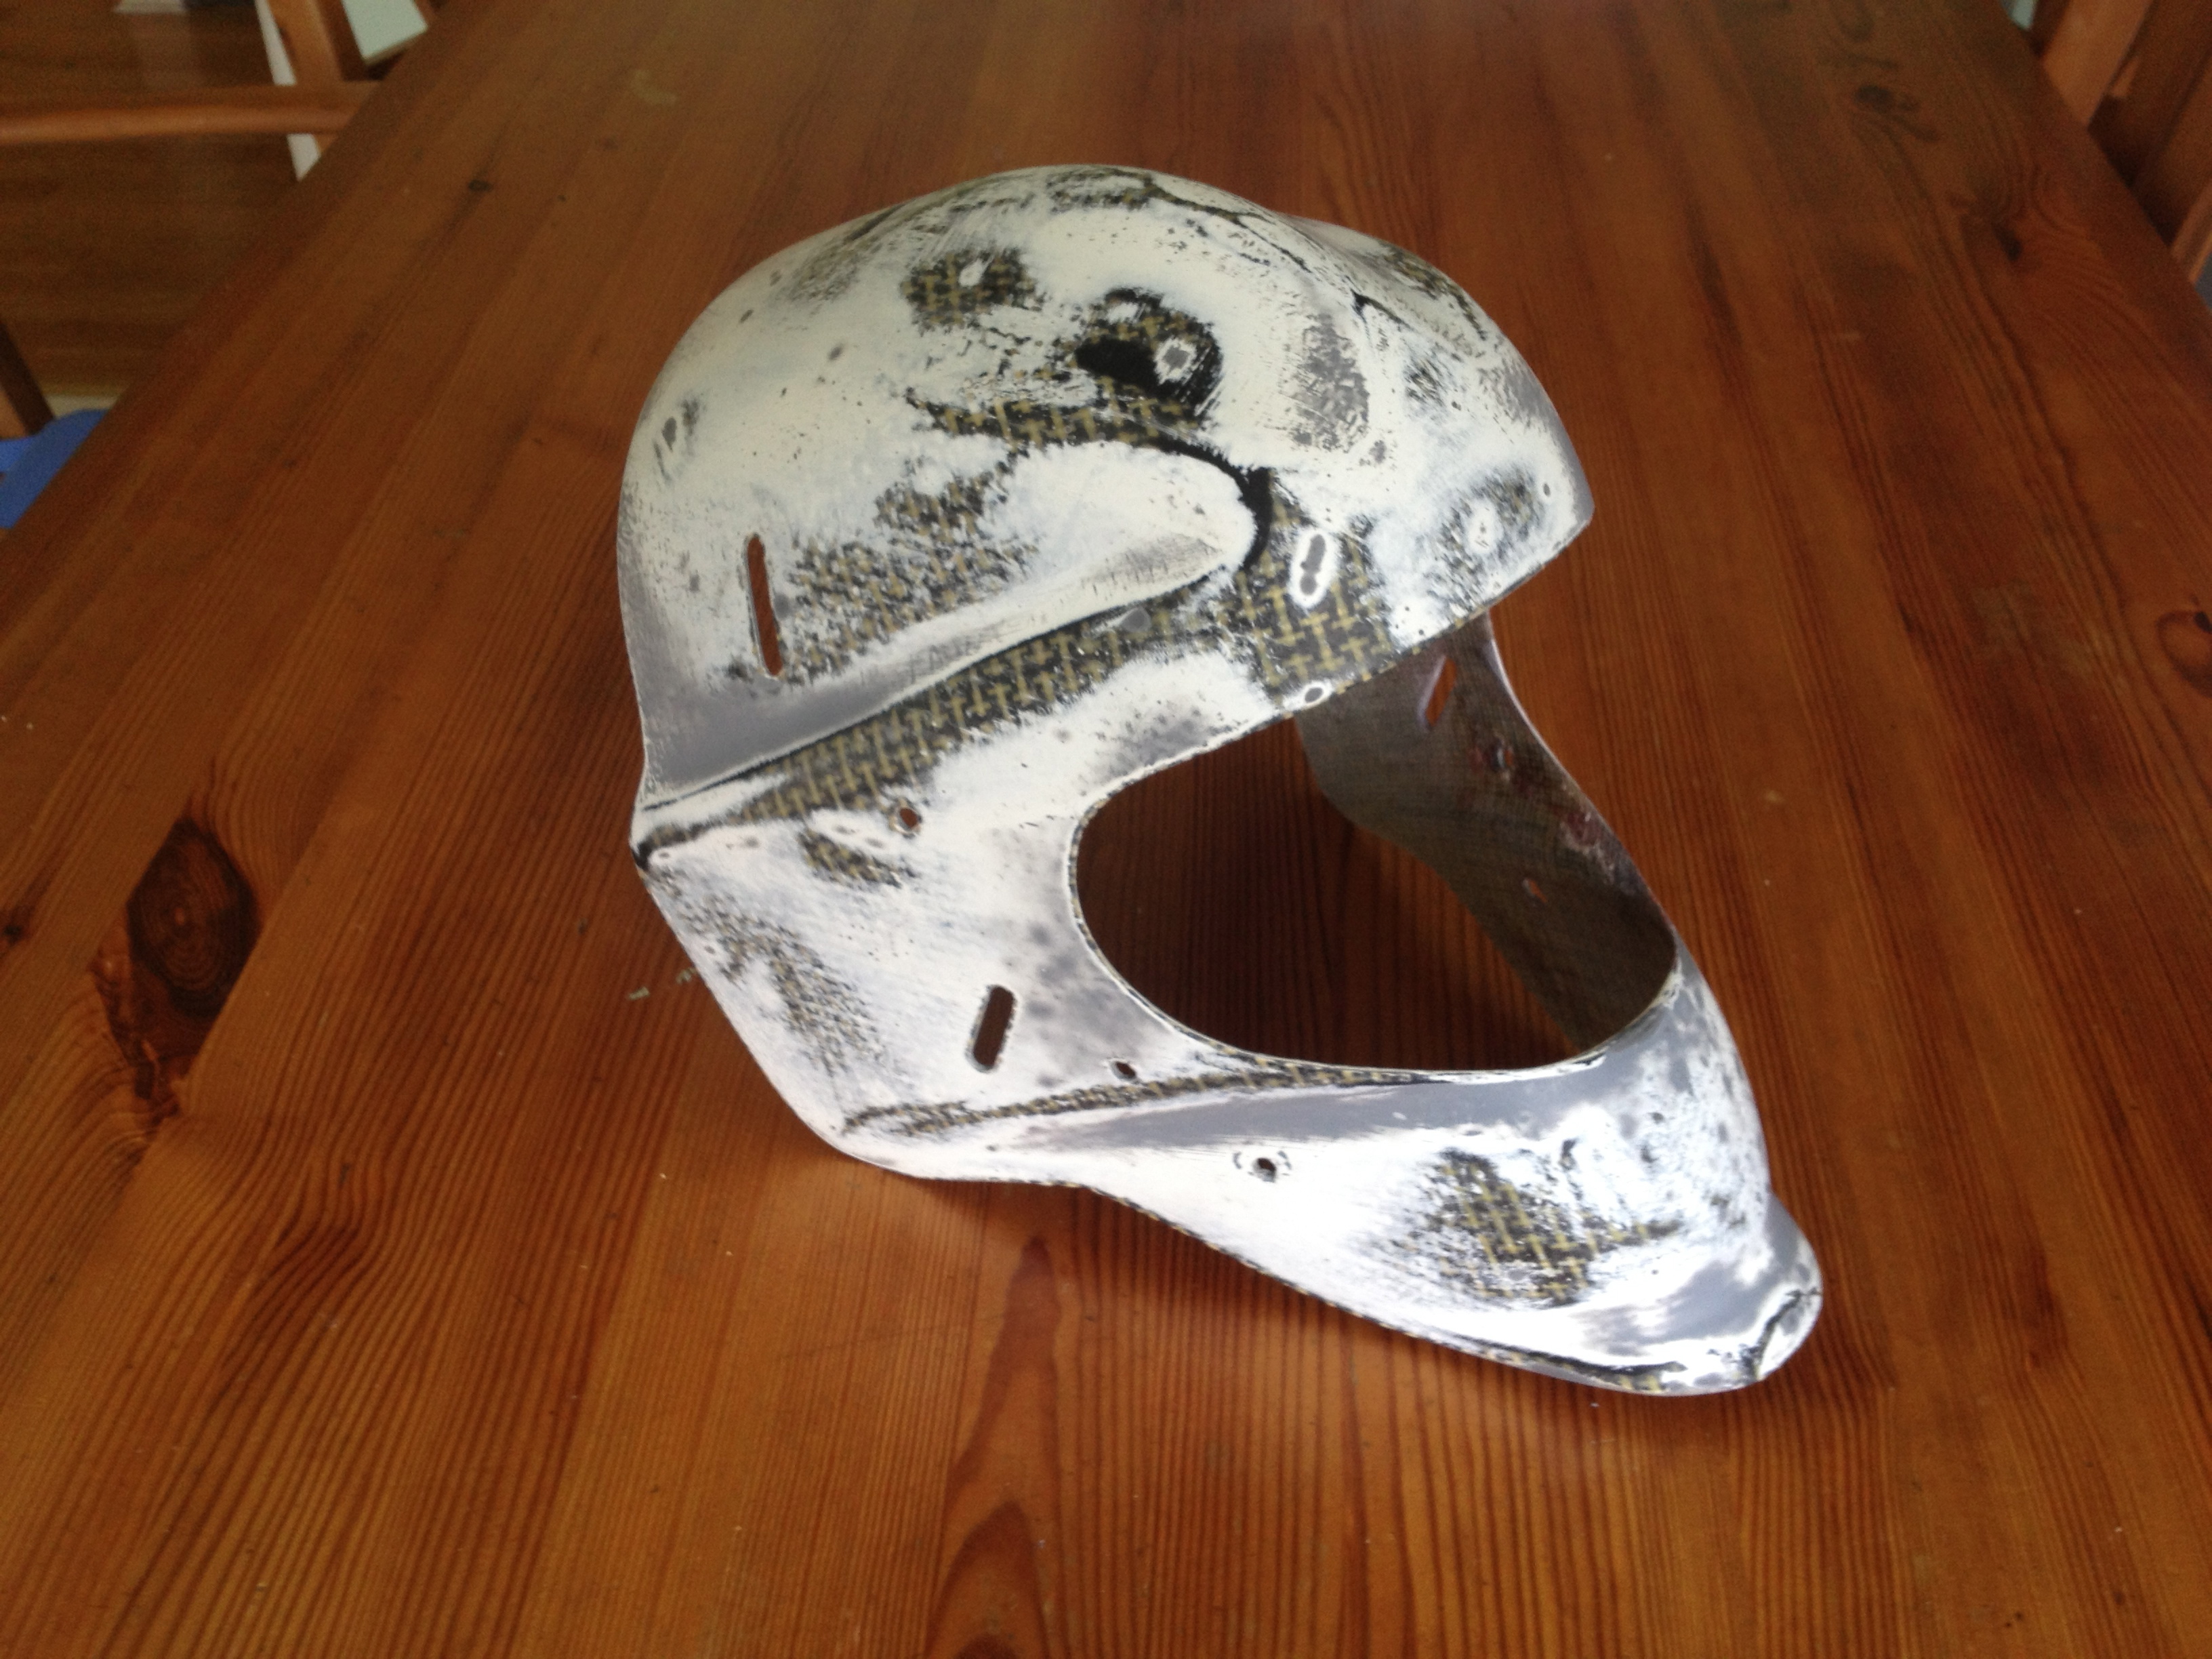
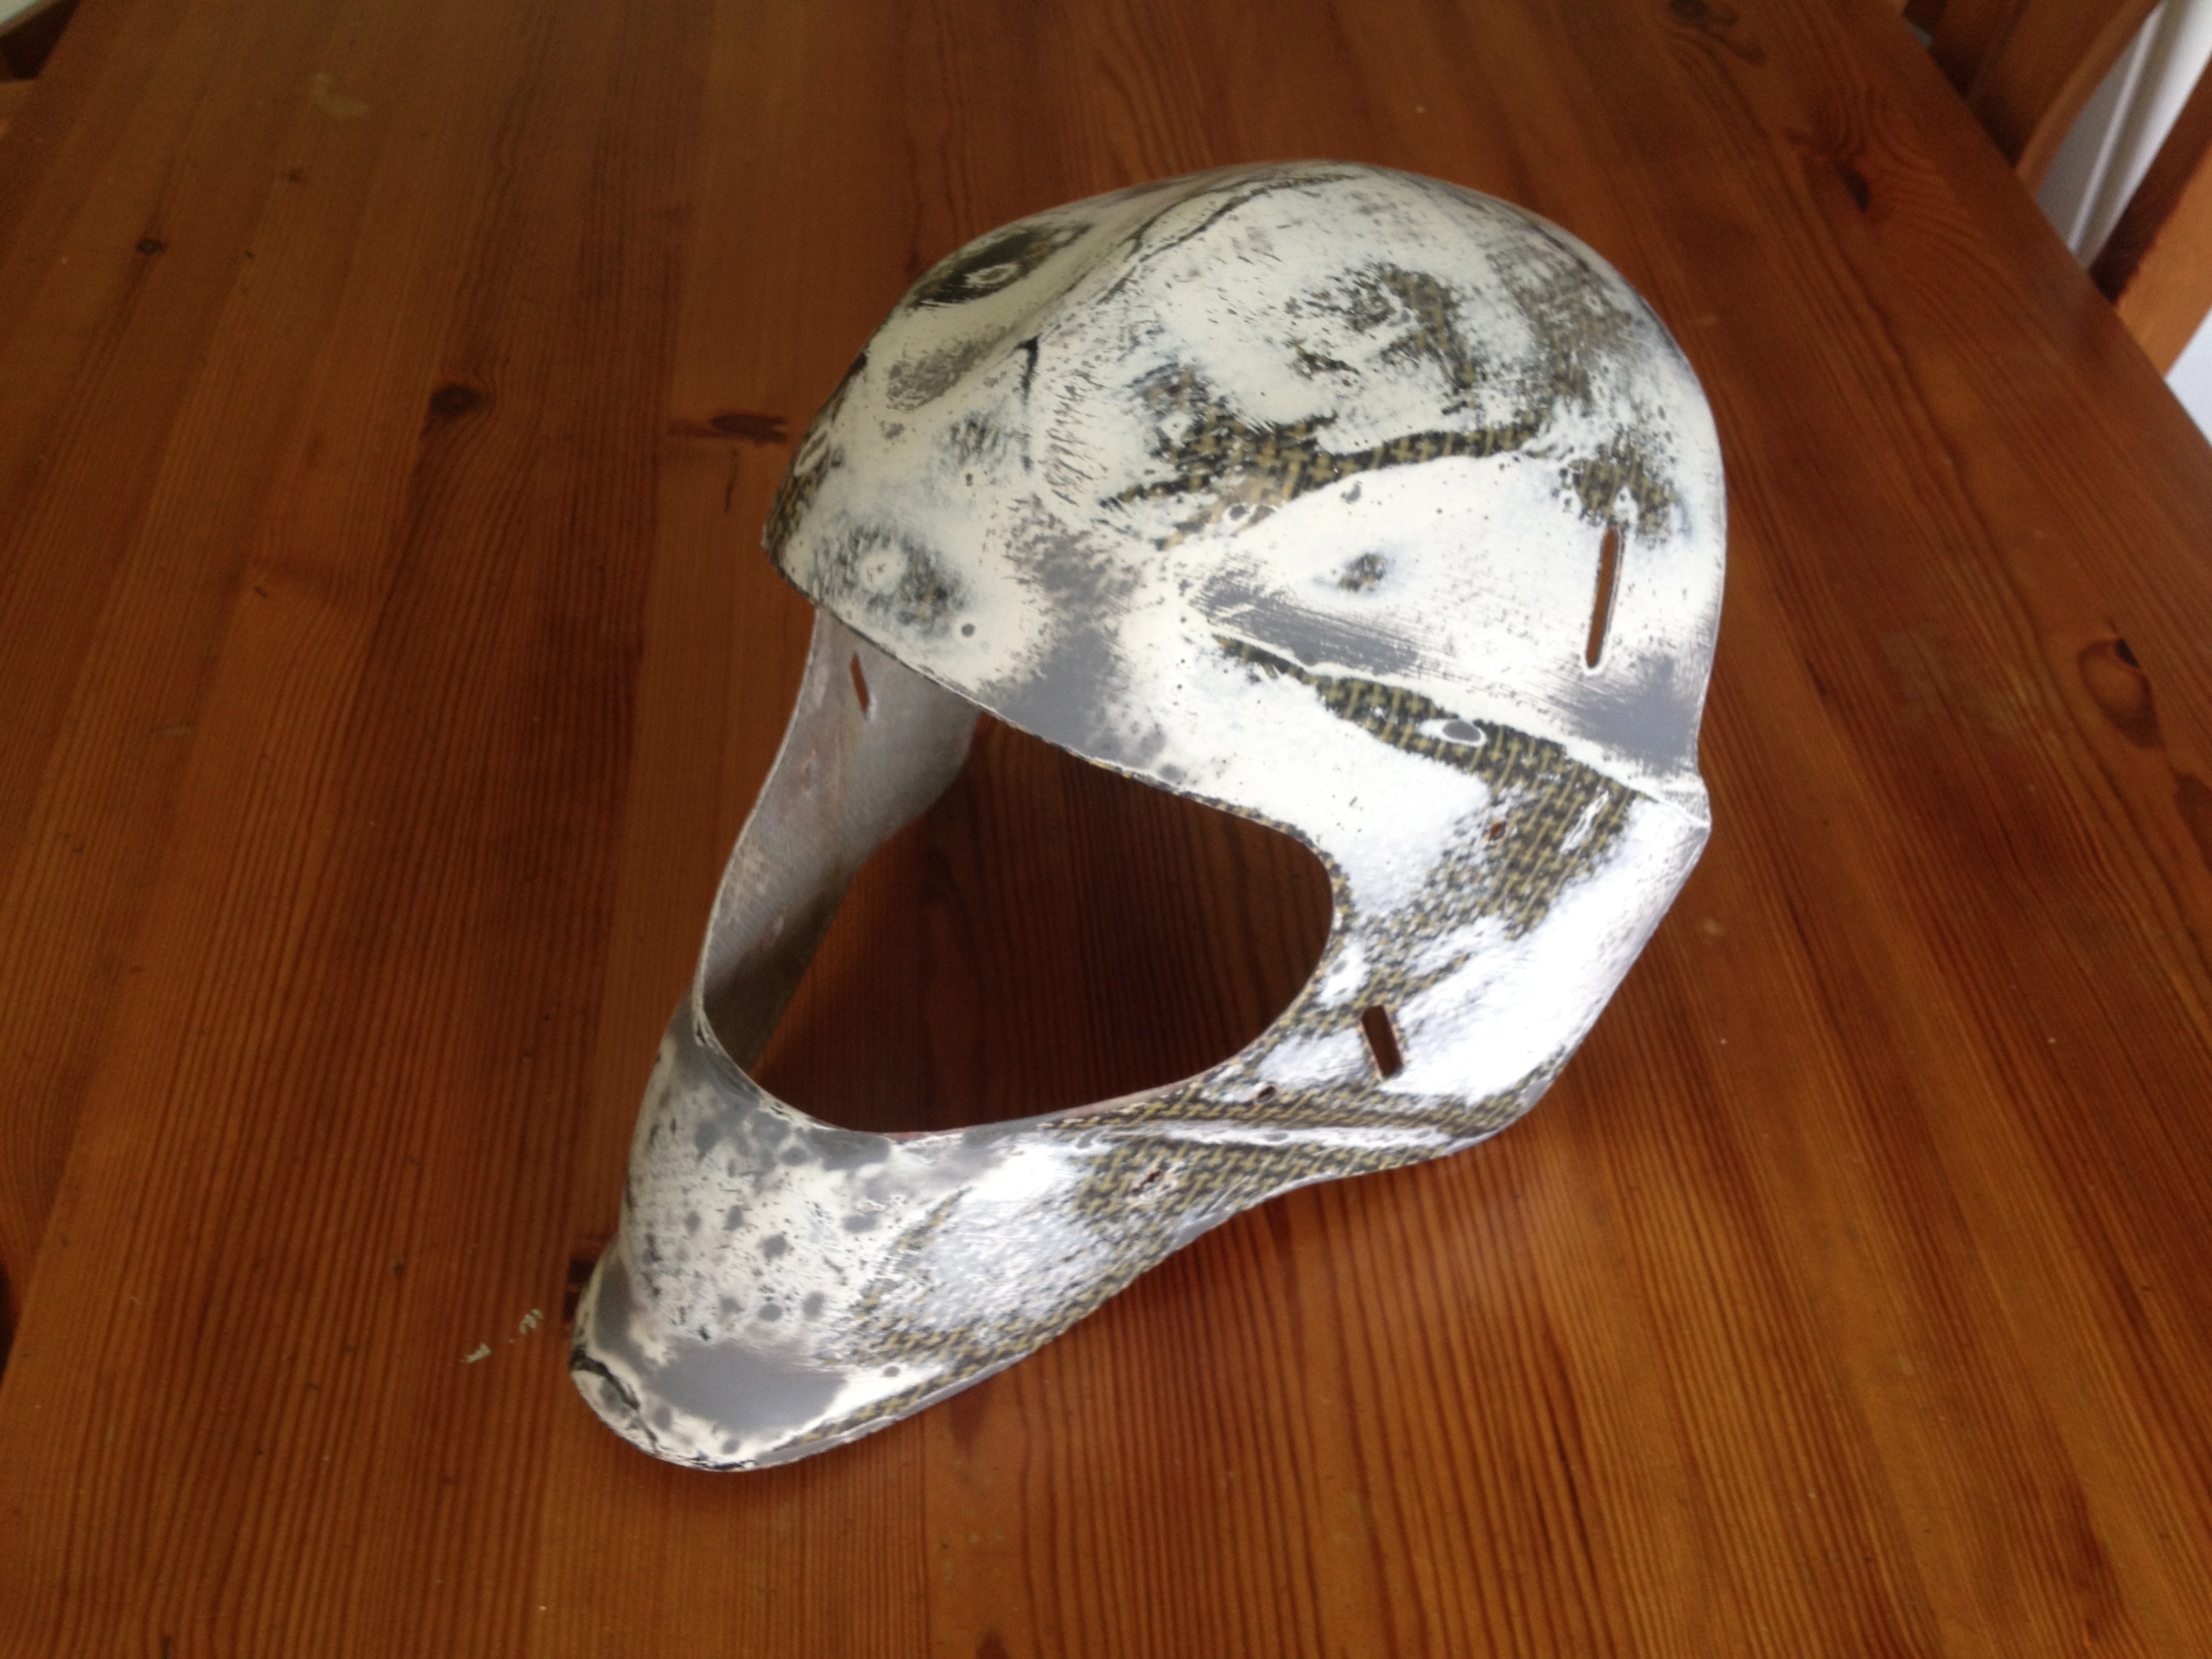
Start to sand the surface of the helmet down using the 120 grade sandpaper. If in doubt, use a finer grade of paper, you can always sand more material away if needed, but you can’t replace it once its sanded away. I used an electric sheet sander for the initial run through, to take the majority of the old clear coat and paint off, then I used a sanding sponge to take the rest of the surface down to Carbon Kevlar weave. The electric sander is good for the flat surfaces of the helmet, but is terrible for the curves and recesses, which is why either a sanding sponge or just plain old sandpaper is good for this process. After this, go over the helmet with the 400 grade wet and dry for a slightly smoother surface.
The pictures below show the helmet after the run through with the sheet sander, the sand paper and the wet and dry respectively. As you can see, the paint is removed on the flat surfaces, but is still present in the recesses and curves of the helmet. I ended up not sanding the remaining paint off, as I felt the surface was as uniform as I was going to get it.
Step 5 – Surface Preparation
Take the methylated spirits and wipe some over the helmet with the clean rag. You can also use a specialised degreasing product, but meths works just fine. This will clean and prepare the surface for the undercoat.
At this point you should also check the helmet carefully for any marks, imperfections, dents, cracks, or parts that will create a non-uniform surface. If you have none of these, you can move on to the next step which is applying the undercoat.
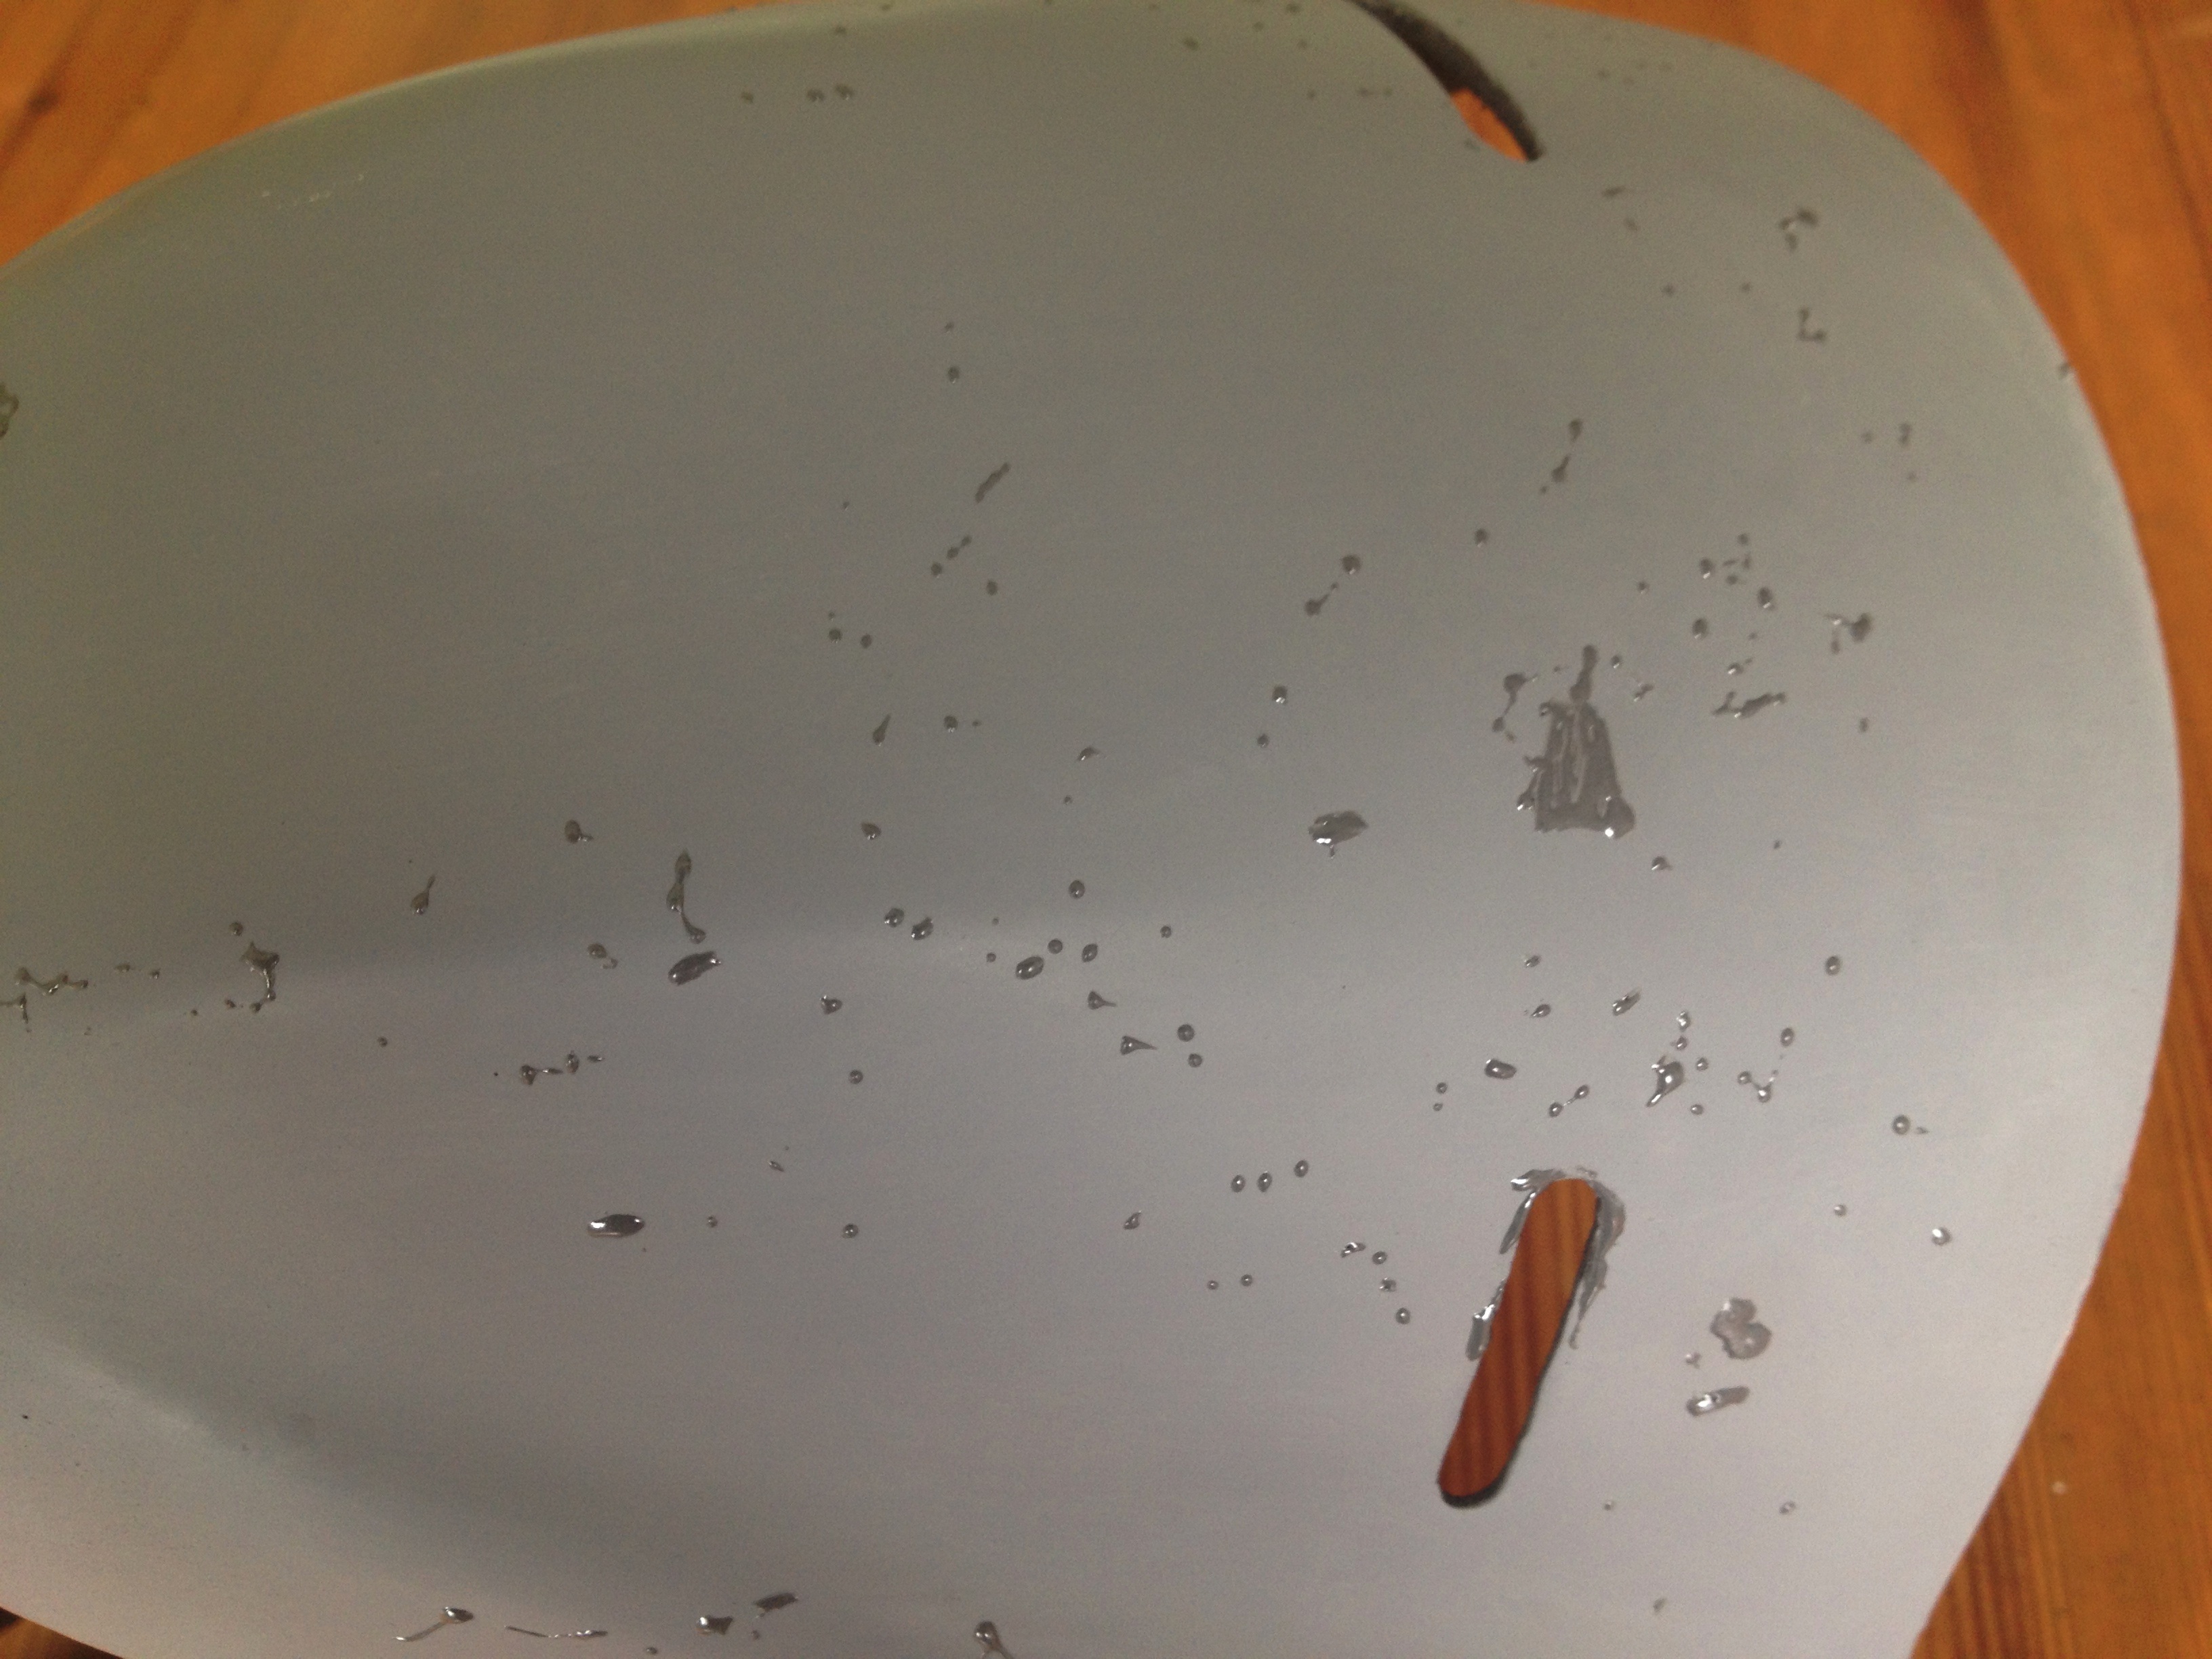
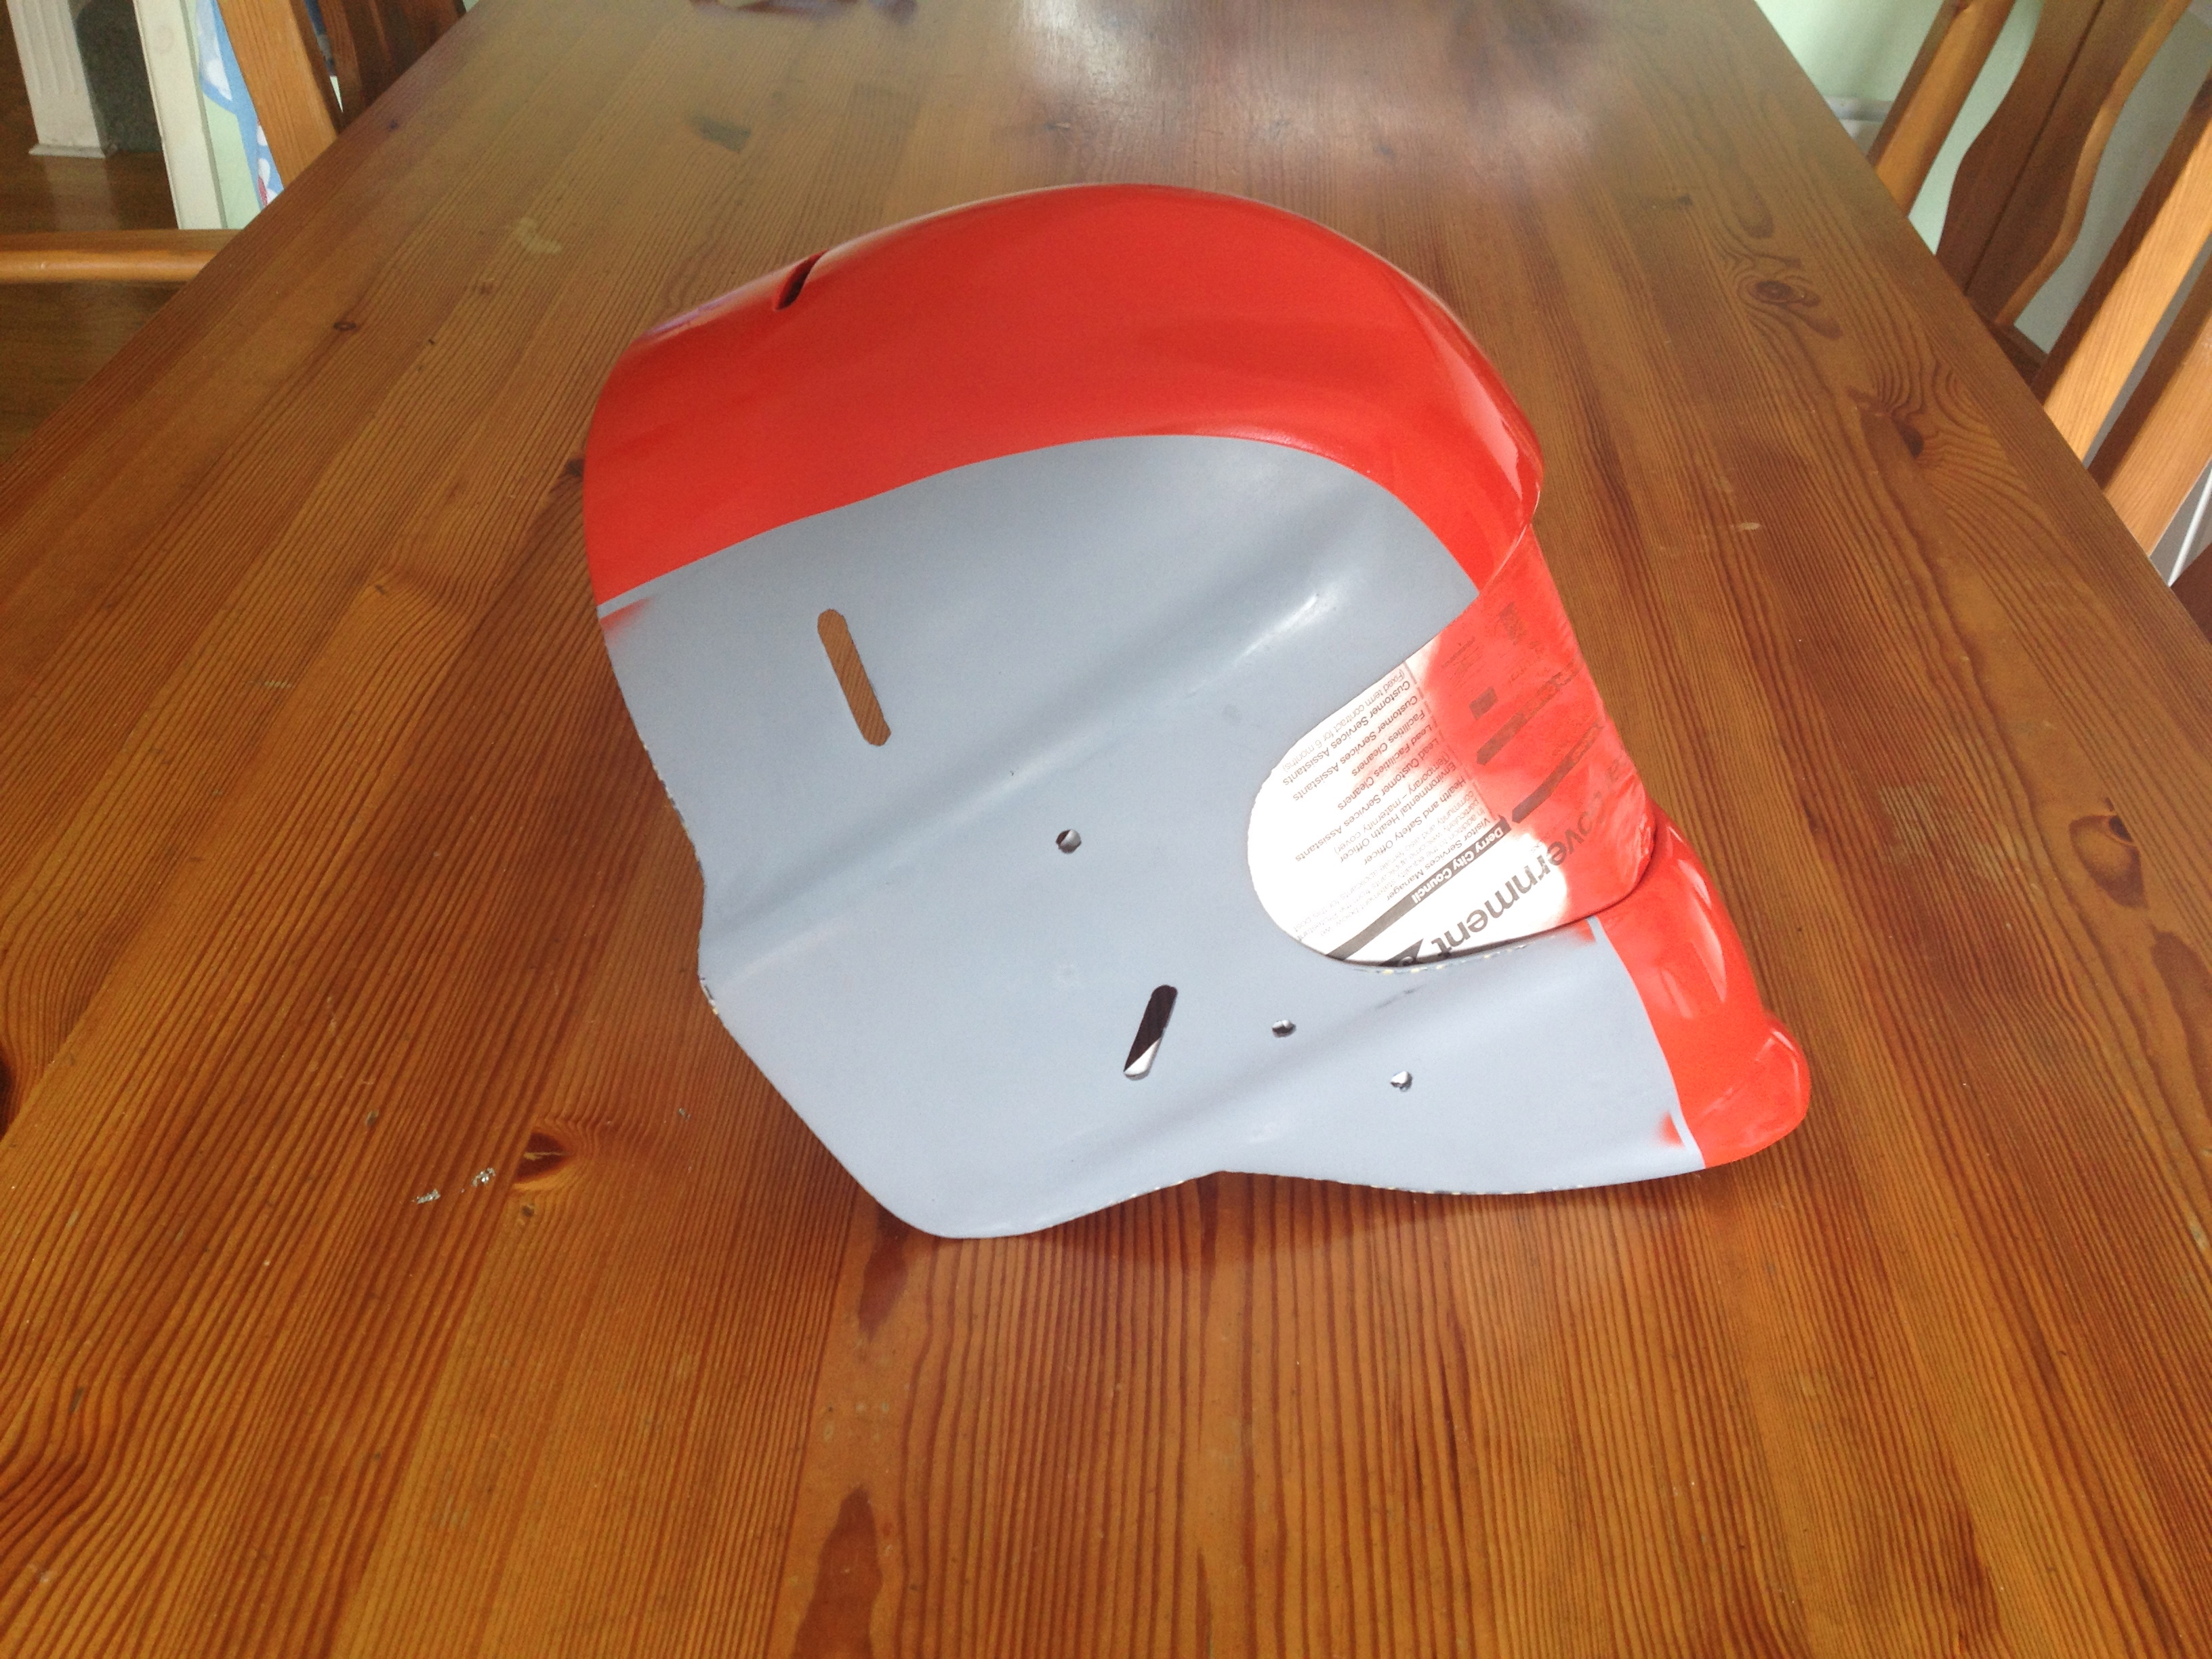
To address the imperfections, I sprayed a thin coat of spare white paint to help highlight the imperfections, before filling the holes in with JB Weld. I then left it to cure, before sanding the JB Weld down with the wetted 600 grade wet and dry. The thin white coat was to create a large differentiation between the filler material and the helmet, as well as to give some extra protection when sanding the filler material off the helmet with the wet and dry.
Repeat this step as much as necessary. I had to do it twice as I missed some small chips after the first pass with the filler. I ran out of the white paint, so I used a spare can of grey for the second run, which is shown below.
Below are both steps, after applying two separate passes of the filler material


Step 6 – Undercoat
The general procedure for spray painting is to spray a large number of thin coats, using the wet and dry in between coats. This is the best procedure to follow for the best finish, i.e. to avoid drips and to provide a smooth finish. Take the meths and degrease the helmet surface. After this is dry, gently and carefully go over the surface with the 120 grade wet and dry. Then take the spray undercoat and shake for the recommended time, usually 2/3 minutes. Spray the work from the recommended distance, remembering to spray evenly by starting and finishing off the helmet.

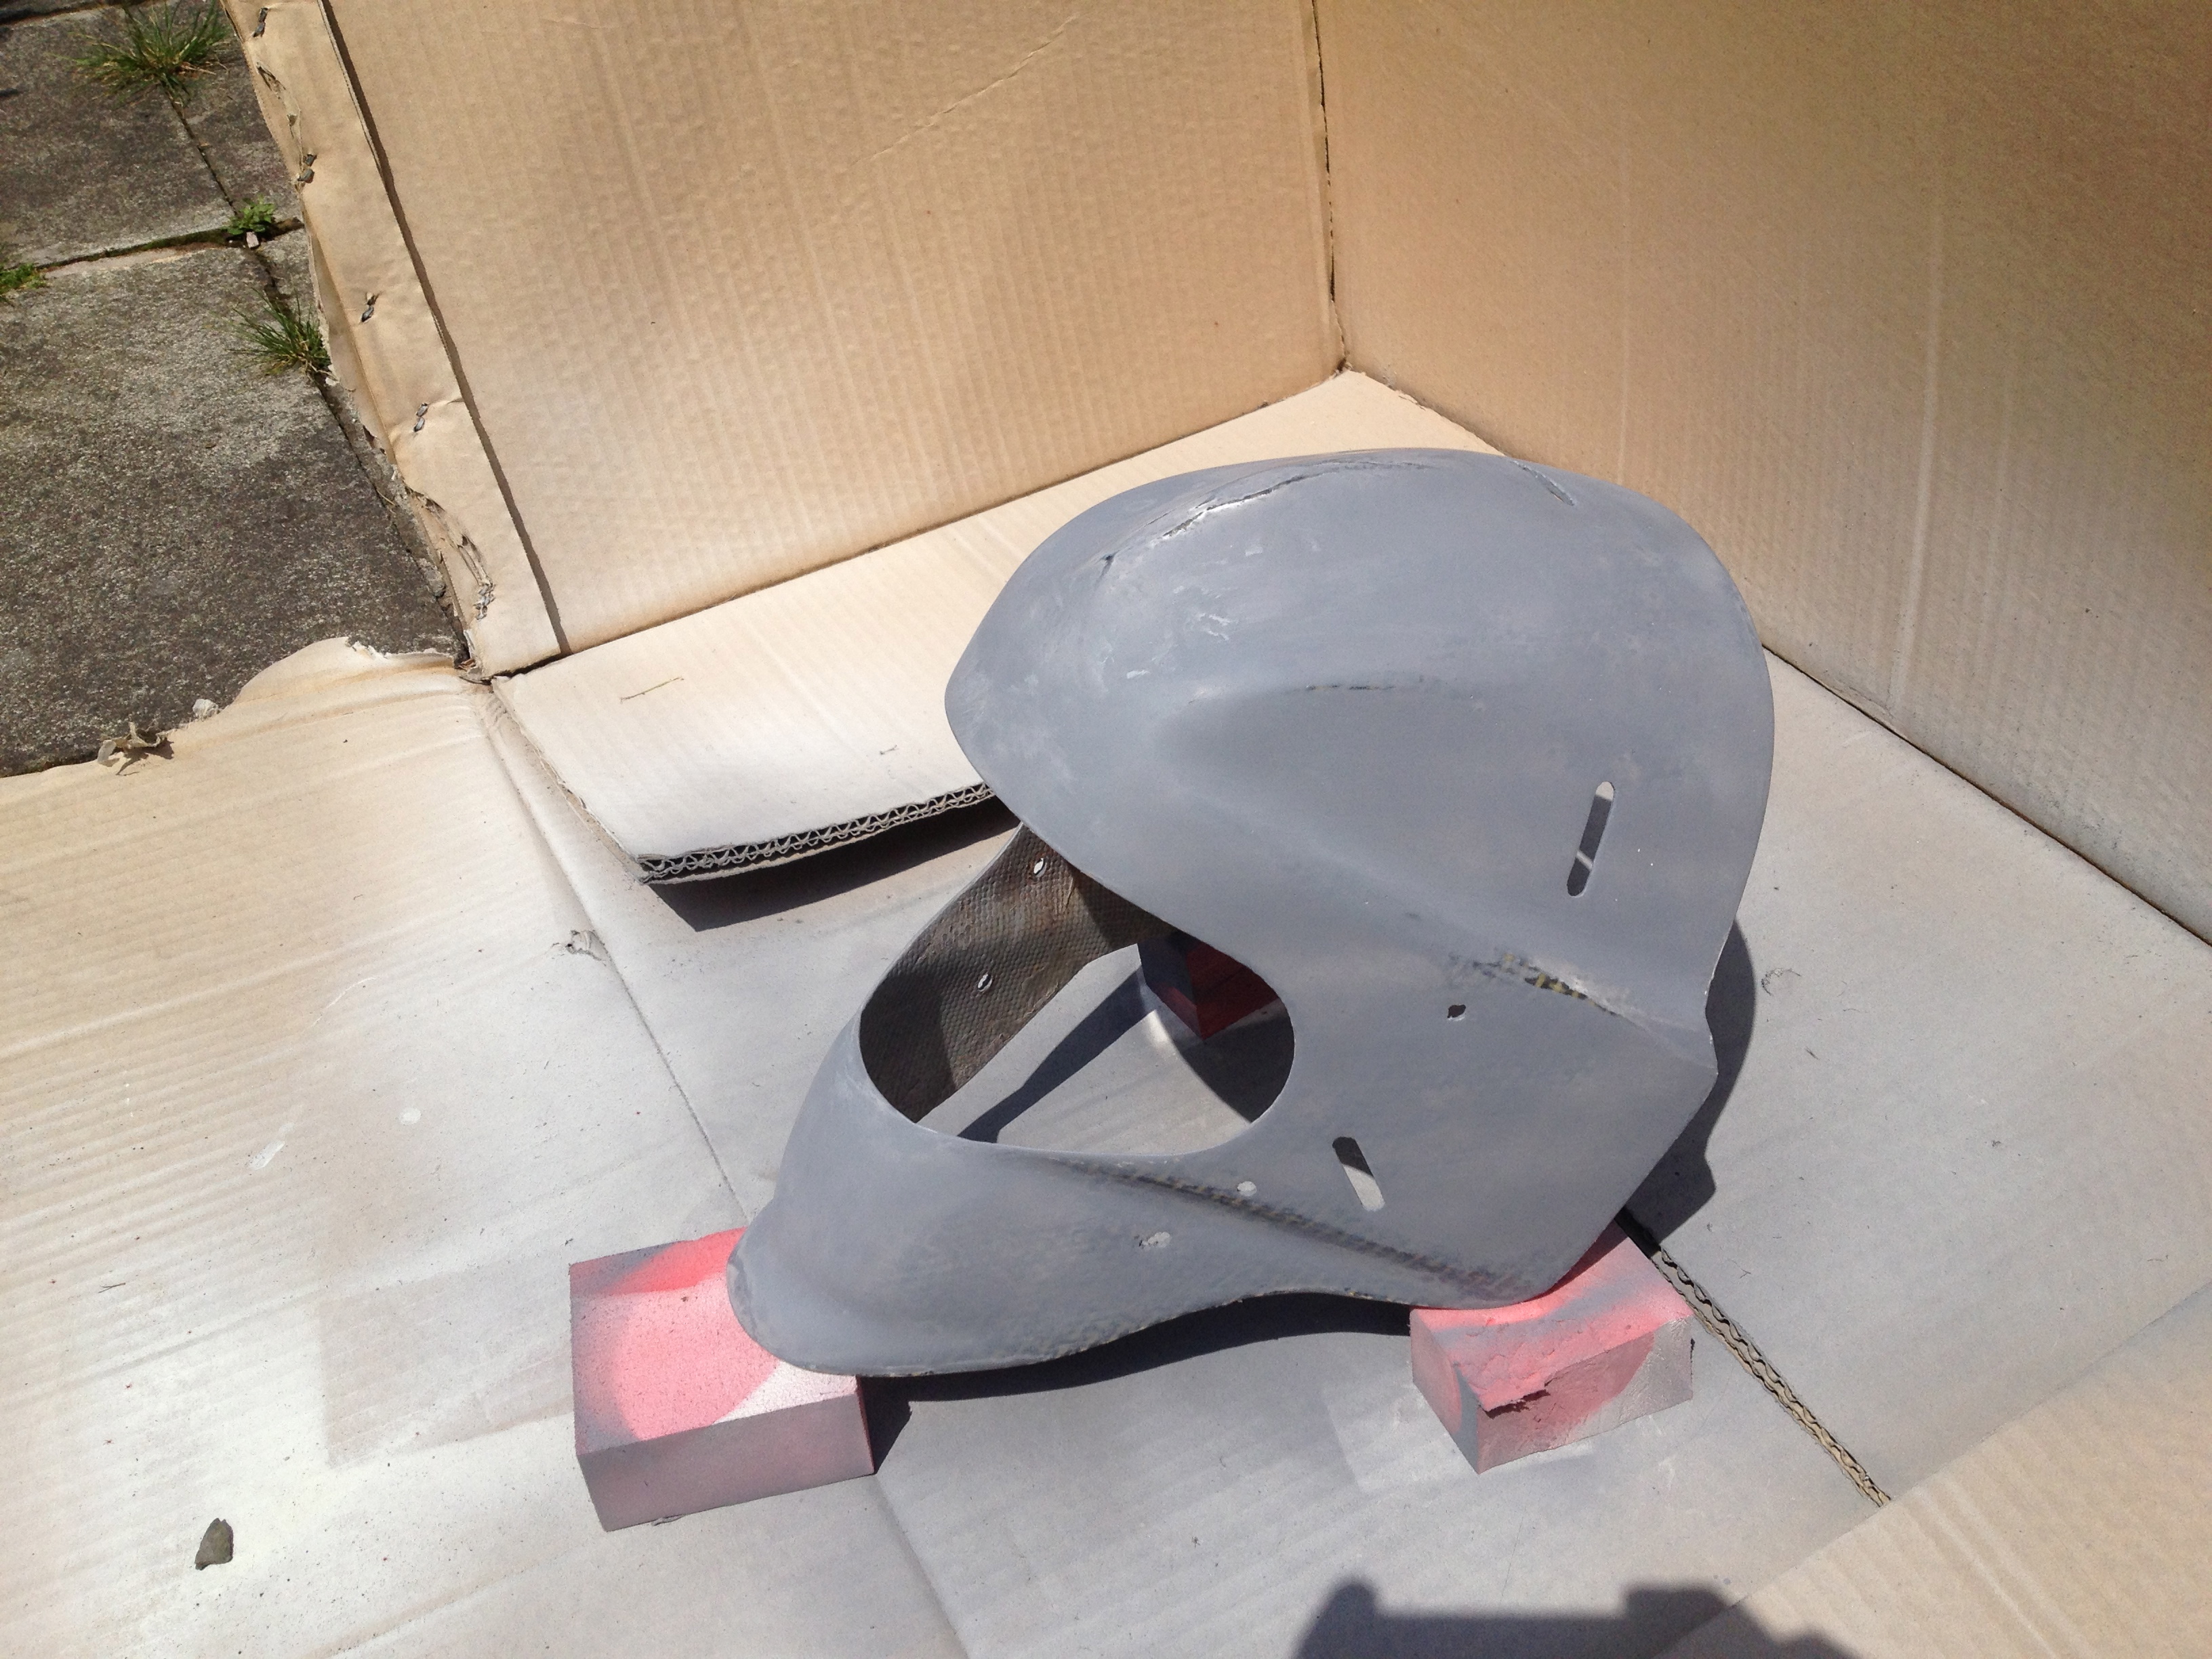
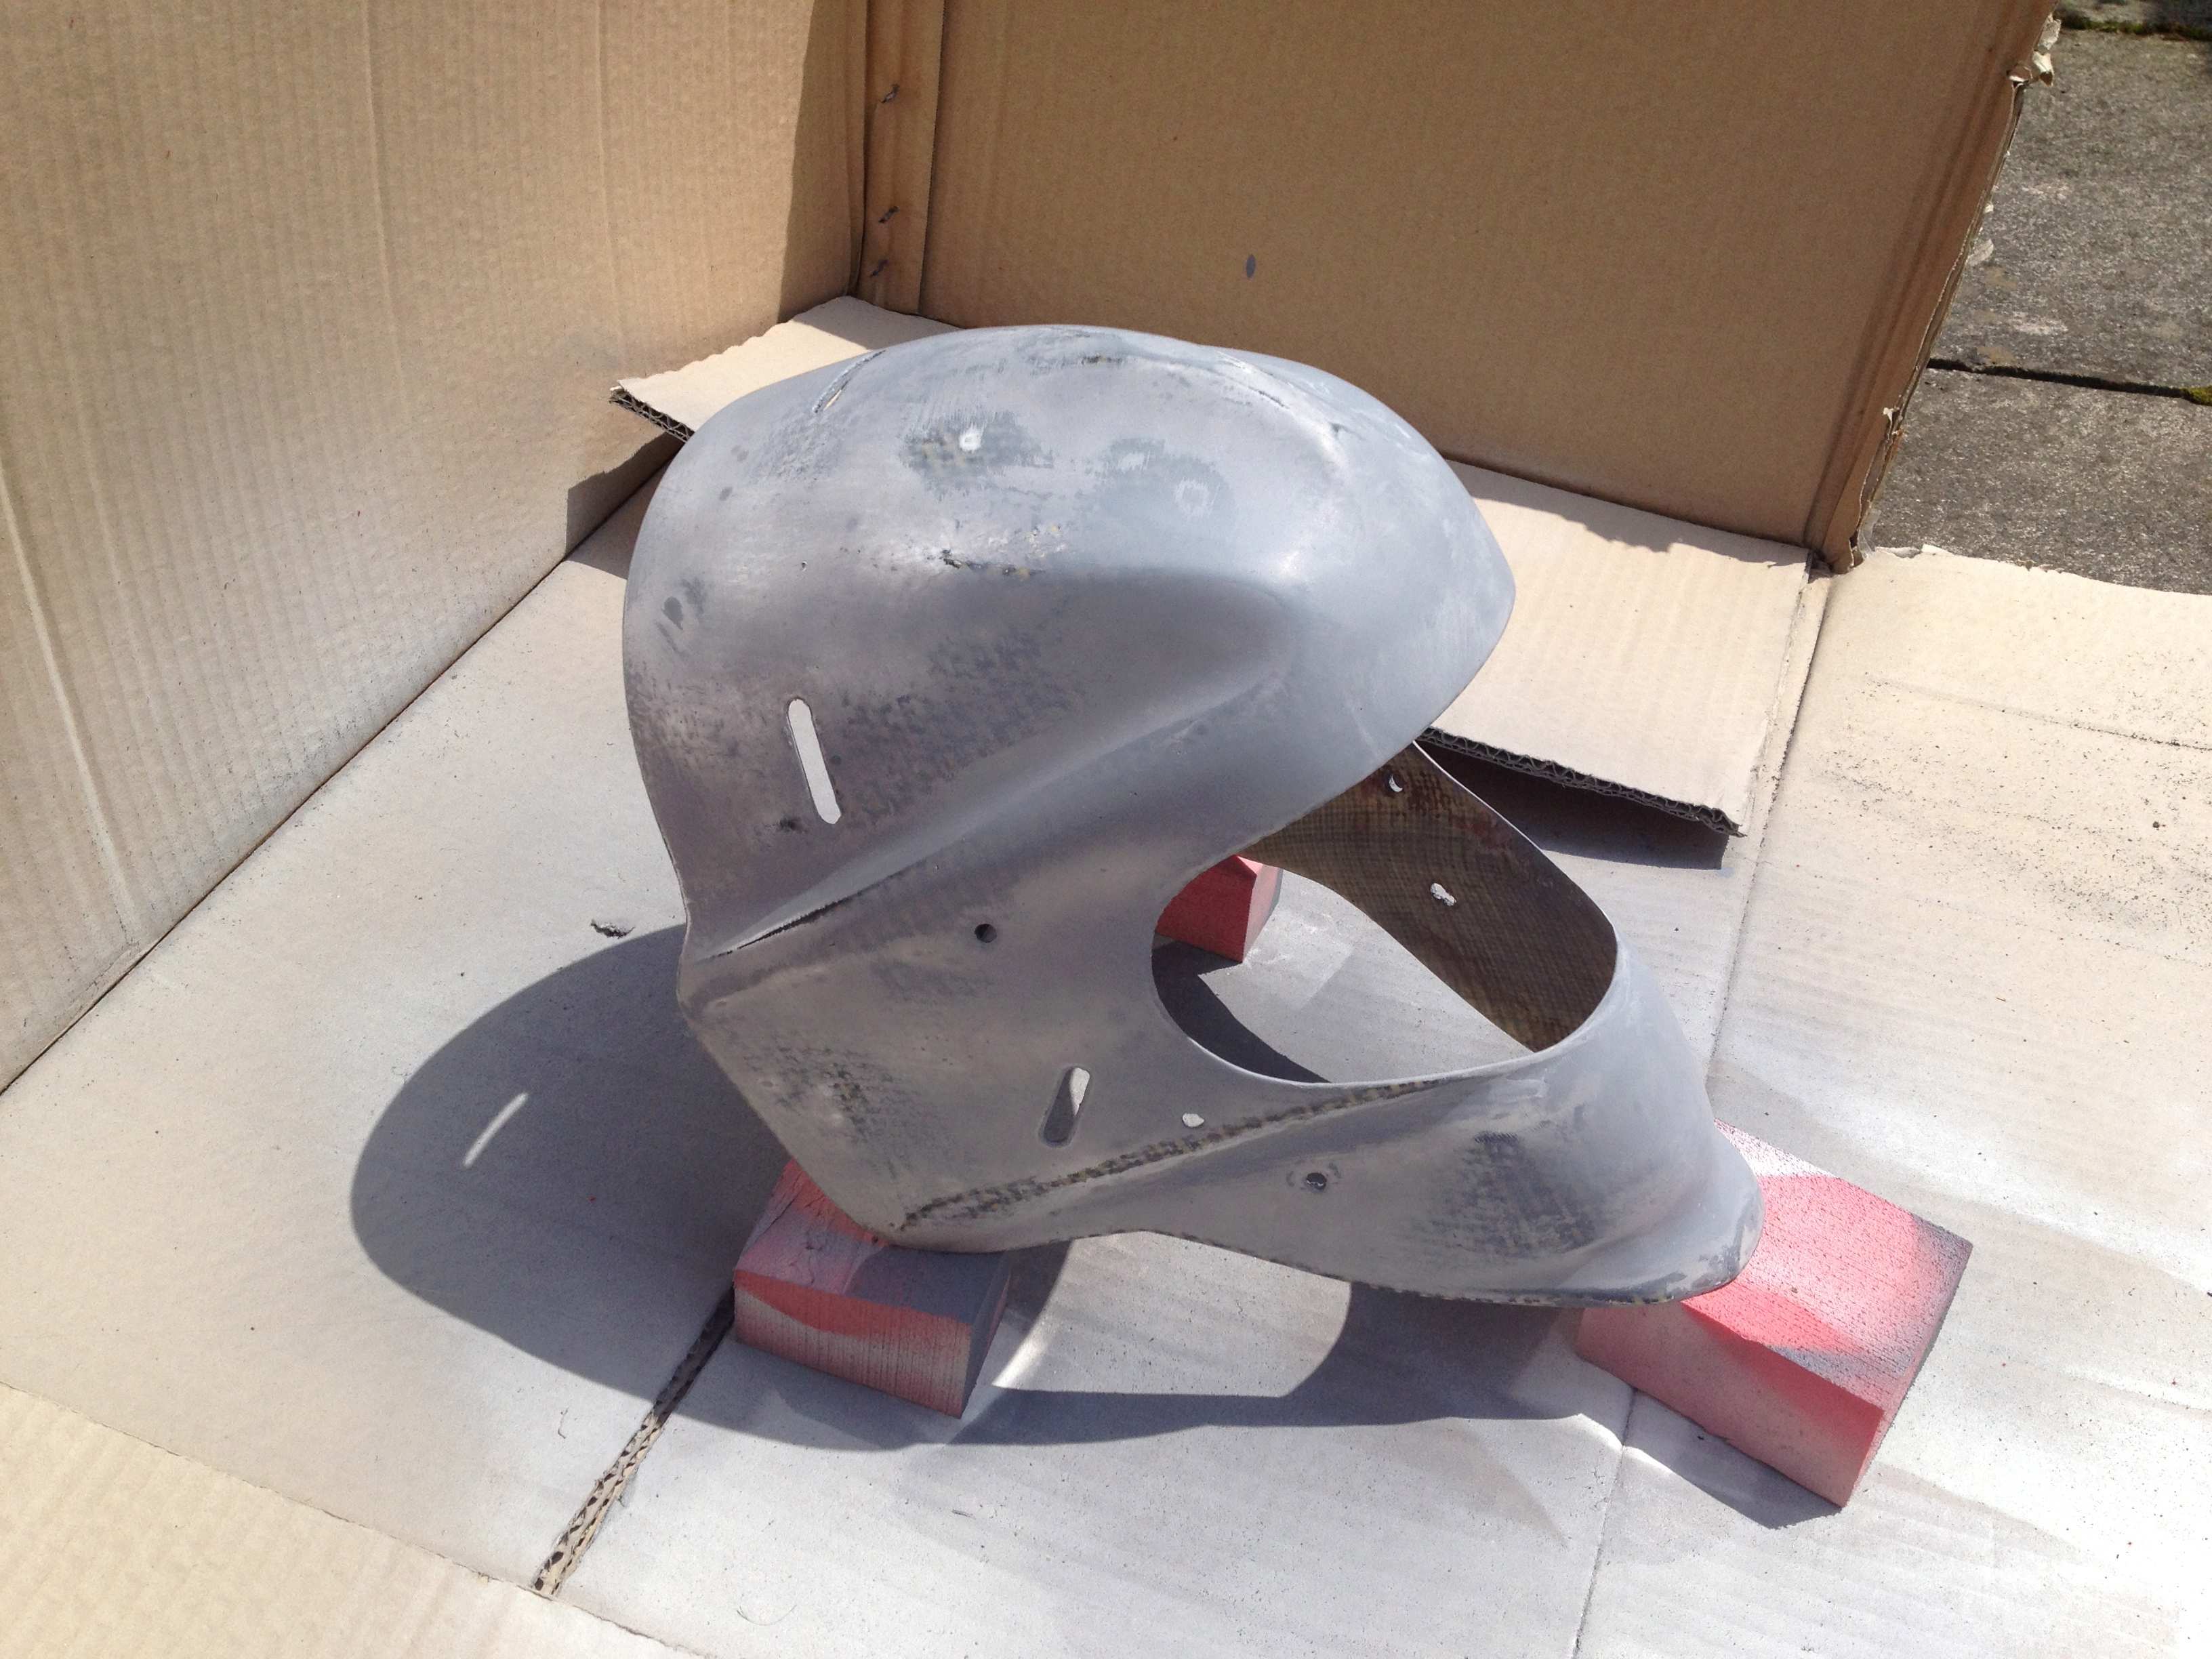
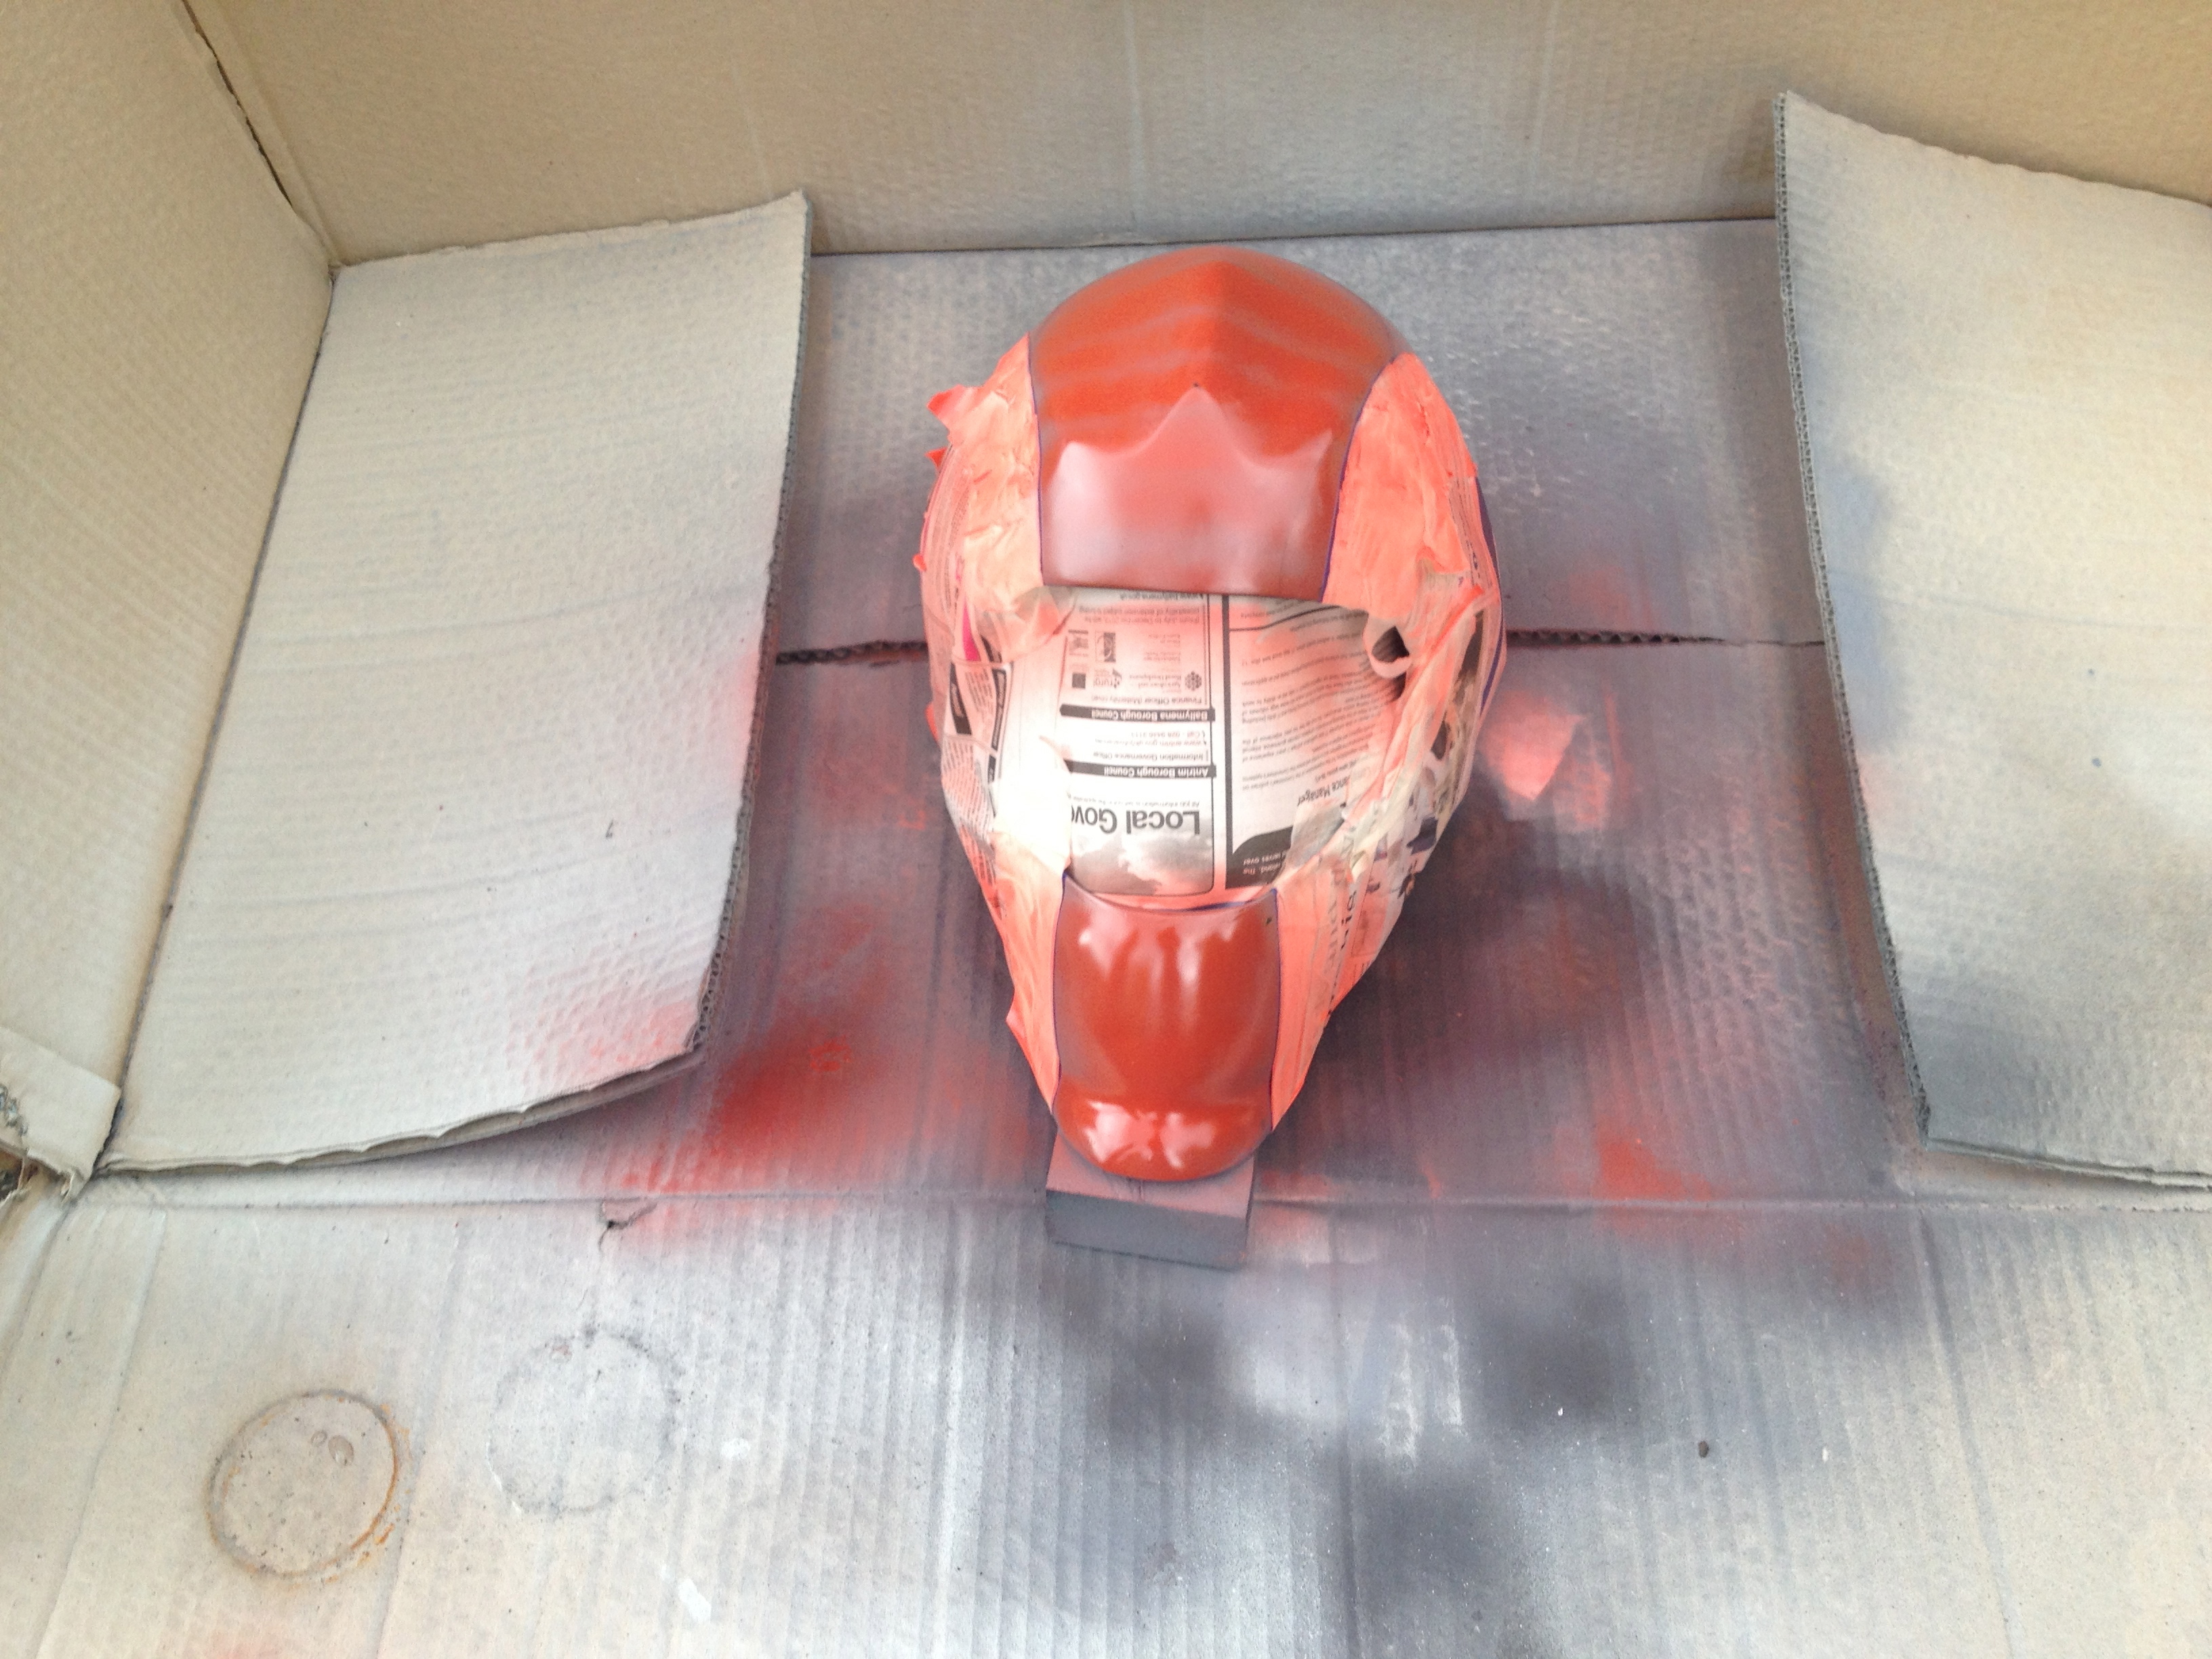
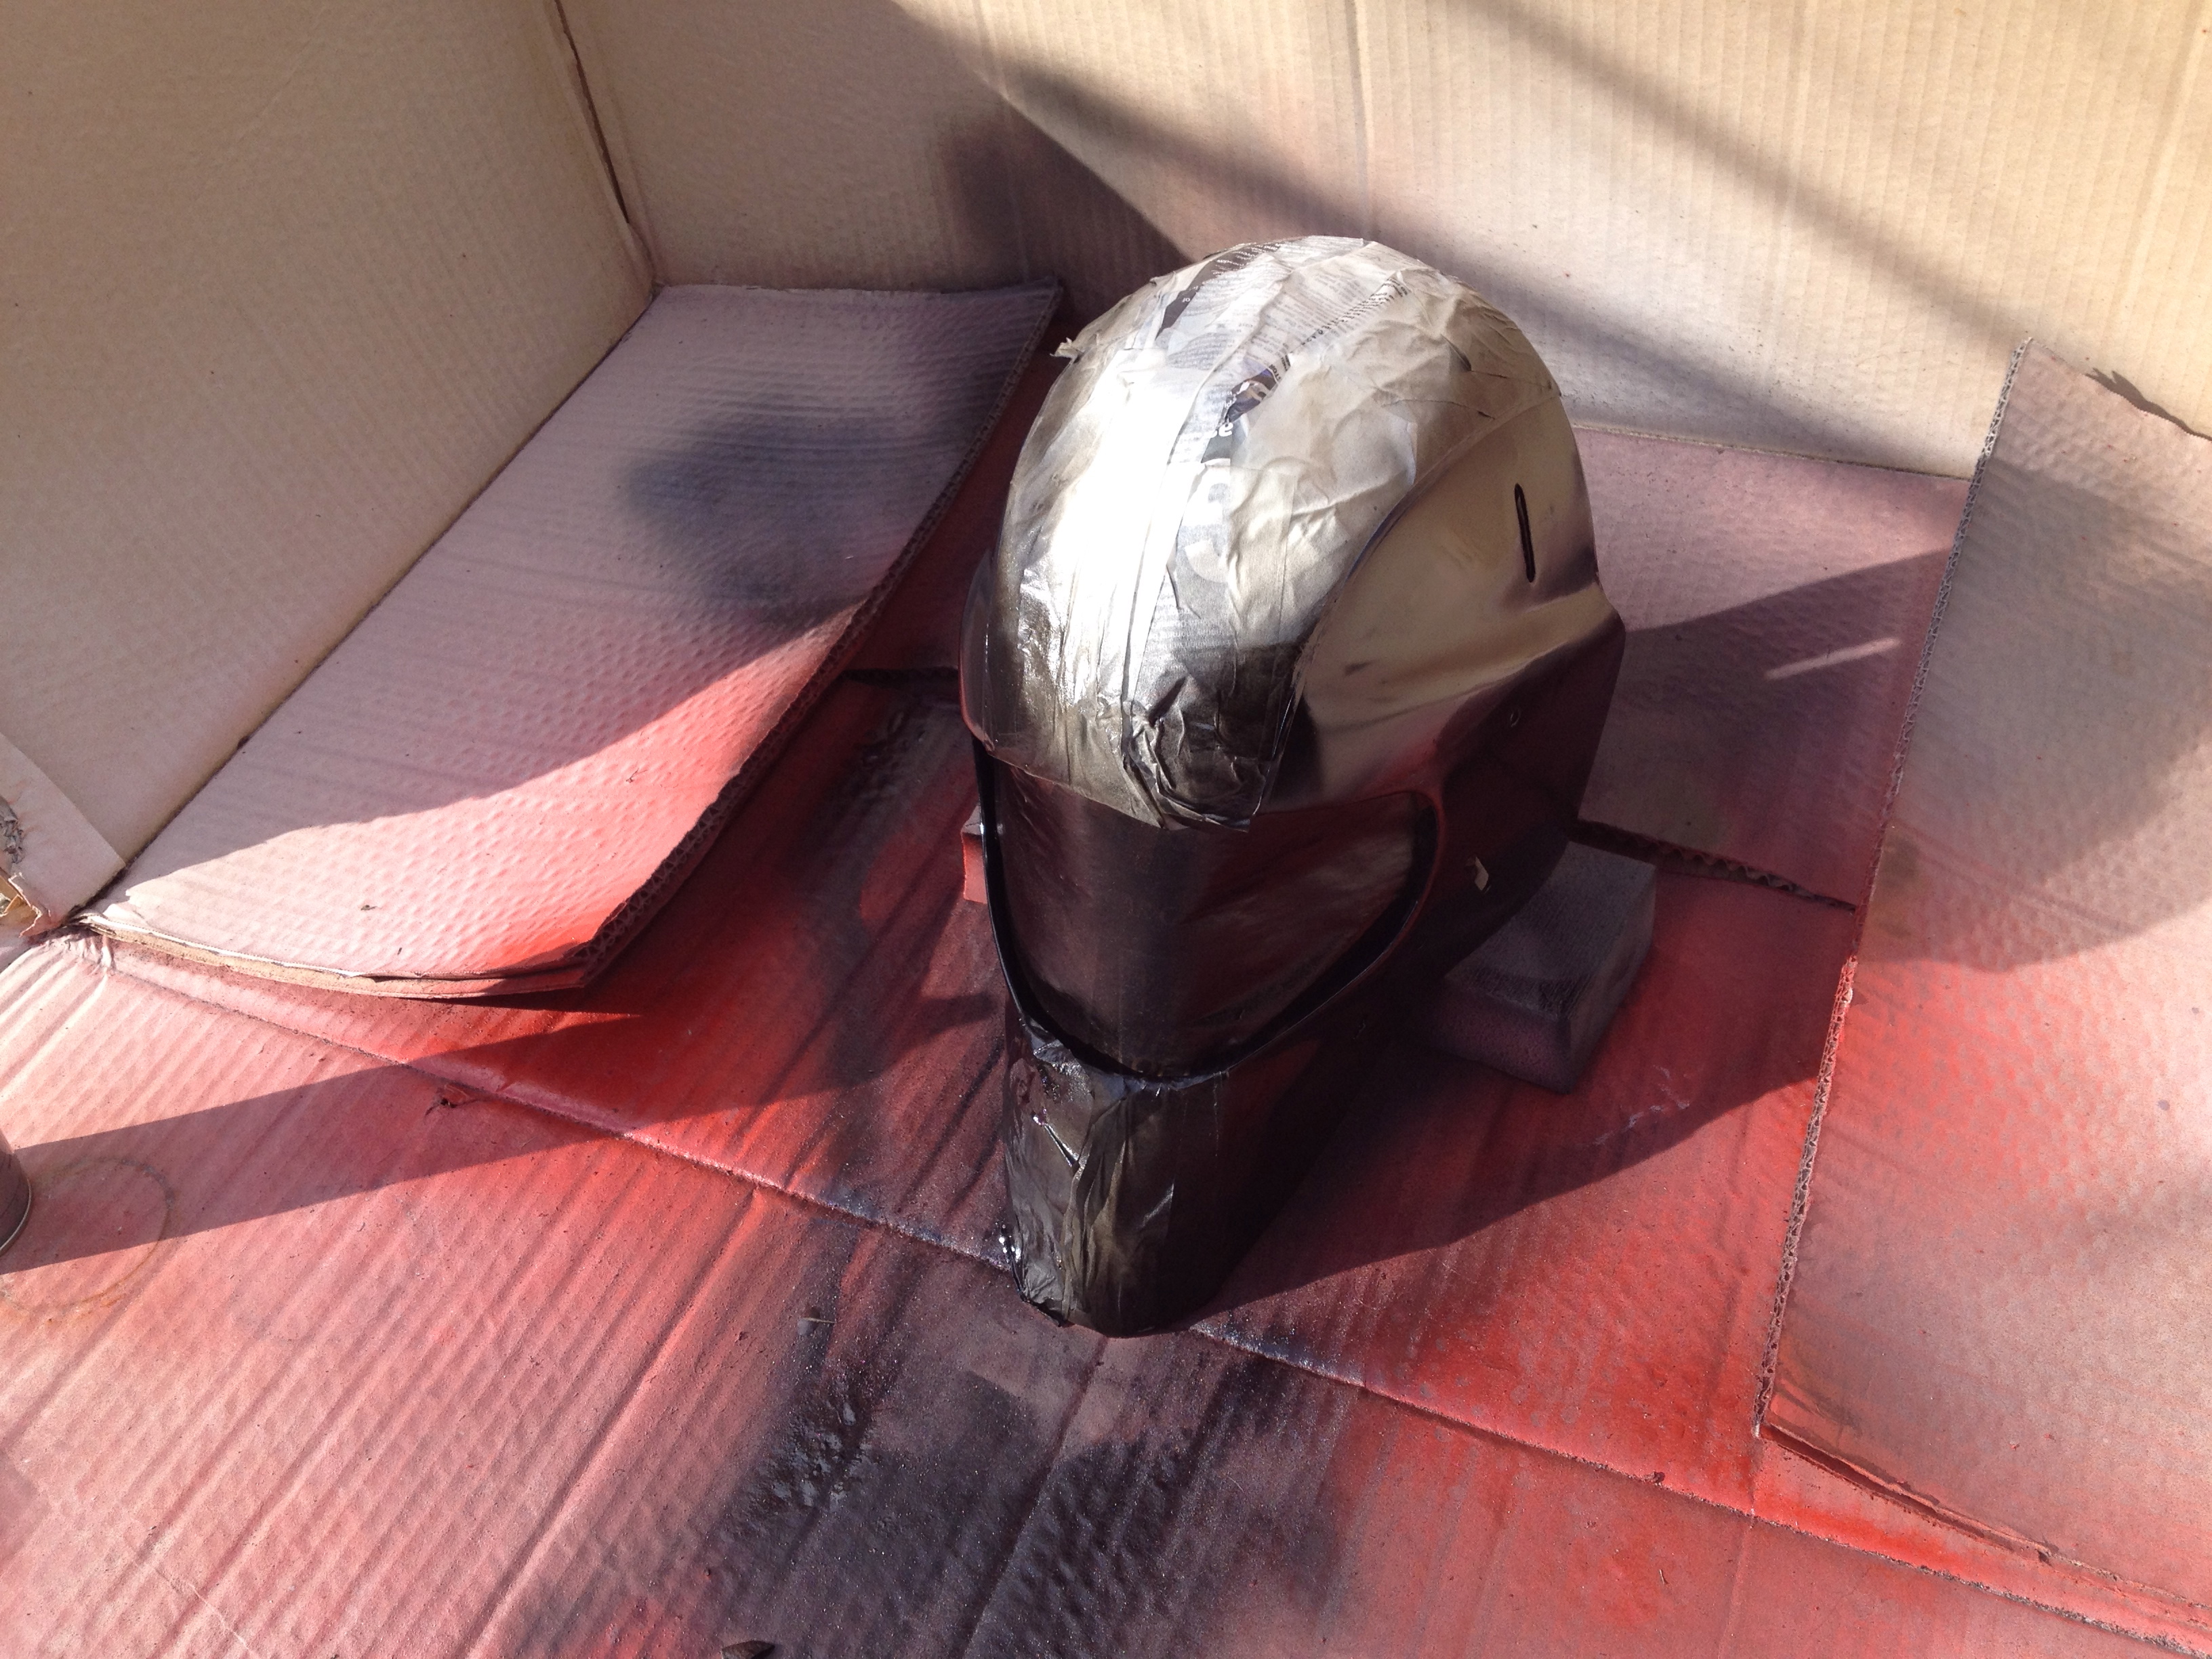
Here is my set up. The helmet is propped on three corners by some pieces of foam. It is about an inch and a half to easily access the lower surface and to avoid the helmet becoming stuck to the cardboard.
Leave the paint to dry for the recommended time. I had a lucky couple of days where it was sunny, warm and dry, so I had about an hours turn around in between coats. After each coat is dry, take the 1200 grade wet and dry, wet it and sand down the surface until smooth. Repeat as required until the undercoat is uniform and smooth and ready for painting. I did as many coats as my spray can would allow, which was about 5.
I left the large grill hole of the helmet open, as after this, I applied one coat of undercoat and a quick black coat of spare plasti-kote to the inside of the helmet as well.
The pictures below show the helmet after the first coat. I didn’t take pictures after every coat, but needless to say the helmet was a lovely smooth solid grey at the end.
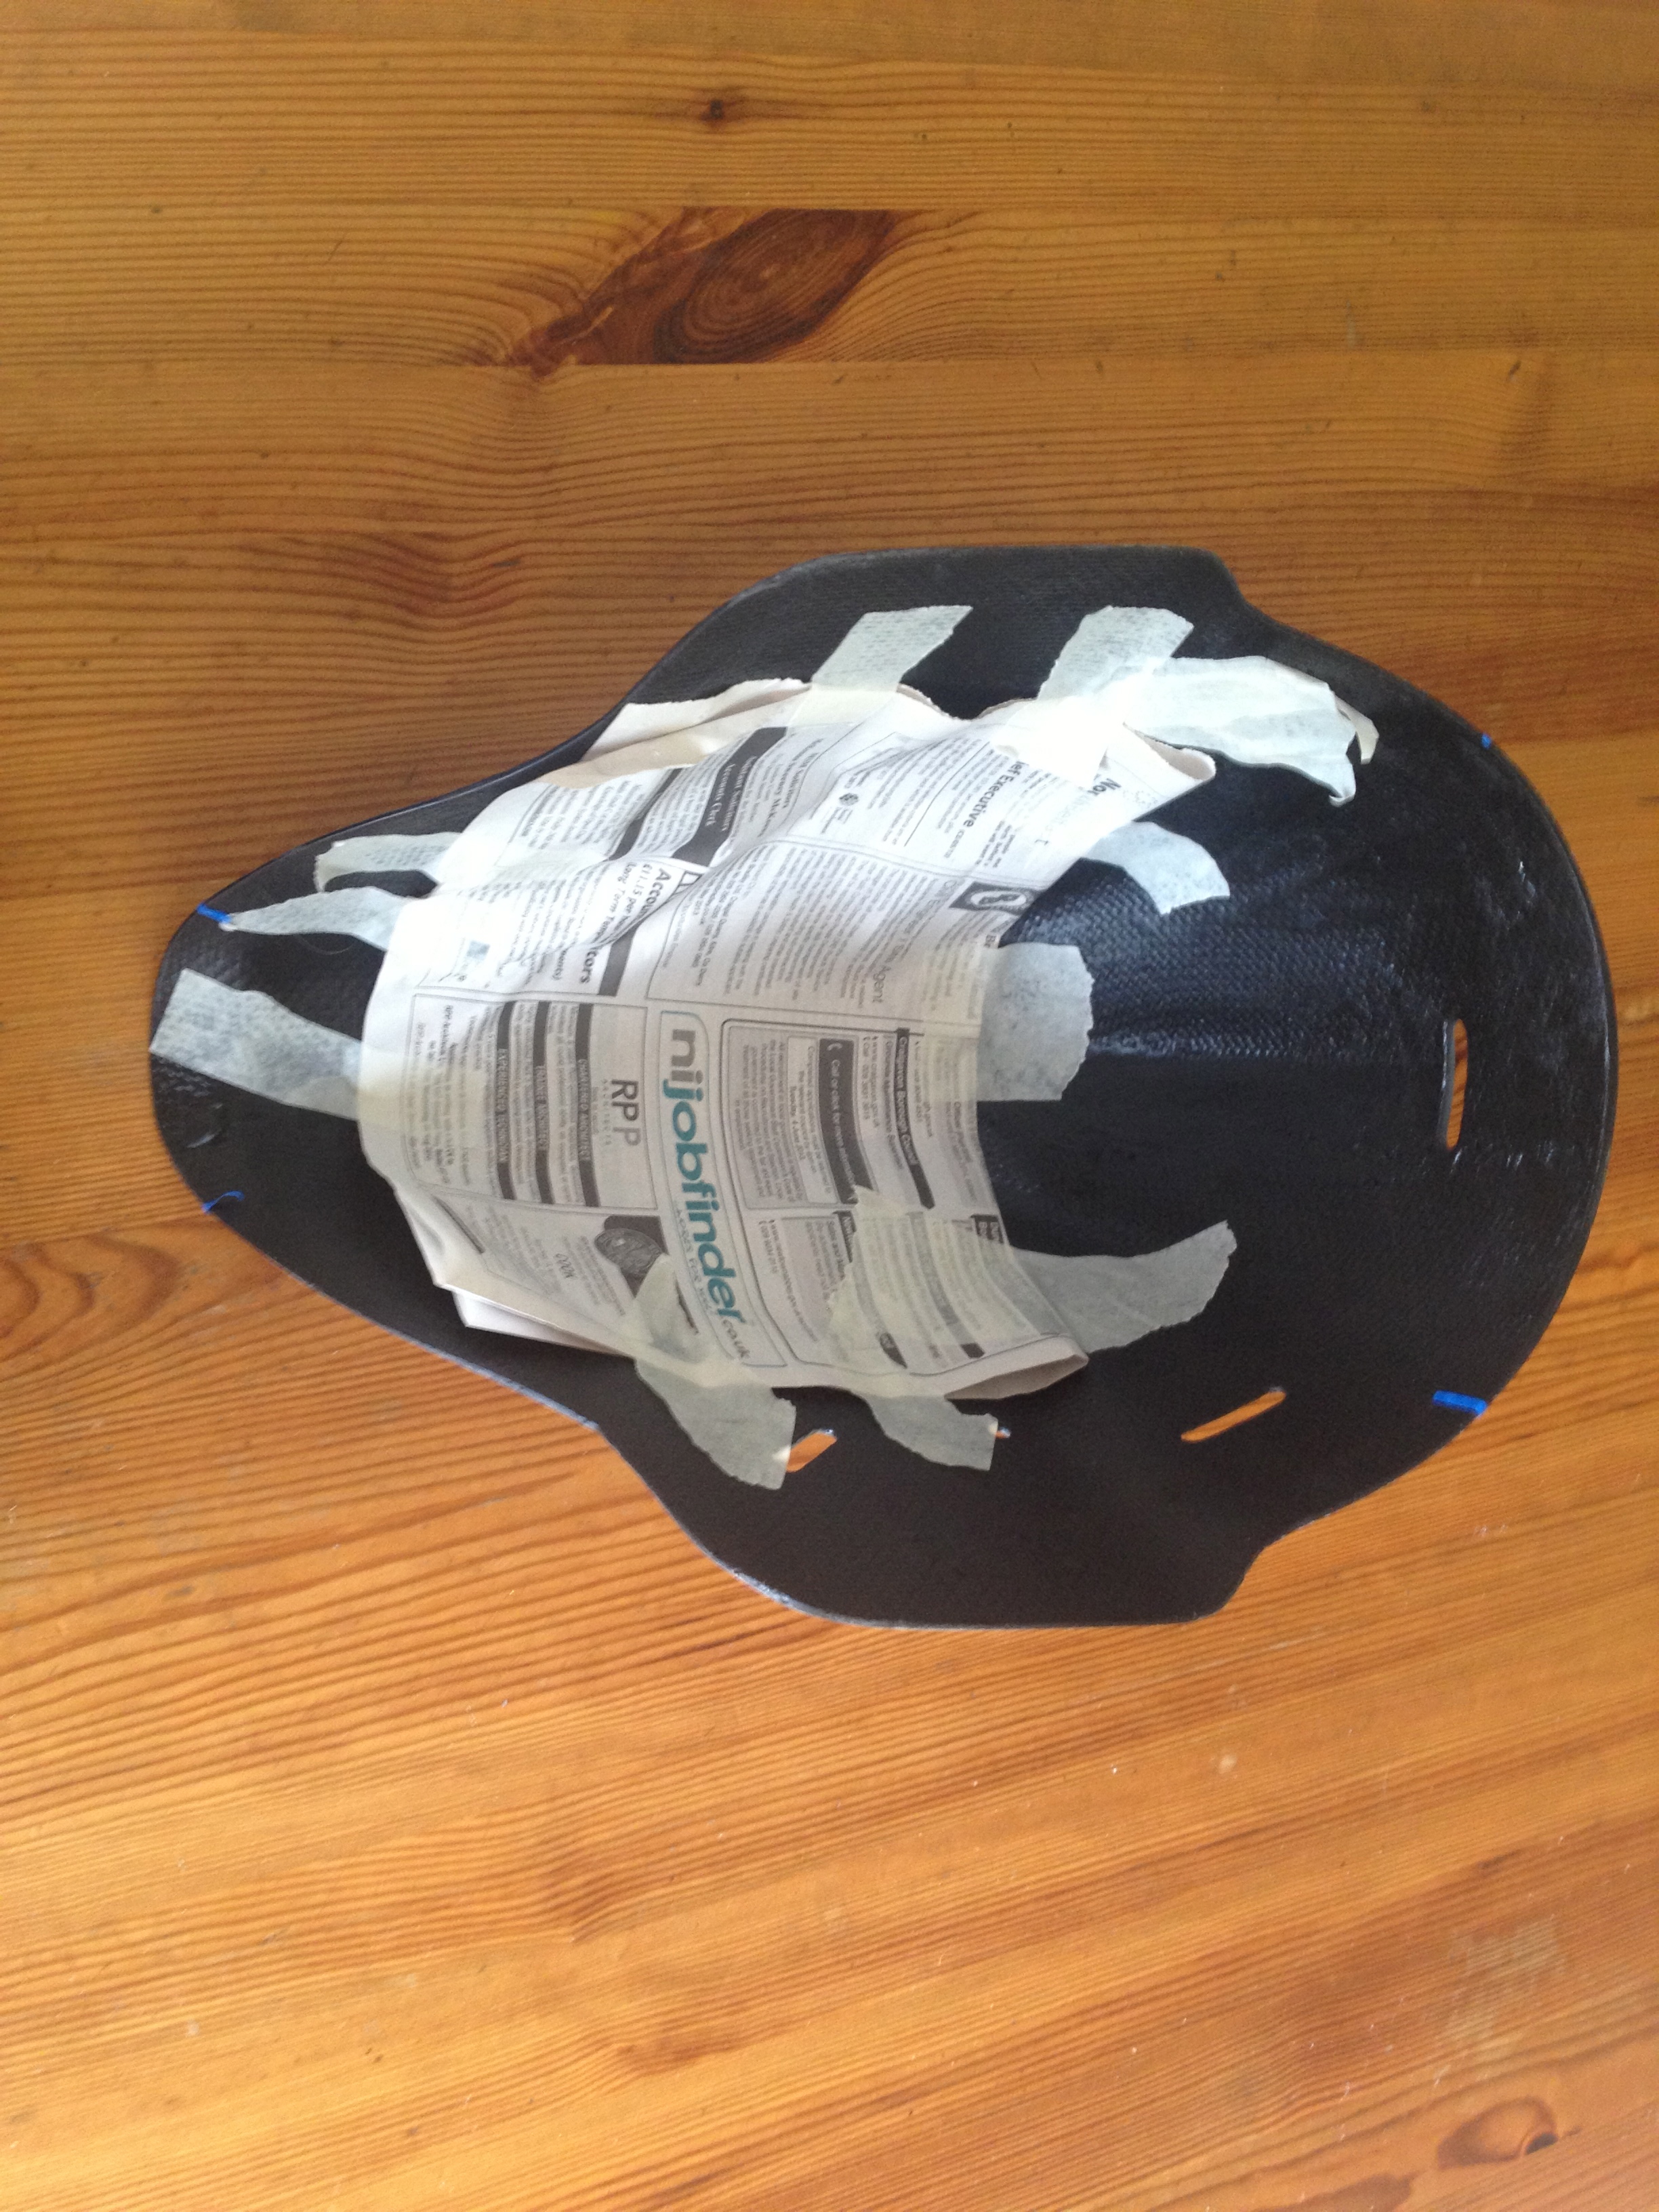
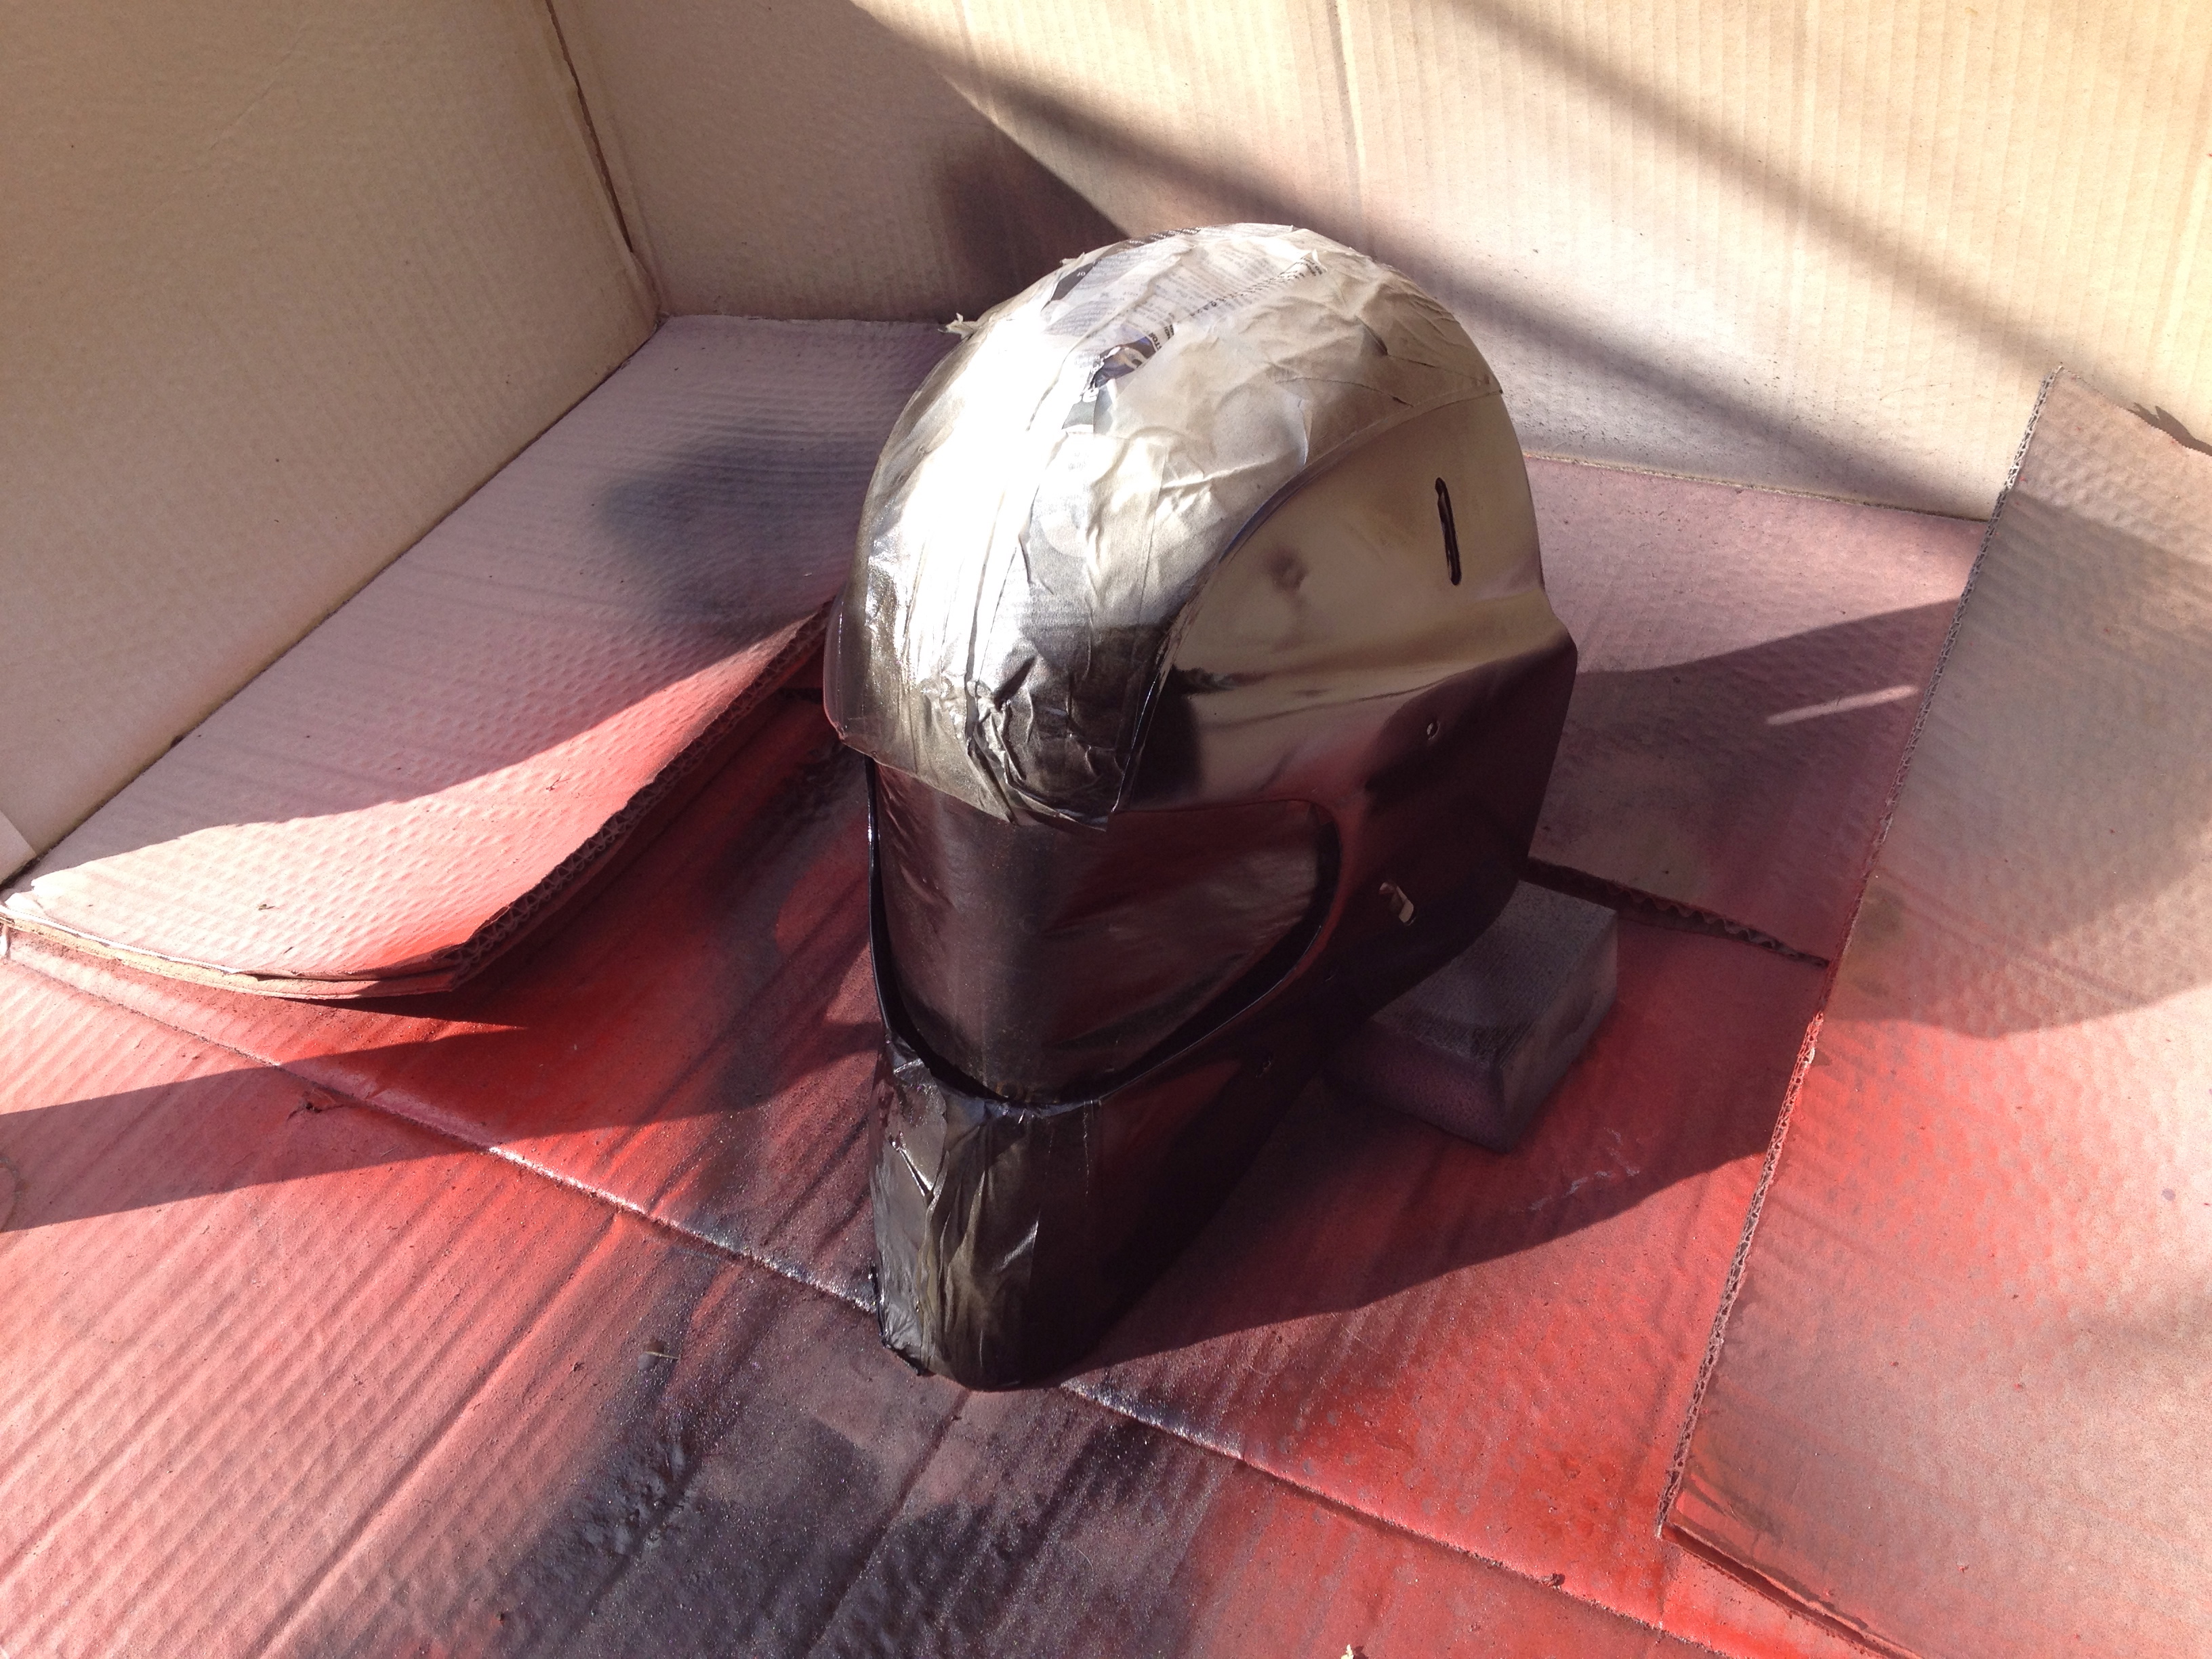
Step 7 – Masking and Preparation
At this point you should start to prepare and protect the helmet for painting. Use newspaper and masking tape to form a barrier along the inside of the helmets grill opening. Ensure that the newspaper is taut to the inside surface of the helmet, so no paint can get in. My helmet was pretty horrendously taped, but it did the job.
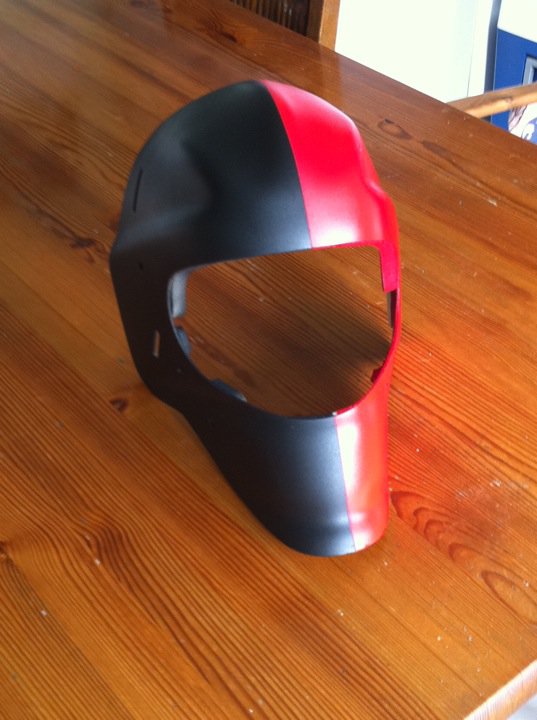
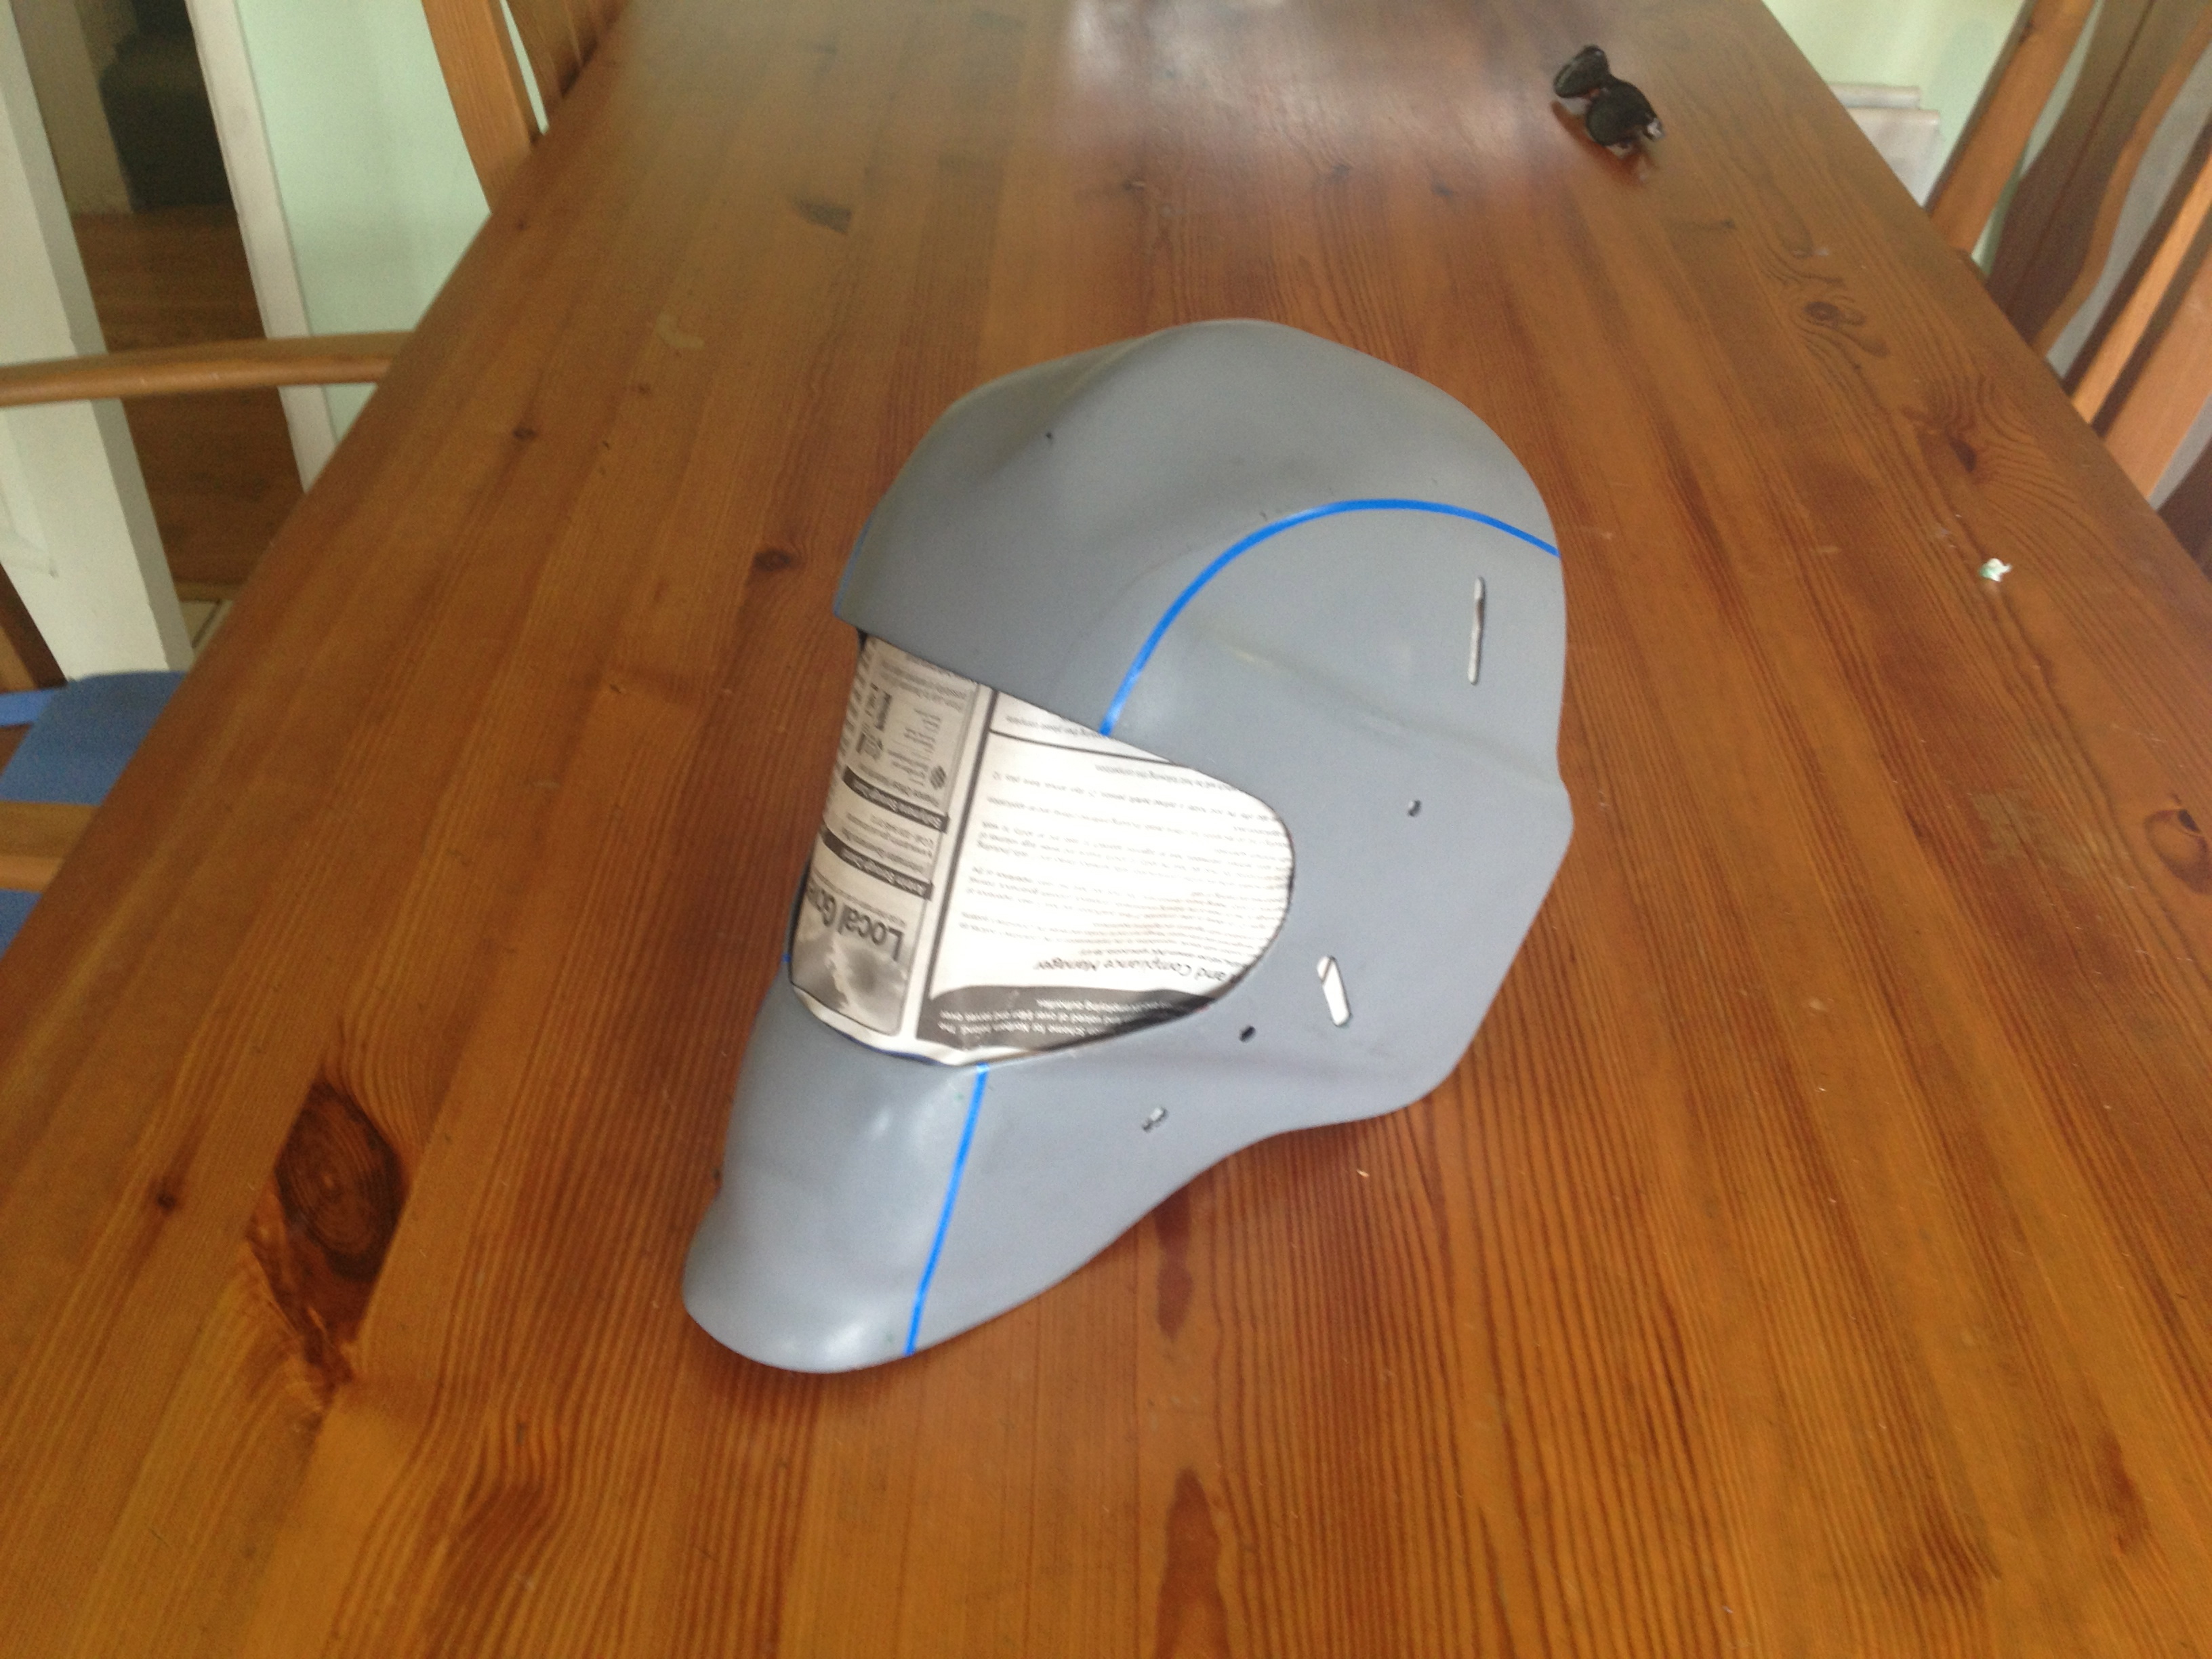
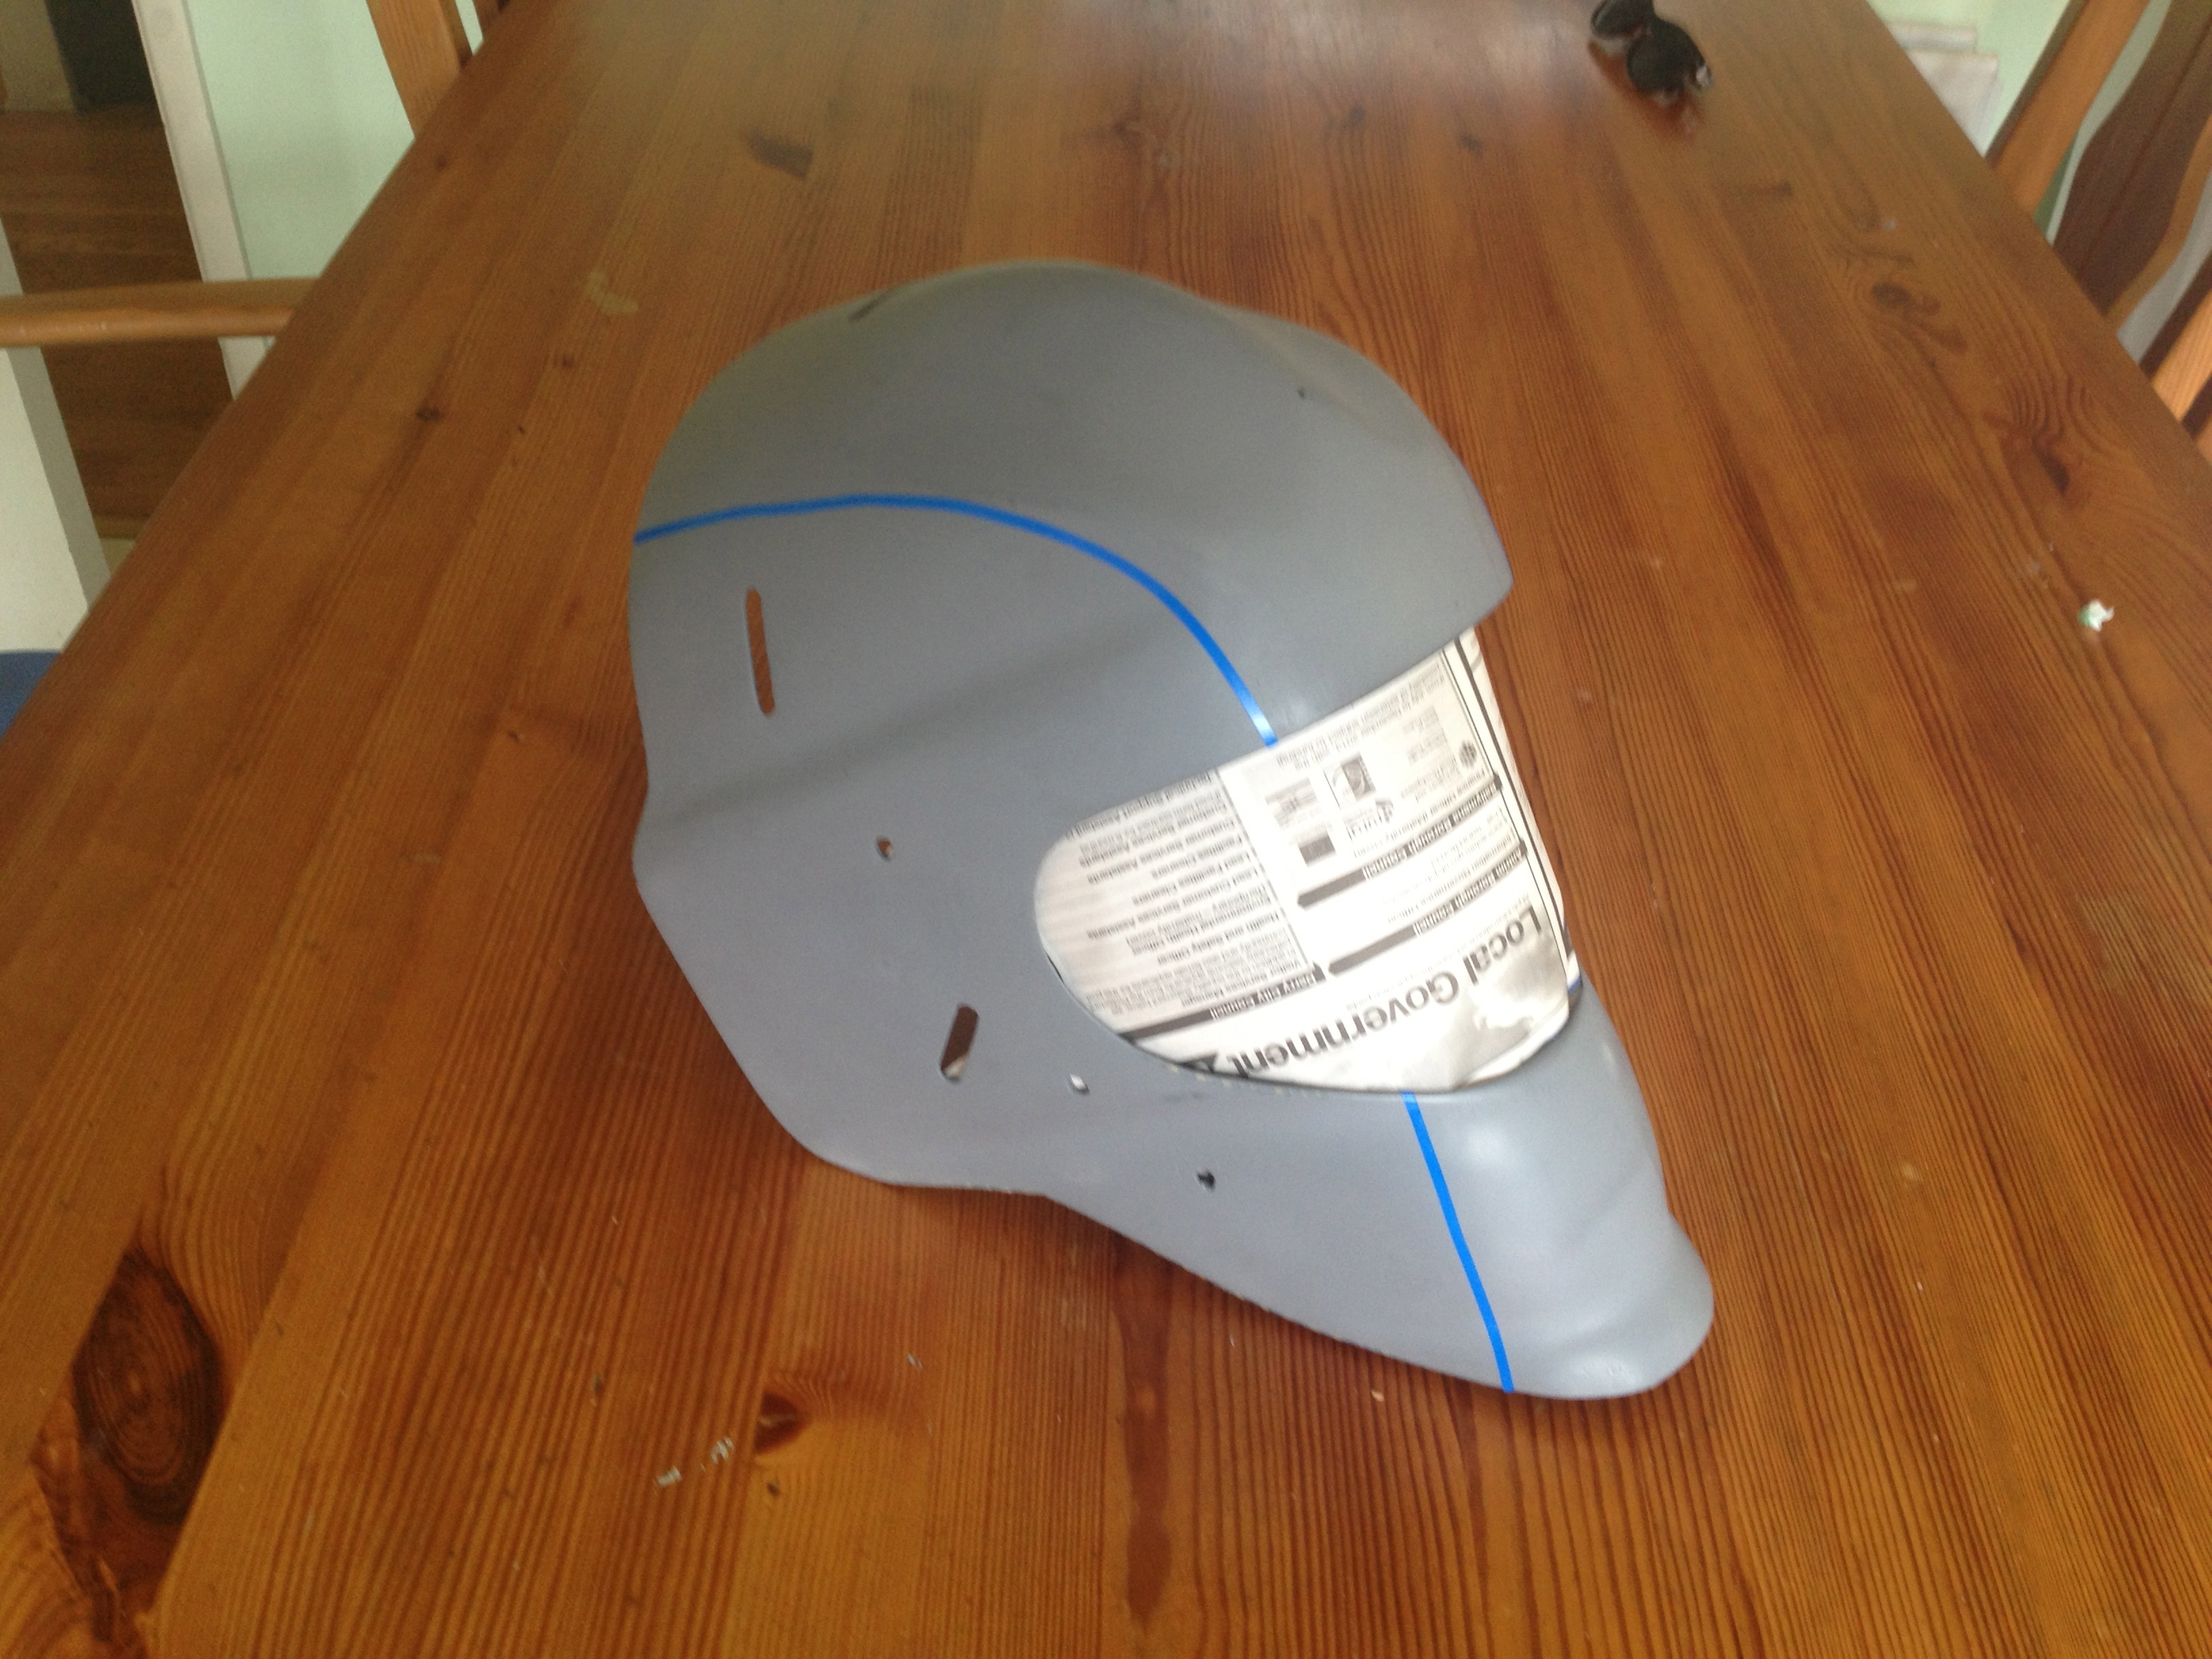
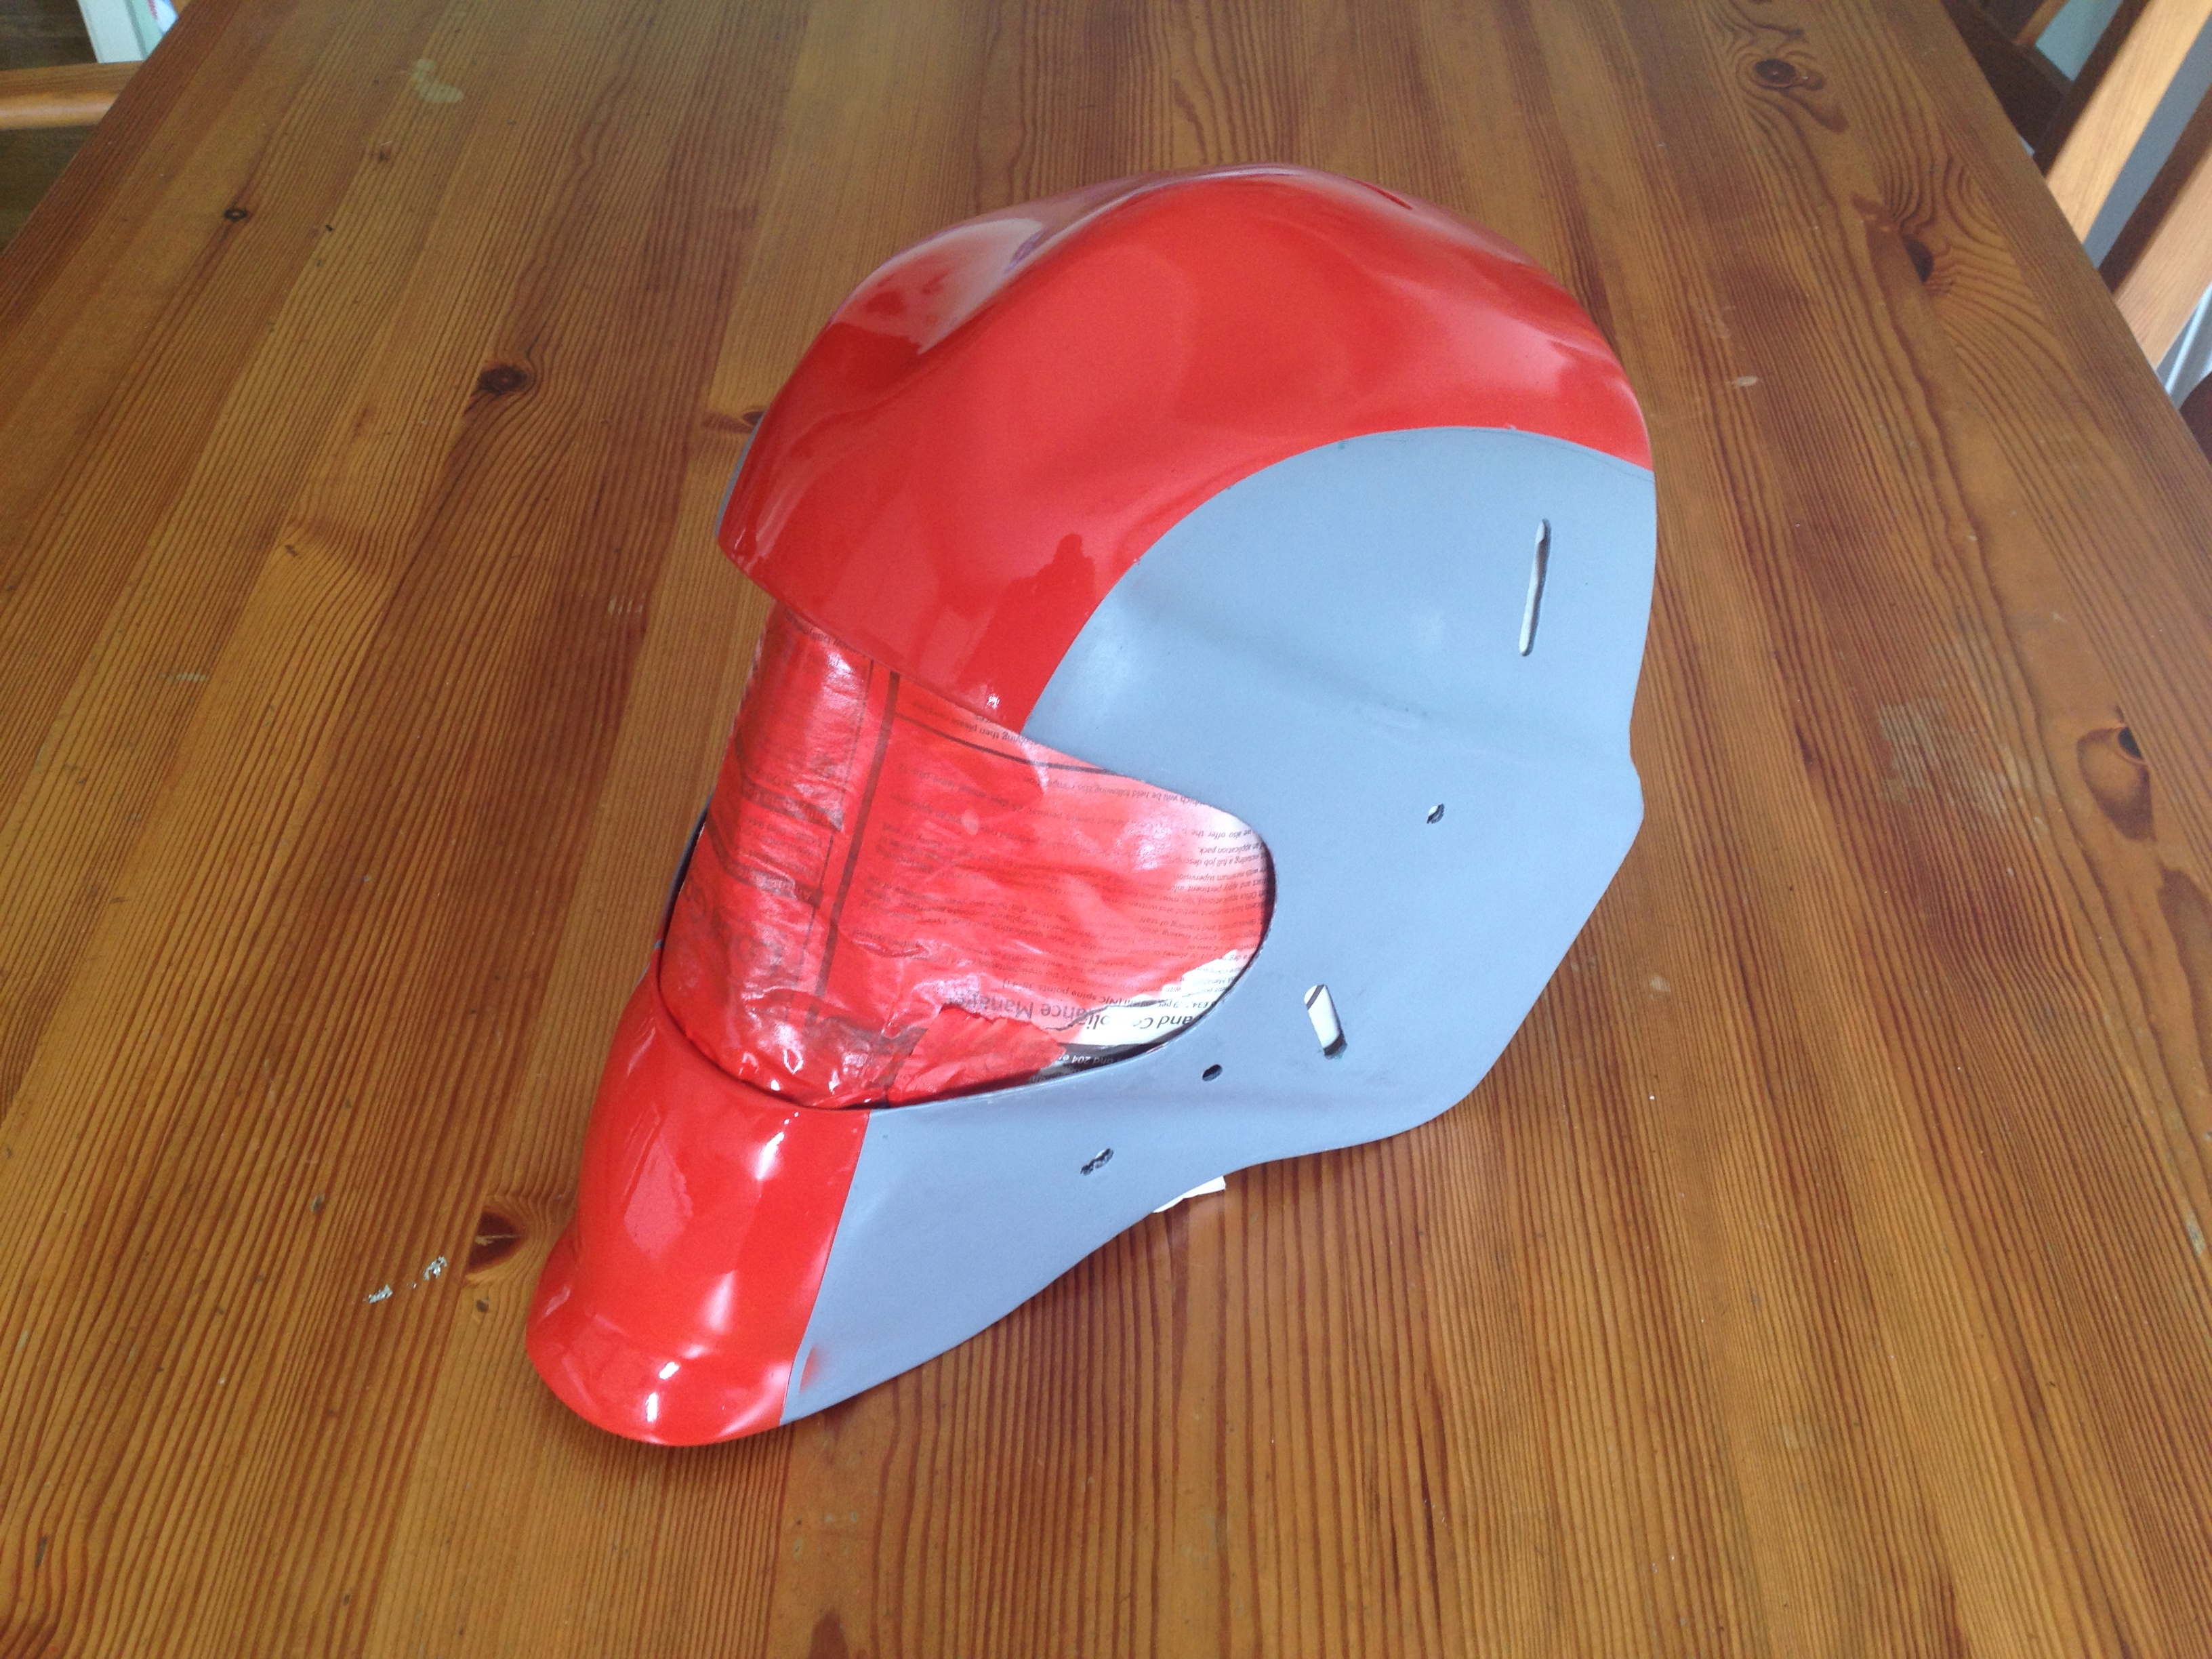
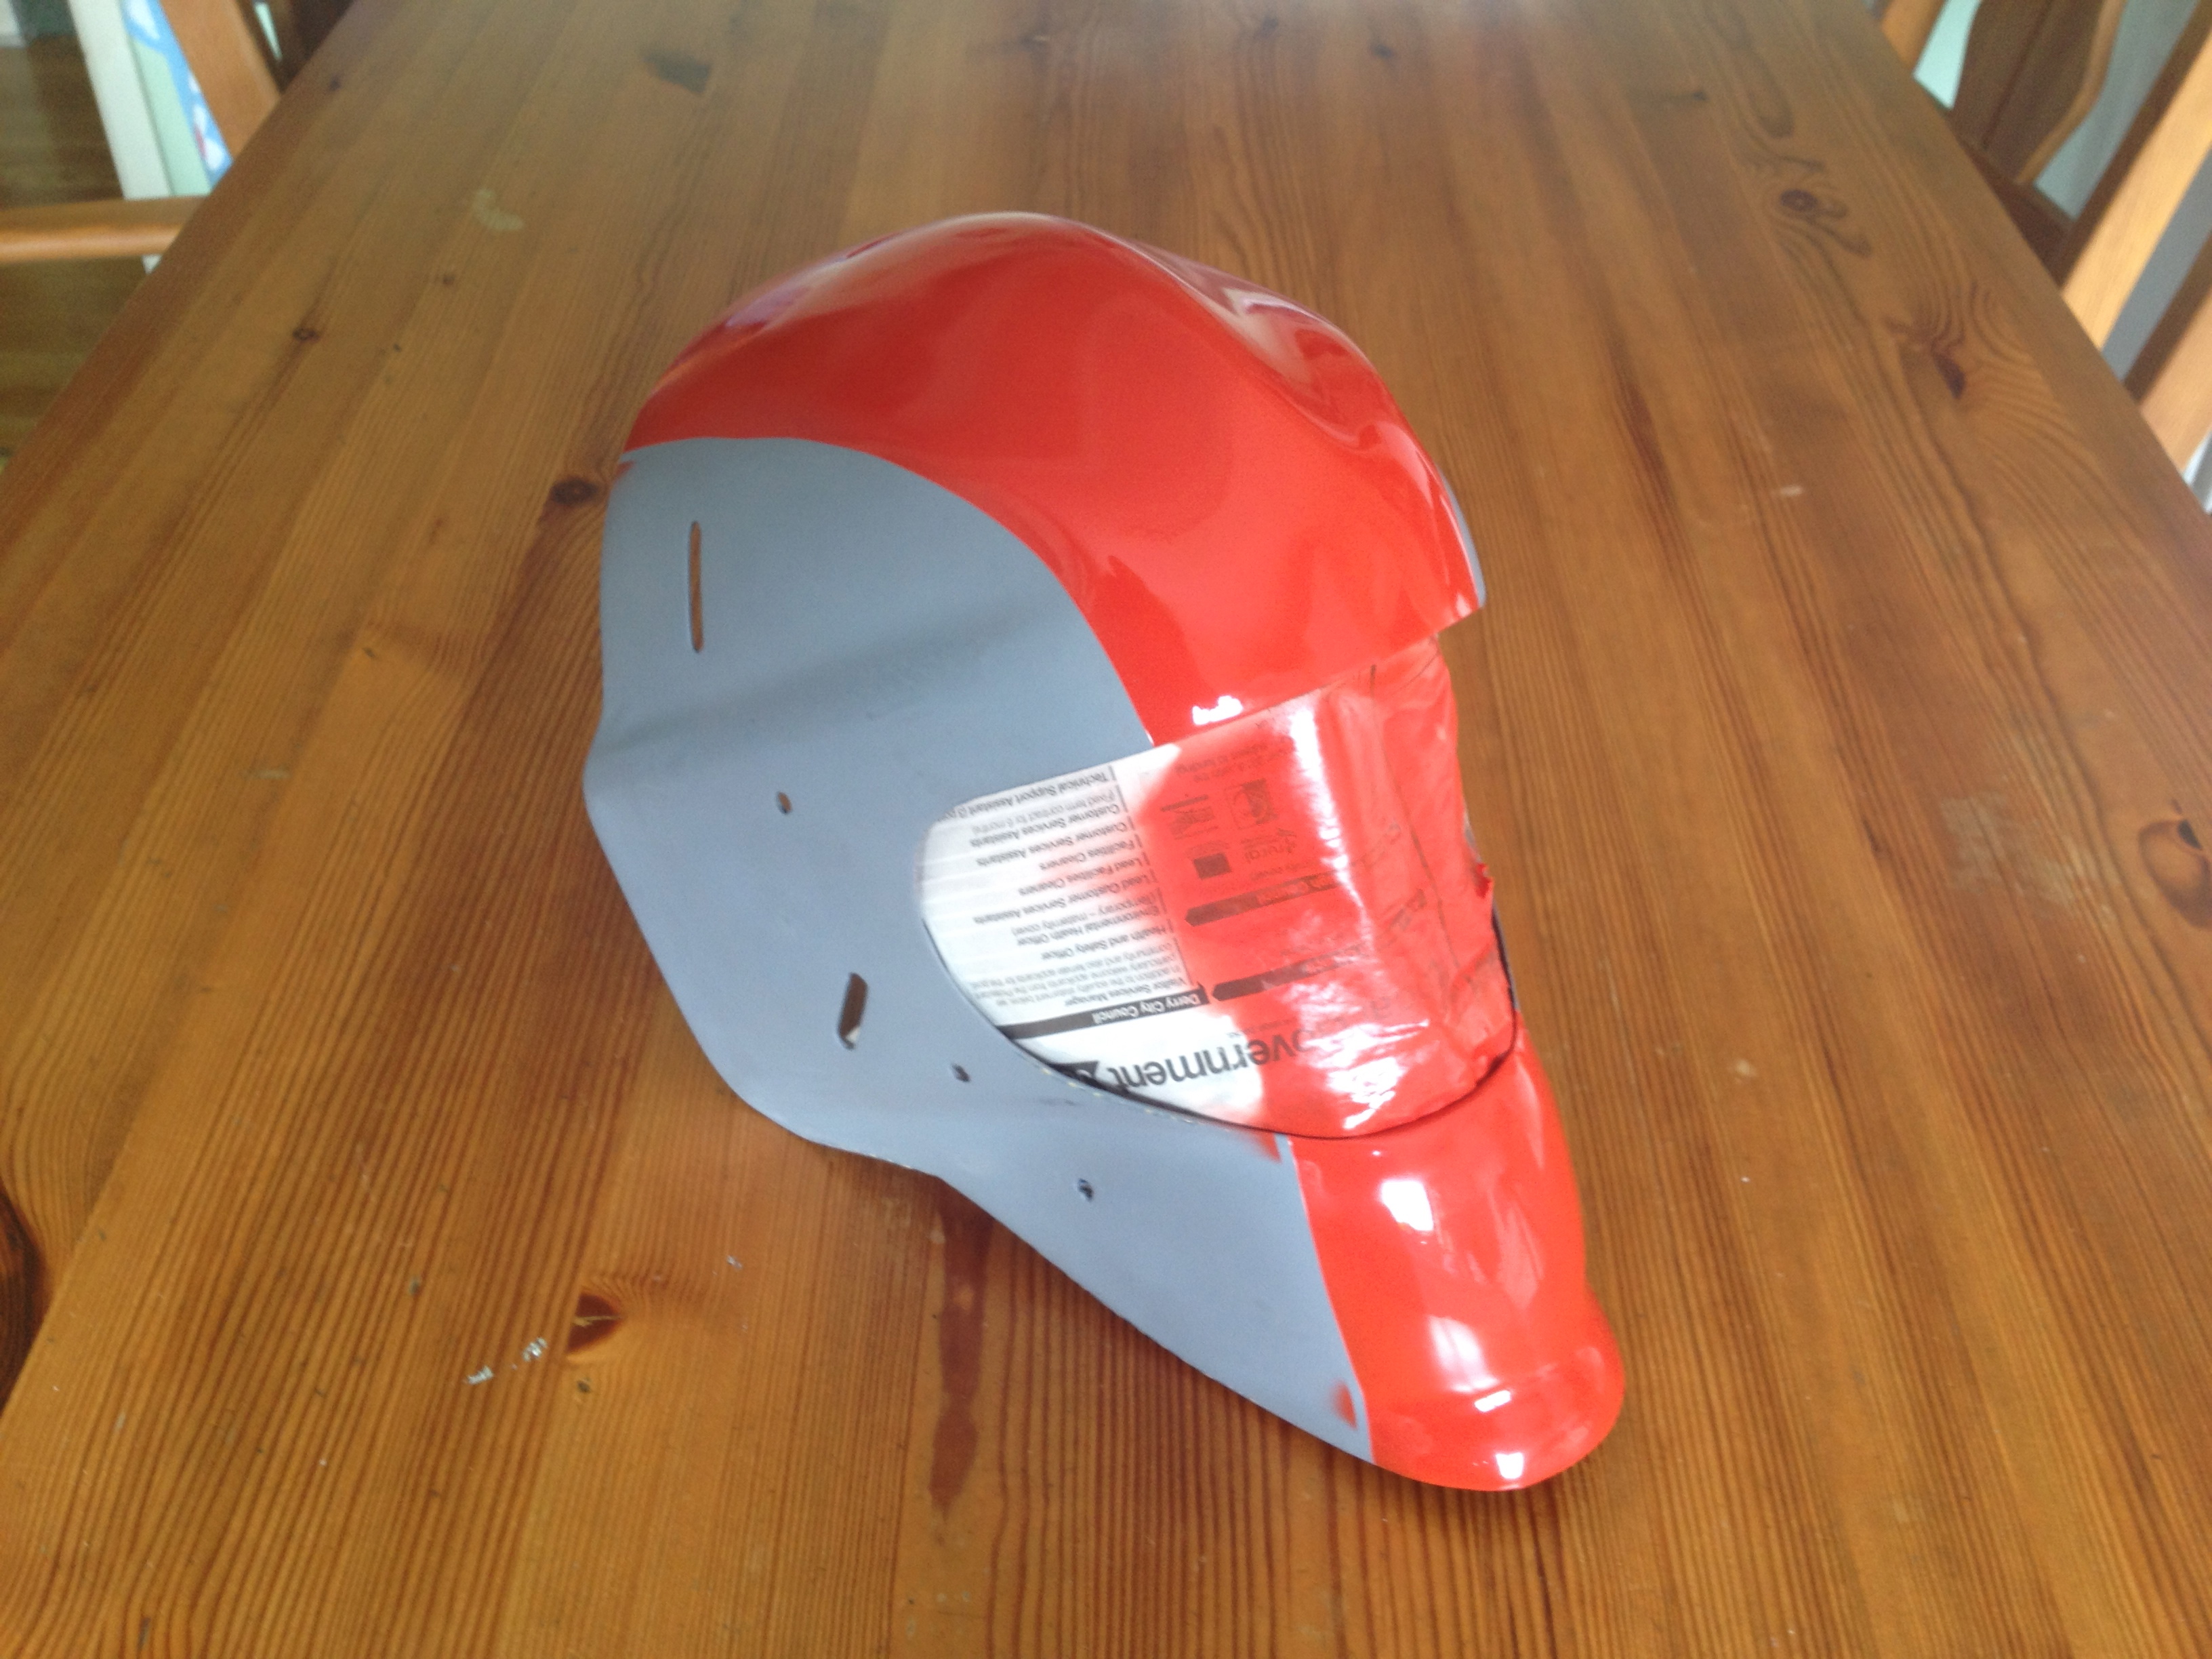
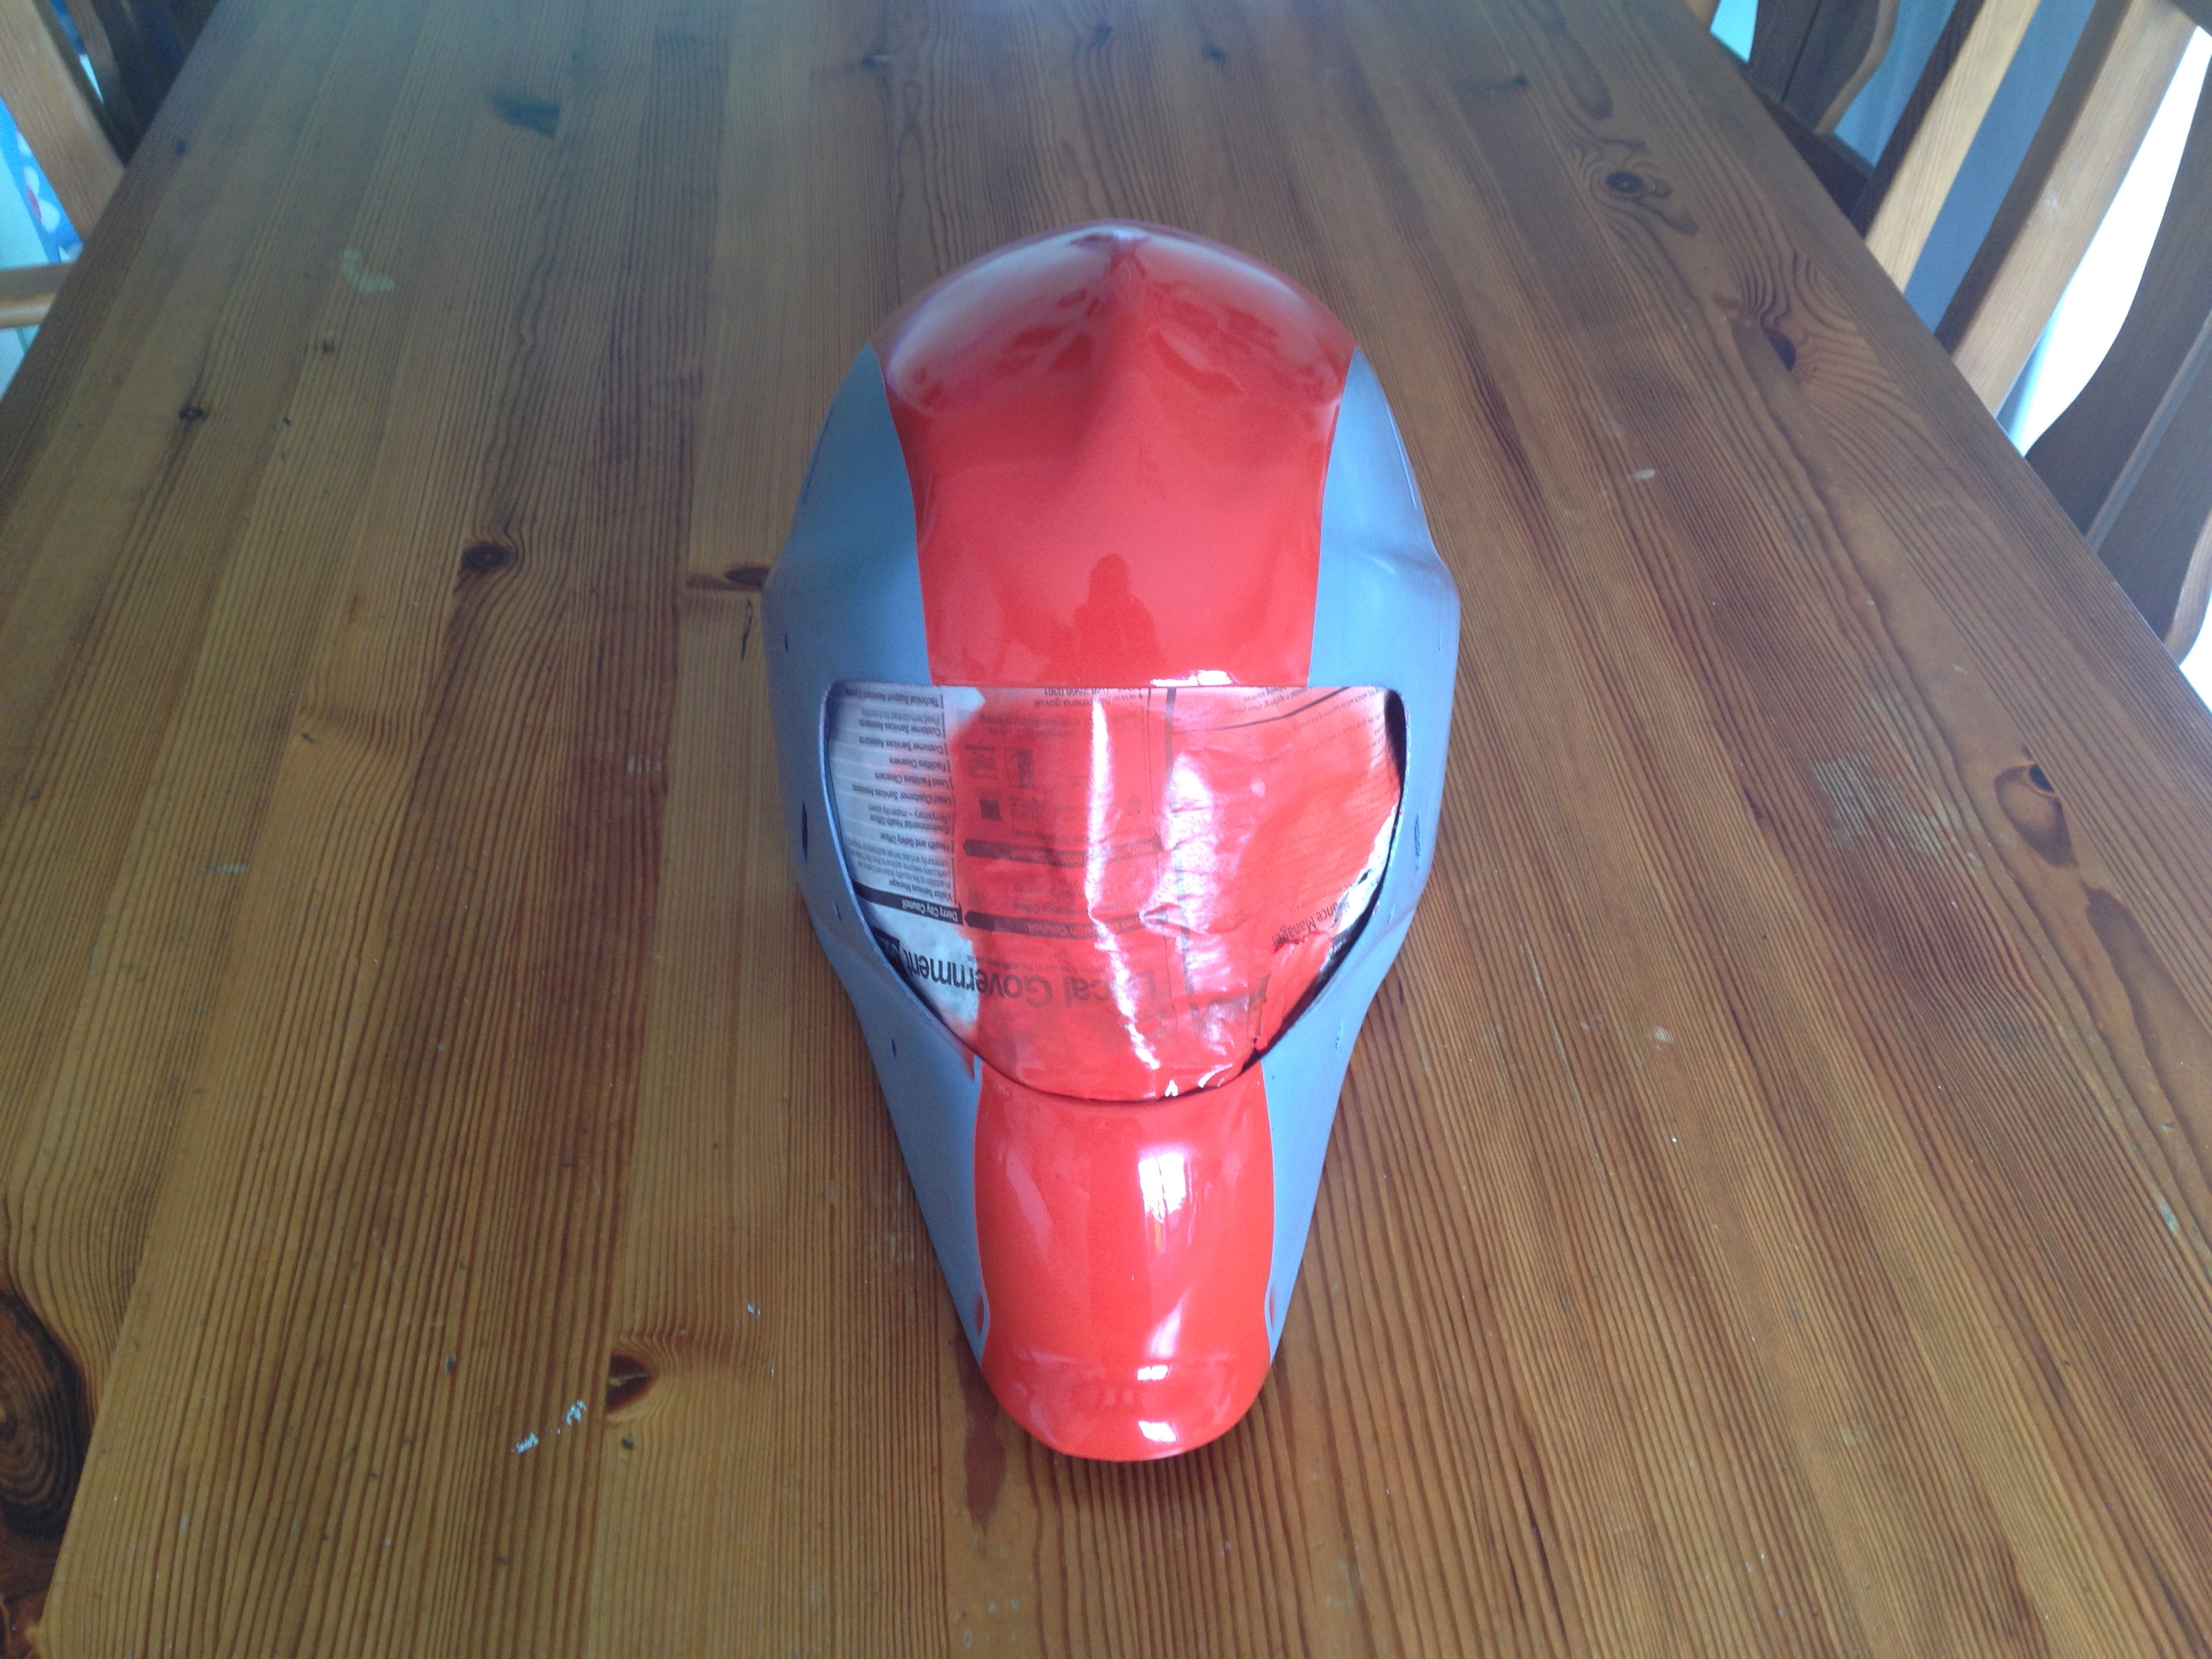
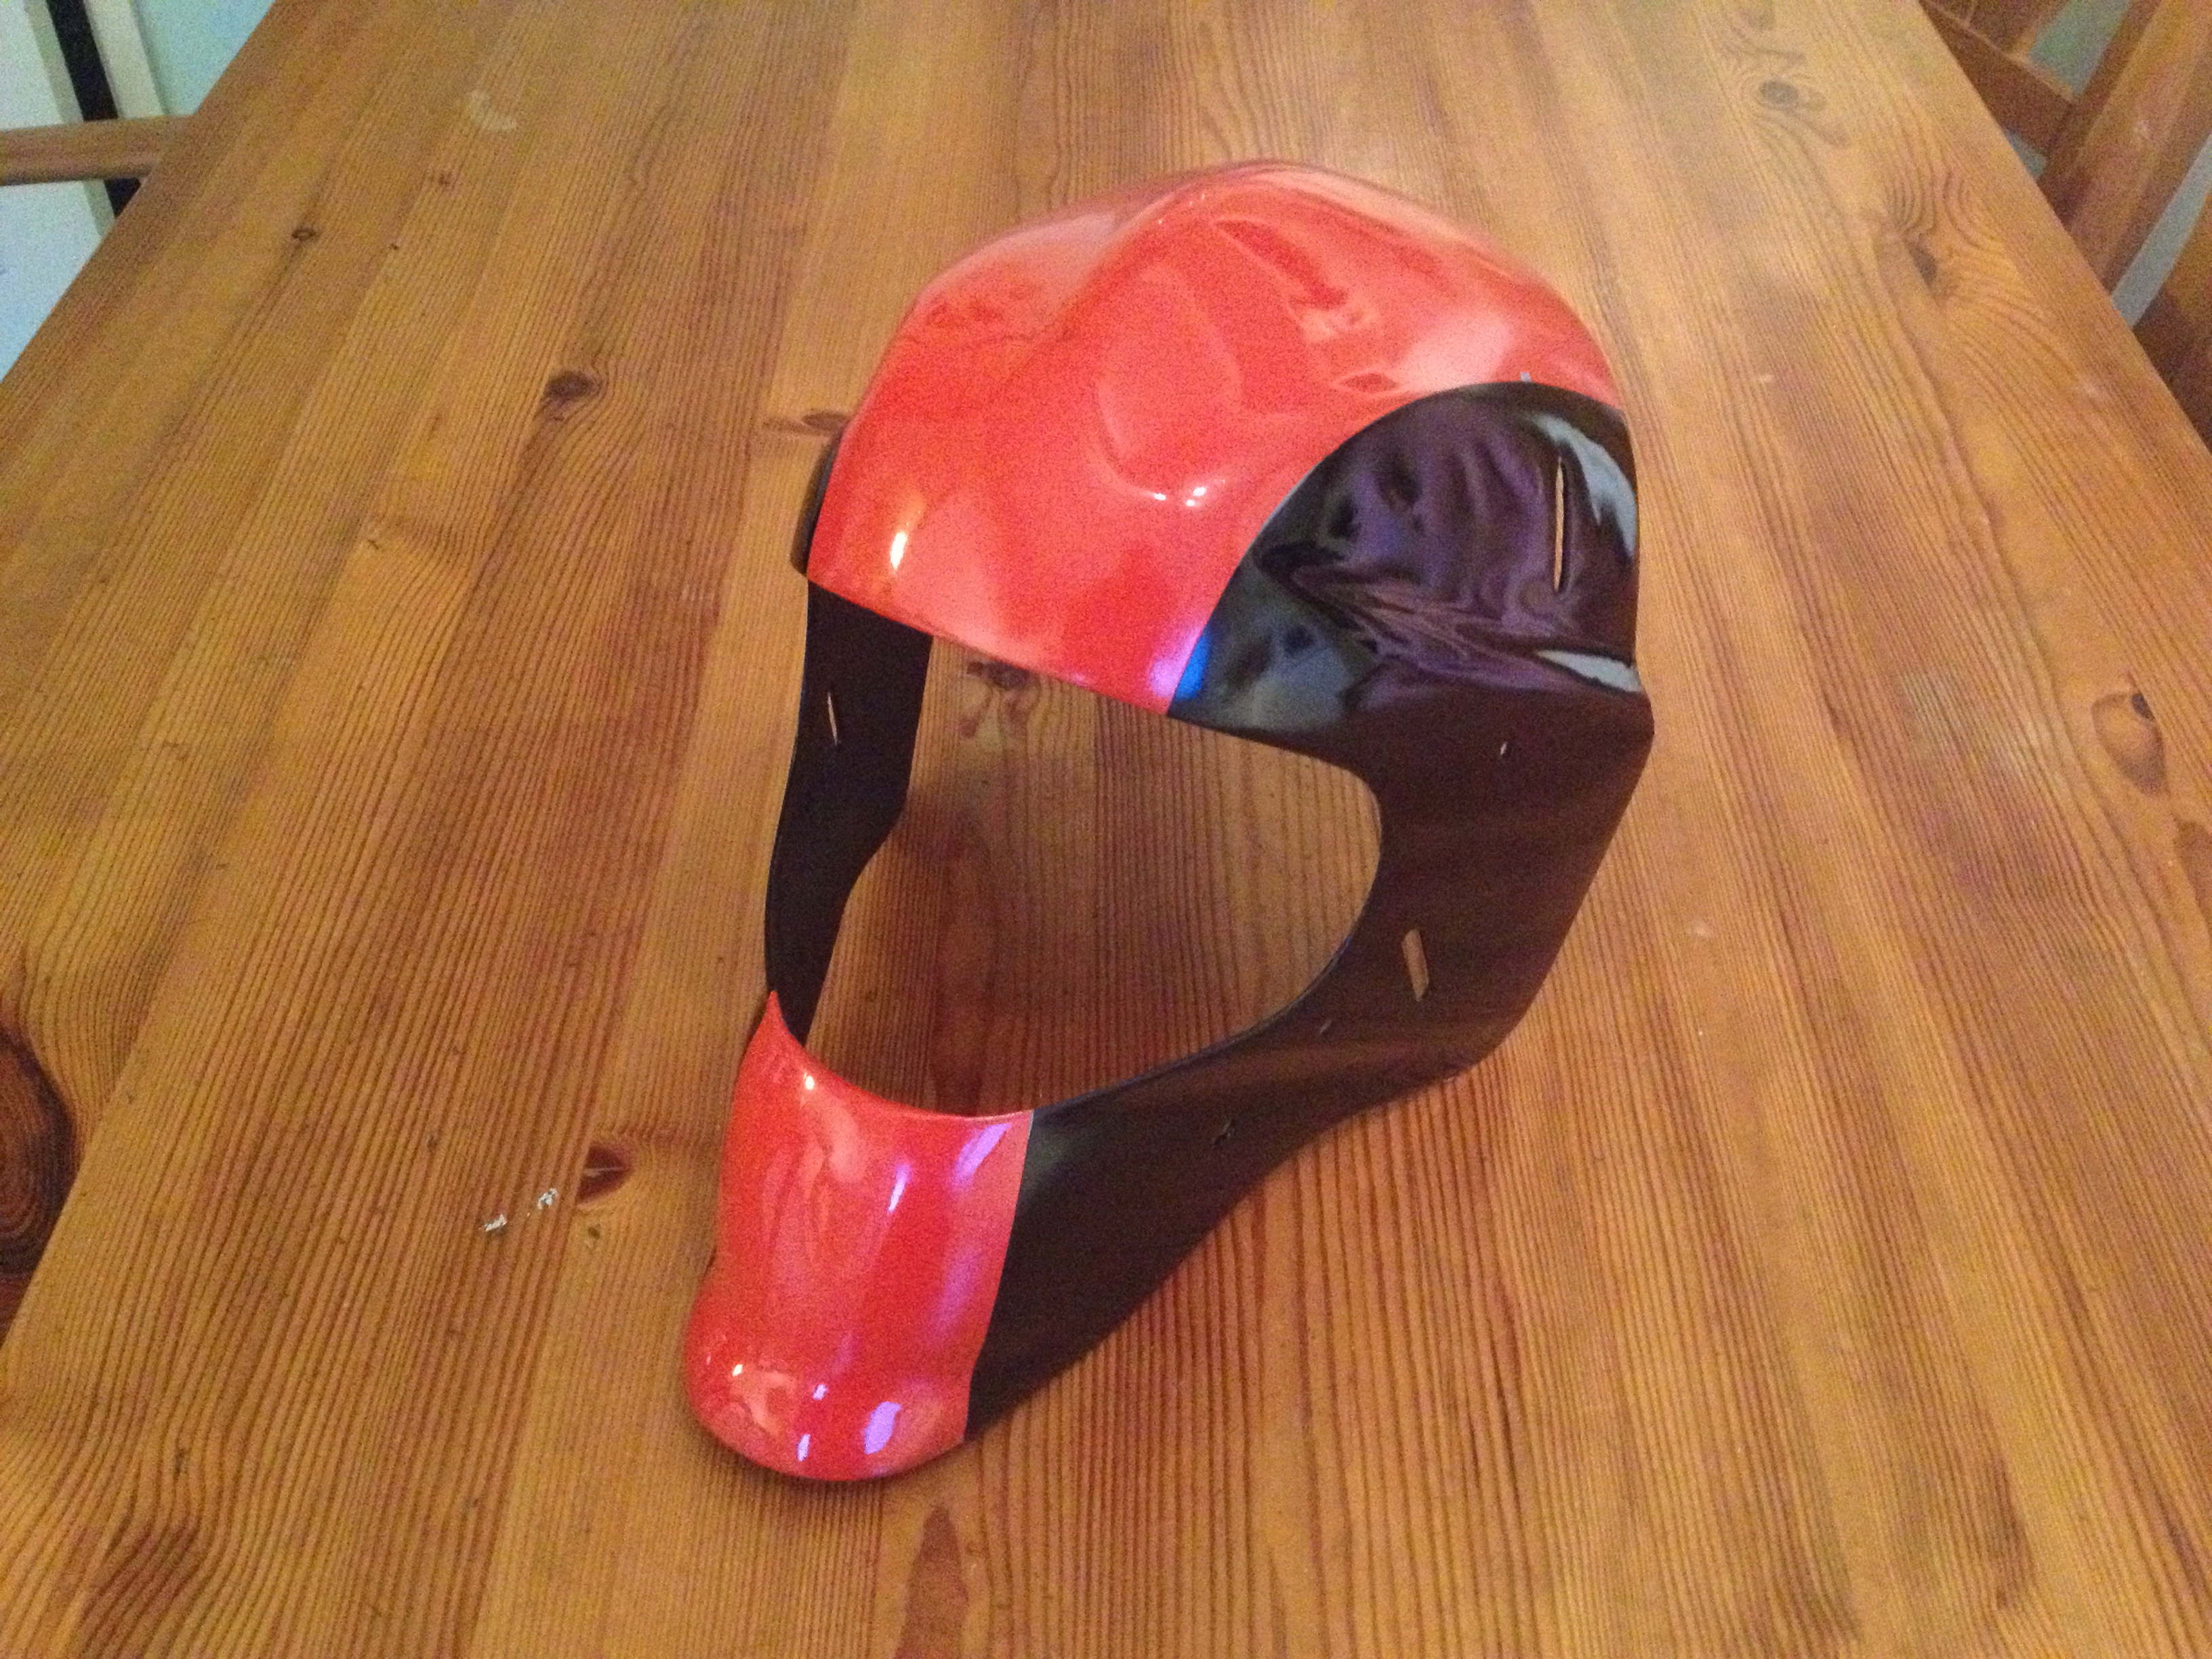
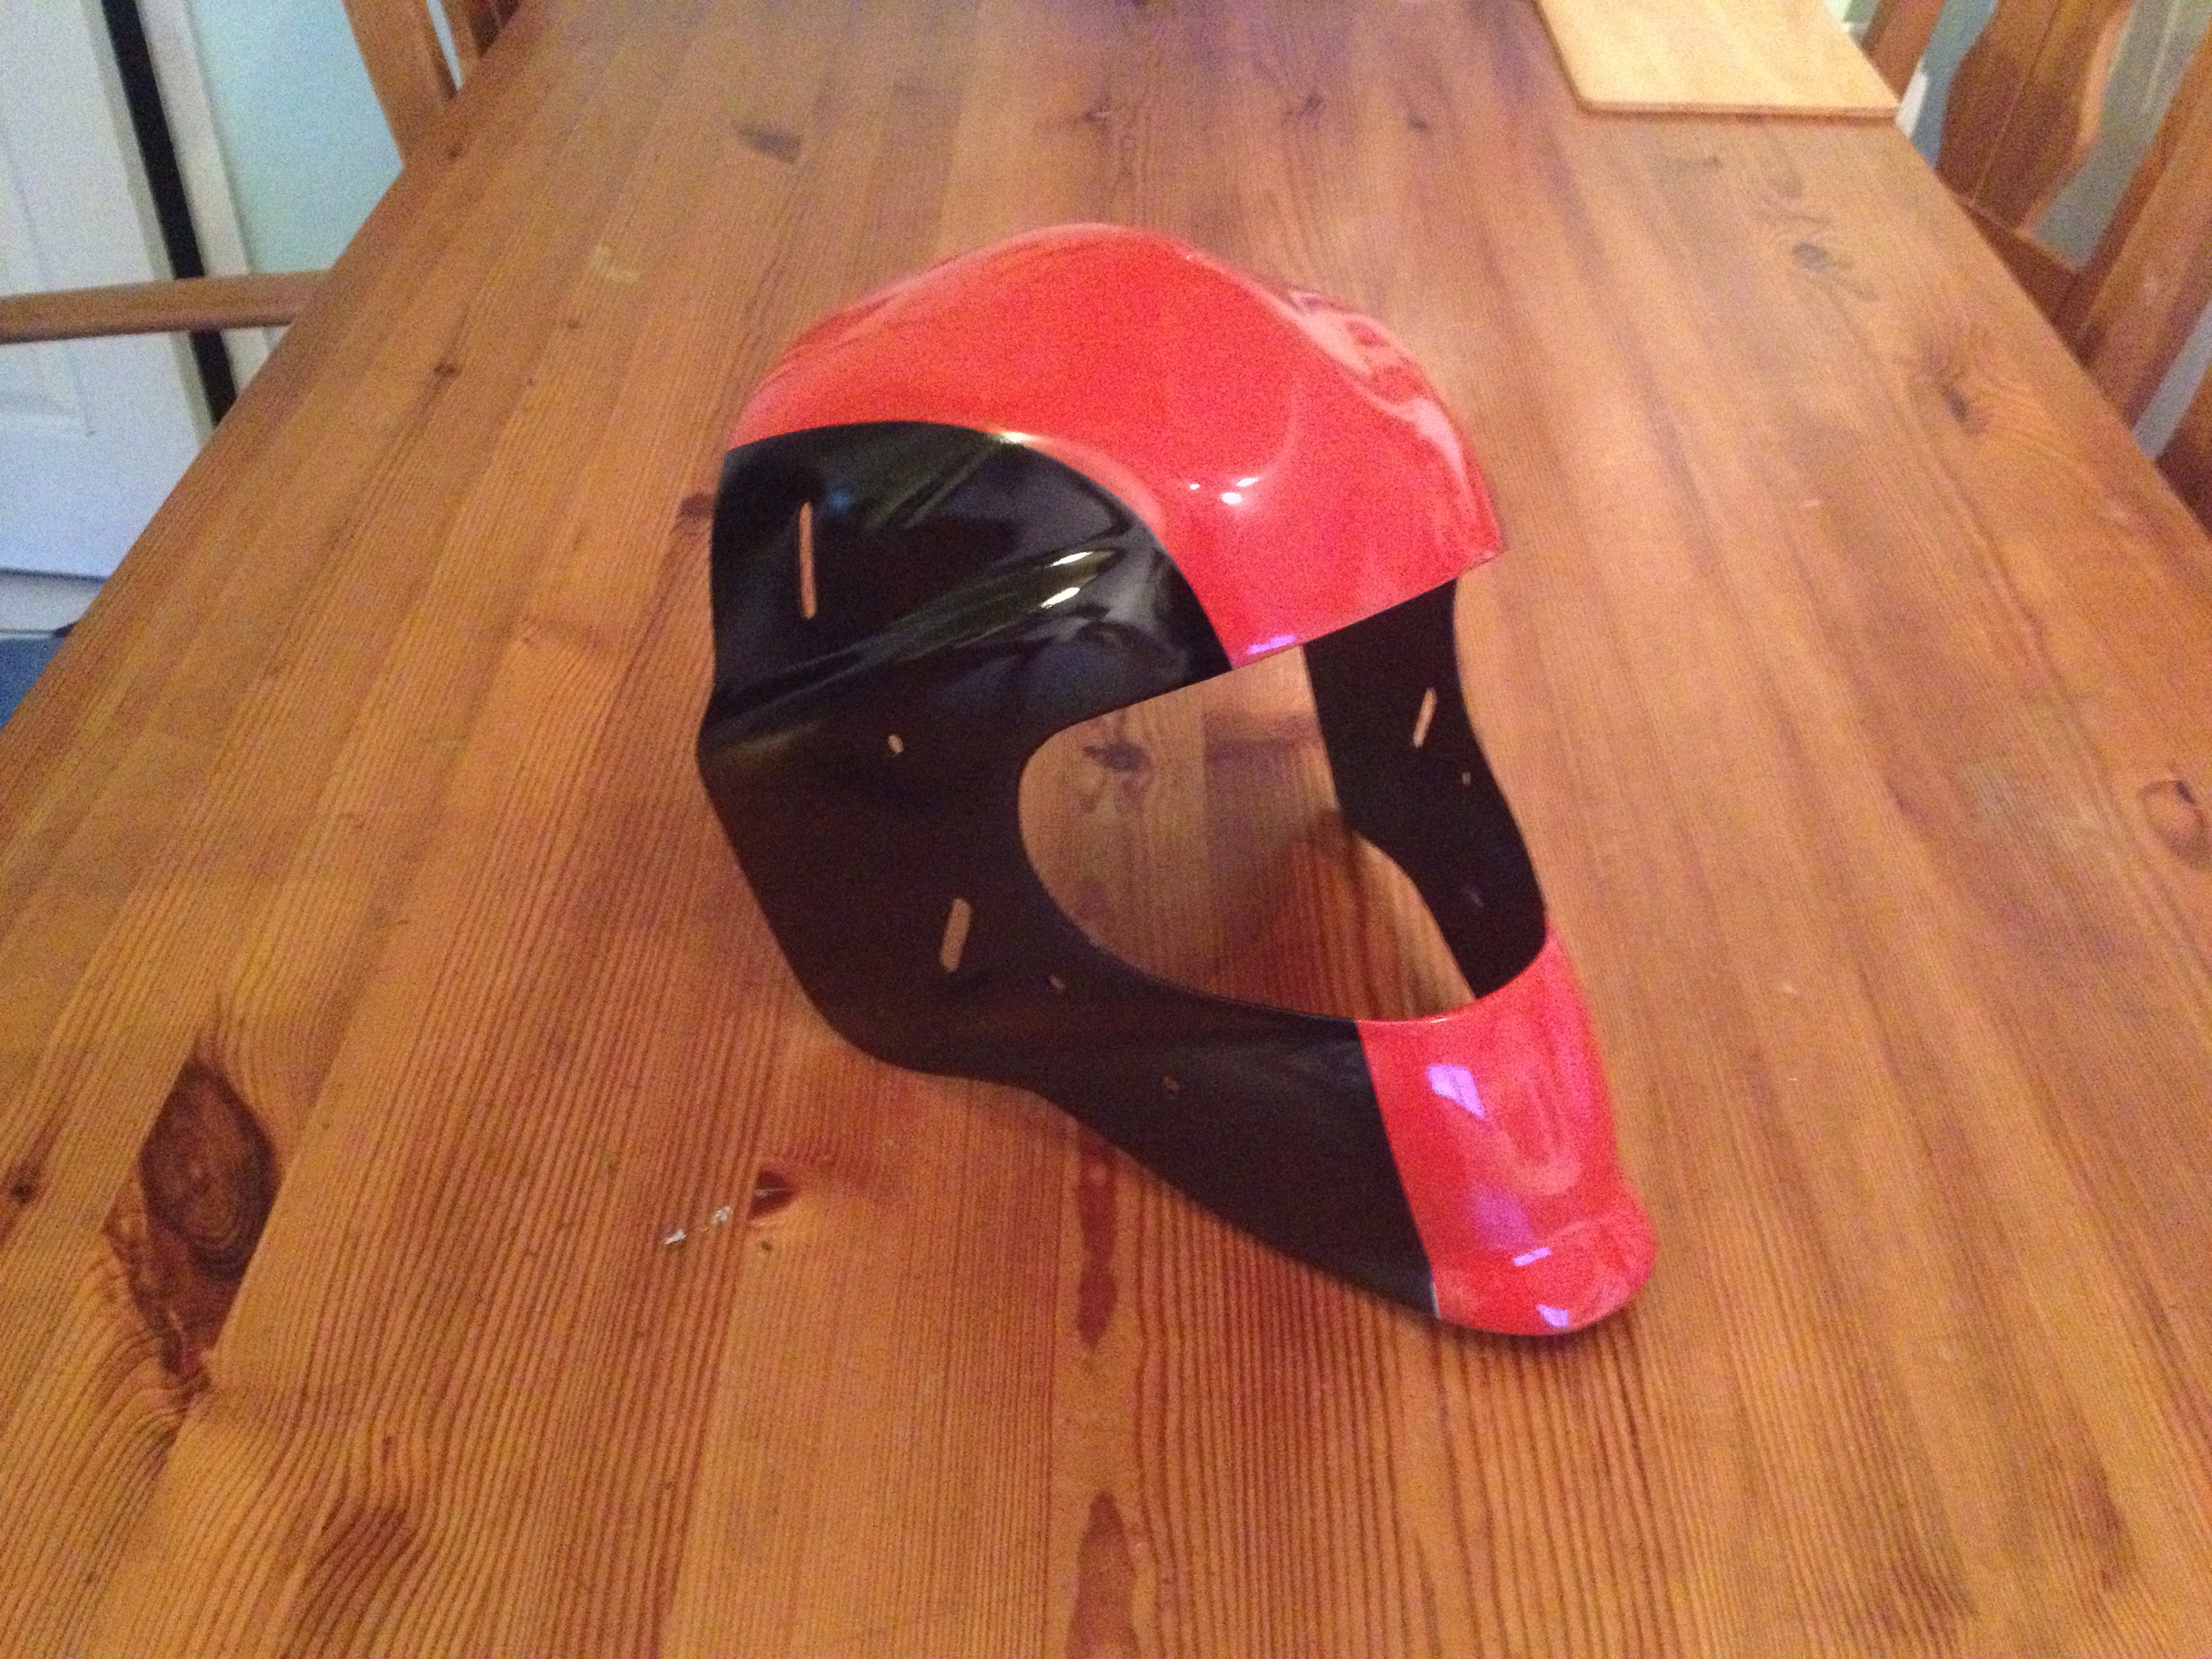
At this point I decided on my colour scheme. I really liked the look of Joyce Sombroek’s blue and orange custom design, so I decided to do something similar in my club colours so I chose paint in red and black for Cliftonville HC Belfast and to match my TK pads.
However, in hindsight I would recommend that you paint the helmet only one colour. The two colours might be really nice looking and a great idea, but the end result will have a degree of discontinuity for a number of reasons.
I was quite lucky in that I managed to get my stripe quite central, but there was a bump between the two colours, as well as some overlap where I failed to mask correctly, as well as paint pull off where the tape damaged the paint. I am pretty pleased with the helmet now, but I will always know the small problems and annoyances that came as a result of choosing to paint it two colours.
Step 8 – Painting
This step is similar to the undercoat step, only we are using paint, so remember, large number of thin coats, wet and dry in between. Don’t forget to keep the newspaper and masking tape you used to cover the large grill hole of the helmet. If you are doing two or more colours, then remember to start with the lightest colour first, as if you make a mistake corrections can be made using the other darker colours. Again, degrease the surface and wait until dry. Then, shake the paint can for the recommended time and spray from the recommended distance remembering to start and finish off the work. A coat should take you 30 seconds to a minute. My paint said it was touch dry ready for another coat in 15 minutes, but I left it for an hour until I started to use the wet and dry just to make sure.
I should mention just how fantastic wet and dry is. It is the reason for the smooth surface and a high quality surface finish. The 1200 grade used in between coats gives the paint a good surface to adhere to, while simultaneously giving the surface the ‘feel’ of being smoother. The use of it wet in gentle circular motions abrades the paint and will give a noticeable difference to the feel of the paint after applying, this smoothness lets you know the areas you have and have not sanded down in between coats.
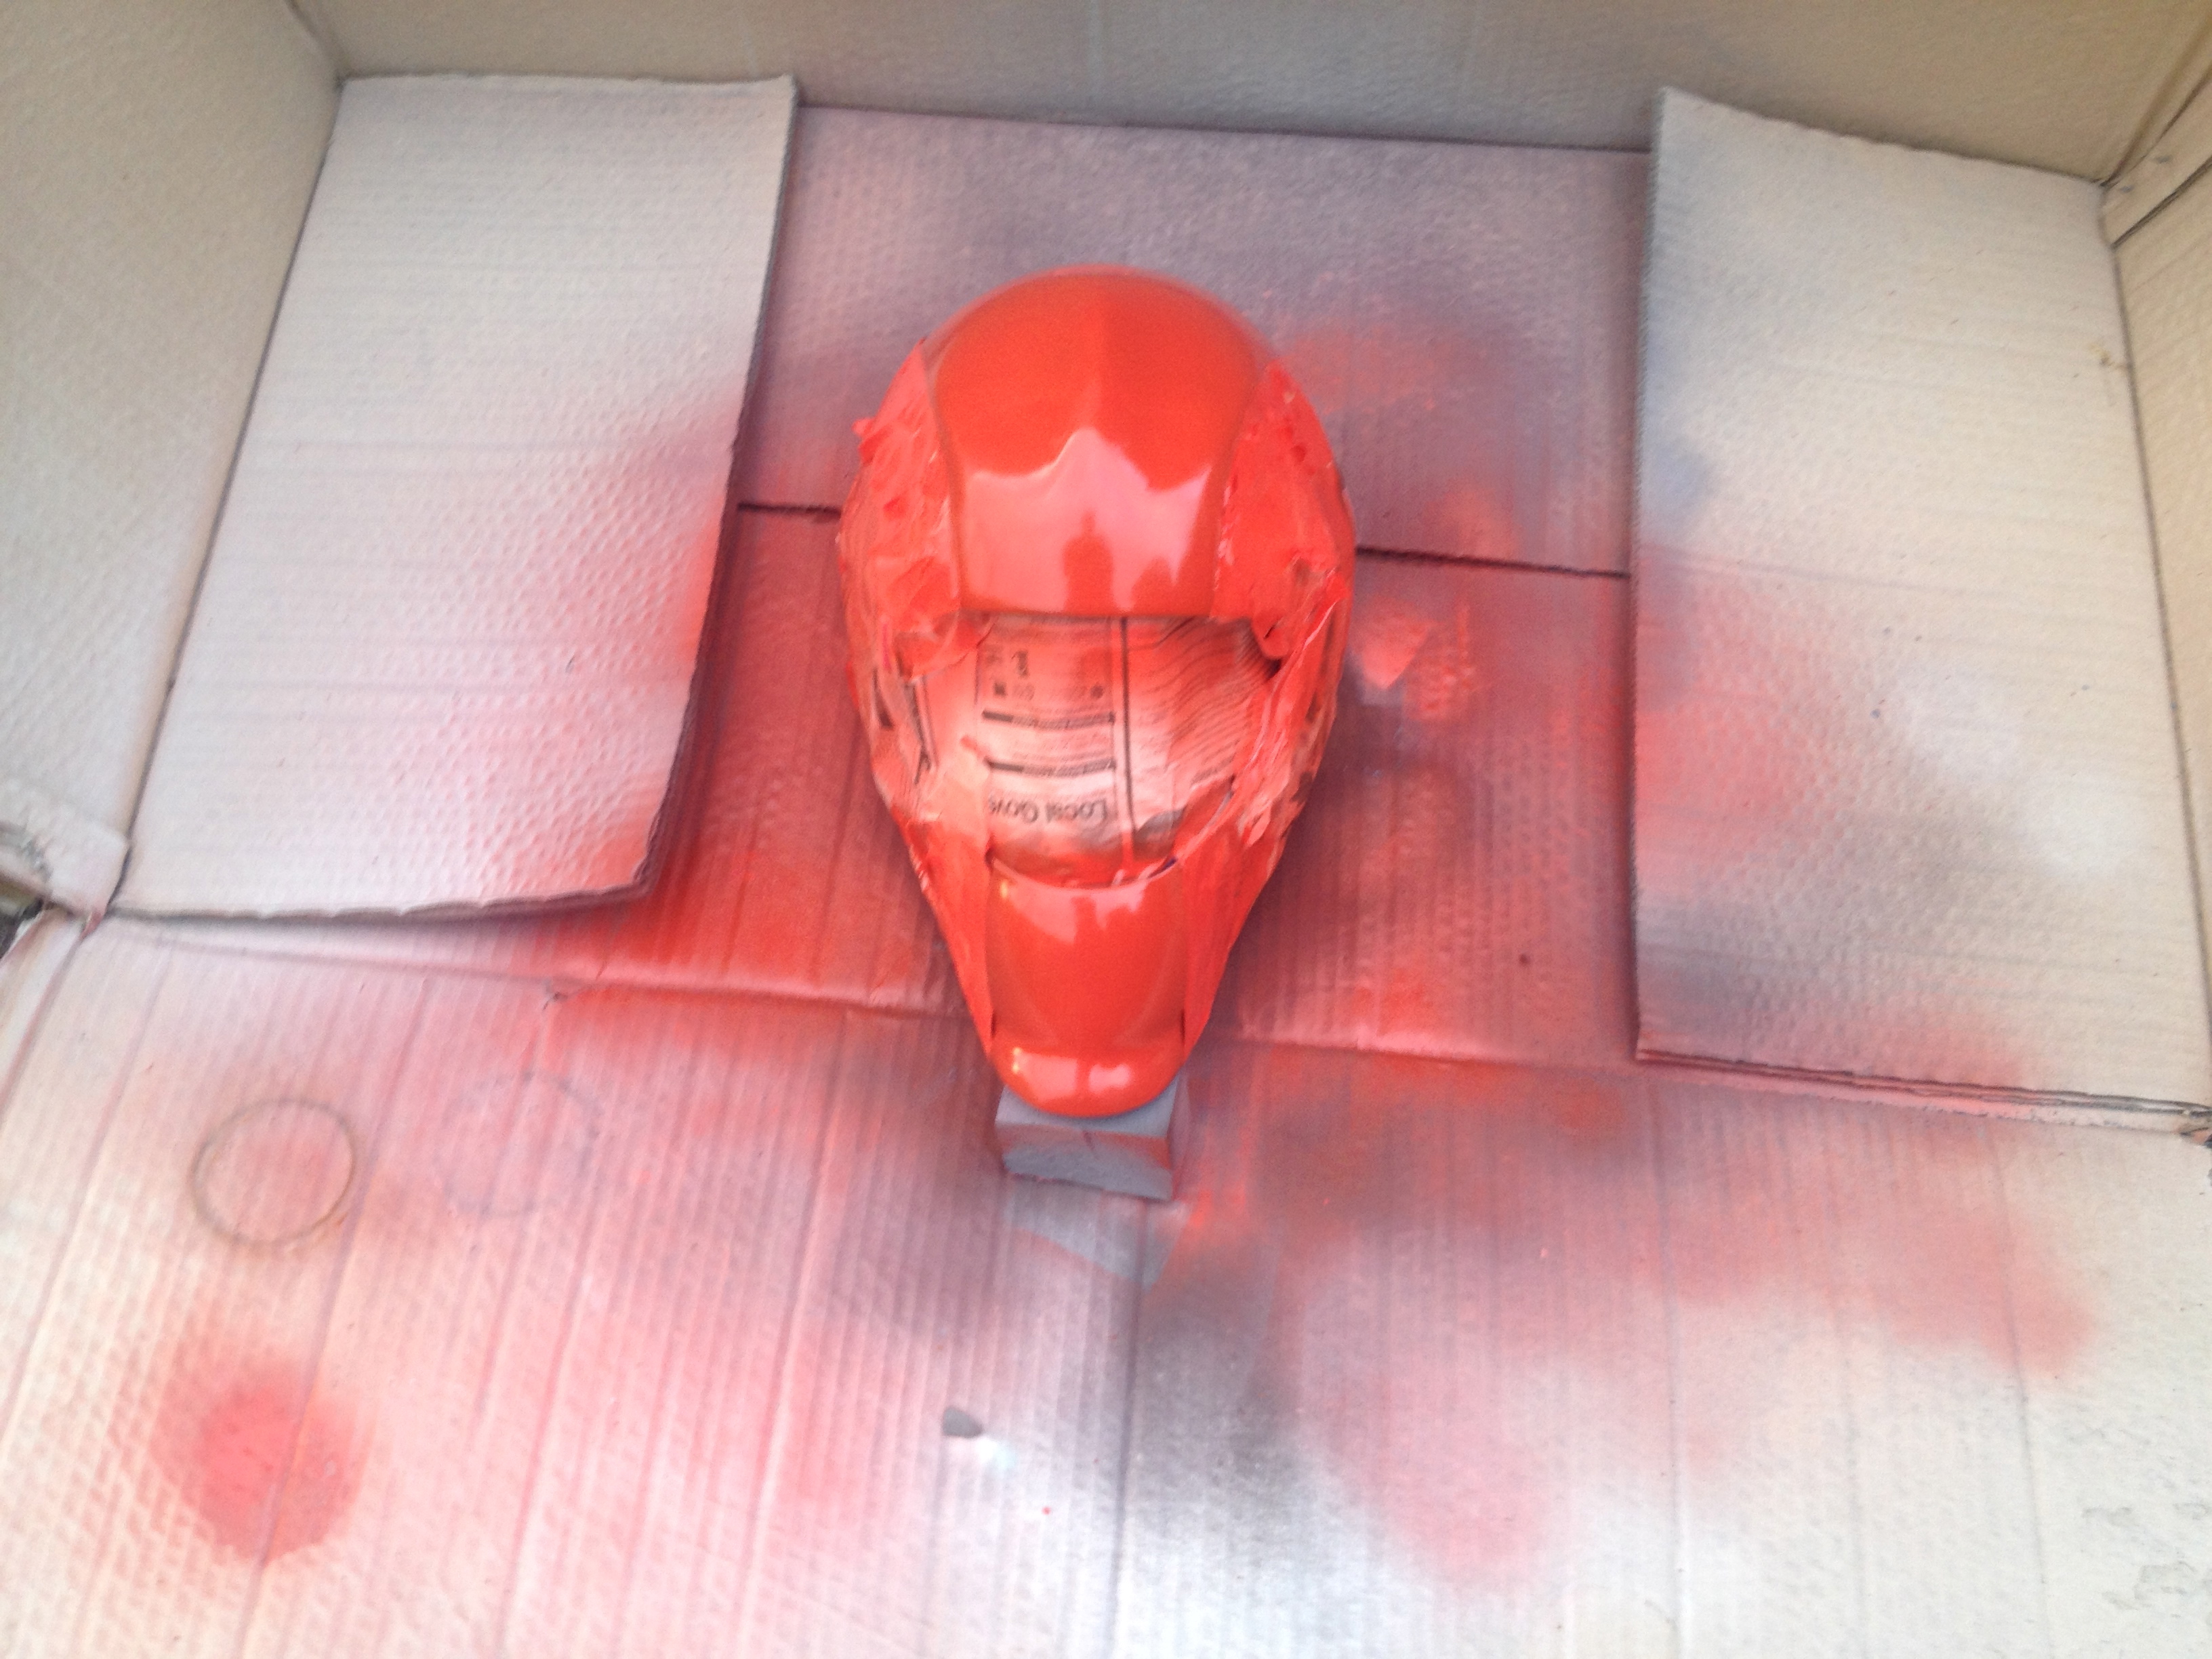
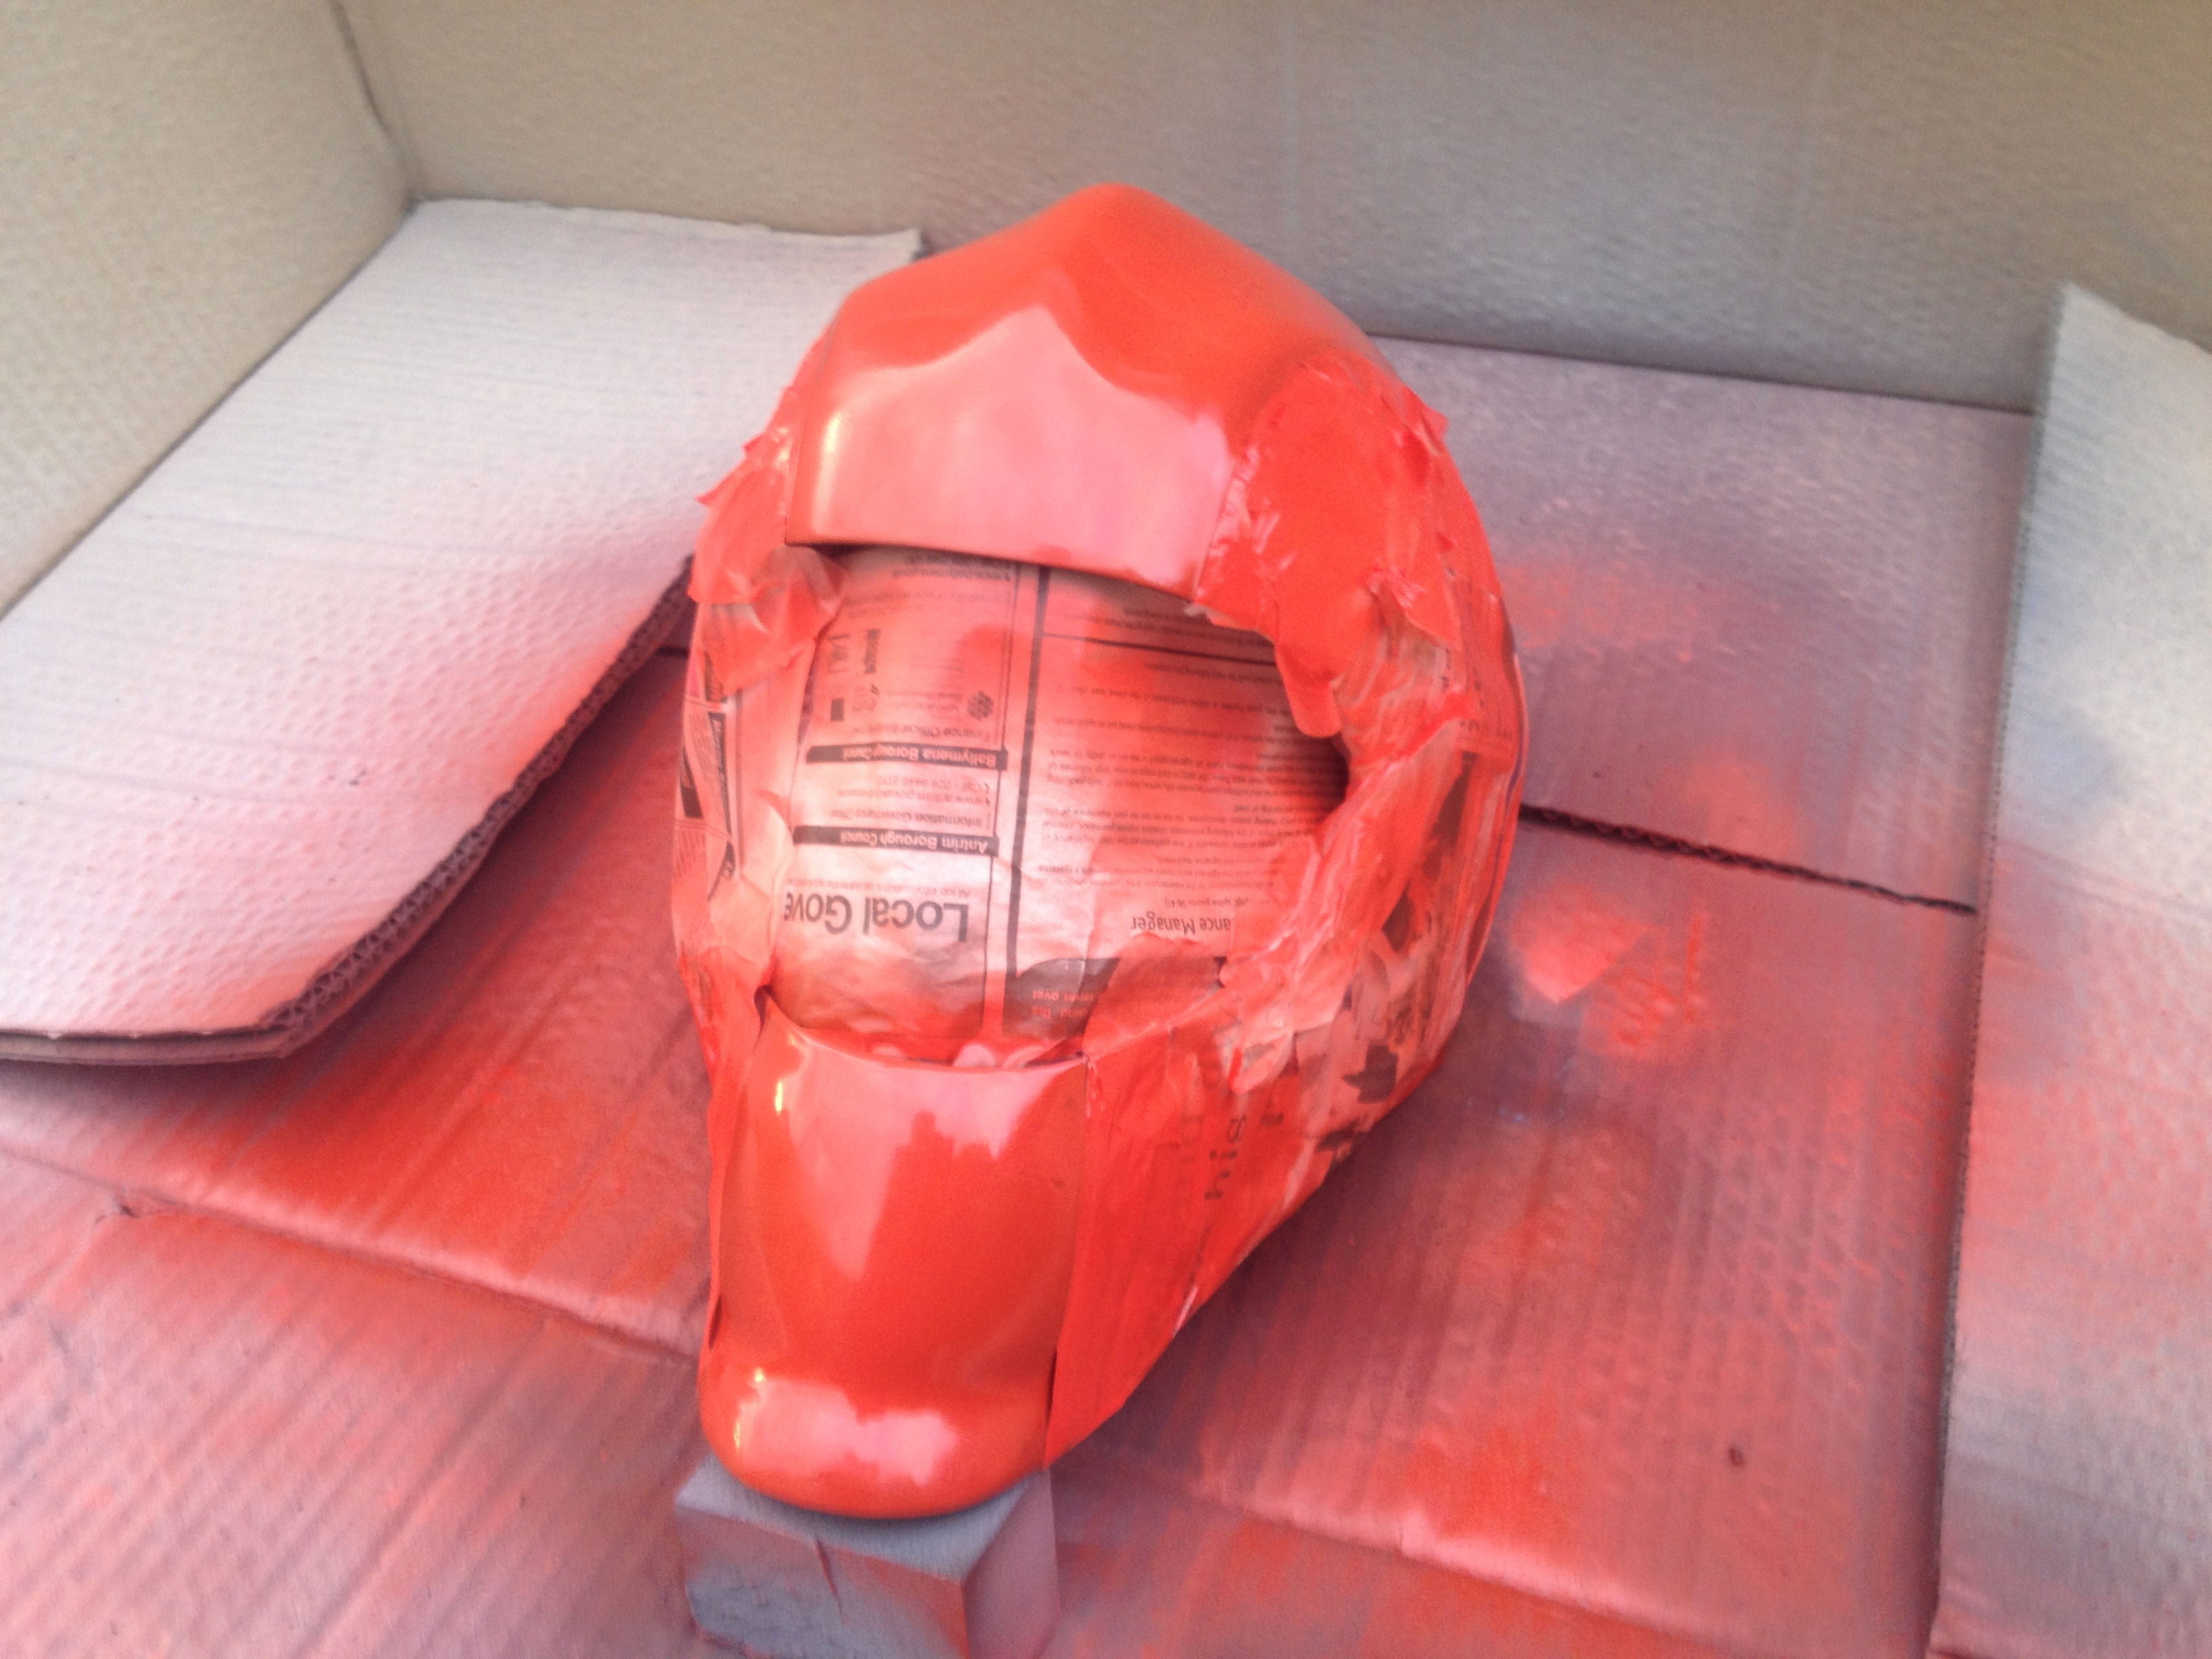
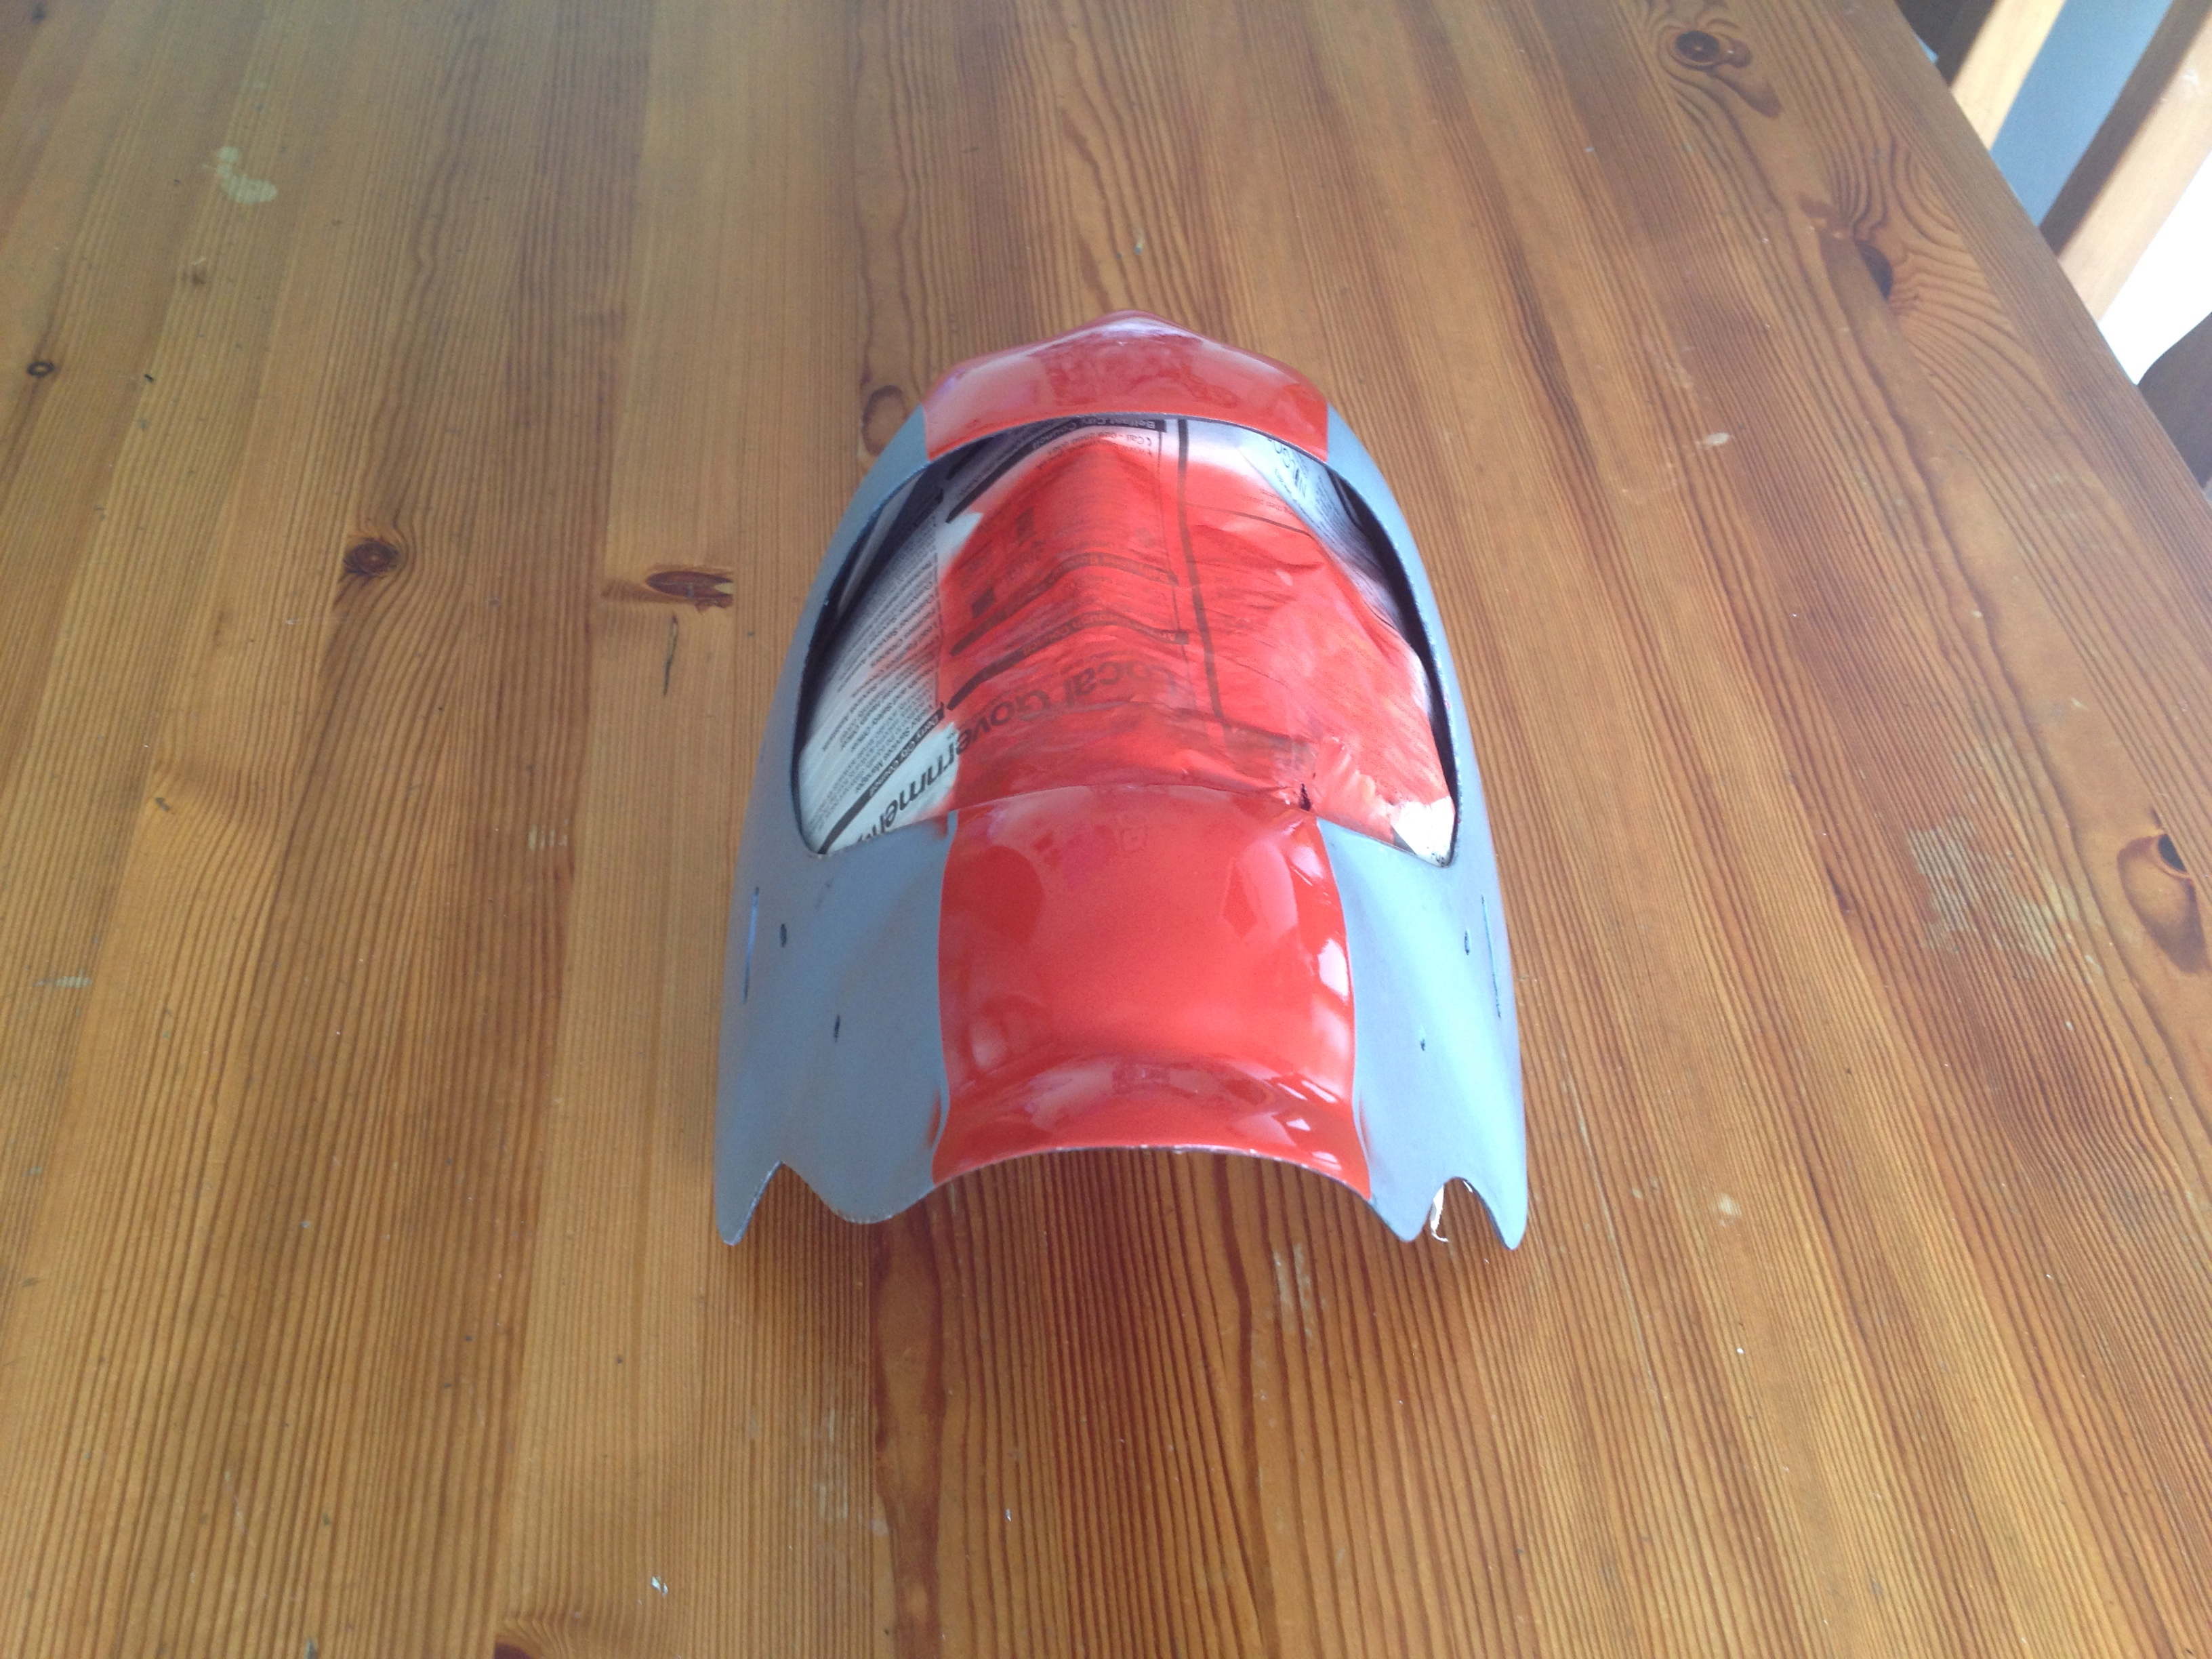
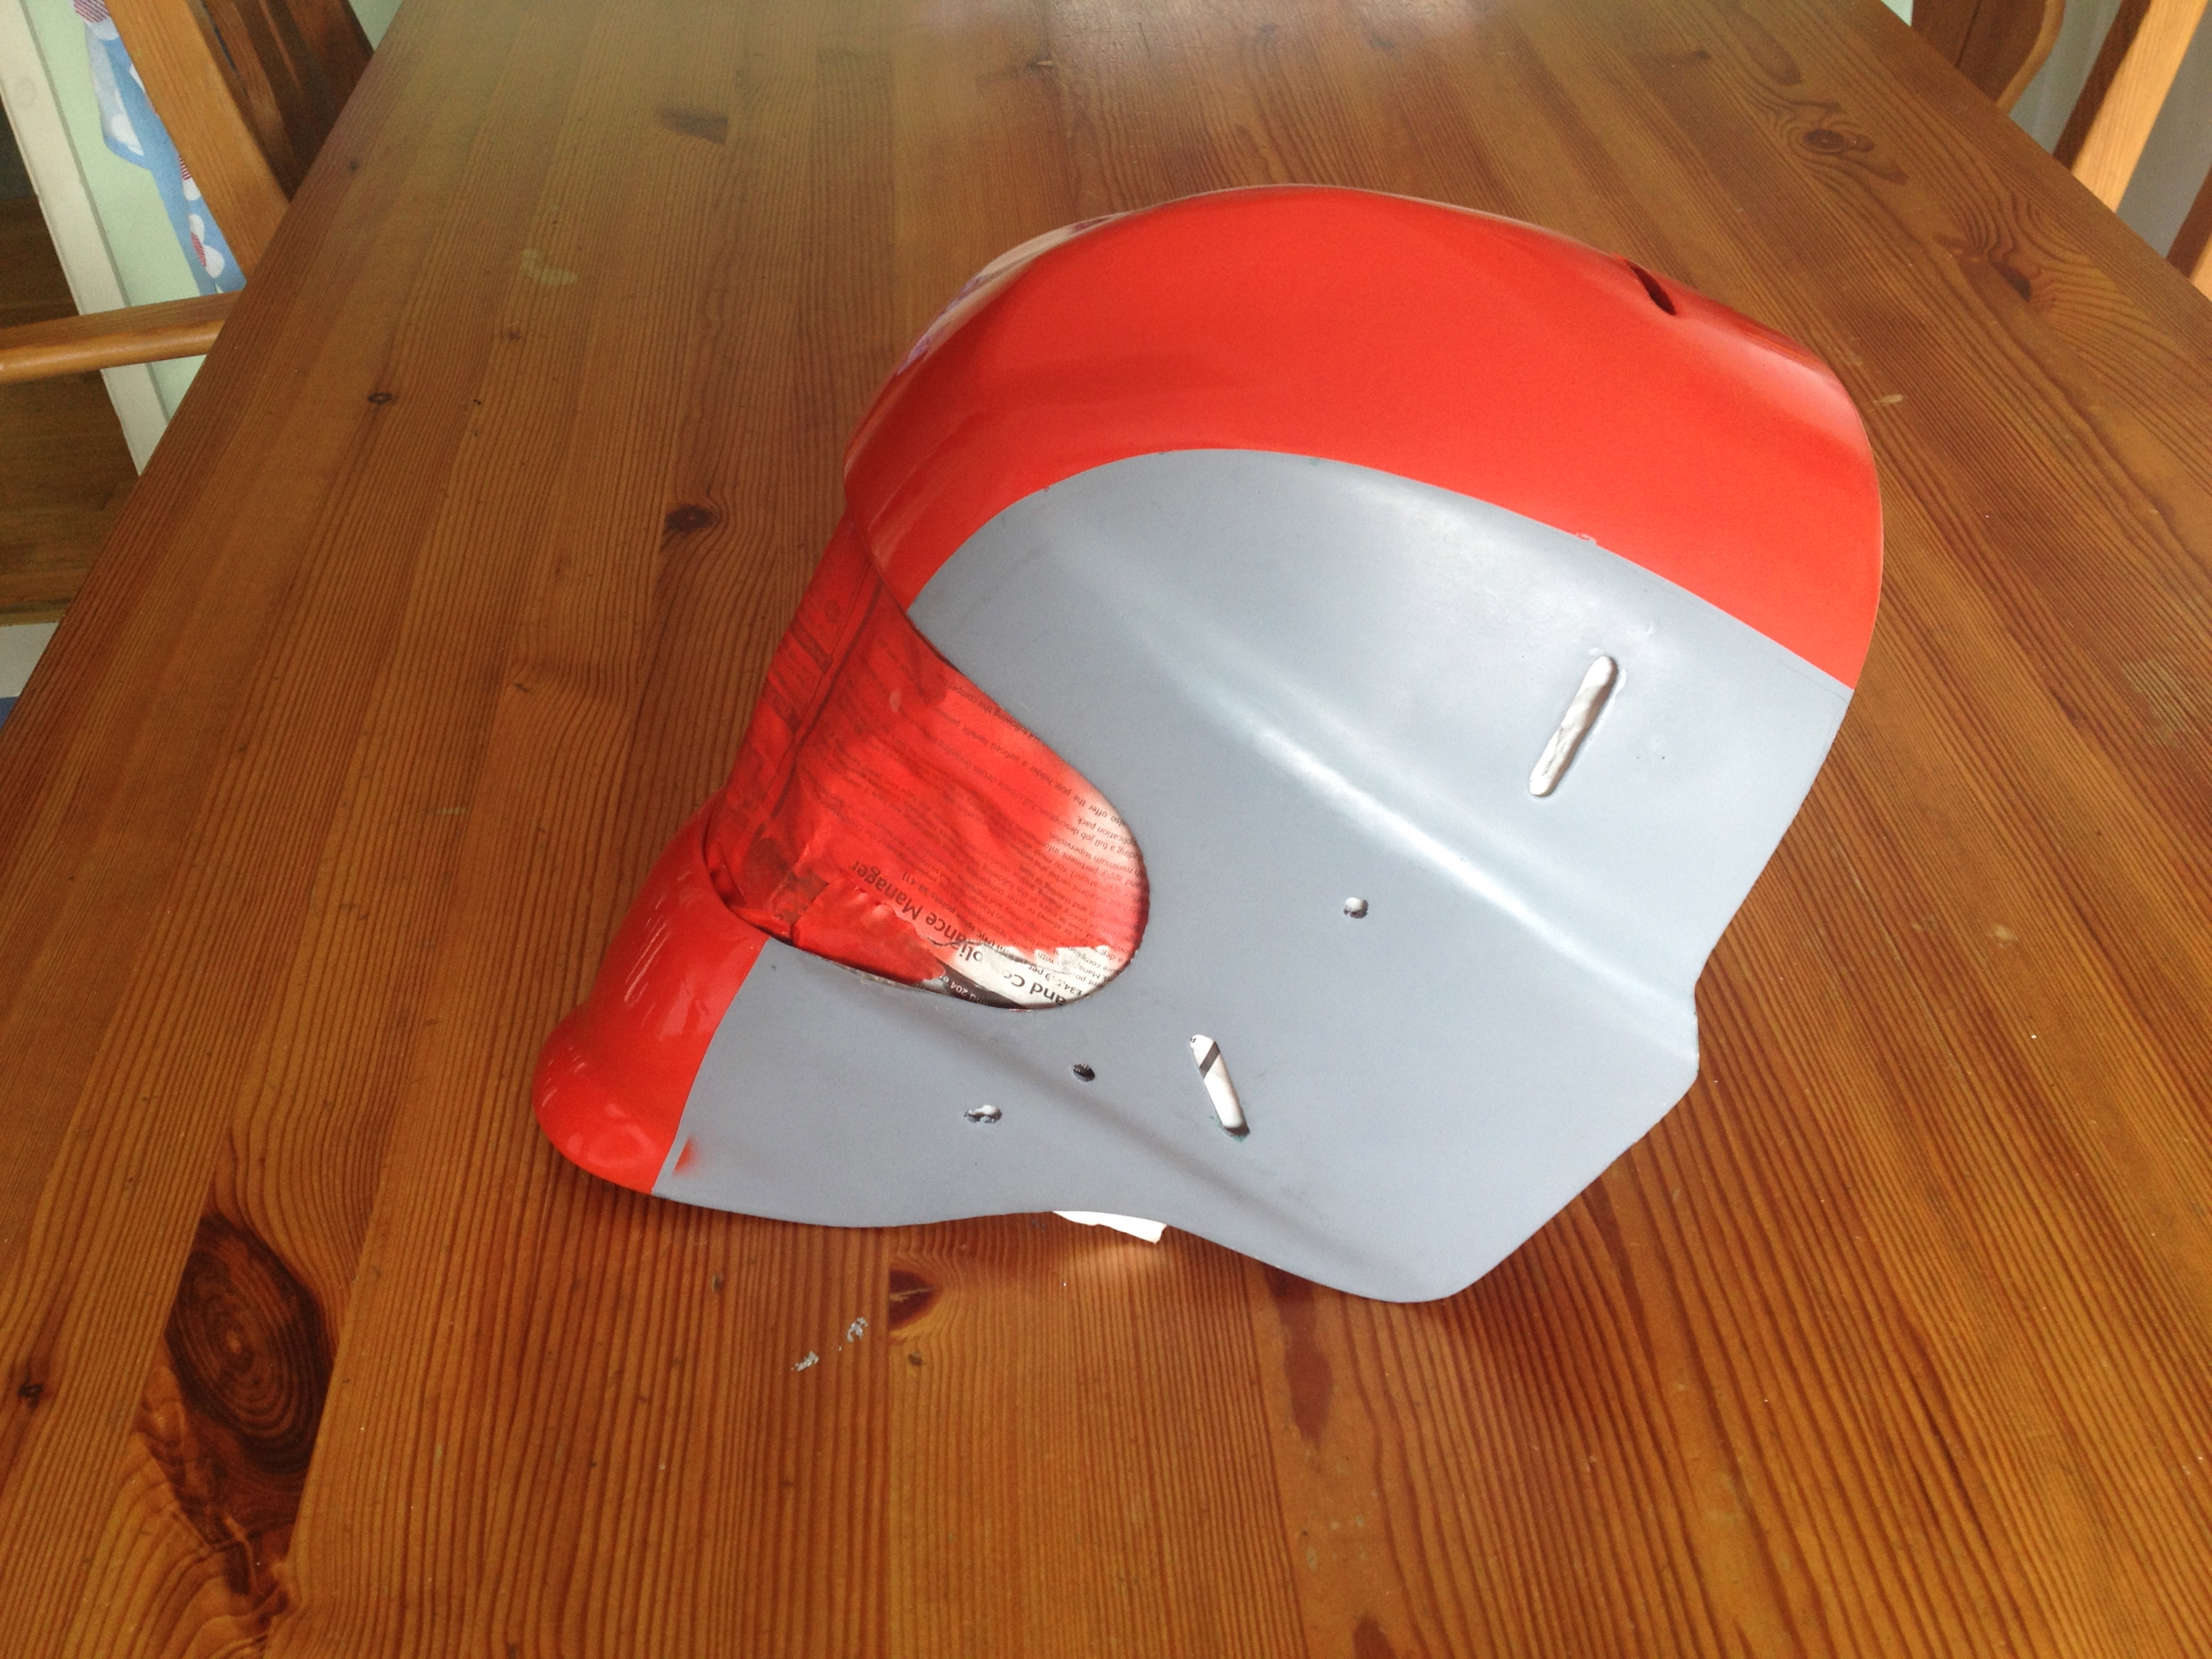
Repeat the above steps until you have an even, uniform, solid covering of paint. For the red paint below, I did 10 coats, which was the majority of the can.
The pictures show some mistakes in the painting as there was some red overlap where the masking tape didn’t cover correctly. It also shows that the freehand masking of the curve is not completely symmetrical and the red stripe is a bit off centre to the right.
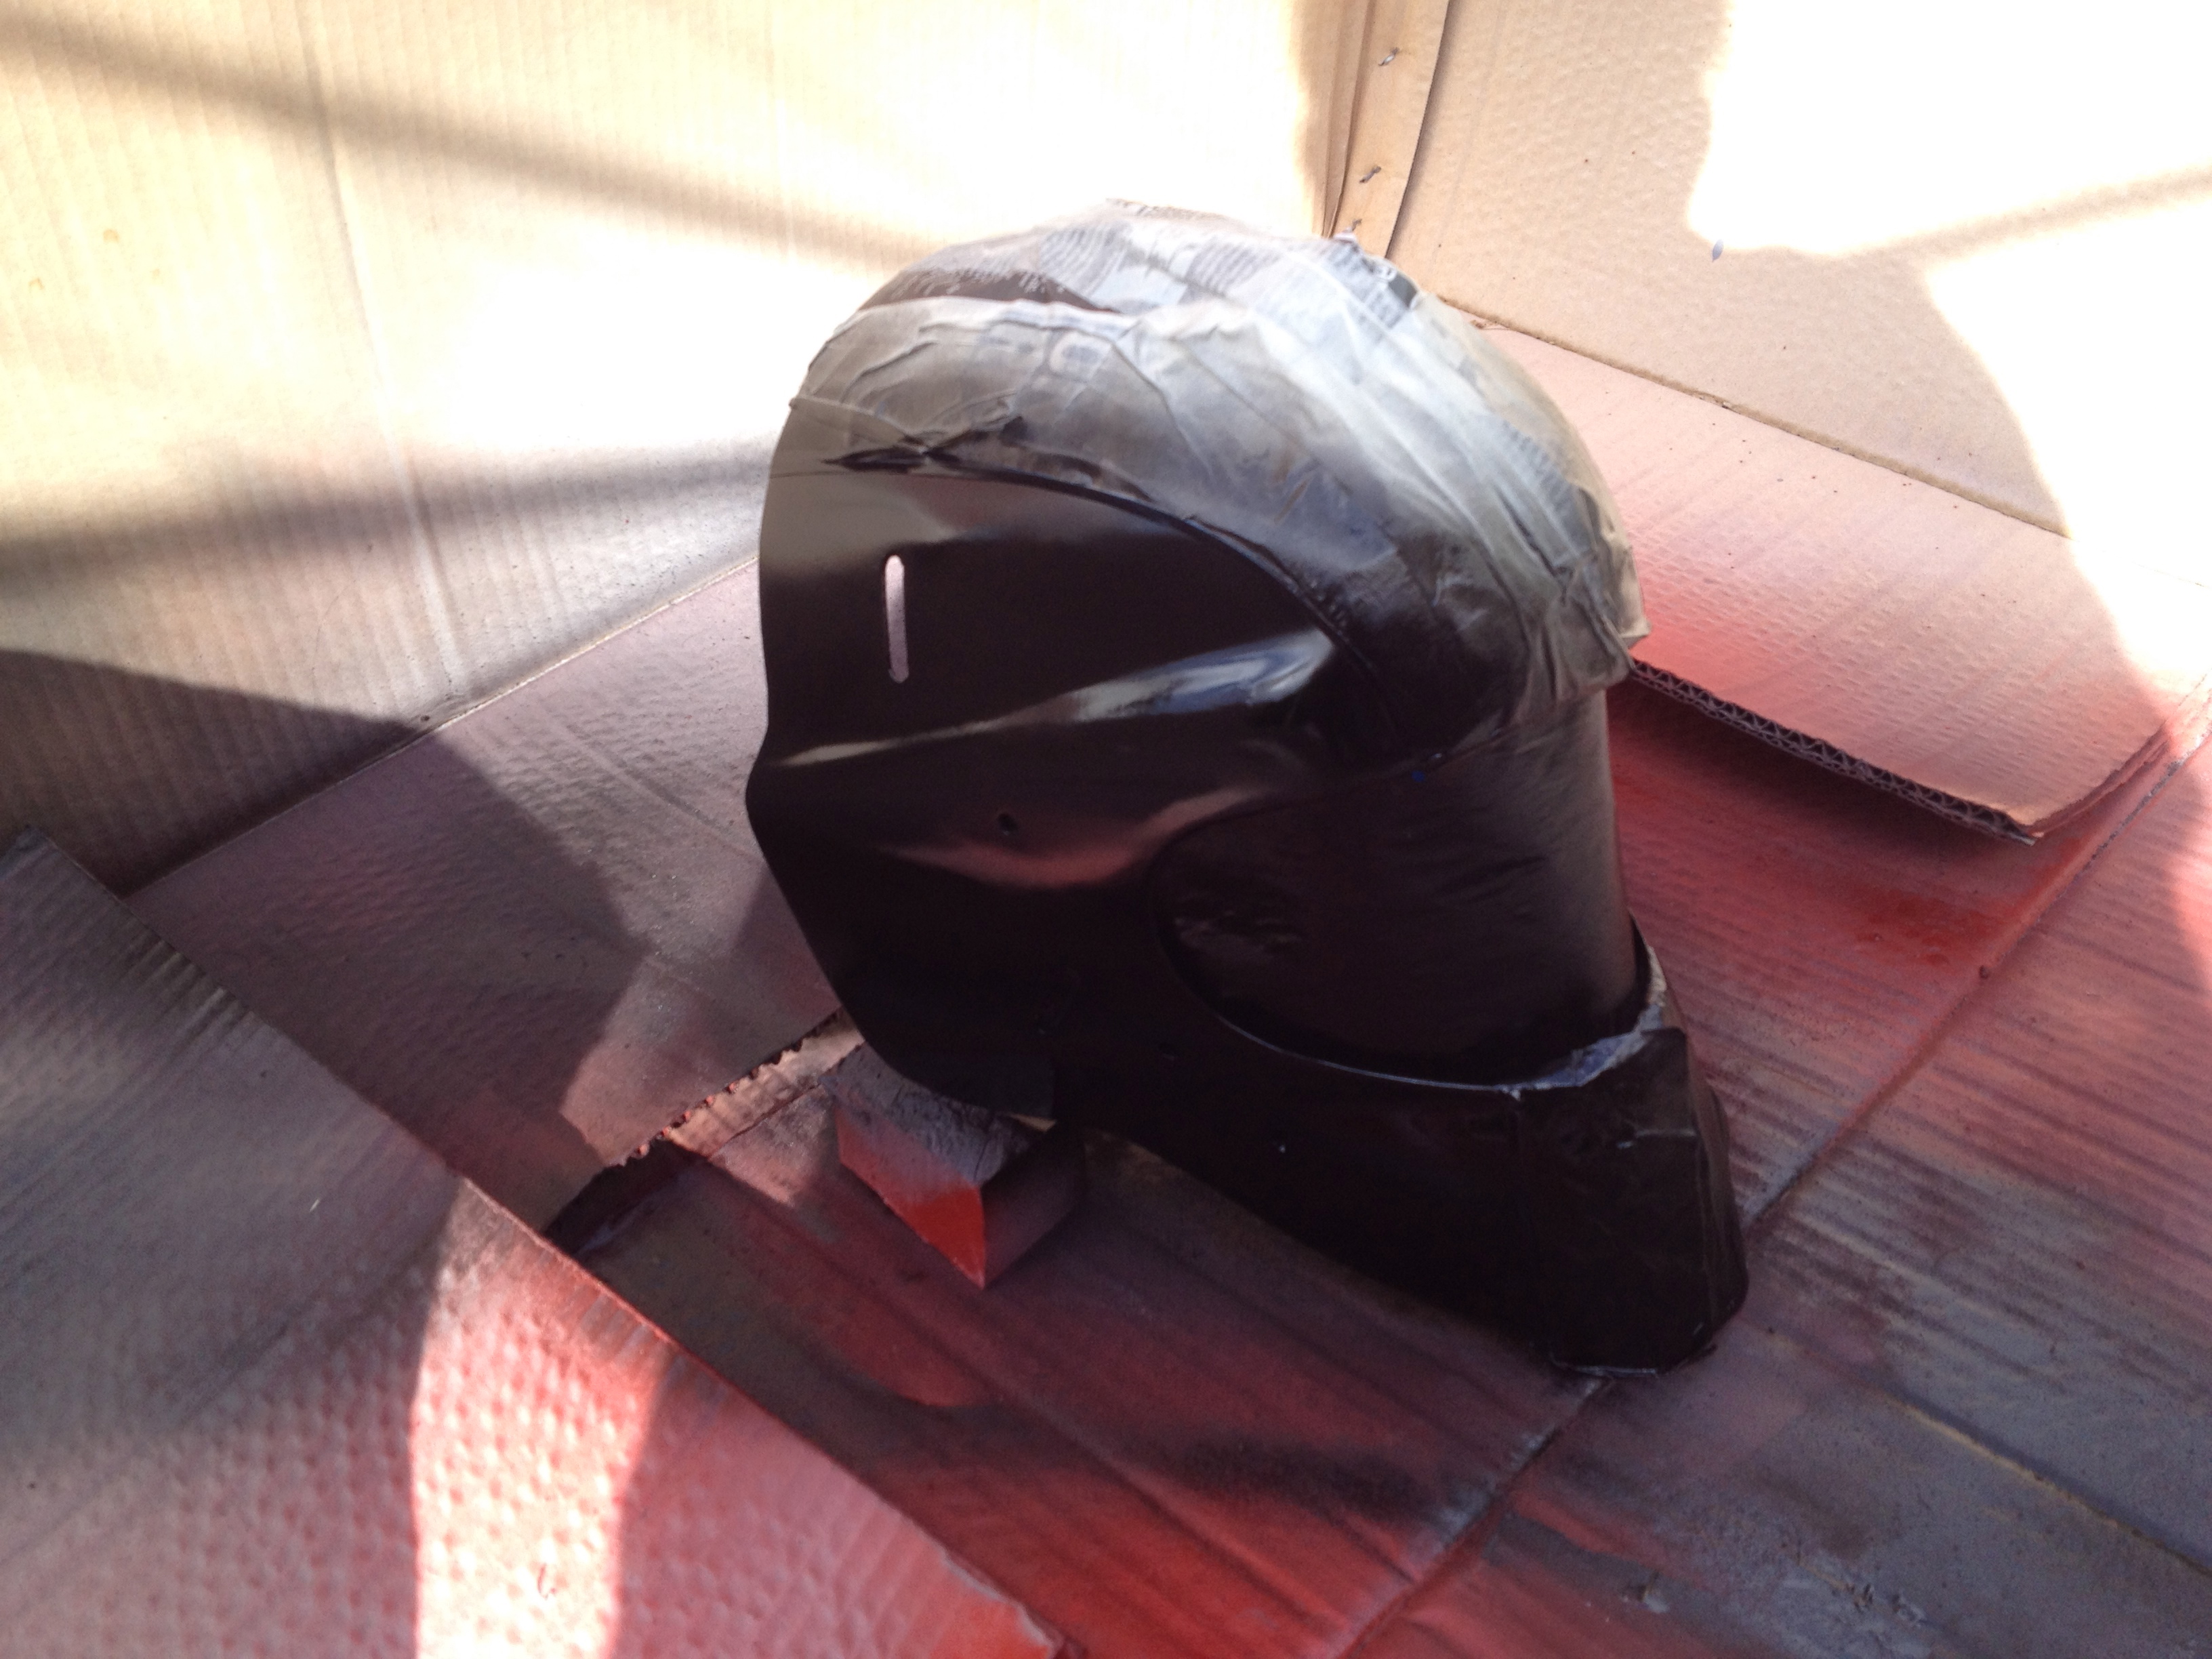
The next step after this was the application of the black paint. Follow the same procedure as above to get a similar surface finish. I used the whole can of black, getting about 7 coats before I stopped. At a guess, a regular rattle can of car paint should last you 5 full coats if you are painting your helmet the one colour.

Step 9 – Finishing.
I should start by stating that I skipped this step, as I was happy enough with the finish that I had after completing the painting stage. After all, the paint I used was spray car paint and was designed to be the finish for a car that doesn’t require a clear coat.
However, I did use a clear coat when I painted my helmet the last time, so these instructions are valid, even if they were not used for this particular refurbishment.
Degrease the surface once more. Then take the 1200 wet and dry, wet it and carefully and gently sand the interface areas where the two different paint colours meet to take away the bump or line that will have formed on the masking tape. Wipe with a clean rag and leave to dry before degreasing again in preparation for the clear coat. The clear coat should be done in the same manner as the previous coats of paint, however no wet and dry should be used after spraying. I did one high quality coat of clear and left it at that.
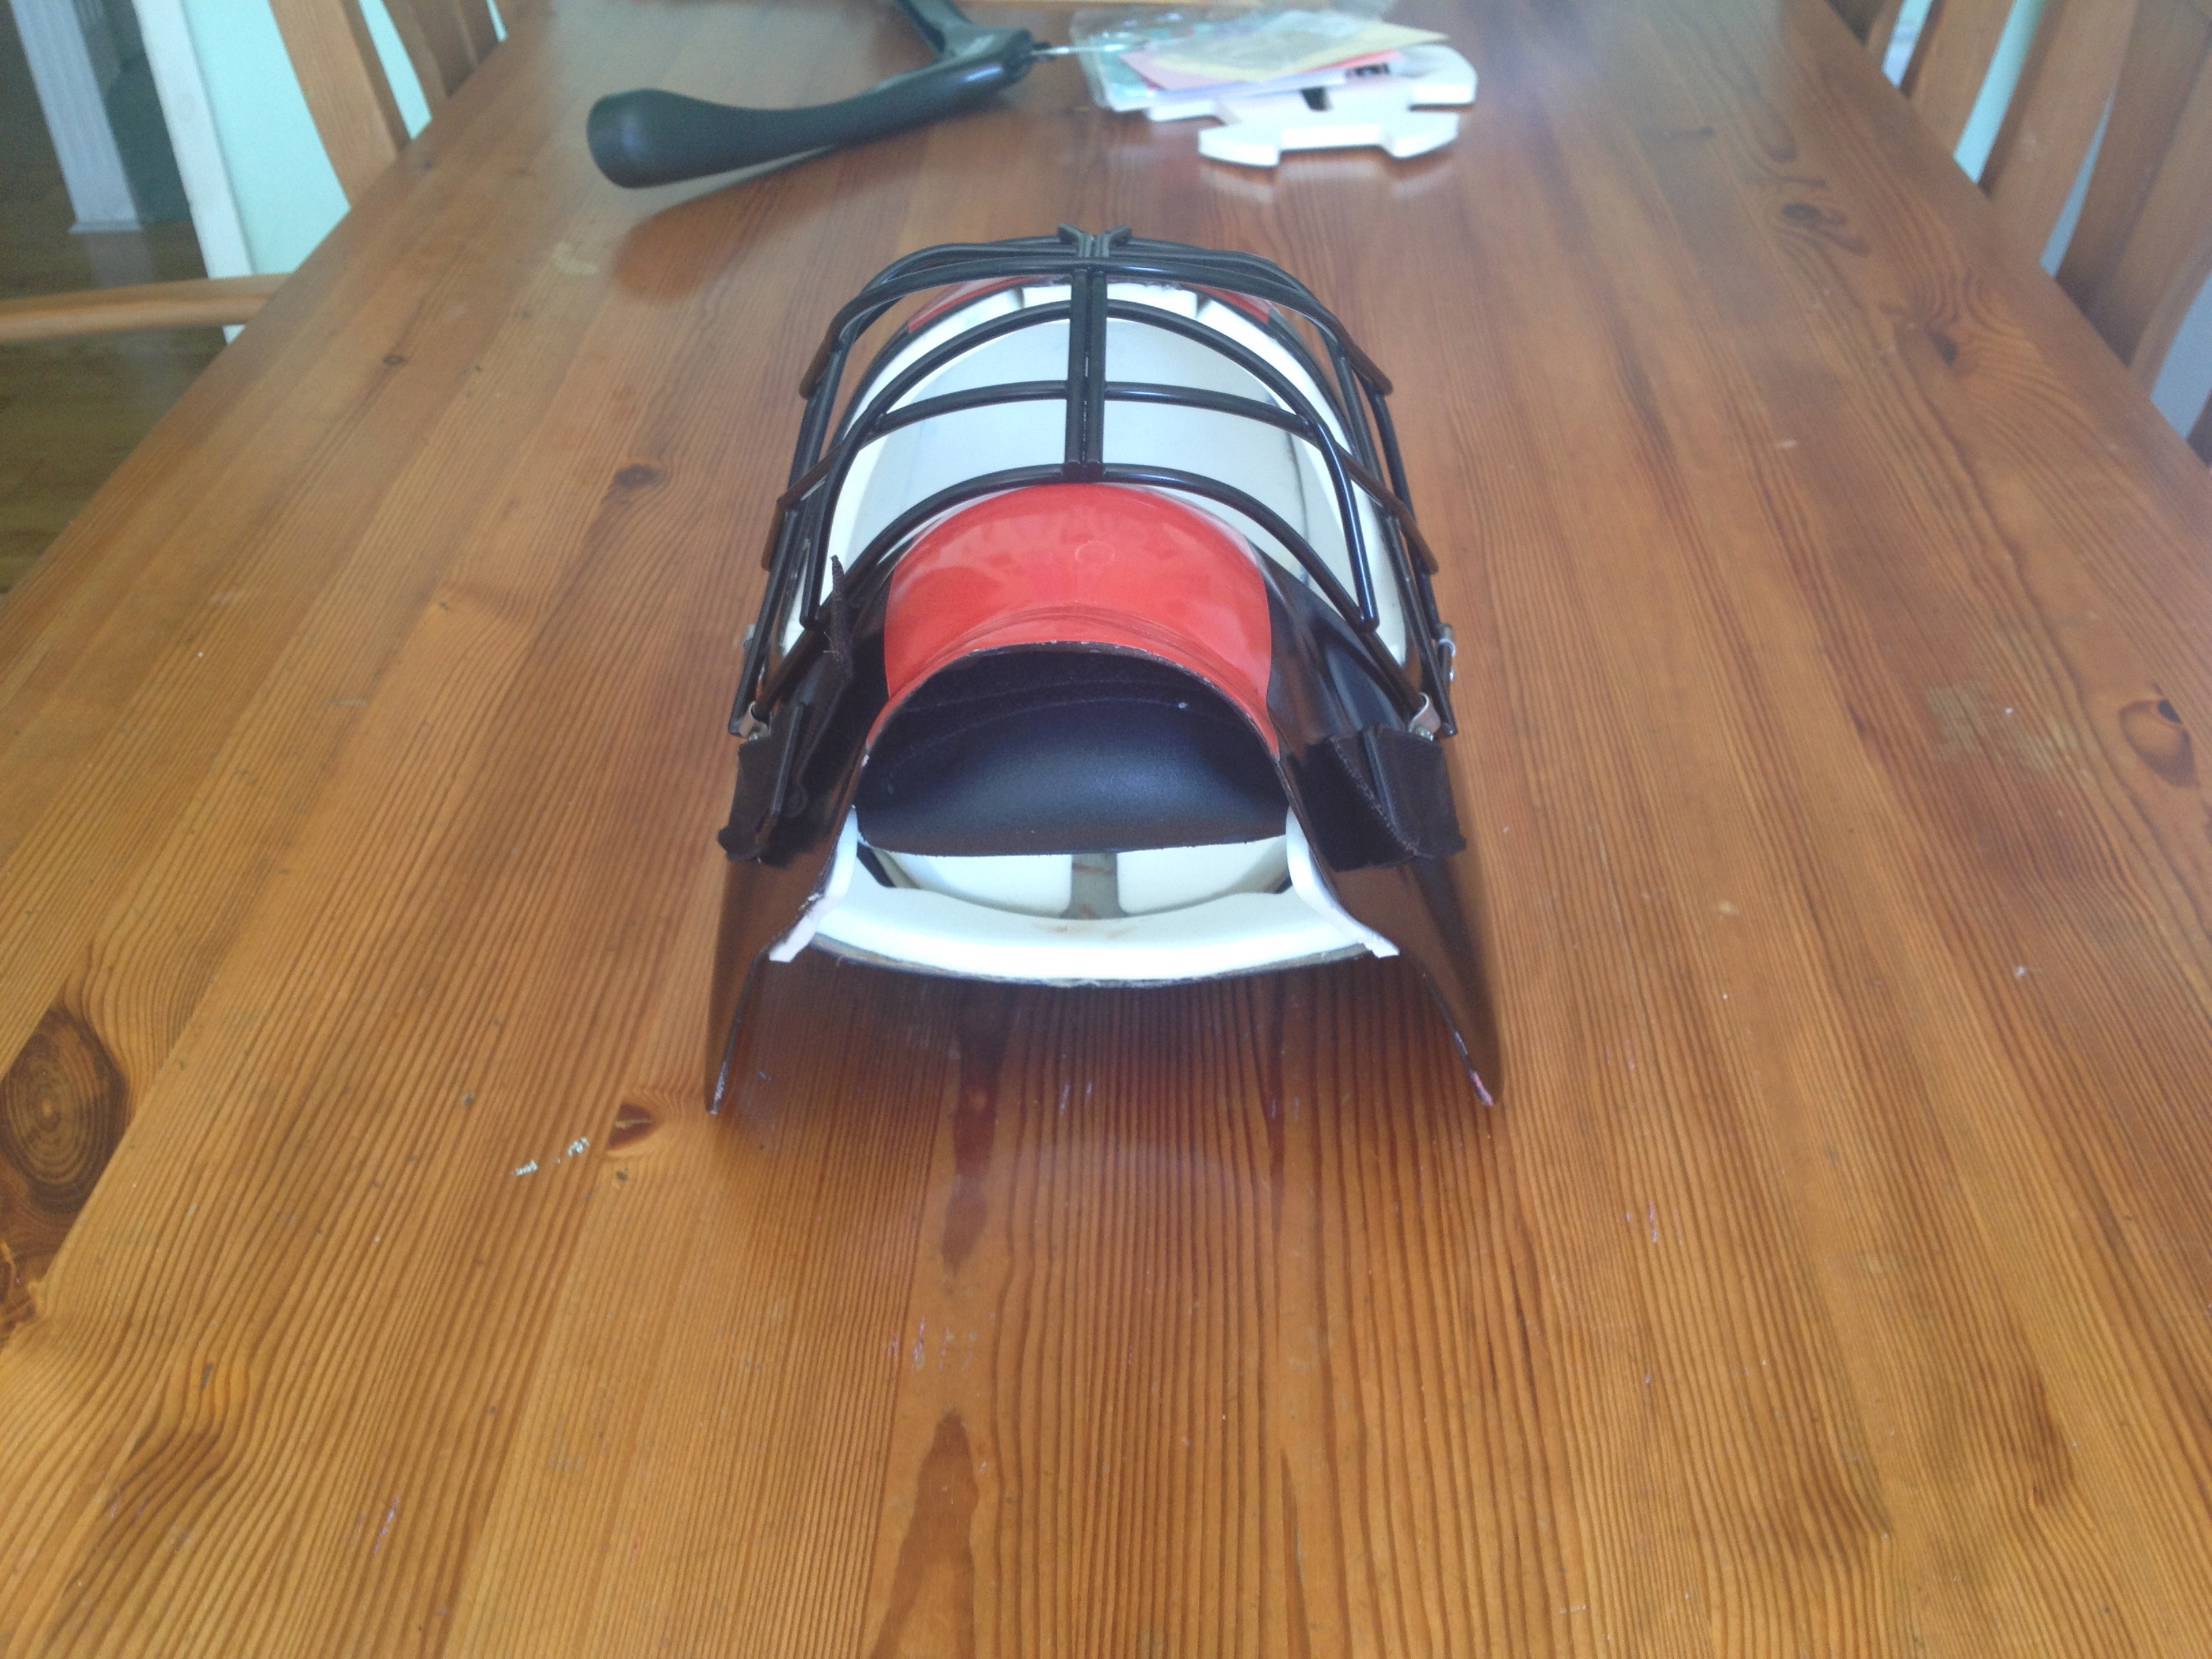
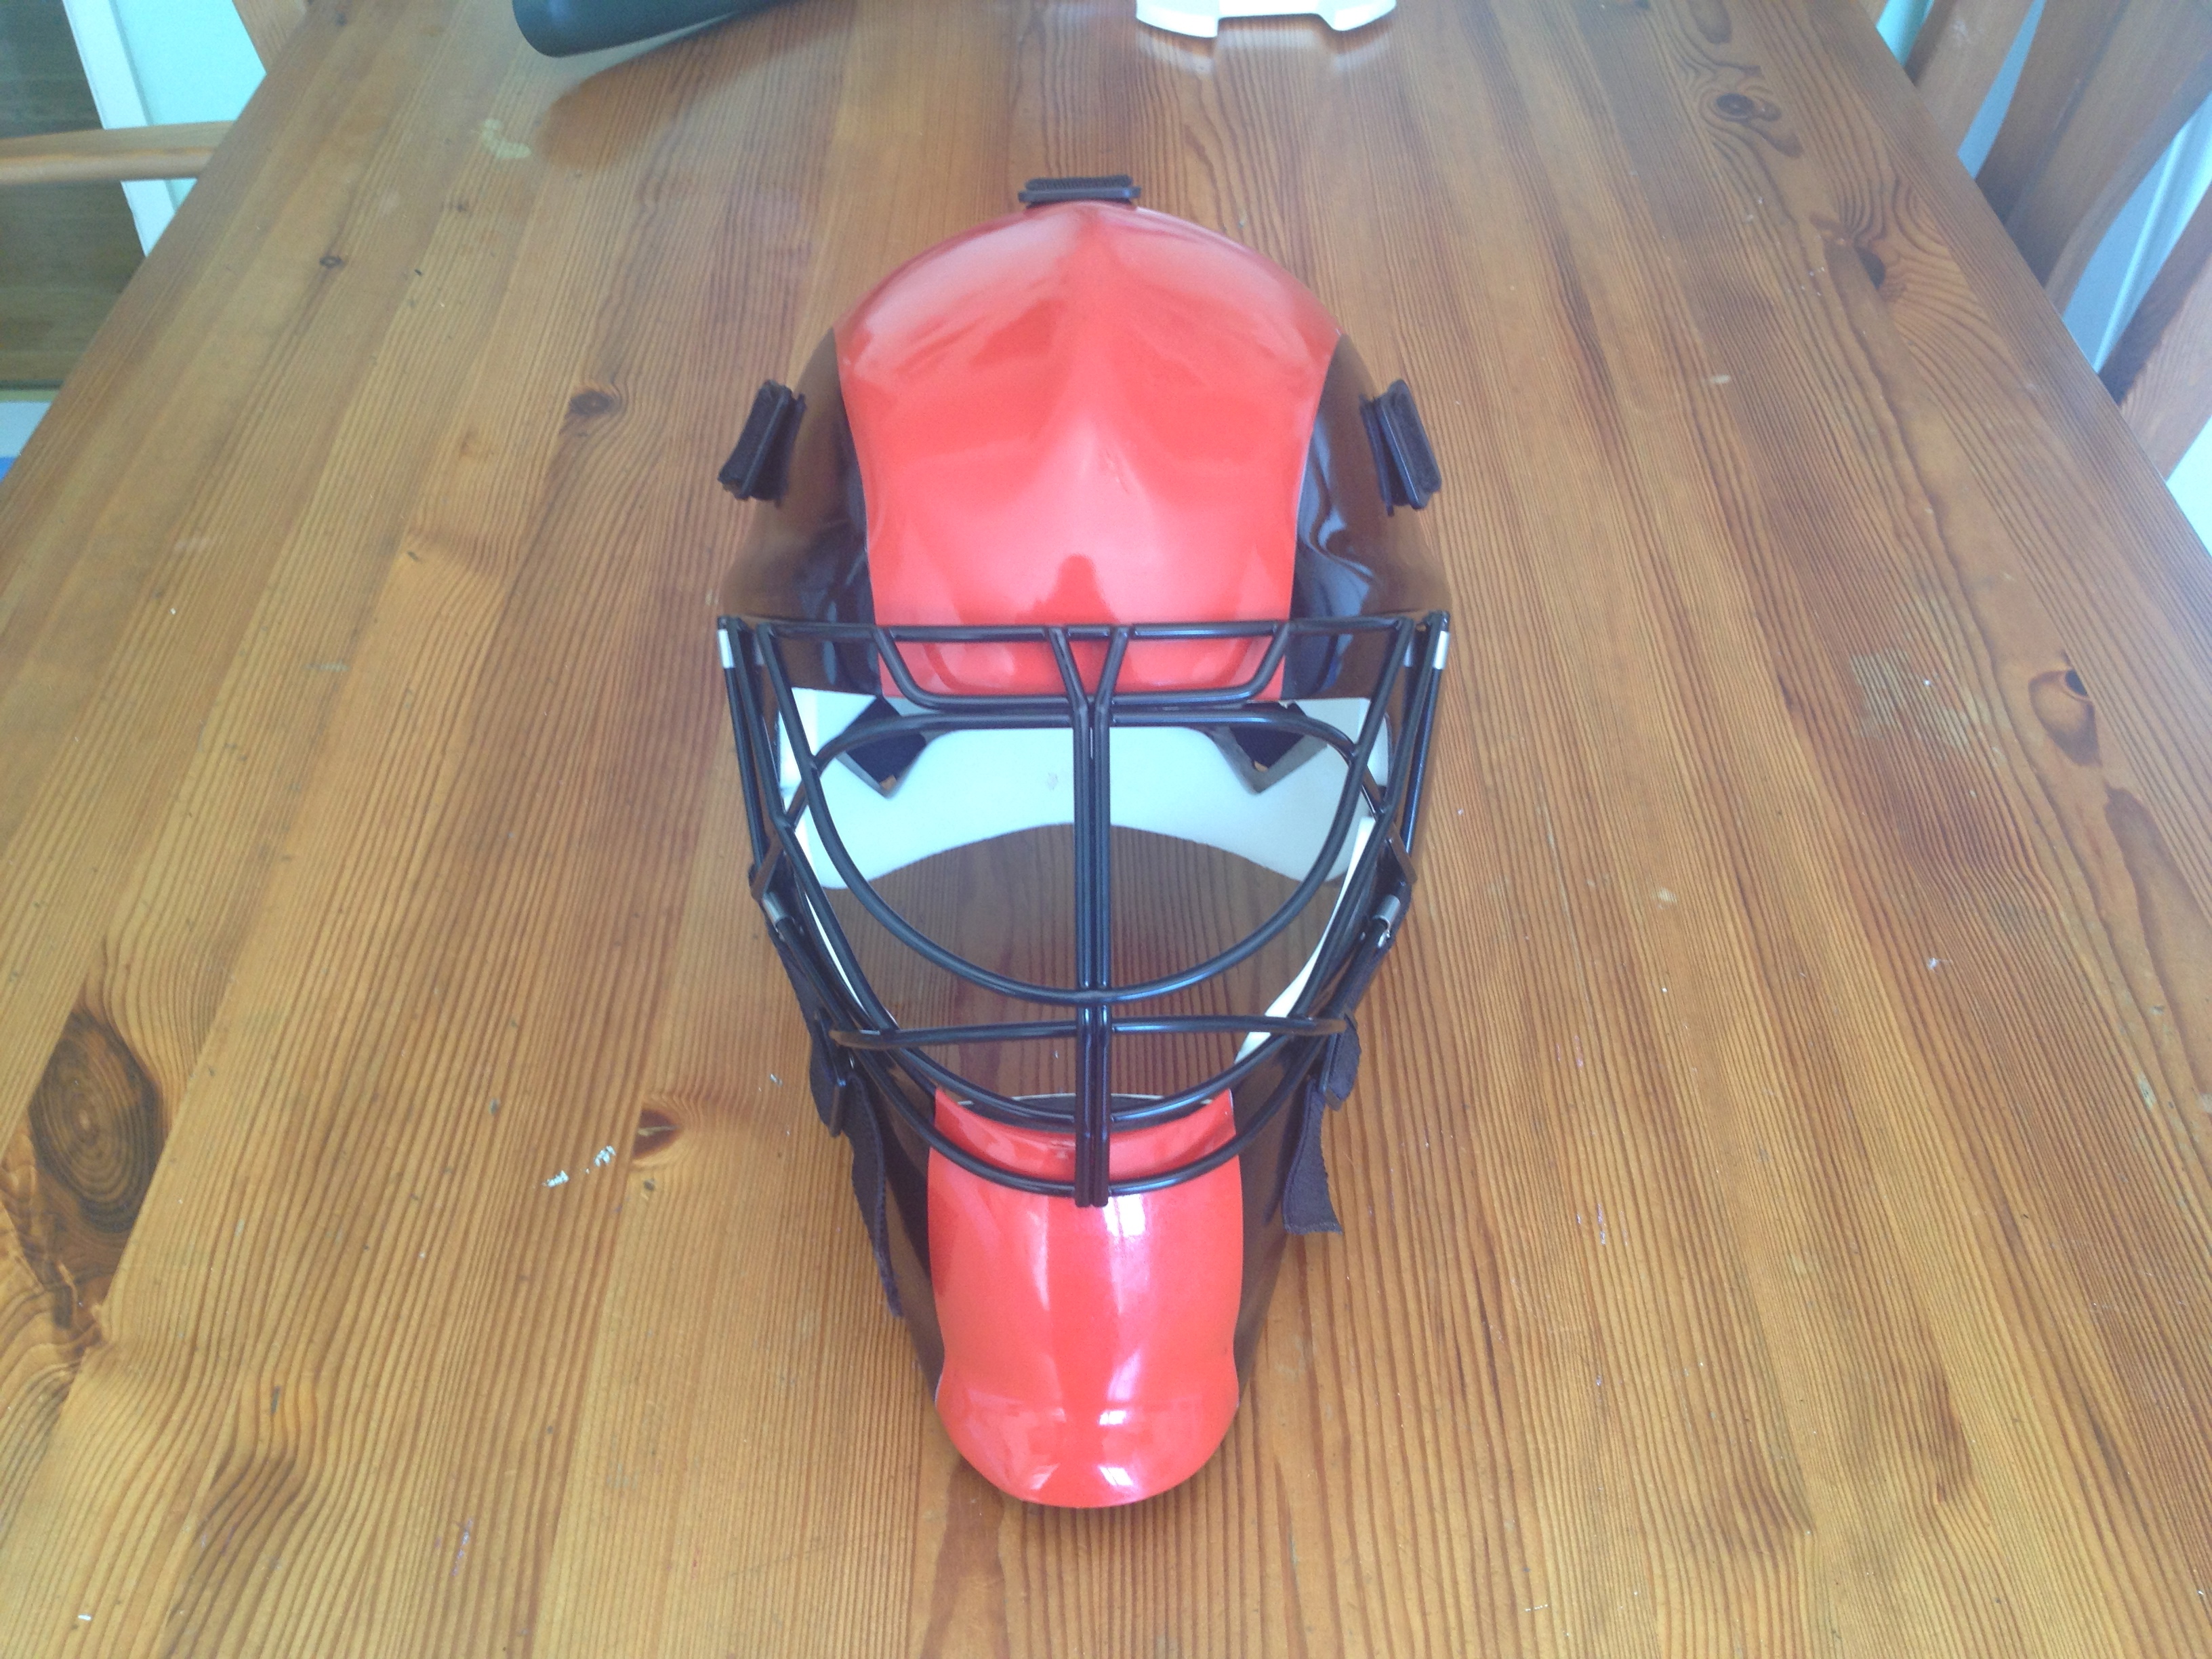
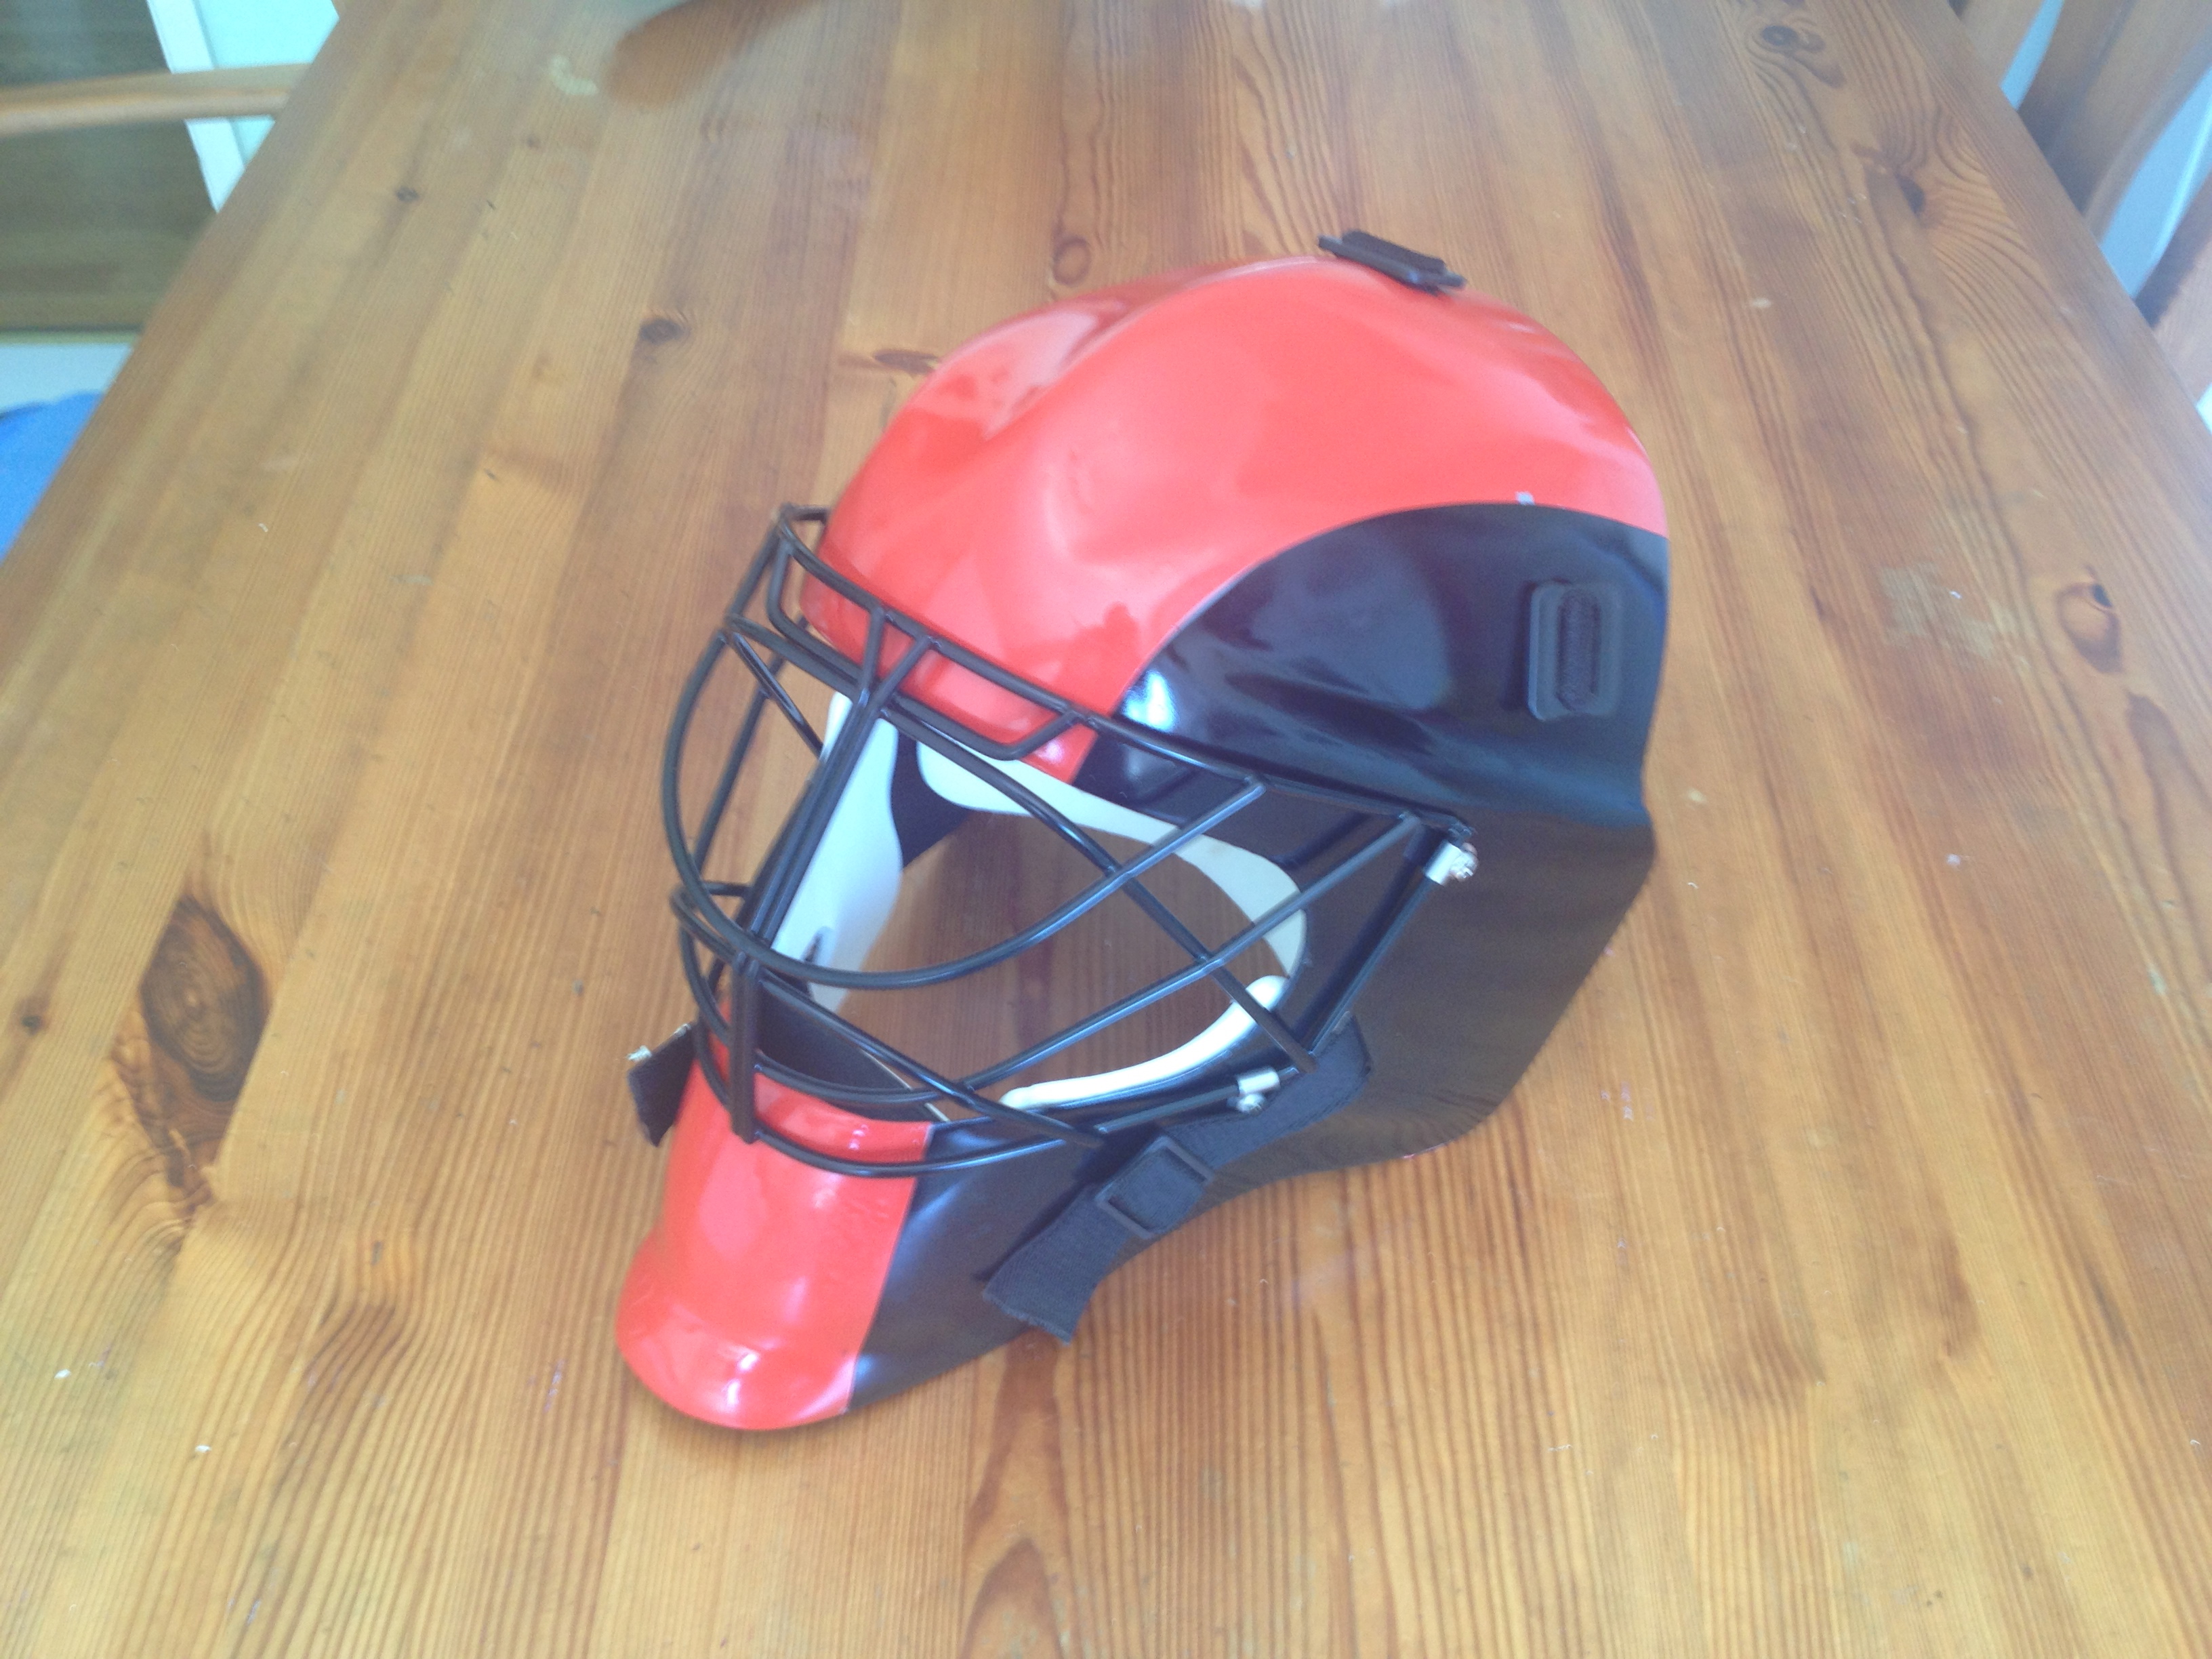
Step 10 – Metal Fittings
Get the bag of fittings and attach the new grill to the helmet, being careful of the metal on the newly painted surface. Ensure you match the correct screws to the correct back plates and that you put the helmet grill clips in the correct places. Use the pictures below to ensure the grill is positioned correctly. My technique for this was to prise the metal helmet clips open and then put them around the grill, then use the tightening of the screws to close them. I found if you put the grill on and hand tighten the screws before tightening them fully means that you won’t force the screws and put undue pressure on the holes in the helmet. Then put the snap studs back on, remembering that the velcro fitting for the chin cup attaches on the inside of these studs. Position the velcro so that it can accommodate the new chin cup, then fully tighten the screws into position.
Step 11 – Foam
With reference to the picture below showing the layout of the foam, take the new foam and apply to the inside of the helmet. Test the fit by placing the foam dry, with no adhesive on it. The larger parts of the foam will need to be bent and shaped before glueing, as they will pull away from the helmet surface and the glue will not hold. From inspection of the old foam, I could see that some sort of latex adhesive had been used. It is for this reason that I used copydex, as I know it will not damage or affect the carbon fibre or fibreglass.
Start with the largest curved piece that goes around the outside and then continue using the numbered picture below.
The method for glueing with copydex is to paint a thin coat on both surfaces, then wait for it to become tacky before putting the two pieces together. I found copydex was fine for the large curved piece (#1) as it was easily weighted with a book or a bag of flour, as well as for the smaller wedge pieces (#5 & 6), as these are not curved very much. However, due to the large curve of the other pieces, (2, 3, 4, 7 & 8) I found the copydex wasn’t as effective, as it kept lifting off the helmet surface due to its large curvature. As a result, I used a hot glue gun for these pieces instead. The use of the hot glue means that if you decide to refurbish the foam again, you will have to rip the foam and it will not be salvageable. Draw a line of glue around the edges of the foam and put a small amount in the middle of the foam before quickly placing and positioning the foam. Hot glue dries fast so be careful. Don’t forget the helmet back piece, use copydex and a heavy weight for this one.
Notes for positioning
Step 11 – Plastic Fittings
Take the new elastic back strap and thread it through the back piece of the helmet as shown below.

Then thread the individual pieces of elastic through the corresponding holes and attach the plastic fittings. Three flat fittings for the middle hole and the holes either side and two snap stud fittings for both the far sides of the helmet. At this point you should also fit the new chin cup and sweat band to complete the refurbishment.