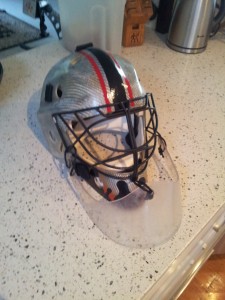
For all you creative OBO-ites who’ve been asking about painting your OBO helmets but aren’t sure how to go about it, here’s some ideas and advice based on recent experience. If you’re handy and keen, you can jazz up your helmet at a reasonable price on your own.
I need to start off with an advisory, if you’re not handy, this is best left to professionals. You can find mask painters on the internet. Depending on the part of the world you live in you might have to ship it away and depending on the type of mask you have it may not be worth it. Professional painters will charge anywhere between $200-$400 US based on how complicated your design is.
If you are handy, but haven’t done this type of work before, PATIENCE (note capitals) is a key skill. Painting a mask properly is not done in a day. Preparation is the other big word. A paint job is only as good as what’s under it and if you don’t do the prep work and get a good smooth, clean surface to paint, it will show in the paint. In keeping with the P theme, the other key to a good paint job is planning.
There are a number of ways to paint/decorate your mask and a lot will depend on the type of mask you’re painting. The OBO CK and FG masks are made from either Carbon Kevlar or Fibreglass and are painted (or have a finish on them) while the PE, Poly P and ABS helmets are essentially plastic without a finish.
Before you commit to painting your helmet, I recommend taking to Youtube and looking at some of the entries under GOALIE MASK PAINTING. Most of them show the work of professionals and involve airbrush work. There are low-tech ways to paint masks and the video below is a particularly good clip:
The mask that’s shown in the video involves painting and vinyl decals. Vinyl decals are another way to decorate your helmet and can be custom done by any Sign Shop that has graphics arts programs. They’re durable, easy to apply and can be a way to incorporate more intricate, detailed designs relatively cheaply. An expensive set of vinyl decals could be $60US. If you’re going to paint your helmet with anything other than one colour, expect to spend at least $40+US for spray paint.
At the planning stage of painting your mask, you should have a good idea of the design and if this is your first go, I’d recommend keeping things simple. If you’re somewhat artistic, draw the design out. You can trace a template of the mask if that helps and lay it out. Assemble your materials, paints, masking tape, sandpapers, paint stripper, scrapers, screw drivers, pliers, adjustable wrench, etc. Spray paints that are designed for cars are best for masks.
As mentioned, preparation will depend on whether your mask already has a finish on it. If it does (CK or FG helmets, you’ll need to take the clear coat and any paint off first). Regardless of type of helmet, you want to remove the cage and any other helmet hardware. Depending on the state of your helmet, that can be tricky as screws can rust (hence the wrench and/or pliers). If you’re helmet hardware is in a really bad state, have replacement hardware lined up before you get too far along. It doesn’t make a whole lot of sense to have a flash paint job and rusty old screws. Set aside your hardware and make sure it’s in a good place.
Step one of preparation starts with a good wash with a mild liquid soap, a plastic scrub brush and a good dry. A couple of notes about spending time and money on your paint job, your finished product will reflect what you put in, especially on what you do before you paint. Quality materials won’t cost a fortune.
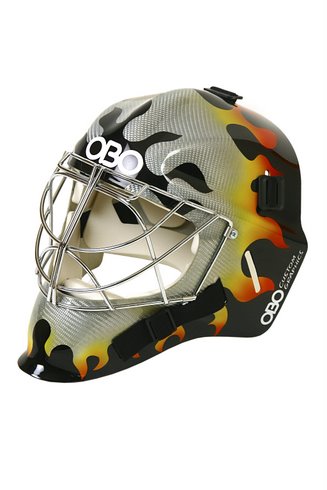
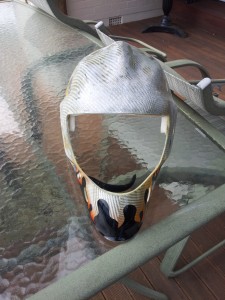
My project was a half painted Flame FG helmet that I was looking to personalize. I wanted to tone down the Flames, accentuate the raw natural fibreglass and add a little simple trim. The first bit was stripping off the clear coat and painted section. When selecting paint strippers, read the directions carefully and make sure they’re suitable for your helmet. Most automotive paint strippers are fine for FG and CK helmets, not for PE, Poly P or ABS types. You will need to use a scraper to remove the paint. A word to the wise, work with the contours of the helmet when scraping and as much as it is scraping, be gentle. You don’t want to leave gouges or deep scratches when you scrape as you’ll have to sand or fill them later.
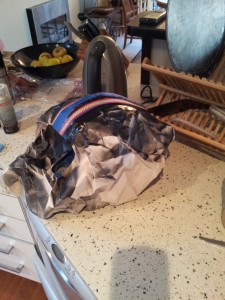
Next up on the prep front is sanding. Sandpapers come in a number of types and grades. The higher the grit, the finer the paper and there is dry and wet sandpaper. If you’ve done a good job with your stripping, sanding should go in rounds. First round is a medium grade (400-600 dry grit paper) and sanding should be done lightly in a circular pattern to smooth out major surface irregularities. Depending on how smooth your painting surface is, you may be able to go directly to wet sanding with a fine paper (1200-1400 grit). Both the mask and the paper (grit side) should be wet when wet sanding and with fine papers, more sanding is better as you won’t sand into the masks composite materials.
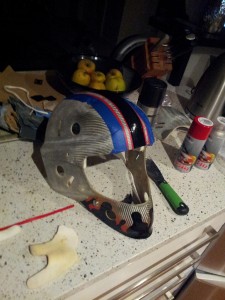
Once you’re satisfied that the mask is smooth and clear of residue paint, you’re ready to start painting. Once again, paint work will depend on your paint job. For my mask, I wanted to retain the natural fibreglass look for most of the helmet so clean and smooth was as far as I needed to go. If you’re looking to completely paint your mask, then primer is next. You can buy sandable primer and if your mask isn’t completely smooth, it’s a good idea. Before applying primer, make sure you’ve completely washed, rinsed and dried your mask. Primer is the bond for paint and if you don’t have a clean, dry surface the primer and paint won’t adhere. You also won’t likely need to paint the inside of your mask. You should tape the cutout for the cage and other holes to prevent spray getting on the inside.
You’re now ready to prime. Using primer will be good practice for painting later. Whatever paint or primer you use, READ THE DIRECTIONS. Not all paints are the same and this is especially true as it applies to spraying multiple coats and for primers, how long you need to wait before spraying colour over it. When spraying coats of primer or paint, multiple light coats are better than single heavy coats. Heavy coats of paint take longer to dry between coats and are more likely to sag or drip. Make sure you’re spraying in a bright and well-ventilated area.
Once you’re happy that you’ve got a good primer coat down, you’ll need to wet sand with a fine paper again. Make sure mask and paper are wet and be light with the paper and work in a circular pattern. Rinse with clean water and then let the mask completely dry.
Painting will depend on the complexity of your paint scheme. If you are using multiple colours, your base colour should be the one that covers the majority of the mask. Like primer, read and follow the paint instructions, especially as it applies to multiple coats of paint and the time between coats. Once again, many, light coats are preferable to fewer heavy coats. Be patient, if you’re in a hurry, it’s easy to overspray and get drips. If you do get drips and you’re looking to do a quality job, it’s far better to stop early, let the paint dry and sand the drips out. Hoping to get the drip out by spraying more coats of paint on, rarely works well.
Depending on your design, you may need to tape when spraying other colours. A couple of notes on taping, buy good masking tape (professional painters grade). Nothing will botch your best paint plans up faster than using bad tape. Make sure the paint layer under the colour you’re taping is fully dried and cured. If it isn’t, the paint will adhere to the tape and come up when you remove the tape. Check to make sure the tape is fully adhered between coats, especially in curvy areas of the mask as tape can release. Lastly, make sure the paint is dry before removing tape. If you do get some wobbly lines when you remove tape, you can always re-tape and spray the adjacent colour or if it’s only a small bit and light you can try rubbing it out with a small bit of paint remover on a rag.
Once you’re satisfied with your paint, the last step is clear coat. Plan on using all the clear coat you get in a large spray can, it’s basically the only thing that protects your paint. Recurring theme, lots of light coats are best. Once your clear coat is dried, wet sand the finished product as that will level the finish.
Painting a PE, Poly P or ABS helmet is much simpler. There’s no paint or clear coat to remove, you don’t need to prime and you can use a plastic paint on the helmet. You’ll still need to apply a clear coat to protect the paint and make sure it’s compatible with the paint you use.
