The problem with injuries, other than actually having to deal with the suffering of sitting out when you feel you should be playing, and then putting up with the pain involved, is that being sporting injuries, they are more of a specialist subject that are hard to deal with, and are not very well understood. We don’t all have access to sports therapists, so how can you tell what’s wrong? How many times have you gone to A & E only to be told that there isn’t anything really wrong with you, and there’s little you can do about it?
The misdiagnosis and waste of precious time in itself, is more than annoying. Therefore, I’ve put together a useful guide to injuries you’re likely to suffer during your careering, and their respective treatments, which you’ll hopefully be able to make use of, without having to rely on an ignorant doctor (that is, one who doesn’t have the sporting knowledge to be of any help!).
Treating swelling
Swelling is the most common form of punishment that your body will come across when enduring the vigour of the game. As it becomes a regularity, you will need to know the best means of dealing with it.
Icing the wound
Ice is the best way of dealing with swelling; holding an ice pack or a packet of frozen peas over the swelling, for a length of time, will reduce the actual swelling. If you’ve got the balls (no pun intended), then you can make use of an ice bath: simply fill your bath up with freezing cold water, and then slowly immerse yourself into it, spending enough time in the cold to help alleviate the pain and reduce the swelling bump. The cold temperature will help to alleviate the pressure on the muscle area.
Dealing with severe bruising
Severe bruising is obviously far worse than your average bruise, but is actually not as bad as it sounds; your skin will be tender than usual, and more vulnerable to further damage. If not treated properly, they can lead to a contusion, which is both painful and annoying; medication for the pain and rest will speed up the recovery, needing a few weeks off the game to let it heal properly.
Contusions
Unlike bruises, contusions need time to rest and then reworked; the bunched muscle needs rehabilitation to remove the ‘lump’ that has formed in the cartilage. Physiotherapy can be found from a hospital appointment; the necessary stretches needed to help it.
Muscular injuries
Muscle injuries are easy to come across in any sport and any position; whilst you may bruise or batter yourself during the game, for whatever reason, it is so easy to forget how the rest of your body can be affected. By not stretching properly, you are begging for an injury, and that is not to mention the possibility of unfair and unfortunate time out of playing as a result.
Strains
It is easy enough to strain any muscle, especially if you have not stretched enough, let alone done any. If you are late to a game, or want to skip warm ups (so you don’t have to face any of those nasty stingers), you’re not doing yourself any favours by not properly warning, in fact you’re making the situation worse. By not stretching, you are putting yourself at easy risk of muscle injury.
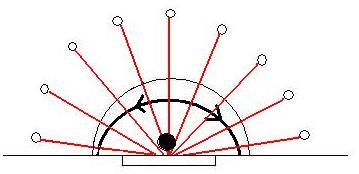
In my experience the most common areas of strains are in the leg area (mainly your groin), which can be caused by over extending your body in a desperate attempt to make the save, where you are not used to doing the splits or do not have the flexibility to normally do so, or in the shoulder area. A lot of goalkeepers don’t even know how to work out their shoulder joints properly, despite how important they are for making saves.
You need strong shoulders to give you the articulation necessary to move your gloves to make the saves; without it, you are going to damage the rotator cuff. Working out with weights will help strengthen them.
Pulls
A pulled muscle is essentially a strained one: once the muscle has been damaged, you should rest it and rehab it until it has repaired itself. A damaged muscle will result in a strengthened muscle; the body dealing with the problem by repairing itself. Give yourself a week or so to heal, depending on the severity; stretching out the muscle to help the process.
Tears
Torn muscles are much more serious, and worse than your general pull. The hamstring, like soccer players, is most vulnerable if you like to make use of your leg muscles to stretch on the play for splits saves. Muscle tears will need longer to repair themselves.
Lower body injuries
There are a number of areas vulnerable to injury below your hips. A lack of suitable equipment that does not meet the standard of play, or a degrading and beat up set of equipment, are the main cause of these problems. If you do not have a level of protection that can protect you from hard shots, you can only expect to end up battered and bruised.
The feet
You feet are the most susceptible part of your lower body to injury; if your feet are poorly protected, then you can seriously damage them. Your feet are an important part of your bodily structure; you need them to balance and grip the pitch, providing the movement you require to keep up with the speed of the game. You should make the effort to protect your feet; if you strap your kickers too loosely, you can expect nothing but trouble.
Bruising
A direct shot to your kicker can result in a bruise if the kicker is not padded enough or on properly. The bruised toenail will take almost a month to heal and drop off. A shot to the side of your feet could lead to broken bones if it is that hard. If your foot does not fit the kicker, or slips loose, then you can expose yourself to being hit; getting caught there as you try to make a save.
Fractures
If you face a powerful shot with full force against your foot, and the kickers you are wearing do not provide enough protection, then you are likely to suffer a fracture.
Soft tissue damage
Poorly kept shoes can leave your feet in pain. There are a number of types of damage to the soft tissue on your feet, and a number of causes. These are listed below:
The blister should be prevented from popping, in case of further pain.
If it gets too thick or dries out, a blister will form under it; a gauze will prevent the pressure.
-
Corns – similar to calluses, toes tightly squeezed by the shoe
Caused by too much pressure on the toes; pressure needs relieving with padding.
Leg injuries
Whilst your legs are generally more protected than the rest of your body, with new technology allowing you to save the majority of shots with your pads without any consequent pain, it is possible that unprotected areas will give you problems.
The knee
The knee area always seems to be overlooked by field hockey goalkeepers; although the arm area can be left unprotected, over personal preference issues, the knee is the only area uncovered and can be hit when shown to the shooter during movement.
The thigh
If you have short shorts, which do not cover the thigh area above your knees, or do not wear your shorts low enough to cover this space, you will leave yourself open to shots to these areas, which can lead to annoying contusions.
Fractures
Unless you face are really hard shot, there is not much chance of a fracture, thankfully. Against a hockey ball, although it can reach excessive speeds, you are more likely to be bruised than broken. Your knee area is only open when in movement, or when dropping onto the knees to make a stop; you are more likely to be hit when moving into the shot, than when making saves to the lower area of the net when standing.
Bruising
A direct and hard strike your shorts can result in a nasty and should be treated by regular icing to ease the swelling. Echinacea cream can also be useful in speeding up the healing process.
Torso injuries
Injuries to the body are also down to poorly maintained equipment or equipment that does not meet the standard of play. Hard shots to the body are more dangerous if you are not protected well enough; there are a lot of chest protectors out there that do not have rib padding, or well padded chest pieces.
The ribs
You can take shots to the ribs any time during a game; if the shot goes high, and your body is in the way, there is a chance you will get hit there, and if you go down against a shot, especially when logging. Down on the ground and with the play continuing, you are likely to take your fare share of whacks as players try to do anything to get the ball free or put the ball in the net; meaning you will get struck hard by flying sticks.
If you are a positional goalkeeper who likes to utilise their body unit to fill up space in the goal and make the save with your body, then you should be aware of the possible problems.
The stomach
Although the ribs are more vulnerable to well placed shots, if they are not properly protected, lack of padding to the stomach can result in ‘winding’ you, or giving you nice welts to show for your efforts.
Bruising
Bruising to your abdominal wall should be treated in the same way as any other bruises you get; however, you should be aware of damage to the organs that lie underneath the abdominal muscles. Stretching should be avoided, unless cramp is experienced, and any painful movement should also be avoided.
Fractures
If the bruising on the chest is more painful than normal, and abrasions are present, then you should get it checked out, and possibly x-rayed. If the bone has not separated, then six weeks of rest will heal the bone. Taping and bracing the rib may be required.
Upper body injuries
Injuries to the upper body are also down to poorly maintained equipment or equipment that does not meet the standard of play. Hard shots to the body are more dangerous if you are not protected well enough; if you choose not to wear any form of padding on your arms out of choice concerning discomfort and weight issues affect reaction speeds, than you are best to stay clear of shots around these areas, and try to avoid such dangers.
The arms
The arms are vulnerable to high shots where you have moved the arm into make the save, or have unwittingly positioned it, as a result of attempting a glove save; pushing the arm directly into the path of the ball.
Fractures
Hard shots to your arms can result in breaks. Your arms are most vulnerable when going down against a shot on penalty corners where you choose to log; you are putting your arm in danger, especially if it is poorly protected. If you cannot move your arm and are in severe pain, then you should consider a trip down A & E.
Bruising
Bruising can occur down any area of the arm; the harder the shot and the less protection, the worse the condition of the bruising. Not wearing any arm protection does encourage your reflexes to do the work as mentally your flinching turns into reaction saves, but you will pay the price sooner or later; just make sure you don’t get in the way of hard shots!
Dislocated shoulders
The shoulder is vulnerable to knocks when diving down onto the pitch to make saves. It is very easy to fall onto the arm when going down in a tackle or save, knocking the shoulder ‘out of joint’, or actually dislocating it if the fall is hard enough.
Winding
‘Winding’ is caused by a short-term injury to the abdomen, affecting the diaphragm, the main breathing muscle. To help you start breathing again, slowly get up from the hips, allowing the lungs to expel air, before expanding to take in air. Note that being hit in the groin area will have the same affect! You don’t always need to show you’re the ‘man’ when you’re hunched over.
Head injuries
The head area should not be overlooked when considering potential injuries and damage when playing games. The head is just as vulnerable as any other part of your body, if not more so. There are a number of shooters out there with a very powerful shot, but a poor helmet will put you in danger.
A poor use of your head to make the save, other than the shot going straight for you, or the ball redirecting into you, is another possible concern; if you want to use your head to make saves, practise your soccer heading, or something seriously bad could happen.
Concussions
Taking a shot straight to the head will generally lead to (as you would expect it to) concussion symptoms. General ringing in the ears will be the start of your worries, other than the shock experienced; after such an event a nice cup of tea or alternative additive is a good idea to calm the nerves.
The source of the concussion will depend upon the area you were hit in; a shot central to your head could cause sight problems, whilst a shot to the sides or forehead area and above can be more concussion related (the cage absorbing the impact of a full frontal shot; if the cage is made out of suitably strong enough metal, the padding will absorb the shot, but the plastic could crack if the shot is hard enough).
After such a shot, you will probably need to replace the cage, if it is bent or cracked; there is no point wearing the same headgear if it is going to lead to serious safety problems.
Sprains and strains
The whiplash of the shot can cause your neck problems. The strong force of the shot snapping the neck backwards or forwards will sprain the muscles surrounding your neck. If the pain is that bad, then a neck collar or brace to limit the painful movement is advised, but the standard treatment for relief (raising your neck via pillows etc. to alleviate movement) is encouraged.
Compression of the vertebrae
Compression of the neck vertebrae and discs can be caused by a fall or blow where the force reaches the top of your head, especially if it is bent forward 20 or 30 degrees. Of course this is very rare, and may not happen at all, but when diving or falling with speed against a shot, you can put your body in danger, especially if going with great momentum. The blow can shatter a vertebrae, pushing it into the spinal cord; pain or tingling burning will be felt along the arm or hand as a result.
You may remember the tales of the soccer goalkeepers who fractured their collar bones and continued playing: just remember that proper technique will keep you safe from injury. This is not included to scare, but simply to keep you fully aware of the dangers. If the pain is that bad, you should get yourself x-rayed immediately.
Getting the wind knocked out of you
A short straight at your neck can obviously cause you significant pain. You will be in need of need immediate treatment due to the seriousness of the injury, possibly even having to spend the night in A & E.
Neck
If you are not wearing suitable neck protection, or choose not to wear any at all, then you are likely to end up causing yourself serious harm sooner or later in your career. While the decision is entirely personal, I would recommend you protect your knock before you end up with serious problems.
A shot to the neck can be potentially catastrophic. There are some body armours out there on the market , leaving the goalkeeper dangerously exposed if they do not wear a neck guard. Similarly, the clavicle (or throat), as well as the bones below your neck can be hit, causing swelling that can suppress your airway and breathing, or worse. Most of the professional goaltenders in the NHL (ice hockey) do not wear any neck protection, and there have been a few cases like this during this year’s season. Their excuses being that a dangler (plastic shell worn as a cover below their helmet) causes irritation or is distracting for them to fully concentrate on the game.
However, facing a 90 – 100 mph puck that strikes like a bullet is beyond insane. This is no different in field hockey: so protect your throat!
Other possible injuries
Whilst outfield players are more likely to suffer broken noses and shots to the head, it is possible to lose a tooth or two if facing a hard shot, if wearing inappropriate and unsuitable headgear, such as a cage not strong enough to face the level of shots you play against.
Obviously it would not be ideal to wear a mouth guard as it will limit your vocal abilities, but should be considered. It could happen, but I don’t want to completely scare you; as the boy scouts say, ‘be prepared for anything’.