Lateral movement

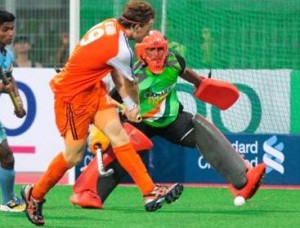
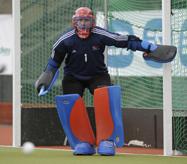
Moving in shuffles is an essential part of getting around the D; staying in front of the play where you can block, rather than being side-on and turned away from goal.

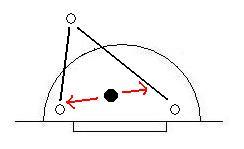
Lateral movement (side to side) is the key area of movement around the circle. Think of your movement area as a mini semi-circle of the larger D you play in; this is the space you need to cover to protect your goal. By moving sideways, you can change your angle against the opposition; moving across to deal with the new attacker as the pass is made.


Shuffles

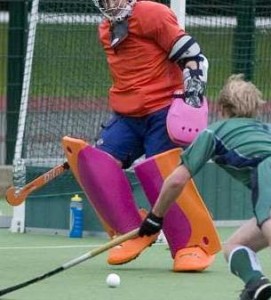
Shuffling is the essential form of movement for a goalkeeper to move across the face of goal. If you watch soccer goalkeepers, the move is very similar; basically, it is sidestepping across to the side you wish to move to. When pushing across from the pushing foot (depending on your left or right direction), make sure your keep in your ready stance, holding your hands up ready for a shot.
 

shuffle1

 shuffle


The following diagram illustrates the shuffle off the right foot moving to the right (the shuffle is a sideways movement, with you moving left or right to move into the space to your side):


shuffle2


Closing holes

With the shuffle opening up a large space between the open legs when moving, a lot of keepers (up to the pros; Stephen Lambert is a good example, and you could find footage of him actively doing this, playing for Australia in the recent Olympics). This closing off of open space when moving makes sure you have no space showing, in case of a shot; when facing a screen or in-close action when facing goal mouth scrambles, or when facing a deflection as you move across goal – more important in higher levels when shooters like to go for this area, as it is easy to expose.


When pushing across, lead the back leg into the lead leg, in order to close gaps by pushing to lock the pads together, or be as close as possible to block. This extra coverage against shots, with the security of no gaps. However, comes at the cost of movement (since it slows you down when moving to force your legs together, which can be costly when moving with speed against the play is vital). So if you’ve got to dash across the D to get back into space, then you have to balance the importance of speed, by ignoring the need to cover gaps and sacrifice coverage for extra movement.

 

lateral_move


Girdles

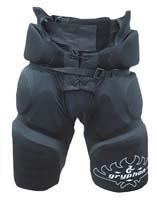
The alternative upper leg coverage available to goalkeepers, rather than wearing padded shorts, are girdles. Rather than having main padding to the front of the short, the padding is spread right around the leg and hips, conforming to the body shape as the layering develops. High density foam is used throughout, giving you suitable protection.


A lot of field hockey companies, getting in on the act of selling goalkeeper gear, now produce girdles specific to the position; often cloning old versions and adding new sections. Unlike shorts, girdles give extra protection to the upper thigh area, conforming to leg pads to allow most possible movement, making them great for reflex orientated goalkeepers who prefer to dive around acrobatically, and aggressive goalkeepers who need to charge down a player in challenging the ball.


There are a few girdles on the market, as produced by Gryphon and Grays.


There are also older ice hockey versions that are available and work the same, such as Bauer’s. Girdles used to be, and still are, used by ice hockey players, with girdles worn as padded shorts, because of the design for fuller movement with protection in mind. Girdles are also produced for inline hockey (the type of ice hockey played on an indoor court), which can be worn for upper leg protection.


girdle


Pros

  • More protection to upper thigh

  • Specifically suited to modern goalkeeper’s needs

  • Extra movement, with padding moulding to body shape

  • Layered padding provides padding to vulnerable areas


Cons

  • Inner thigh area is missing or the protection is reduced (allowing for greater movement) – vulnerable to shots there

Moving around your D

Moving around your D is just as important as controlling it; if you’re not moving into position every time the ball moves, you’re not going to be into position to make the save. Shuffling is the main vehicle for moving around, for sideways movement across the D and between attackers, but don’t rule out running sideways, backwards or forwards – how else are you going to charge down the shot, or rush back to fill up space?


Moving with the play

To be able to react to the play’s development and be ready to make an immediate save when called upon, you have to constantly be moving with the play itself. With the change in pace and direction, you have to be adapting your position to match. If you are not and caught unawares, you make the opposition’s life all too easy; not being set on the angle and leaving a wide open net to shoot at.


Moving constantly to re-position in the arc (that has been talked about in previous articles; http://blog.obo.co.nz/2009/05/18/the-arc-around-goal/) will dramatically improve your shot stopping and ability to play the angles to your advantage, instead of being forced into a difficult save as the ball moves into the open space you were not ready for.


moving_d


Focus on the ball

You can arrange your movements by where you are in relation to where the ball is; moving with the ball to keep up with the scoring chances and angles for incoming shots. Your head should be on a swivel, constantly checking to see where the ball is, in case a long pass or run has been made, and then moving your body to adapt to the change in play; kind of like a turkey in a farmyard!


When the ball gets past your half way line you can relax, but once it’s over the line and an attack can easily appear out of nowhere you need to be ‘switched on’ and alert; ready to spring into action.

Stripper shorts

With recent strides in technology and production, hockey kit producers have been able to design a pair of shorts that best suits the goalkeeper’s needs; using strips of strong foam around the leg (with thick padding at the hip and body area to cover when sliding or going down to block), providing a hybrid of quality protection with the flexibility needed for explosive movements in jumping or diving, as well as helping leg movements for kicking, given the active nature of the position.


The ‘stripper’ short design has pieces of foam that wrap around the keeper’s leg to fix to the individual’s leg width (for best fit), with a velcro strapping system to hold them in place, leaving gaps around the groin/thigh to allow for the groin guard to fit within the shape without interference (as shorts can often become tighter as they stretch to fit the jock; limiting your chance to move), which maximises the movement possible for forward and sideward drives. There is thinner and flexible padding inside to cover the inner thigh and groin as well.


Obo’s Hot Pants design is the pioneer of this unique design, matching the keeper’s playing needs for enhanced movement as well as strong protection. The TK GX 1 padded short, is actually a stripper short, with the leg padding attaching together separately. Gryphon have also produced something similar, as have Monarch, along with Mercian’s international shorts.


strip_short


Pros

  • High level of protection for the top levels of play

  • Work well with the keeper’s ‘box’ to help stop possible interference when moving

  • Great speed of movement provided, without the cost of shot stopping safety

  • Easier to take off and put on when padding up due to the strapping design of linking the parts together – you can ‘tie them’ on when standing, rather than having to pull on the shorts!


Cons

  • Only problem is the cost!

Padded shorts

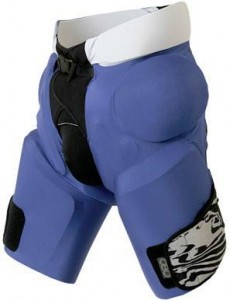
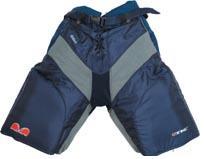
Padded shorts are the basic type of lower body protection; hard foam padding or strong plastic are sewn into the shorts. Unlike girdles, the shorts do not cover the whole of the upper legs, but do give considerable protection to the lower area above the pad.


What with the game and technology constantly evolving, field hockey companies are now producing padded shorts, taking the model and design of ice hockey shorts (their equipment predating ours), and adapting it to suit the game. The shorts mainly have two large ‘blocks’ of strong plastic, with padding around the joins.


There is greater movement as the shorts are baggier and roomy for more active leg movements, such as when shuffling across, or launching off for an aerial save. There is thin and flexible padding to the inner leg, making movement considerably less restricted, making them very suitable to fast and active goalkeepers.


They also have padding to specific areas like the sides and upper leg areas, making use of square sheets of shatter proof, moulded plastics. The main manufacturers, TK, have a basic model graded for different levels of play, whilst Grays have their own make, with a more circular mould to the lower leg. The Cloud shorts are probably the closest thing to a specifically padded short that are made by Obo.


short


Pros

  • Pads cover the upper leg area well

  • Strong level of protection to go down against shots in a logging position

  • Suitable prices


Cons

  • Padding not layered strongly in outside areas (i.e. hips)

  • Restricted movement

  • Only padding to the legs – lack of protection to the inner areas (possible painful shots)

Finding The post

Sometimes when moving around goal and focusing on the play around you, you can forget where you are in relation to the post and lose your angles; ‘tapping’ the post is a simple way of getting round this.

To help you gage where you are when you cialis 5mg move on or off the post, you can use your hands effectively to help you out: the further you are away from the post, the further you have to reach back to find out where you are in relation to the goal and your angles. Once you’ve found the goal post, you should be able to step backwards successfully onto the post, ready to cut off a possible shot. This allows you to reset your angles and set your positioning for a potential save or block: aware of where you are in relation to the amount of net space you cover (by standing over or away from the post) according to the expected shot; ready to move off, into a save off and outside the post, if the shooter decides to target that area instead.


Knowing your angles is essential to finding your whereabouts in order to move around the posts in order to make saves. If you happen to watch GB’s current no. 1, Alistair MacGregor of Loughborough Students, you’ll notice this is a technique he has perfected down to a tee.


‘Tapping’ the posts

When moving off your glove side goal post to step out into the play, you can reach back and out with your glove arm; tapping the post with your glove to check your positioning in relation to the goal. Just like soccer goalkeepers that ‘punch’ the post with the side of their bunched up fist, or tapping with their fingers, you can tap the inside post with top of your glove, or push against it with your palm. You can basically ‘feel’ your way around to work out where you should be standing. This way, you are able to find where you are in relation to the post (and goal in general) and then reset your angles accordingly to deal with the action around you.


findingpost1


For movement onto and off your right post, you can use a similar technique to find the goal post with your stick; swinging it round to tap against the post to check the line of angle. Like ice hockey goalies who regularly tap their posts to check their bearings, you can use your stick actively; pushing out to tap the post. Check the noise made; the louder, the better. Theoretically, the louder the sound is, the closer the post is (helpful if you are too busy focusing on the play to look at the post itself), whereas the quieter it is, the further away the post is. The distance you have to reach out with the stick will also tell you how far you are from the post – if you have to extend the stick to reach it, then you are too far away from it.


finding-post


First picture comes from England Hockey; the second is supplied by Alex Master’s action photos – www.alex-masters.com

Shoulder Pads

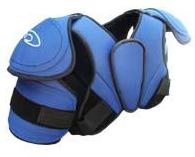
Without any protection to the shoulder areas when using a solo body/chest pad, separate shoulder pads can be used in conjunction, to protect your joints when you hit the pitch when landing a save, or challenging on the ground. Increasing your upper body protection should be considered if you are concerned over the level and types of shots you will face.


Ice hockey shoulder caps

To cover the space above the chest pad and around the shoulder joint, which is not covered by the armour, some form of protection is needed for the vulnerable shoulder areas, when landing a save, risking knocks and bashes when scrambling around the goal mouth, or facing a direct shot to the top of your body. The padding often extends around the biceps (top of the arm) to take the sting out of shots.


Wearing ice hockey shoulder pads (worn by outfield players) on top of the body pad is a great solution to this problem of missing padding on the shoulders. You will find a number of reflex orientated goalkeepers at international wearing them in conjunction with a body pad, providing adequate protection that they need for the upper body (which the chest pad does not cover).


Some hockey shops will sell ice hockey shoulder caps, and Mercian have gone as far as making their own version. Some on-line shops like the Hockey Factory Shop (www.hockeyfactoryshop.co.uk) stock ice hockey player’s shoulder pads, like the CCM and Reebok ranges. Again, Ebay is an idea, and you can find suitable first or second hand padding, by doing a search for “shoulder pads” in the ‘Ice Hockey section’ in the ‘Sporting goods’ area


shoulder


Pros

  • Combine well with field hockey body pads

  • Add protection to vulnerable shoulder joints and upper body

  • Moderate, affordable costs


Cons

  • Harder to find – specialised stores

  • Potential to be bulky (depending on preferences/upper body strength)

  • Can limit arm protection at the shoulder cuff rotator muscle (but only slightly)


Advanced positioning

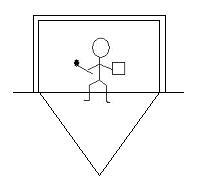
To make the most of angle play, and challenging the shooter’s angle of the possible shot, you must understand your positioning in relation to the goal, and the ball itself. By really challenging the angle, and ‘getting in the face’ of the shooter, you should be able to force the shot wide; coming out so far that they miss because there is nothing of the net to shoot at.


Covering the angle

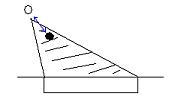
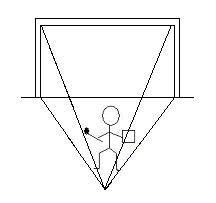
When playing the angles, it is necessary to understand how your depth in goal affects your ability to make the save. Staying on your line means that shots to the sides will be much further away, forcing you to extend and across in order to make the save, whereas coming off your line closes down the angle, making an easier save. Draw a mental line between the striker and centre of goal and positioning correctly, you can reduce the amount of space the striker can shoot at.


If you have the chance to challenge the angle, use positioning to your advantage to allow you to cover more of the shot, rather than making the save difficult for yourself.


angles7 

Gap control

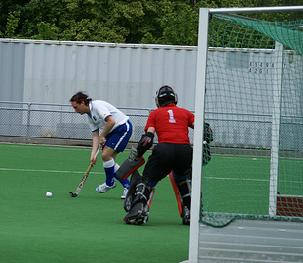
Gap control is basically the space between you and the shooter. With a small gap between you and the attacker, they will have less space to shoot at, and will have to shoot at you, or look for the space in the corners, whereas not challenging and hanging back against the shot, will give the shooter more options. By playing the gaps actively, you are able to limit the shooting space the shooter can see, reducing their options of scoring; actively challenging to pick their spot wisely from a number of options that have been cut down by you limiting the angle they can see.


Goalkeeper with strong gap control, vastly reducing the shooter’s scoring chances.


Goalkeeper with poor gap positioning, leaving too much of the net open for the shooter.


Making use of your angles

Now that you have grown used to positioning yourself in the correct angle around goal and the D, it is important to employ your angles in playing a situation to your advantage. Learning to be aggressive with your positioning to challenge the shooter really gives you an edge when faced with an open opportunity against a one on one or set play scenario (like a close-in shot developing from a pass within the packed D from a free hit or long corner), where you can actively reduce scoring chances by stepping out to meet the shot. This way you have the means at your disposal to give you the upper hand in reducing the chances of a goal; it is up to you to use them.


Narrowing the angle

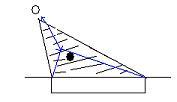
The most important skill of angle play by the goalkeeper is narrowing the player’s shooting angle to make it harder for them to score; bringing the goalkeeper closer to the shot, to make the save easier, whilst taking away valuable shooting space at the same time. As the attacker comes in to for the shot the goalkeeper steps out onto the angle, getting in position to cover the shooting space, thus reducing the shooter’s options.


By challenging the shooter, you make it harder for them; having to take time to choose the shot, by which time you are ready and waiting.


Staying on your line gives the shooter too much space to choose from on the play.


By challenging off your line, you can dramatically reduce the shooting options.


Here, the goalkeeper moves off his line to challenge the angle to his left post (holding the right post to force the shot to his left).


Danglers

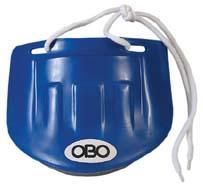
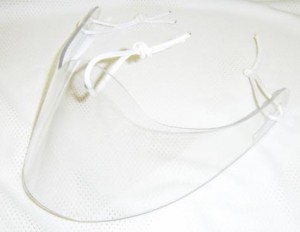
Other than covering your neck area with a removable bib/guard, it is possible to use to increase the protection required for your neck, with the mask not follow covering this dangerous area. The dangler is attached to the helmet or mask, hanging off the chin of the helmet, to cover the open neck area and provide suitable protection against a potential shot there.


Hockey plates

There are field hockey specific types of danglers mass produced by a number of companies, like Grays, Obo or TK, that can be attached to the helmet, fixing on below the chin area. Made of pvc, they are strong enough to withstand the majority of shots to the neck area; offering a flat blocking shape against balls ending up between the helmet and body armour. However, they should really only be used in conjunction with helmet/cage combos, as the plastic dangler can attach to the helmet without it moving around wildly; if you tried to attach it to a mask, then it will not make efficient connection, leaving you open to shots as you move around, as it swings up.


dangler1


Ice hockey danglers

Ice hockey companies mass produce lexan danglers for their goaltenders, which attach around the mask’s chin to offer all-round protection to the throat. These can be used by us field hockey goalies to cover the open space below the mask chin; covering your voice box and neck from possible harm. The dangler is made of strong composite materials which are capable of absorbing a shot (really hard shots could crack it and will obviously need replacing!). You can get different danglers to suit the type of helmet; larger round danglers are suitable for both helmet/cage combos and masks, providing a wide rim of protection, whilst the smaller V-shaped danglers work OK with masks, offering a tighter area of coverage; the shape not interfering with the chin.


dangler2