Jon’s Tips: Painting Your OBO Helmet

For all you creative OBO-ites who’ve been asking about painting your OBO helmets but aren’t sure how to go about it, here’s some ideas and advice based on recent experience. If you’re handy and keen, you can jazz up your helmet at a reasonable price on your own.

For all you creative OBO-ites who’ve been asking about painting your OBO helmets but aren’t sure how to go about it, here’s some ideas and advice based on recent experience. If you’re handy and keen, you can jazz up your helmet at a reasonable price on your own.

I need to start off with an advisory, if you’re not handy, this is best left to professionals. You can find mask painters on the internet. Depending on the part of the world you live in you might have to ship it away and depending on the type of mask you have it may not be worth it. Professional painters will charge anywhere between $200-$400 US based on how complicated your design is.

If you are handy, but haven’t done this type of work before, PATIENCE (note capitals) is a key skill. Painting a mask properly is not done in a day. Preparation is the other big word. A paint job is only as good as what’s under it and if you don’t do the prep work and get a good smooth, clean surface to paint, it will show in the paint. In keeping with the P theme, the other key to a good paint job is planning.

There are a number of ways to paint/decorate your mask and a lot will depend on the type of mask you’re painting. The OBO CK and FG masks are made from either Carbon Kevlar or Fibreglass and are painted (or have a finish on them) while the PE, Poly P and ABS helmets are essentially plastic without a finish.

Before you commit to painting your helmet, I recommend taking to Youtube and looking at some of the entries under GOALIE MASK PAINTING. Most of them show the work of professionals and involve airbrush work. There are low-tech ways to paint masks and the video below is a particularly good clip:

The mask that’s shown in the video involves painting and vinyl decals. Vinyl decals are another way to decorate your helmet and can be custom done by any Sign Shop that has graphics arts programs. They’re durable, easy to apply and can be a way to incorporate more intricate, detailed designs relatively cheaply. An expensive set of vinyl decals could be $60US. If you’re going to paint your helmet with anything other than one colour, expect to spend at least $40+US for spray paint.

At the planning stage of painting your mask, you should have a good idea of the design and if this is your first go, I’d recommend keeping things simple. If you’re somewhat artistic, draw the design out. You can trace a template of the mask if that helps and lay it out. Assemble your materials, paints, masking tape, sandpapers, paint stripper, scrapers, screw drivers, pliers, adjustable wrench, etc. Spray paints that are designed for cars are best for masks.

As mentioned, preparation will depend on whether your mask already has a finish on it. If it does (CK or FG helmets, you’ll need to take the clear coat and any paint off first). Regardless of type of helmet, you want to remove the cage and any other helmet hardware. Depending on the state of your helmet, that can be tricky as screws can rust (hence the wrench and/or pliers). If you’re helmet hardware is in a really bad state, have replacement hardware lined up before you get too far along. It doesn’t make a whole lot of sense to have a flash paint job and rusty old screws. Set aside your hardware and make sure it’s in a good place.

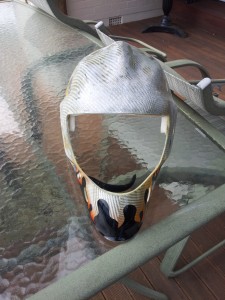
helmet-fg-halfpaint-flame

Step one of preparation starts with a good wash with a mild liquid soap, a plastic scrub brush and a good dry. A couple of notes about spending time and money on your paint job, your finished product will reflect what you put in, especially on what you do before you paint. Quality materials won’t cost a fortune.

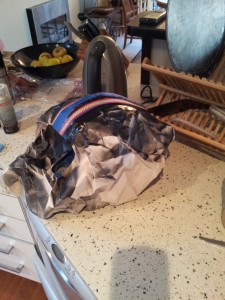
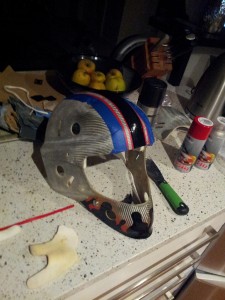
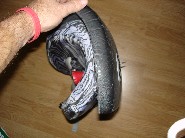
My project was a half painted Flame FG helmet that I was looking to personalize. I wanted to tone down the Flames, accentuate the raw natural fibreglass and add a little simple trim. The first bit was stripping off the clear coat and painted section. When selecting paint strippers, read the directions carefully and make sure they’re suitable for your helmet. Most automotive paint strippers are fine for FG and CK helmets, not for PE, Poly P or ABS types. You will need to use a scraper to remove the paint. A word to the wise, work with the contours of the helmet when scraping and as much as it is scraping, be gentle. You don’t want to leave gouges or deep scratches when you scrape as you’ll have to sand or fill them later.

Next up on the prep front is sanding. Sandpapers come in a number of types and grades. The higher the grit, the finer the paper and there is dry and wet sandpaper. If you’ve done a good job with your stripping, sanding should go in rounds. First round is a medium grade (400-600 dry grit paper) and sanding should be done lightly in a circular pattern to smooth out major surface irregularities. Depending on how smooth your painting surface is, you may be able to go directly to wet sanding with a fine paper (1200-1400 grit). Both the mask and the paper (grit side) should be wet when wet sanding and with fine papers, more sanding is better as you won’t sand into the masks composite materials.

20130901_104050

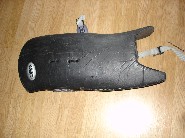
Once you’re satisfied that the mask is smooth and clear of residue paint, you’re ready to start painting. Once again, paint work will depend on your paint job. For my mask, I wanted to retain the natural fibreglass look for most of the helmet so clean and smooth was as far as I needed to go. If you’re looking to completely paint your mask, then primer is next. You can buy sandable primer and if your mask isn’t completely smooth, it’s a good idea. Before applying primer, make sure you’ve completely washed, rinsed and dried your mask. Primer is the bond for paint and if you don’t have a clean, dry surface the primer and paint won’t adhere. You also won’t likely need to paint the inside of your mask. You should tape the cutout for the cage and other holes to prevent spray getting on the inside.

You’re now ready to prime. Using primer will be good practice for painting later. Whatever paint or primer you use, READ THE DIRECTIONS. Not all paints are the same and this is especially true as it applies to spraying multiple coats and for primers, how long you need to wait before spraying colour over it. When spraying coats of primer or paint, multiple light coats are better than single heavy coats. Heavy coats of paint take longer to dry between coats and are more likely to sag or drip. Make sure you’re spraying in a bright and well-ventilated area.

20130903_070718

Once you’re happy that you’ve got a good primer coat down, you’ll need to wet sand with a fine paper again. Make sure mask and paper are wet and be light with the paper and work in a circular pattern. Rinse with clean water and then let the mask completely dry.

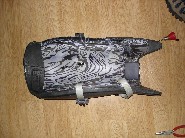
Painting will depend on the complexity of your paint scheme. If you are using multiple colours, your base colour should be the one that covers the majority of the mask. Like primer, read and follow the paint instructions, especially as it applies to multiple coats of paint and the time between coats. Once again, many, light coats are preferable to fewer heavy coats. Be patient, if you’re in a hurry, it’s easy to overspray and get drips. If you do get drips and you’re looking to do a quality job, it’s far better to stop early, let the paint dry and sand the drips out. Hoping to get the drip out by spraying more coats of paint on, rarely works well.

Mask 2

Depending on your design, you may need to tape when spraying other colours. A couple of notes on taping, buy good masking tape (professional painters grade). Nothing will botch your best paint plans up faster than using bad tape. Make sure the paint layer under the colour you’re taping is fully dried and cured. If it isn’t, the paint will adhere to the tape and come up when you remove the tape. Check to make sure the tape is fully adhered between coats, especially in curvy areas of the mask as tape can release. Lastly, make sure the paint is dry before removing tape. If you do get some wobbly lines when you remove tape, you can always re-tape and spray the adjacent colour or if it’s only a small bit and light you can try rubbing it out with a small bit of paint remover on a rag.

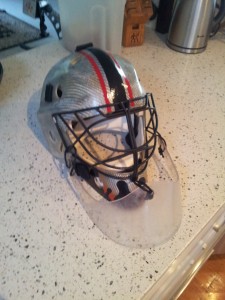
Once you’re satisfied with your paint, the last step is clear coat. Plan on using all the clear coat you get in a large spray can, it’s basically the only thing that protects your paint. Recurring theme, lots of light coats are best. Once your clear coat is dried, wet sand the finished product as that will level the finish.

20130912_065241

Painting a PE, Poly P or ABS helmet is much simpler. There’s no paint or clear coat to remove, you don’t need to prime and you can use a plastic paint on the helmet. You’ll still need to apply a clear coat to protect the paint and make sure it’s compatible with the paint you use.
Goalkeeping in Field Hockey: 2nd Edition

A document containing all of the training tips from our old website up to September 2005 along with Jon’s expert advice in the Q&A section.

Select which format of download below:

Goalkeeping in Field Hockey 2nd Edition (PDF 3.07mb)

OR

Goalkeeping in Field Hockey (ZIP 2.57mb)

Created by Pete Carling.

You will need the free Adobe Reader to open the PDF. .

Goalkeeping in Field Hockey

A document containing all of the training tips from our old website up to October 2000 along with Jon’s expert advice in the Q&A section.

Select which format of download below:

Goalkeeping in Field Hockey (PDF 1.71mb)

OR

Goalkeeping in Field Hockey (ZIP 1.66mb)

Created by Rene Verbeek.

You will need the free Adobe Reader to open the PDF. .

Play it forward

Whether it is the New Year, the holidays, or just the opportunity to look back, life presents us with a chance to take stock of all we have. One of my all-time favorite books (and movies) is Pay It Forward. The story revolves around a boy’s class project, the concept of what we can realize if we pass on the good that comes to us. Many of us have been given a great many gifts. I’ll speak for myself and say many of my greatest gifts have come through sport. In the spirit of passing on what we have and the chance to give back, I offer a list of how we can play it forward.

Whether it is the New Year, the holidays, or just the opportunity to look back, life presents us with a chance to take stock of all we have.  One of my all-time favorite books (and movies) is Pay It Forward.  The story revolves around a boy’s class project, the concept of what we can realize if we pass on the good that comes to us.  Many of us have been given a great many gifts.  I’ll speak for myself and say many of my greatest gifts have come through sport.  In the spirit of passing on what we have and the chance to give back, I offer a list of how we can play it forward.  In no particular order:

1. Shake your opponents’ hands after every game.

2. Encourage your teammates (even after they’ve screwed up and especially if it resulted in a goal).

3. Coach a youth team.

4. Train hard when you don’t feel like it.

5. Let your teammates know when they’ve done something good in training (even when it’s scoring on you).

6. Take a younger keeper under your wing.  Train with them.  Go to their games, encourage them.

7. Pass on your old equipment.

8. If you’ve got equipment that you’re going to throw out, salvage what’s usable, buckles, straps, bolts, screws, etc.  Give it to a youth program.

9. If you’re handy, offer to help them repair their gear.

10. Show a younger keeper how to take care of their equipment.

11. Support your country’s national team.

12. Umpire.

13. Don’t yell at umpires.

14. Thank an umpire for their time and efforts.

15. Thank your coach.

16. Live with passion.

17. Add to this list.

I’m indebted to a number of people through hockey who’ve helped me along the way as a coach, a player and a person.  Now there are too many to list here, but thank you all.  Special thanks to Simon and Mike and all the folks at OBO.  Not only do they work to make better hockey players with their equipment, they make hockey better through their work.

All the best in 2008,

Jon

Goalkeepers are amazing people!!!

email Jon

Please note that OBO together with Jon O’Haire hold copyright over any material appearing on tips pages. We welcome the printing and distribution of these tips, provided that they are not sold, or used for financial gain. This paragraph must appear on all printed or distributed copies. Any photographs above must not be used in any form without express permission from Jon O’Haire.

Rules

There was a day when any lifted shot at goal had to be controlled and cleared by the keeper. Control meant stopping the ball and dropping it straight down to clear. Keepers were required to wear gloves and essentially had to catch the shot without closing their hand on the ball and drop it down. Opposing forwards knew exactly where the first save had to go and were quick to pounce on the dropped shot. If the equipment made the job difficult enough, the consequences of bad technique made the lifted shot brutal. If your save caused the ball to be pushed or deflected you were rewarded with a penalty stroke against you. If you think that was ancient history, those rules were on the books in the 1980's.

There was a day when any lifted shot at goal had to be controlled and cleared by the keeper. Control meant stopping the ball and dropping it straight down to clear. Keepers were required to wear gloves and essentially had to catch the shot without closing their hand on the ball and drop it down. Opposing forwards knew exactly where the first save had to go and were quick to pounce on the dropped shot. If the equipment made the job difficult enough, the consequences of bad technique made the lifted shot brutal. If your save caused the ball to be pushed or deflected you were rewarded with a penalty stroke against you. If you think that was ancient history, those rules were on the books in the 1980's.

As we've moved in to the 21st century, hockey has experienced increased exposure to larger global audiences through television and the spectacle of Olympic Games and World Cups. Marketing research has shown that the new or casual spectator enjoys scoring and hockey has progressively changed the sport to open the flow for offense. Starting with the elimination of offsides, the advent of chip shots, drag flicks, reverse sweeps (or Argentinean backhands) and carbon fiber sticks, scoring and offense ruled the day. 

In the interest of safety, the game's rule-makers have become more sympathetic to the plight of today's keeper. It started with high density foam and continued with hand protectors and increased latitude in how the keeper can play the aerial shot. This year, the Hockey Rules Board put in to effect a change that can have a significant impact on the position. To better understand the potential of this rule change, let's take a look at how the rule is worded. The following comes from 2007 FIH Rules for Hockey:

Conduct of Play: Goalkeepers

10.2 When the ball is inside the circle, they are defending and they have their stick in their hand, goalkeepers are permitted to:

A. use their stick, protective equipment or any part of their body to push the ball away, deflect the ball in any direction (including over the back-line) or stop the ball.

This permits a goalkeeper to use their hands, arms or any part of their body to move the ball way, but only as apart of a goal saving action and not to propel the ball forcefully so that it travels a long distance.

Further explanation comes in the Briefings and Guidance to Umpires from the FIH:

Umpires Briefing

Goalkeepers are permitted to move the ball away with their hand/hand protector/arm/body, as part of a goal saving action

This action is permitted in ALL situations where attackers have an opportunity to score or attempt to score a goal, so it can also be used to deny attackers the possibility of possession of the ball or another shot at goal.

There is no requirement that the ball is going towards the goal when using this action, so a goalkeeper may intercept a pass across the face of the goal or sweep the ball away from in front of an attacker's stick — there only needs to be the threat of an attacker being able to play the ball.

Umpires Guidance

Allow goalkeepers to move the ball away with their hand/hand protector/arm/body, as part of a goal saving action

Permit this action in situations where attackers have an opportunity to score or attempt to score a goal, so it can be used to deny attackers the possibility of possession of the ball or another shot at goal

Be aware that goalkeepers who intentionally propel the ball over a long distance should be penalized with a penalty corner

In the realm of the aerial shot, this rule allows the keeper to bat or propel the shot. Whereas before the keeper could only deflect the ball, he/she can now use a more active skill in playing a shot in to safe areas. Slower paced flicks and difficult knee high shots can now be swatted away with hands or arms as long as they're kept in the field of play and not over a long-distance. Even the "long distance" wording to the rule gives the keeper an element of flexibility as long as he/she uses common sense in saving the scoring opportunity. An umpire is not going to allow a keeper to propel a medium paced lofted shot 40 meters, but the good news is where as before the punishment was a penalty stroke it's now a penalty corner.

The rule change has an even greater impact on how the grounded keeper can defend goal scoring opportunities. Remember the old days of 2006 and logging on corners. The keeper would lie down on the corner and the striker would hit a moderately paced shot right at his/her midsection. The initial shot wasn't a threat to score. The real scoring opportunity came as the keeper was helpless to clear the ball off his/her body and had to rely on teammates to get to the rebound before some forward came crashing in to smash the ball in to the keeper in a "best case situation." Today the keeper can sweep that rebound to safety with his/her left hand.

The Umpire's Briefing makes it very clear that the keeper can propel the ball away in any goal scoring opportunity and that goal scoring opportunities are not limited to shots on goal. Think about another situation from last year. You have a one on one with a forward, he pulls to his right and you make a great reverse stick tackle. The ball is a half a meter away from your left hand, but you can't do a thing because you can't reach it with your stick and last year's rules prohibit you from pushing the rebound away with your arms or left hand. The ball is collected and deposited in to your goal. Now you can push it out of harm's way with your left arm/hand.

Goal mouth passes outside the keeper's left foot used to present a similar problem. The keeper may have intercepted the pass diving hand first to his/her left, but he/she wasn't out of danger until the ball was cleared. Now the keeper can push/parry the ball away from the opponent.

These same rules and privileges for the keeper apply to indoor hockey with the difference being that the keeper can not raise the ball when propelling it. 

I'll admit as keeper who has played through the "good old days" there's a part of me that wants younger keepers to appreciate the older skills and experience the pressure that those situations required. Perspective tells me that doesn't have to be the case. As a coach and an advocate of the position, I see a far greater benefit to the rule change. As Richard Aggiss of the rules board noted when discussing the change, "We don't want to make life too easy for goalkeepers but we also don't want to restrict them in petty ways." Field hockey is a fast, athletic game and from a player and spectator's vantage point it's exciting to see and imagine the ways goals can be scored. With this new rule change it's equally exciting to imagine the way goal scoring opportunities can be saved.

Good luck,

Jon

e-mail Jon

Please note that OBO together with Jon O’Haire hold copyright over any material appearing on tips pages. We welcome the printing and distribution of these tips, provided that they are not sold, or used for financial gain. This paragraph must appear on all printed or distributed copies. The photographs above must not be used in any form without express permission from Jon O’Haire.

Fixing split kickers and legguards

Recently I've received some questions from people having problems with bonded foam separating in kickers and leg guards. First off, if your leg guards or kickers are under one year from time of purchase they should be under warranty. If that fits your situation, you should take the matter up with the agent who sold you your gear. If the pads are older than a year, than try this…

Recently I’ve received some questions from people having problems with bonded foam separating in kickers and leg guards. First off, if your leg guards or kickers are under one year from time of purchase they should be under warranty. If that fits your situation, you should take the matter up with the agent who sold you your gear. If the pads are older than a year, than try this…

For kickers:

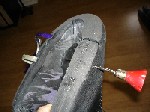
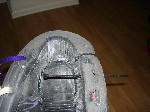
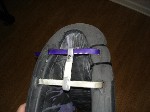
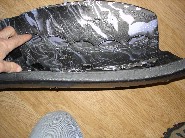
Most splits I see with kickers are around the strap slots between the inner and outer face of the kicker. I know there are a couple of different glues that have been used successfully to bond the surfaces together. I’ve used Shoe Goo, Sports Goop and Gorilla Glue (brand name adhesives in the US) and know that OBO recommends using a hot glue gun. You can check at a hardware or home repair store for similar types of glue where you are. Clean the section you want to clean as much as possible by running hot water in the affected areas and then allow to completely dry. My experience has been that glue alone won’t hold. I use heavy duty landscape zip ties to reinforce then split areas. I’ll apply the glue (try to avoid getting glue in the strap slots) and then use an awl to punch a hole through the inner and out face of the kikcer as close to the strap slot as possible. Run the zip tie through the kicker so the notch where the tie is secured is on the inner face of the kicker. Pull the zip tie securely (the ties are self-tightening) and then cut the excess tail. You might have to use a couple of zip ties if you have a big split. Allow 24 hours for the glue to cure and keep the kicker straps loose until the glue is set.

For Leg Guards:

You’ll need to bond the face of the leg guard to the channel that your leg fits (the outer to the inner). You can either use a hot glue gun or an adhesive. Whether you use Shoe Goo or a hot glue gun, apply adhesive liberally between the sections of foam (try to avoid getting glue in the slots where the straps run. Once the glue is applied you’ll want to reinforce the glued area with zip ties. Punch two holes through the face and channel of the leg guard about an inch apart and run the tie through the pad and pull tight. You’ll probably need more than one zip tie to securely fasten the glued area.

Good luck,

Jon

e-mail Jon

Please note that OBO together with Jon O’Haire hold copyright over any material appearing on tips pages. We welcome the printing and distribution of these tips, provided that they are not sold, or used for financial gain. This paragraph must appear on all printed or distributed copies. The photographs above must not be used in any form without express permission from Jon O’Haire.

Penalty Corners: Drag Flicks

Drag flicks present a huge problem for keepers in that they increase the variables that a keeper must deal with on penalty corners. Previously, the straight hit was the primary option and logging became the popular technique for dealing with the well struck shot.

Drag flicks present a huge problem for keepers in that they increase the variables that a keeper must deal with on penalty corners. Previously, the straight hit was the primary option and logging became the popular technique for dealing with the well struck shot.

In my previous tip on logging, I talked about a corner set up for defense and touched on the positioning of the post player and the keeper. In that set up the post player is even with the keeper and to his left when the shot is taken which requires the keeper to effectively cover the three yards to the right of the post player (facing out). Most keepers are looking to get low and extend to their right when dropping to log and that presents a problem with balance for options and especially the drag flick.

Drag flicks require the keeper to play in a more upright and balanced stance. No longer is goalkeeper's responsibility the three yards to the right of the post player and the height of the backboard. Now he has to cover that three yards and the height of the crossbar. You need to remember that you still have a post player and he is still responsible for shots at him. If you're area of responsibility is the right side of the goal you're not going to set up on an angle to cover the whole goal, you're going to set up slightly to the right.

As I mentioned, balance is key. Your weight needs to be evenly balanced on both feet. When keepers are anticipating a shot to a side (like their right) they tend to load their weight on the opposite leg (left foot) to get full extension. That's fine if the shot is going to the right, but you're stuck if the ball goes to your left. Make sure you keep your shoulders over or between your feet. That will help keep your weight evenly distributed.

A keeper must be able to get to high and low corners on drag flicks and that requires a more explosive, bigger stance. At the top levels you see keepers keeping their hands up and out to reduce the distance they need to react to make saves to the upper corners. This also adds the illusion of size.

The width of your stance will also impact whether you can use your legs or hands to make a save on low flicks. The wider you are in your stance, the harder it's going to be to save low flicks with your legs. That typically results in the keeper diving with his hand on shots to the left.

Because of the mechanics of the drag flick, it is a deceptive shot. A strike is fairly straightforward because the ball comes off the stick head. A drag flick starts on the stick shaft and the shot location will depend on the release point. It's a hard shot to read and keepers typically have problems because as soon as they see flick, they think aerial shot. Track the ball from the pushout to the stop and react to the shot. Focus on the ball, not the striker.

The reality of corners is that when they are well executed they're lethal. Even when you know what the corner is and where the shot is going, there is a high success rate for scoring. Having said that, don't eliminate yourself by getting caught up in reacting to dummy hits and motion at the top of the circle. Successful penalty corner defense is a team effort. Your rusher has to be fearless and have the courage and confidence to limit or block the shot at the top. Your post player has got to be able to cover his area. You can't cover everything by yourself. The most realistic expectation is for you to save the saveable.

Good luck,

Jon

e-mail Jon

Please note that OBO together with Jon O’Haire hold copyright over any material appearing on tips pages. We welcome the printing and distribution of these tips, provided that they are not sold, or used for financial gain. This paragraph must appear on all printed or distributed copies. The photographs above must not be used in any form without express permission from Jon O’Haire.

Throat Guards

Recently there's been a thread on the Community section on throat guards and I'll throw my two cents in. Wearing a throat guard has nothing to do with vanity and everything to do with protection. Drag flicks, deflections and point blank chip shots make it difficult to predict how you'll be able to react and where you're going to get hit.

Recently there's been a thread on the Community section on throat guards and I'll throw my two cents in. Wearing a throat guard has nothing to do with vanity and everything to do with protection. Drag flicks, deflections and point blank chip shots make it difficult to predict how you'll be able to react and where you're going to get hit.

As has been noted, the collar type and dangling throat protectors offer protection. In my experience I've found the acrylic ice hockey throat guards to be the most protective. Whether you wear a helmet and mask combination or a face mask, the throat guard ties to the bars of the wire cage on the helmet or mask. Because they tie at three points, they're not prone to flipping up when you dive like some of the dangling throat protectors. In addition, when it's properly fitted and secured the hockey throat protectors sit at the top of your chest protector. This prevents the throat guard from being driven back in to your throat when you're hit.

Ice hockey throat guards do take a while to get used to. With the movement of the field hockey goalkeeper, how the protector is affixed and the contact between the acrylic and the metal cage there is some clanging/rattling. When you way that against the possibility of a crushed larynx and a tracheotomy, it's a small price. I play a lot of indoor and a fair bit of outdoor hockey and I've had three protectors break as a result of shots to my throat. At twenty US dollars a piece, I can rationalize their replacement. I don't want to imagine the cost of playing without one.

Good luck,

Jon

e-mail Jon

Please note that OBO together with Jon O’Haire hold copyright over any material appearing on tips pages. We welcome the printing and distribution of these tips, provided that they are not sold, or used for financial gain. This paragraph must appear on all printed or distributed copies. The photographs above must not be used in any form without express permission from Jon O’Haire.

Agility Drills: Reflex Work

Starting with reaction training, please check Rachel’s Tips on the OBO website. She has a good tip on REFLEX TRAINING. I do a lot of work with tennis balls in place of hockey balls in reaction drills but obviously that’s pretty tough on your own. I like to work on aerial saves with just a helmet, hand protectors and a stick and having someone hit tennis balls with a racquet. You can further add to the reaction element by facing your back to the hitter and turning on their call be fore the shot so you have to find the ball first.

Starting with reaction training, please check Rachel’s Tips on the OBO website. She has a good tip on REFLEX TRAINING. I do a lot of work with tennis balls in place of hockey balls in reaction drills but obviously that’s pretty tough on your own. I like to work on aerial saves with just a helmet, hand protectors and a stick and having someone hit tennis balls with a racquet. You can further add to the reaction element by facing your back to the hitter and turning on their call be fore the shot so you have to find the ball first.

In regards to working on your own, one device that’s pretty cool is called a reaction ball and I believe it’s available through Just Hockey in Australia and specialty stores for strength and agility training. Reaction balls are rubber balls that have knobs so they’re not round and when you through them off a wall, they’ll take irregular bounces (hence the reaction part). You can work on reactions by throwing the ball off a wall and trying to catch it or keep it in front of you. If you have a training partner, try this drill. Stand five to seven meters from a wall facing it. Your partner stands behind you with the reaction ball. As you face the wall, they stand behind you and throw the ball. You have to catch or stop it.

As far as reaction work for feet out of pads, I like to use a size three or smaller soccer ball and work on kicking off a wall. I’ll set up cones 1.5-2 meters apart and work on footwork by going around a cone in between kicks, i.e. make a kick, go around a cone, have to kick with appropriate foot, go around the other cone, kick, etc. Start ten meters away from the wall. By varying the distance you are away from the wall you can mix the emphasis between reaction and technique work. Even better, if you have access to a racquetball court or a corner with a two sided wall or a narrow hall way you can work off the different walls and focus on changing the angle of the ball.

Good luck,

Jon

e-mail Jon

Please note that OBO together with Jon O’Haire hold copyright over any material appearing on tips pages. We welcome the printing and distribution of these tips, provided that they are not sold, or used for financial gain. This paragraph must appear on all printed or distributed copies. The photographs above must not be used in any form without express permission from Jon O’Haire.

Selections: Making/Picking the Team

Selections, mention the word and the reactions for keepers competing for a spot on a team range from a rise in pulse and butterflies the size of basketballs in his/her stomach to nerves of steel and a confidence that says

Selections, mention the word and the reactions for keepers competing for a spot on a team range from a rise in pulse and butterflies the size of basketballs in his/her stomach to nerves of steel and a confidence that says “bring it on.” Whether it’s a club first eleven or a National team, making and selecting a team can be a challenging experience for keepers and coaches alike.

In the world of competitive sport the selection process is a necessary component in trying to find the best players for a team, but unlike sports like track and field finding the best goalkeeper isn't simply a matter of finding the fastest or strongest athlete. Fast doesn't always translate to smart. Strong doesn't necessarily mean quick. A keeper needs to be fast, strong, quick, smart and more. The best goalkeeper for one team may be the wrong keeper for another depending on his/her personality, a team's style of play, the demands of a coach and the players on the squad.

As a player and a coach I've been involved in the selection process many times, with varying successes. I can remember my first selections more than 20 years ago. I was one of six keepers trying out for two spots on a regional select team. The trials consisted of three games with players split into teams. I played two halves for two different teams and saw two shots, allowing no goals and thought to myself I was sure to have made the team. At the end of the games we were told we would be receiving a call if selected and I'm still waiting for that call. Fortunately, I’ve received other calls since then.

Looking back at my first trials from my perspective as a player I considered the process unfair and arbitrary. I had no idea what I was being evaluated on and though I know now there were good reasons for me not making the team it would have been good to know what coaches were looking for. How to make a team shouldn’t be a mystery. The goal of selections is to pick the best keepers for a team and the more prepared keepers are, the better they’re likely to perform. In this tip, we'll examine some of the attributes of goalkeepers and ways to evaluate them as well as looking at the roles and responsibilities of coaches, selectors and keepers. 

The Selection Process
There is a wide range as to what constitutes selections depending on the type of team being selected, facilities and the quality of keepers competing for the position. Selection length can be anywhere from a game, an afternoon, to a week or more. They can consist of a game, a series of games, physical tests, skill tests, drills and even written exams. Selections for an Under 12 team are going to be different those of an Olympic team, but whatever the skill level, it's important to have a solid idea of the attributes of the position regardless of whether you're trying out for a team or selecting it. 

In my experience I've had the opportunity to see and experience selections around the world and from those have drawn some common criteria. I've listed them below in no particular order and provided some examples of each: 

Physical — Physical attributes include height, weight, body type, strength and flexibility. While some physical components like strength and flexibility can be developed, physical attributes tend to be what the keeper brings to the position naturally. 

Athleticism — Athleticism is a broad category and includes fitness, agility, speed, reactions and ambidexterity. While there are physical components to athletic attributes, athleticism is more trainable (a 25-year old keeper can run faster through training, but he/she isn't likely to get taller). Measures of fitness can range from a 5km run, a BIP test, to a series of 25-meter sprints. Agility incorporates balance and movement. It includes planned movement and reaction movement. Speed is the ability to move from point A to point B and in the context of the position includes covering distances from .5 meter to 15 meters, and directionally (forward, backwards and side to side). Reactions are the ability to stop a ball regardless of speed or distance with the appropriate body part. Ambidexterity is the ability to use either left or right side of the body (hands or feet) to save and clear a shot.

Skills — In the broadest sense, skills are trained reactions that allow the keeper to save and clear the ball. A goalkeeper is more than a shot blocker and skills allow him/her to play a shot successfully to safety. Depending on the speed and location of the shot, skills can include kicking or deflecting with either foot, actively deflecting with legs or hands and tackling from an upright or sliding position.

Mental — A goalkeeper must be able to think the game. He/she must be able to position a defense and him/herself accordingly. A keeper needs to read situations and make decisions regarding appropriate skills and position for him/herself. Presence is a word that’s frequently used when describing keepers and it speaks to an aura of confidence and composure. Keepers with presence seem to play bigger and faster than they are. They have the ability to settle a rattled defense with the key save or right words at critical times in a game.

Coachability — How does a keeper respond to feedback? Does he/she try to make the changes or is there a “but” to every comment? Is he/she self-motivated? Are they on time? Are they prepared? Do they work well with others? Sometimes the most talented keeper isn’t worth the drain he/she brings to a team.

Selections may have specific formal protocol or simply consist of just observing. Selectors may be asked to be anonymous during the process. They may be asked to discount previous experiences with keepers involved in trials and consider their play only in the context of the current selections. Protocol usually follows the significance of the team being selected. If you're responsible for designing a selection you are responsible for that protocol as well as determining how you're going to evaluate keepers.

There are a number of elements to consider when designing trials: How many keepers are trying out? What is their age and experience? What kind of facilities and equipment do you have? What are you trying to assess? What skills are you looking to see? Are you looking to measure technical or tactical ability? What measures are you using for evaluating keepers? Are you accounting for variables? It would be great if there were a universal one-size-fits-all selection process, but there's not. Just as there isn't a universal one-size-fits-all goalkeeper the process used to select keepers will determine the keepers selected.

As a coach and selector, I like to see keepers in as many settings as possible in trials. I want to get a sense of a keeper's overall fitness, his/her position specific fitness, his/her technical skills and how he/she performs in games. If there's general fitness testing for field players, I want to see how keepers perform (as long as that testing doesn't severely impact their ability to perform in other parts of the trials). I like to use drills where keepers have to play a variety of balls (i.e. hard drives, chips, flicks, crosses) from a variety of locations to targets. I want to see how a keeper thinks. I like decision-making drills where a keeper can use a variety of skills to be successful. How does a keeper play with strong and weak players? Depending on the needs of a team, those areas may have more or less emphasis. The selection process used goes a long way towards determining the type of keeper you select.

For Selectors/Coaches
The type of team being chosen usually dictates who does the selections. At the club level, coaches are usually responsible for picking their team. At the regional level, local associations might leave the team's coaches to select their squad or appoint neutral coaches to choose keepers or assist the coach in his/her selections. Selection committees tend to be the norm at the national level and governing bodies usually have defined protocol for input from the coach and the responsibilities and qualifications of selectors.

Depending on the type of team selected, being a selector can carry a wide range of responsibilities. At a minimum, a selector should be an impartial observer and evaluator. At the national and regional level selection criteria may be issued and the selectors' responsibility is to adhere to it. At the club level the job may entail establishing criteria for evaluating keepers and/or administering drills. 

Whether it be a coach or a selector, it’s important for those picking the team to have a concrete idea of the ideal keeper. I’ve mentioned some of the attributes I feel are important. Depending on the needs and abilities of a team, the importance and emphasis on another selector/coach's attributes may vary. I’ve seen trials where selectors are given evaluation forms to rate and rank goalkeepers with specific criteria for grading attributes. At the other end of the spectrum, selectors might be sent out with the vague instructions, “pick the best one.” Either way, selectors should come in to the process with an open mind and a clear of idea of what they're looking for.

It's important that selectors are well prepared and have evidence to support their selections. If I'm selecting, I like to get to sessions early. I like to see what keepers do when they're left on their own to warm up. Do they cool down after a session? I like to see how they interact with other keepers and those they play with on the field. How do they respond to feedback? I keep my own notebook for selections in addition to any criteria I may be given to evaluate keepers at a trials. I find the more I have written down, the better the frame of reference I have when comparing keepers and writing evaluations.

Part of being selector is giving keepers as fair an opportunity to show their talents as possible. It may be impossible to see every play a keeper makes at a trial, but a selector should give his/her undivided attention for the times he/she is observing. As I mentioned, I like to see keepers play as much as possible and in as many settings as trials allow. How does a keeper train? How does the keeper play? Does the keeper make the flash save and then allow the ordinary goal? How does the keeper stand up under pressure? 

While a coach/selector may not pick a keeper for their team, they can aid in the development of the keeper and the team by giving specific feedback on why a player didn't make the team and what they need to work on. Those keepers may come back to help the team in years to come with good feedback. Exit interviews for all keepers trying out for a team are an excellent way to review performances. 

For Keepers
As a player, preparation was key to my success. I found the more I knew about the selection process, the better my chances for success. Others might just be able to wing it. Good things to know are: How long are selections going to be? Are they a couple of hours or days? What do the trials consist of? Where are the trials? How long does it take to get there? Are the trials simply playing games or are there drills? Is there physical testing? What are the drills and testing? I always performed better in drills or testing if I had the chance to practice them beforehand and the more I knew, the more confidently I performed. 

Details like making sure kit is in good working order are important. The last thing a keeper needs to worry about is a loose screw on a helmet or a broken kicker strap when he/she is playing for a chance to reach his/her dreams. Bring sufficient and appropriate clothes and shoes for the weather, type of facility and activity. Control the controllable. Bring a water bottle and food like energy bars or fruit. Be self-sufficient. As a selector I'm impressed by younger keepers who don't require their parents as personal servants. 

First impressions are important. Be on time. Know where the trials are and allow travel time. Dress the part. I've seen keepers show up at trials sporting beer t-shirts, cut-off shirts, shorts and bare feet, and I wonder if they've thought about the message they're sending. How do you respond to feedback and surprises? Do you "freak" or do you roll with the punches. Getting noticed is important in selections, but what are you getting noticed for? I've seen keepers go out of their way to make a basic save seem extraordinary. Knowledgeable coaches are more impressed by effective play.

Be professional. Know the schedule. Bring a notebook and pen. Write things down. Drills, times, dates, and expectations are important. Take care of yourself. If you need extra time to warm up, make sure you arrive early enough to take care of yourself. Ask questions where appropriate. If you're not sure about a technique or a drill, ask.

Finally, enjoy the process. By their nature selections are stressful. You're putting yourself on the line as a player, but stress shouldn't be a burden. Selections are a test just as games are a test. If you didn't enjoy the challenge of games you wouldn't play the position. Don't get caught up in how other keepers play. The only performance you can control is yours. While your ultimate goal is to make a team, it never hurts to have your own goal of improving with every selection experience. Progress can be measured by performing better every time you play regardless of the outcome and a keeper can and should take satisfaction in that.

Selections can be challenging for those making the decisions and those putting themselves up for a team. Players may have invested years of training and personal sacrifice to make a team and are likely to be disappointed when they're not selected. I've experienced that disappointment in my career as a player, but I always felt better if I understood the process and was told where I fell short. As selectors and coaches it's satisfying to see the players you pick warrant their selection with great performances. They should take equal satisfaction from the player who was inspired by not making the team and came back to be a better player the next time around.

Good luck,

Jon

e-mail Jon

Please note that OBO together with Jon O’Haire hold copyright over any material appearing on tips pages. We welcome the printing and distribution of these tips, provided that they are not sold, or used for financial gain. This paragraph must appear on all printed or distributed copies. The photographs above must not be used in any form without express permission from Jon O’Haire.