Last tip we made a start to covering goalkeeper equipment. We talked about what to look for, how to take care of it and specifically looked at equipment bags, kickers and leg guards. In this second part, we’ll look at helmets, hand protection, body pads, pants and assorted other items.
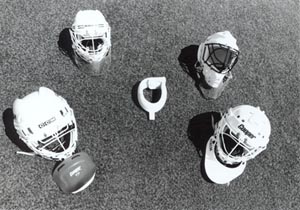
Helmets/Masks
|
| Robo CK Helmet
|
Starting from the top, helmets or masks are one of the most important pieces of equipment a keeper can wear. Too often, though, fashion rather than function become the criteria for selecting head protection. The most important factor when selecting a helmet or mask is whether the item can provide adequate protection for the level you play at. In other words, can it stand up to a shot in the face that you’re likely to see (or not see)? Unfortunately most keepers don’t consider the possibility until it’s too late. We talked about a number of factors to consider last tip in selecting equipment, cost, durability and the level you play at. These factors are very relevant when it comes to head protection.
One of the most basic types of head protection is an ice hockey helmet with wire cage attachments. They are among the most affordable types of protection and also among the most durable. When selecting a helmet, make sure it fits your head. Most helmets are adjustable within a range of head sizes. Most manufacturers use hat sizes to calculate the range that a helmet will fit. It helps to know that information when you go to buy your helmet. When properly fitted, a helmet shouldn’t move when you shake your head. Many helmets are available with wire cages already affixed. That’s usually the best way to make sure that a cage will fit your particular helmet. If you are buying a cage separately, make sure that it’s compatible with your helmet. Cages from manufacturers different than your helmet may not fit and that can be a big problem when you get hit. Also make sure the cage is properly fitted to your face. If there is a chin cup, your chin should rest in it. At no time, should the wire cage be able to come in to direct contact with your face.
Masks with built in cages are becoming more and more popular. They are available in a number in a number of different styles from a variety of manufacturers. If you’re looking at this type of protection, make sure you pick a mask that’s compatible with the shots you’re facing. I’ve seen extremes at both ends; junior keepers playing with $700US carbon/Kevlar masks where shots are rarely hit in the air and on the other side, elite level keepers playing in the equivalent of glorified street hockey masks.
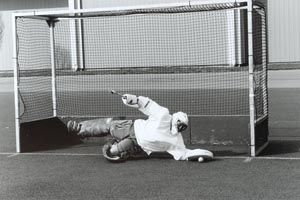
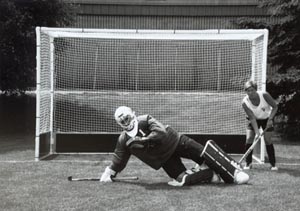
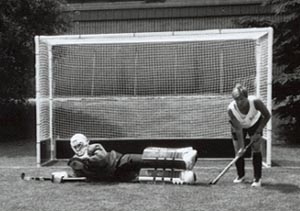
As a rule of thumb, the harder the shot you face, the sturdier you want your mask to be. You need to consider the techniques you’re using and the conditions you play in. If you’re lying down on corners or playing on the ground, your reactions are limited. The chances of getting hit in the face in situations you can’t control increase. Many of the plastic masks are subject to extreme heat or cold. Combine extreme conditions with extreme impact and some plastics will shatter. Carbon/Kevlar masks may be more expensive, but they are also more durable. At the end of the day, you get what you pay for and you don’t want to be cheap when it comes to your head.
Masks do come in sizes also. When ordering make sure you get the right size. Most masks have a chin cup to keep the mask away from your face. Make sure your chin fits securely in it. Once again, if your chin can slip, the mask will make direct contact with your face and you can get badly cut if you’re hit in the head with a shot. Many masks also come with extra padding to help customize the fit. Take the time to properly fit the mask when you get it. As with a helmet, the mask should not move when you shake your head if it’s properly fitted.
Throat protectors are more than a good idea; they can be the difference between a wake up call and a tracheotomy. Throat protectors come in two types, a collar type protector or a plastic hanging type. One thing to consider with the hanging type is whether it will flip up when you slide or go down. If the protector is flipping up, it’s not protecting your throat. The clear plastic hanging type used by ice hockey keepers can be tied to prevent it from flipping up.
A few things to consider when selecting a helmet or mask, color can make a difference, especially if you play in hot, sunny conditions. Dark colors will absorb heat, making them hotter to play in. Similarly, if you play in hot conditions, look for a helmet or mask that is well ventilated. Many keepers have taken to painted masks or helmets. Most masks or helmets must be painted with special paints. The process can be detailed and expensive and if not done properly, the wrong paint can ruin a good helmet by compromising the integrity of the materials the helmet is made. The same can happen when you drill holes in a helmet to adjust the fit of a cage.
Helmet/mask care is fairly straightforward if done regularly. Make sure screws and bolts are tight. The best time to check is immediately after training or games. Keep a screwdriver handy. A towel is also a good idea. If you play on wet turf or sweat a lot, helmets and masks can get wet and some hardware will rust. Wipe your helmet dry after use. It’s also a good idea to periodically wash and rinse your helmet with mild soap or detergent periodically to prevent cheese like aromas.
If you wear a helmet, make sure you attach the chinstrap. If you wear a mask, make sure the straps are secured. Helmets and masks can be loose enough to allow you to talk, but they shouldn’t be so loose that they come flying off when you slide. If the wire cage on your mask or helmet gets dented, replace it. While the dent may not be serious, the welds to the cage can be compromised with a dent. If you get hit again in the same place, you risk serious injury.
Hand Protectors/Gloves
 |
| Robo Hand Protectors
|
Hand protection used to be gloves and they were your one and only option. The rules of the game called for keepers to wear protection on their hands that had five “separate and independent fingers”. Those rules often allowed for those independent fingers to get broken by equally independent and hard shots. Mercifully, those days are gone and we’ve seen the development of hand protectors.
Depending on your needs, your budget or what’s available, gloves can be adequate protection, particularly at the junior level. At a minimum, gloves should protect the hands, wrists and lower forearms. Basic features of the left hand (or hand-stopping) glove are a well-padded palm, in addition to wrist and forearm protection. The right hand (or stick) glove should have padded fingers, a sturdy thumb shell, as well as wrist and forearm protection.
Gloves should be big enough to cover the lower forearm, yet not be so big that they slip off. A keeper should be able to comfortably handle his stick in one hand. Some keepers prefer gloves for indoor hockey specifically for their ability to stick handle. If you do wear gloves, make sure they do what they’re supposed to; protect your hands. If your hands are getting stung making saves on hard raised shots, it’s time to replace them.
Hand protectors not only offer superior protection to gloves, they offer a keeper a wider range of skills to play aerial shots much the same way high density foam kickers allow keepers a wider range of skills to play shots on the ground. With hand protectors, a keeper can use the pace of a shot to deflect the ball away from him and into space. While a keeper still can’t bat a ball, the rules of the game now allow him to intentionally deflect a ball out of play over the end line or crossbar.
Like kickers and leg guards, the primary difference between most models of hand protectors is the density of the foam. The harder the shots you face, the thicker and denser you want the foam. If your hands are getting stung by aerial shots, it’s time to upgrade your hand protectors.
The shape of the right hand protector can also affect the way you play. Early models of some types of right hand protectors had a round hand. This often made it difficult to get your stick flat on stick tackles, especially to the reverse side. Others have padding at an angle that is better suited to playing with your hands back, closer to your body as opposed to in front of your body. It makes sense to buy hand protectors that are suited to your style of play.
At the senior men’s level, hand protectors are pretty much a one-size-fits-all affair, but the distinction isn’t so clear for boys, girls and women. Similar to gloves, hand protectors should protect the hands and lower forearms. This is especially critical for younger keepers who may have smaller equipment. Fingers should never be exposed on the right hand protector. If you wear arm pads, the hand protectors should overlap on the lower forearms. Your wrist should not be exposed. Even if you don’t wear arm pads, your wrist and lower forearms should be protected. Make sure the finger loops on the right hand protector allow you to hold a stick with a confident grip. The strap on the left hand protector should be snug enough that a well-paced shot won’t knock the hand protector off.
Care of hand protectors is similar to leg guard and kickers. You can easily clean them with soap and water. Check straps periodically. If you do wear gloves, make sure you keep them dry. Leather will crack if it’s not properly dried. Balled up newspaper or a hand held hair dryer are good for drying out soggy gloves.
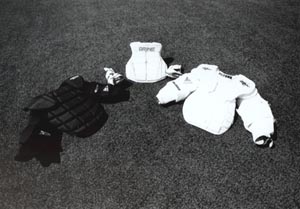
Upper Body Protection
 |
| Robo Body Armour
|
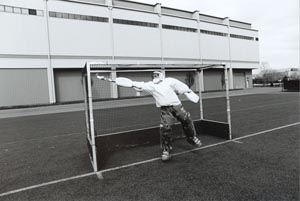
Upper body protection takes a number of different forms and what’s best for you will depend on your style of play and what you’re comfortable playing in. The two main types of protection are body pads with attached arm protection and stand alone chest pads.
Stand alone chest protectors are usually preferred by keepers who want lightweight protection that allows for open movement or junior players who don’t face a lot of hard, raised shots. When choosing a chest pad, make sure the pad fits. The chest pad should cover the front of the shoulders and extend from below the throat to just below the abdomen. If the pad is too small, the keeper will have open areas exposed as they move. When the pad is too big, movement is usually restricted. Make sure straps are properly adjusted. The pad should be loose enough to allow for full range of motion, yet be secure enough that the pad doesn’t twist or shift when you move.
If you do wear a chest pad, elbow pads are highly recommended, especially for advanced play. Sliding on abrasive surfaces like artificial surfaces can leave nasty turf burns. In addition, consider the materials chest protectors and elbow pads are made from. Look for water resistant coverings, padding and plastic as materials, particularly if you play on water based turfs. Some keepers who wear chest pads will wear separate arm pads that cover the inside of the arms as well as the elbows. If you go the arm pad route, make sure the arm pads work with your chest pad. The biggest thing to avoid is a set of arm pads that cover the same area as your chest pad. If they do, the pads overlap and the chest and arm pads tend to bunch up and restrict movement.
The second style of upper body protection is a body pad (or body armor). Body armor was first developed for ice hockey keepers and as mentioned earlier is a one-piece pad that covers the chest and arms. Because they are designed as a one-piece pad you don’t get the bunching you do with separate arm and chest pads. Body armor provides excellent protection for the chest, the inside of the arms and the elbows. Having said that some body armor is more restrictive than others and may need to be modified depending on the level of protection and mobility you require.
OBO body armor is designed to provide a full range of motion for the movements of a field hockey keeper. Some keepers prefer ice hockey body armor that offers more protection, though sometimes at the cost of mobility. Ice hockey body armor can be modified to increase range of motion, particularly in the shoulders. Often times it’s simply a matter of getting used to and the pads breaking in, both of which happen in time. If you haven’t used body armor before, whether it is OBO or ice hockey, it can be bulky, it can be hot and it might feel restrictive. The same can be said for bruises and internal bleeding. Swelling is bulky and restrictive and it also hurts. I’ll take body armor.
If at all possible, try body armor on before you buy it. As mentioned earlier, body armor will become more flexible as it breaks in, but no amount of breaking in will help if the elbow and shoulder joints of the body armor don’t correspond to your body. There are usually a number of points of adjustment to body armor. Take the time to adjust straps to your body and needs. These straps may slip over time. Check them periodically. You may need to stitch or tape problem straps. Make sure protruding buckles face out so they don’t dig in to you when you slide.
Contrary to popular myth, upper body equipment can and should be washed. It’s best to hand wash them with soap or a mild detergent. Allow plenty of time for them to air dry. Don’t ever try to dry them in a machine dryer. Plastic buckles on body pads may break. If they do, you can often find similar buckles in camping/backpack shops or on old luggage you might have
Lower Body Protection
|
|
| Senior Smarty Pants |
Robo Hot Pants |
|
|
| Senior Groin Guard |
Senior Pelvic Guard |
For the most part, gone are the thrilling days of yesteryear where lower body protection was sweatpants and a bruise the size of a grapefruit was a badge of courage. Padded pants are more than a good idea at every level of play. Once again, depending on your budget or what’s available to you, there are a number of affordable and adequate options. In recent years, field hockey goalkeeping pants have been developed and the OBO pants are excellent. Regular ice hockey or ice hockey goalkeeper pants are also reasonable alternatives.
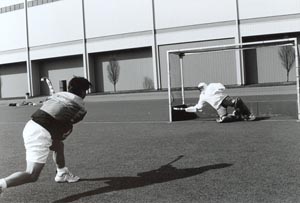
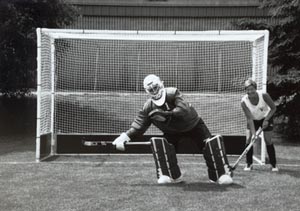
Goalkeeping fundamentals start with the keeper trying to get his or her body behind the ball when making a save. That requires confidence and confidence comes from having good protection. At the junior level, danger may not always come from raised shots as much as it may come from bad bounces on grass fields. The pace of shots is usually such that the keeper only needs pants with protection on the front of the thighs and pants with foam padding are usually enough.
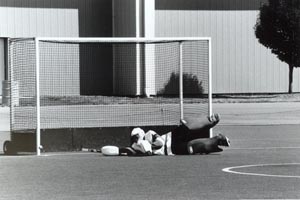
Once shots start to get harder and a keeper is using more advanced techniques, needs change. A keeper is exposed to hard, raised shots in training and games and is frequently making contact with the ground while developing skills like slide tackling and logging on corners. Getting hit once with poor equipment is bad enough, to risk it on a regular basis is asking more than should be expected of a keeper.
At advanced levels of play, pants should have padding in the more exposed areas that is as hard as a hockey ball. Those areas include the front and inside of the thighs, and the front and outside of the hips. As mentioned earlier, OBO makes two types of field hockey goalkeeper pants that are designed to specifically cover those areas. They are the Smarty Pants and Hot Pants. Smarty Pants are designed for keepers who favor a loose pant that will not hinder movement. The padded panels of the pants move with the keeper, especially on the area at the front of the hips. The Hot Pants are a snugger pant that is made of a stretch material. The main part of the pant is like a girdle. The padding sits directly on the leg and the stretch material allows the pant to move with the keeper. An outer shell is worn over the girdle to protect the pants and provides additional protection. Both Smarty Pants and Hot Pants are available with a durable outer that can be replaced.
Many keepers also wear ice hockey pants that come in styles similar to the OBO pants. These pants also come in a girdle style that should be worn with an outer shell, or a baggier pant that is a shell with built in protection. The major problem with these pants is that they are designed for ice hockey. Ice hockey players need protection on the outside of the thighs and hips for checking. They don’t want protection on the inside of the thighs as that restricts skating. The padding on the outside of the thighs is redundant for field hockey and the inside of the thigh is an area where field hockey keepers frequently get hit so the drawbacks are a problem.
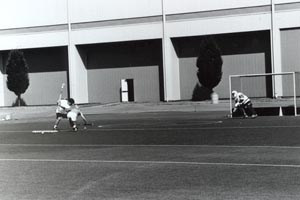
Ice hockey goalkeeper pants provide excellent protection for many of the areas that the field hockey keeper is exposed, but it comes at the cost of mobility. An ice hockey keeper is usually playing within a three yard area of a much smaller goal while a keeper may have to play anywhere in a sixteen yard circle while defending a goal that is almost four times as big. Having said that, ice hockey pants are better than nothing.
Whatever type of pant you use, fit is critical. Pants need to be big enough that they don’t restrict movement. By the same token, you don’t want them so big that they shift when you move or prevent your other equipment from sitting properly. As a note, the Smarty Pants are designed to be big and baggy. Many keepers who are used to a snugger pant may be put off. Smarty Pants are not designed to be flattering to the figure. They are designed for function. Pants are usually held up with an adjustable belt or suspenders. Make sure they are adjusted to keep the pant from slipping down, yet still allow you to breathe.
Pants can and should be cleaned. The pads can be removed from the Smarty Pants and the shell washed. The inner pads can be removed and hand washed with soap and air-dried. The shell can be machine washed in the gentle cycle. The same holds true for the Hot Pants and most girdle type ice hockey pants. Ice hockey pants with pads built into the shell should generally be hand washed only. Periodically check the outer shell of your pants. If you’ve got holes in the shell, or it’s starting to rip, replace it.
Pelvic protection should be worn in addition to pants. Whether it be a protective cup for boys or men or a pelvic protector for girls or women, the consequences of injuries without them makes them invaluable, end of sermon.
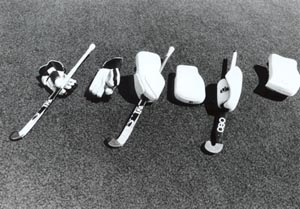
Sticks
 |
| OBO Goalie Stick
|
A keeper doesn’t use a stick for the same thing a field player does. He doesn’t need to hit a ball 70 miles-an-hour. He needs to stop the 70 mile-an-hour shot. For that reason, weight and stopping surface are important.
Goalkeeper sticks are becoming increasingly popular. Made from wood or composite materials, they are light and stiff and have an extended toe that provides a large stopping surface. Longer sticks allow a keeper maximum reach when making stick tackles and as long as the stick length doesn’t interfere with your ability to make plays in your normal position, they are a good idea.
Some goalkeeper sticks have a shorter, flat handle. They are designed to provide a flat stopping surface for those keepers who lie down on penalty corners. While they do provide a more predictable stopping surface, their shorter length is a drawback when making stick tackles, especially when you need maximum extension. Goalkeeper sticks with especially big heads present a different problem in that you may not be able to get your stick flat when making reverse stick tackles.
Many keepers prefer traditional sticks and they are perfectly fine for goalkeeping. Indoor sticks or lightweight field hockey sticks are fine for goalkeepers as long as they allow you to perform the skills necessary for the position.
Whatever stick you use, make sure the grip allows you to comfortably and adequately hold the stick. If you sweat a lot, tennis racquet gauze tape can help prevent your stick from slipping. Athletic tape near the head of the stick is also a good idea, especially if you’re a post banger. It’s a good idea to have a second stick in your bag and to have at least played with it a couple of times in the event that your stick does break in a match.
Shoes

Shoes are important. All the equipment in the world is pretty useless if you can’t get from point A to point B without falling on your face. Having the right footwear is a matter of knowing the surface you’re playing on and the conditions you’ll be playing in. These can change during the course of the match and it’s critical to be prepared.
Different surfaces require different shoes. Natural surfaces like grass require multi-cleat shoes, but depending on the length of the grass and weather conditions, a shoe with a longer cleat may be needed for adequate footing. There are a variety of artificial surfaces, water and sand based, that require different footwear depending on conditions and your playing style. Athletic shoes with flat, rubber soles are good for dry, artificial surfaces and some sand based pitches. A multi-cleat shoe with lots of short nubs or studs is good for wet, water-based turfs. Shoes with longer studs may be needed depending on how heavily watered the turf is or how slick the surface is, particularly with new pitches.
When you go to buy shoes for hockey, take your kickers with you. Some shoes are better suited to wearing under kickers, especially when it comes to kicker straps and stud alignment. Ideally, you want a shoe that will allow the straps to sit directly on the sole and between the studs to provide maximum traction and prevent the straps from slipping. Barring that, look for shoes that will allow the straps to sit as close to the sole as possible. You can cut a slot for straps with shoes that have short rubber studs using a utility knife but you don’t want to do have to do radical surgery on your boots if there’s an easier choice.
Use your warm up to test which footwear will be best for your playing conditions. As noted, conditions can change during a match. Dry fields can be naturally watered with rain, wet turfs can dry out. Make sure you have shoe options to meet your playing conditions, especially as they might change. Also be aware of how you play. Keepers who play up on the balls of their feet may not want a shoe with long studs as they’re likely to get stuck making a save. On the other hand, keepers who play more flat-footed will require a longer stud. Know how you play and what’s best for you.
Shoes do need to be taken care of. They need to be aired out and dried properly, especially when wet. Balled up newspaper is good for absorbing moisture. If you play on wet turf, look for shoes made of water resistant materials. Leather shoes can be treated to better deal with water. Avoid extreme heat when drying shoes.
Final thoughts
There’s a lot to think of when it comes to equipment: how to select it, how to use it and how to take care of it. All affect your ability to play well. Make sure you take the time to take care of what takes care of you. If you play for a school or club team, I highly recommend getting your own kit, especially if you plan on playing for a while. Having your own kit allows you access to it all the time. Many schools have policies that prevent issuing equipment out of season. Club equipment often has to be shared. If you have your own equipment, not only do you have access, you have the ability to make adjustments and select equipment that is ideal for you.
Money is often an issue. I mentioned the internet earlier when researching equipment. It can also be a resource when looking for bargains. The OBO seconds sale is one such place for savings. You may be able to find similar savings when looking for ice hockey equipment like helmets, masks, body armor and pants. You may not always be able to get what you want immediately, but if you do your homework you can get what you need.
Equipment is a substantial investment. It’s an investment in your safety. Treat it accordingly. Don’t expect anyone else to take care of it. Don’t throw it in your equipment bag after a match and expect it to be good to go when you take it out of the bag a week later. As a wise man once said, “Failing to prepare is preparing to fail.” The right equipment properly cared for can make the difference between winning and losing. Do what you can to make sure you have that advantage.
Good luck,
Jon
email Jon
Please note that OBO together with Jon O’Haire hold copyright over any material appearing on tips pages. We welcome the printing and distribution of these tips, provided that they are not sold, or used for financial gain. This paragraph must appear on all printed or distributed copies. The photographs above must not be used in any form without express permission from Jon O’Haire.