Suggestions For Using The Hi-Rebound RHP On The Ground by Roland Löwe

The robo SP right hand protector has been designed for an upright style of play however it can still be used successfully for ground defence. Roland Löwe outlines techniques for effectively using the new hand protector on the ground.

There are two major positions for using the SP RHP on the ground:

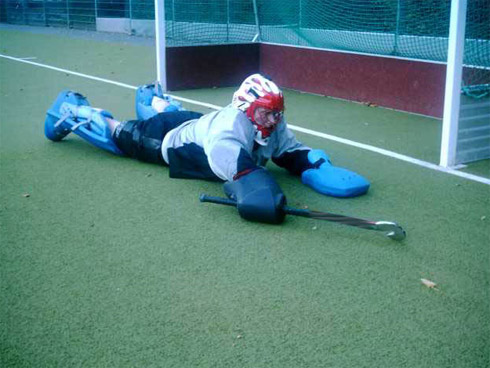
1. Long forehand slide or penalty corner defence:
– as the glove contacts the ground the glove is able to rotate to the most suitable position for play on the ground.
– the longer you stretch your arm the more the glove rotates right into the final position as seen in the picture.
– inside the glove your hand rotates left into the opposite direction to keep the stick in the right position.
– if you stand up again the glove and stick rotate back into the normal position.

Long forehand slide

2. Sliding backhand tackle:
– for the sliding backhand tackle you use the the sliding part of you glove.
– the glove stays in the normal position.
– rotate the stick to the left to get into the backhand postion.
– press the top of the stick on the ground so that you do not lose contact.
– this kind of tackle allows you to play the ball with your stick or glove.

Sliding backhand tackle

Product Review by George Pinner

George Pinner is a sponsored OBO player. In this review he provides his feedback on the Hi Rebound gear and his painted helmet.

George Pinner is a sponsored OBO player. In this review he provides his feedback on the Hi Rebound gear and his painted helmet.

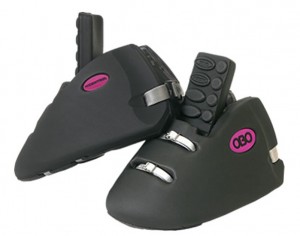
Hi Rebound Kickers

robo kickers

OBO are the first and only company that make kickers that fit my size 12 feet properly. All other companies just increase their kickers length ways rather than the whole dimensions like Obo. Therefore the Obo kickers offer better protection and fit me better too. The Kickers are also a lot more hard wearing, my previous kickers were made by gluing foam together and so after only 3 training sessions they were starting to come apart. The rebound of my new Hi Rebound kickers is much more consistent than I have ever experienced, the rebound on my previous kickers used to vary from day today and was never as strong. Another great plus point about the Kickers is the straps. It’s the first time I have ever been able to do my kickers up really tight and have them stay like that for a whole game! I am also delighted at the way the Obo kickers sit flat to the ground, my previous Mercian kickers had about a inch gap between the kicker and the ground so it was very painful if I got a ball near the end of the kicker. The new softer tongues also caused no problems to my shins. I just taped them down over night and they were fine the next day.

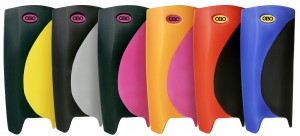
Hi Rebound Legguards

robo legguards

The main thing I love about the Hi Rebound legguards are the wings. Being a goalkeeper that in the past has suffered the ill fate of collapsible wings I love the way the wings stop the ball when logging for shorts. I am also a big fan of the tongue system, which means the pads don’t twist. My previous legguards used a strap to join the legguards and kickers but it still lead to a bit of twisting, which was annoying, as I had to keep twisting them back after every slide. The other great thing about them is on my old pads I regularly got balls stuck between pad and kicker, the new Hi Rebound’s don’t let this happen, the ball pings back out to safety instead! I also like the new shape of the pads, they are a more rectangular shape which I am a fan of. It did take a while to get used to sliding in them but they now work extremely well. The smooth surface they have means they slide very easily, unlike my old pads, which had designs on the front that meant sliding wasn’t very good. The new shape Hi Rebound’s also mean I can slide much easier and can slide in the new L shape position much easier and get to my feet quicker. The legguards also fit me a lot better than other companies do. They come up above my knee, which is great, as before I had to wear kneepads but the Hi Rebound’s mean I don’t! They are also a lot harder wearing, the foam doesn’t get chunks taken out of it really easily like my Mercian stuff did. The new two-type foam is also great as I get great control when sliding out and logging, but get good quality and constant rebound when I make a Legguard save! The softer foam where your calf sits is also great as this was something in the past I had preferred on other brands kit, but obo have obviously seen this and added it to their new pads.

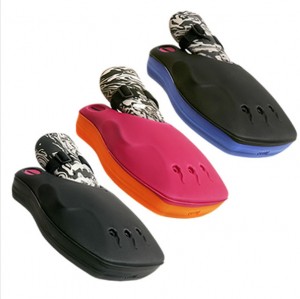
Hi Rebound Left hand Protector

left-hand-protector

I love it, what more can I say! It covers my lower arm which me previous gloves never did, this is great as I wear elbow pads so this means I only have a tiny gap between my glove and elbow pad. I also love the powerful rebound its fantastic for clearing those lifted shots. I also find I have much greater movement than I did with my old glove which is a really important factor.

The thing I love most about the new Hi Rebound range is that it does everything I want it to do as a goalie. I want my kickers to give me large amounts of rebound so I can clear shots really fast, the new Hi Rebound kickers do this. I want legguards to offer a really big surface area yet still be able to move freely, I also want high rebound but at other times great control, yet again the new Hi Rebound’s do this. The left hand glove also gives me great rebound so I can save shots as quick as they come at me!

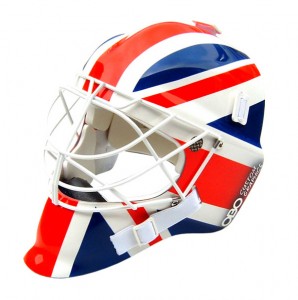
CK custom helmet

helmet

I love my helmet, its about one year old now but is still as good as new. I previously used the bauer helmets and the slazenger one, neither can even compare. The obo fits my head really well, it covers my whole head offering great protection but is still just as light as my old one. I have had a 90 mph ball in the visor and it just pinged right off it. No headache no nothing! Having undergone rigorous shots to all parts of it, it hasn’t weakened in any way; it’s a great helmet. The graphics are also great on the custom painted helmets, as we all know looking great is important!

Threading Your Robo/Cloud/Yahoo/OGO Legguards

The first thing you should do is nothing! Don’t even remove the old straps, because you can use them as a threader instead of having to make one yourself.

If you’ve already removed the old straps then you’ll need to follow the steps outlined below.

The first thing you should do is nothing! Don’t even remove the old straps, because you can use them as a threader instead of having to make one yourself.

If you’ve already removed the old straps then you’ll need to follow the steps outlined below.

Otherwise, remove the male component of the clip from one end of the strap and cut the buckle off the other, without removing the straps from the legguards. Then all you need to do is staple your new straps onto the old ones and pull them through. Have a look at steps 6-8 below. It doesn’t get much easier than that!
legguard01

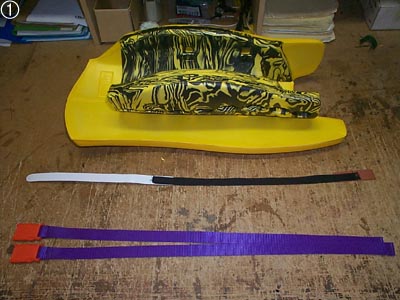
Here’s what you need: a legguard of course, your new set of straps and a device to help you get those straps through those channels. Note that both male and female components of the clip are at one end of the strap.
legguard02

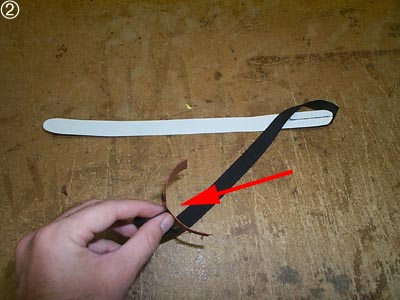
This is what we use at the OBO factory…. a threader! It’s a piece of flexible plastic, flexible enough to easily pass through the curved shape of the channel, but not so flexible that it snaps on you when you are half way through the process. We’ve sewn a piece of black nylon webbing onto the plastic. We’ve then sewn a piece of terracotta fabric to the black webbing. The legguard strap is then placed between the two ends of the terracotta fabric as shown by the red arrow. This helps the strap travel relatively easily through the channel.

The reason we use a plastic threader is because we need to thread hundreds of legguards. To thread a single legguard Jon O’Haire reckons a piece of 1″ cardboard with a pointy end will do the trick.
legguard03

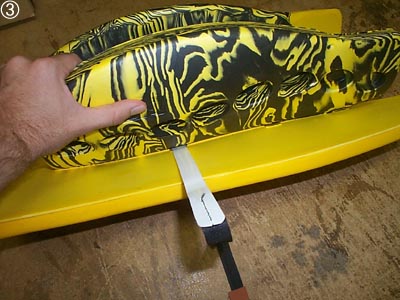
Thread the plastic into the channel on the ‘wing’ side of the legguard. (This is a left legguard. The top of the legguard is to the left of the picture)
legguard04

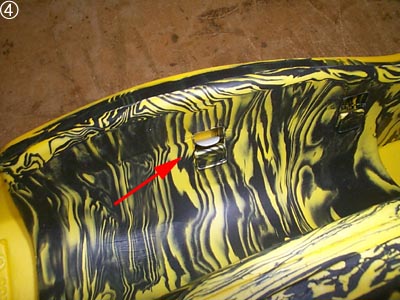
Thread the plastic all the way through the channel until the tip of the threader appears at the channel exit as shown by the red arrow. You may need to assist the threader through the exit with a finger.
legguard05

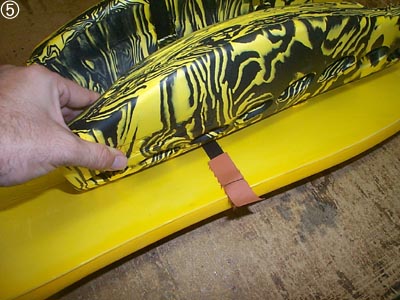
Pull the threader almost all the way through the channel. Leave enough of the black webbing and terracotta fabric showing outside the channel so that you can attach the legguard strap to the threader.
legguard06

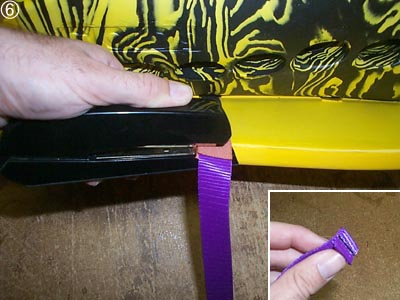
Staple the legguard strap between the two ends of the terracotta fabric of the threader (check out image 2 above to refresh your memory of what we mean if you need to). Use two staples if you’re not convinced it will hold but you should only need one. The insert in the image above shows how the legguard strap is folded over on itself and sewn at one end. We staple the legguard strap into the threader with the folded end down so that the OBO logo on the clip faces outwards. (Okay…. a fairly
minor point I know, but it’s a little detail we always remember.)
legguard07

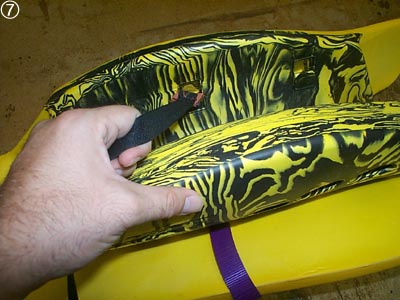
Pull the rest of the threader, with legguard strap attached, gently through the channel. If you go too fast the strap will probably come off the threader part way through the channel. You can just see the end of the strap exiting the channel in the image above.
legguard08

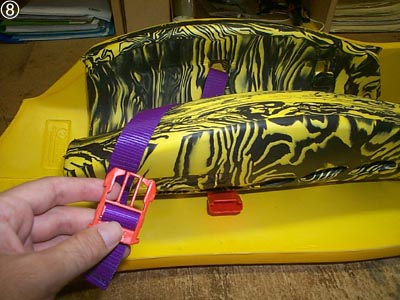
All that remains is to attach the male component of the clip to the other end of the strap. That’s it, real easy, especially after you’ve done several hundred like we have at the OBO factory!